Posts may contain affiliate links (see Disclosure). Thank you so much for supporting Artsy-Fartsy Mama!
wreath
Showing posts with label wreath. Show all posts
Friday, December 13, 2024

Christmas "There's Some Who's in this House" Wreath

Friday, December 13, 2024

Christmas "There's Some Who's in this House" Wreath

Read more »

If your family celebrates Christmas like the Whos down in Whoville, you will love this festive "There's Some Who's in this House" Wreath!


"There's some Who's in this House" Wreath

There's no one who parties harder at Christmas than the Whos down in Whoville. If you can relate you these festive creatures, then I think this sparkling piece of holiday decor is for you! This handmade "There's Some Who's in this House" Wreath is is made of wood cut with the xTool S1 laser cutting machine, and it's a lot of fun to make. Once the wreath is on display, everyone who visits will know that you are a Grinch-free family that celebrates the holidays in a way that the town of Whoville would be proud of!

New to laser cutting? Be sure to check out how to get started with the xTool S1 Laser Machine!
Wednesday, September 18, 2024

Autumn Floral Wreath

Wednesday, September 18, 2024

Autumn Floral Wreath

Read more »

Add a pop of fall color to your home with this gorgeous handmade Autumn Floral Wreath!


Autumn Floral Wreath

While hitting the craft store (for other supplies), a vibrant floral bundle caught my eye. I don't always feel confident in my wreath-making abilities, however, I knew I needed these gorgeous autumn colors displayed in my home. Like I tell my own daughter, how will you get better if you don't practice?! After a big, deep breath, this Autumn Floral Wreath eventually came together like magic. It only took me about 1-2 hours, which is the perfect about of time to make as a craft night with the girls! I'm loving this new piece of autumn decor, and hope I've inspired you to give it a try for yourself!
Monday, October 17, 2022

Halloween Black Cat Crossing Wreath

Monday, October 17, 2022

Halloween Black Cat Crossing Wreath

Read more »
Make a spooky Halloween Black Cat Crossing Wreath with items from the dollar store!

Halloween Black Cat Crossing Wreath

Halloween is one of my favorite holidays, and I can't resist making a new wreath when I find the perfect sentiment to add to it! I spotted this sparkly and spooky sign at the dollar store, and couldn't resist bringing it home.This is a simple wreath that crafters of any skill level can make, I'm so thrilled with how it turned out. Read all about how to make your own Black Cat Crossing Wreath with the tutorial below, and then head to the dollar store ASAP to make one for yourself!
Tuesday, October 12, 2021

Felt Scrap Jack-O-Lantern Wreath

Tuesday, October 12, 2021

Felt Scrap Jack-O-Lantern Wreath

Read more »
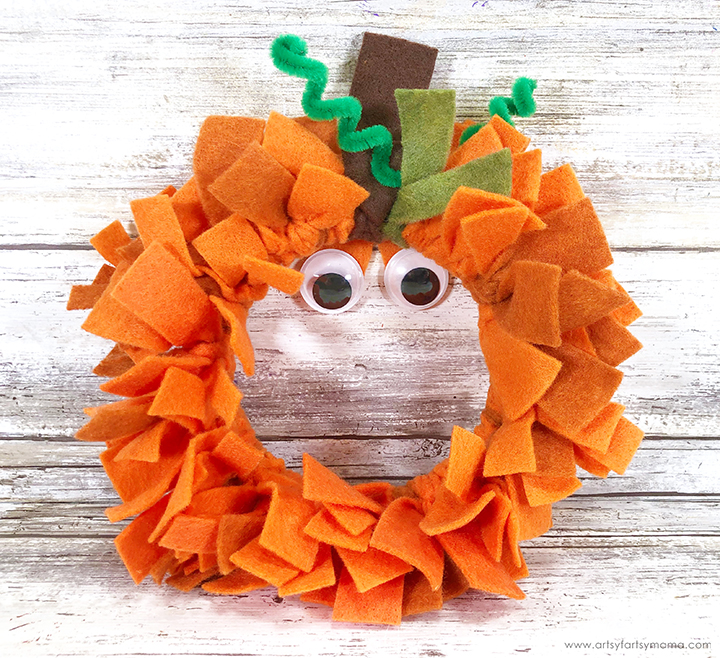
Tie leftover scraps of felt onto an embroidery hoop for a fun and fringy wreath that is perfect for Halloween!

Felt Scrap Jack-O-Lantern Wreath

Halloween crafts are so much fun, and even more-so if they are simple! This adorable Jack-O-Lantern Wreath is made using scraps of felt, and comes together so quickly. This wreath works as festive home decor, and would also be a cute to pair with a treat to share as a Halloween gift for neighbors, friends, or teachers!
Tuesday, September 14, 2021

"I Love Fall Most of All" Wreath + Free Cut File

Tuesday, September 14, 2021

"I Love Fall Most of All" Wreath + Free Cut File

Read more »
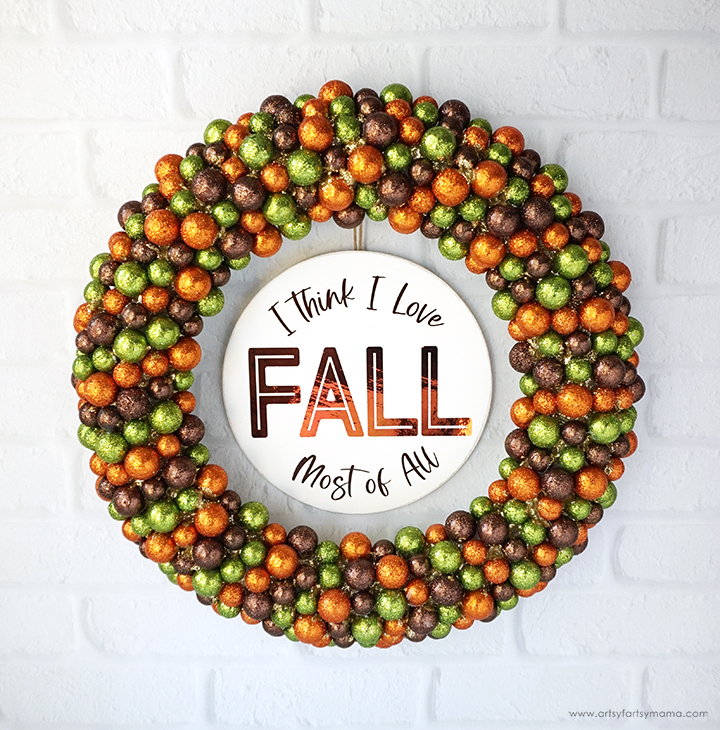
Put your love of fall on display with this "I Love Fall Most of All" Wreath with FREE Cut File!

"I Love Fall Most of All" Wreath

Which season is your favorite? Unless you're new here, you might know that autumn is the one I love most of all! I'm so thrilled that it's here that I decided to craft my adoration of this perfect season with a colorful wreath with my sentiment right there in the middle of it. The best part? I've got the FREE cut file to share so that you can make your own fall wreath to put on display!
Monday, June 7, 2021

DIY Summer Peony Wreath

Monday, June 7, 2021

DIY Summer Peony Wreath

Read more »
Make this easy DIY Peony Wreath for summer in less than 30 minutes!


Growing up, we had beautiful pink peonies that blossomed every year at the beginning of summer. We loved to cut them and put them into a vase for my mom to enjoy inside the house. When I spotted these gorgeous faux peonies in a sunset of colors at the craft store, it brought back all of those summer peony memories. I just had to have them! This summery wreath looks so gorgeous on my front door, and I love the vibrant pops of color from the peonies.
Friday, November 20, 2020

Magnetic Advent Calendar Wreath with Free Printables

Friday, November 20, 2020

Magnetic Advent Calendar Wreath with Free Printables

Read more »
Count down the days to Christmas with this Magnetic Advent Calendar Wreath!

Magnetic Advent Calendar Wreath

Hello, artsy friends! I'm so excited to finally show you this holiday project that I've been working on this week. My family and I love using advent calendars throughout the holiday season, and this one is a lot of fun! This Advent Calendar comes in wreath form, and is also magnetic - which makes it easy to store once Christmas is over. Kids will love opening a new tin every day, and I've got the printables all ready for you to download to make this project as simple as possible. I hope you love it as much as I do!!
Monday, November 9, 2020

Christmas Elf Laundry Wreath

Monday, November 9, 2020

Christmas Elf Laundry Wreath

Read more »
Let the elves air their adorably tiny laundry on this Christmas Elf Laundry Wreath!

Christmas Elf Laundry Wreath

Are you ready for a Christmas craft project to make this weekend? This Christmas Elf Laundry Wreath is easy, and looks absolutely adorable on the front door. With just a few supplies, including some elf clothing, you can have a new piece of holiday decor to get you into the Christmas spirit! I'm so excited about this new piece of Christmas decor and I hope you love it just as much as I do.
Wednesday, October 7, 2020

DIY Fall Wreath

Wednesday, October 7, 2020

DIY Fall Wreath

Read more »
Dress up your front door for autumn with a colorful Fall Wreath!

DIY Fall Wreath

Are you ready for a fall craft project to make this weekend? This DIY Fall Wreath is easy, and looks beautiful on the front door. With just a few supplies, including brightly colored mums, you can whip up a wreath for yourself. It's also easy enough to make during a craft night with the girls! I'm so excited about this new piece of decor for my home, and I hope you love it just as much as I do.
Tuesday, July 28, 2020

DIY Bicycle & Butterfly Wreath

Tuesday, July 28, 2020

DIY Bicycle & Butterfly Wreath

Read more »
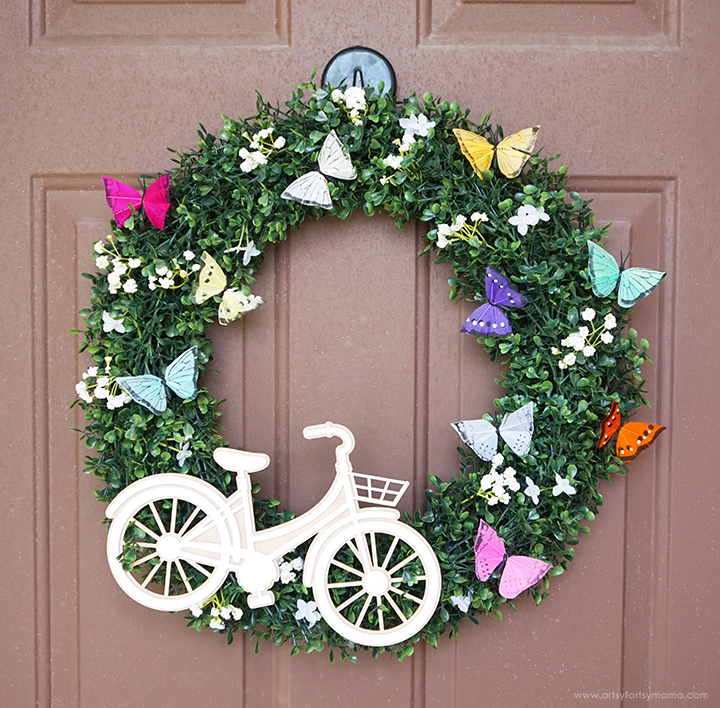
Add a pop of color to your door with a Bicycle & Butterfly Wreath made with feather butterflies!

Bicycle & Butterfly Wreath

My front door has been looking a little dreary lately, so I decided to make a bright and cheerful wreath to bring it back to life. Wreaths are a lot of fun to make, and are an easy way to add pops of color and personality to your decor. This Bicycle & Butterfly Wreath is simple for wreath beginners to make, and is perfect for both spring and summer decor!
Friday, July 26, 2019

Paper Succulent Wreath

Friday, July 26, 2019

Paper Succulent Wreath

Read more »
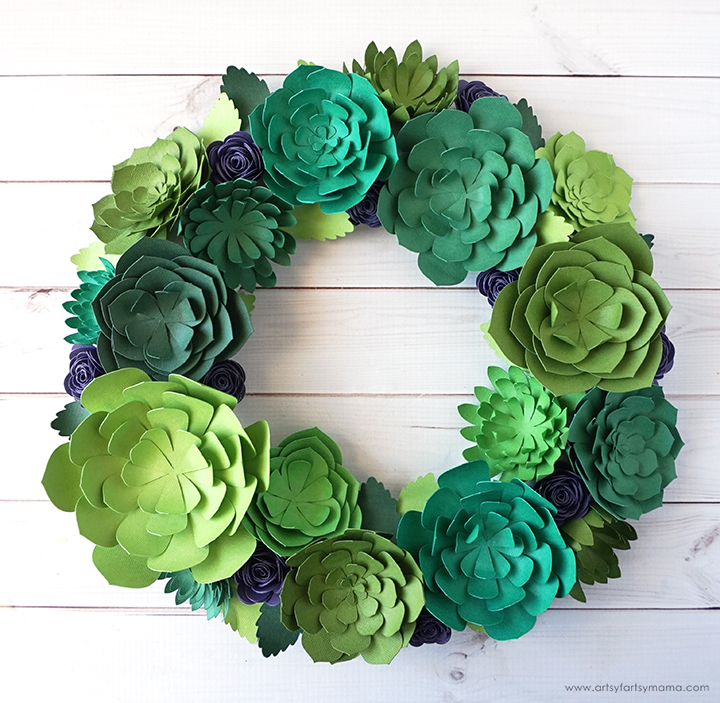
Freshen up your home with a gorgeous Paper Succulent Wreath!

Paper Succulent Wreath

I love succulents, but I just can't keep them alive. The best way I've found to bring succulents into my home without feeling guilty is to go faux! Paper succulents are surprisingly easy to make, and you can create so many things with them. This wreath was made with only four different succulent patterns cut out of multiple shades of green paper using my Cricut Maker. Speaking of which, be sure to read through to the end for an awesome Cricut GIVEAWAY!
Monday, October 16, 2017

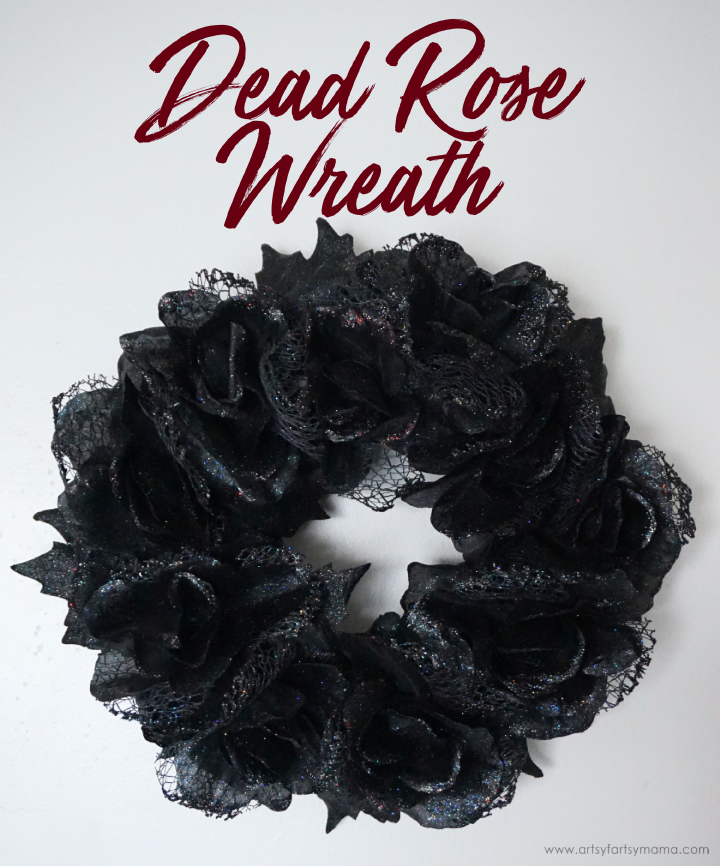
DIY Dead Rose Wreath

Monday, October 16, 2017

DIY Dead Rose Wreath

Read more »
Make a Dead Rose Wreath out of items from the dollar store to display this Halloween!

DIY Dead Rose Wreath made with dollar store supplies


DIY Dead Rose Wreath made with dollar store supplies

Here's what you'll need to make this Dead Rose Wreath:
• 8" Foam Wreath Form
• 3-4 Black Rose Bunches
• Black or Gray Ribbon
• Glue Gun & Glue Sticks

DIY Dead Rose Wreath made with dollar store supplies

Foam wreaths are awesome for projects like this, but the hot glue can melt the foam if you add something directly to it. So first you need to cover the wreath with some ribbon. It doesn't matter what kind or color, but I usually go with a wide ribbon in a coordinating color. Add a glob of hot glue to the wreath and attach one end of the ribbon to the wreath form. Wrap the ribbon all the way around the wreath so you don't see any foam showing. Glue the other end of the ribbon down.

DIY Dead Rose Wreath made with dollar store supplies

Cut the flowers from the stem using some wire cutters. If your stems don't have wire, you can use regular craft scissors. I also cut off the leaves from the stems. Add some glue to the bottom of a rose and place it down on the front of the wreath. Next I would place another rose right next to it (without glue) to see where it looked/fit best. Then add some glue and stick it down. Repeat until the wreath is covered and looks how you want it. For any empty spaces or in places that need a little something extra, I stuck leaves down and in between the flowers.  

The best part about making a wreath for Halloween? You don't have to worry about removing all of those glue gun strings! They will look like cobwebs tangled between all of the dead roses, lace and leaves. 

DIY Dead Rose Wreath made with dollar store supplies

Hang the wreath up to decorate your home, office, or favorite space for Halloween. I hope this tutorial has left you feeling inspired to make on for yourself. The wreath is spookily beautiful for only spending about $5 for everything!

Friday, March 24, 2017

DIY Glittered Easter Egg Wreath

Friday, March 24, 2017

DIY Glittered Easter Egg Wreath

Read more »
Decorate your home for Easter with this easy-to-make DIY Glittered Easter Egg Wreath!

DIY Glittered Easter Egg Wreath

After doing a little Easter shopping for our upcoming family Easter egg hunt, I came across these glittery beauties and couldn't resist adding them to the cart. Instead of filling them with sweet treats and surprises though, I decided they needed to adorn my walls every spring instead in the form of a wreath!!
Thursday, December 3, 2015

Handmade Holiday Christmas Peppermint Wreath

Thursday, December 3, 2015

Handmade Holiday Christmas Peppermint Wreath

Read more »
Handmade Holiday Christmas Peppermint Wreath at artsyfartsymama.com

I've always enjoyed creating my own holiday decor. By combining pre-made pieces and your own handmade creations, your decor is truly one of a kind and I think that makes it a little more special. I partnered with Cricut and Balsam Hill to create this Christmas Peppermint Wreath, and am hoping to inspire you to create handmade holiday decor for your own home!
Wednesday, October 7, 2015

Easy Halloween Skull Wreath

Wednesday, October 7, 2015

Easy Halloween Skull Wreath

Read more »
Easy Halloween Skull Wreath at artsyfartsymama.com

Halloween decor is one of my favorite things to create. I love the colors, and adding a bit of sparkle to otherwise spooky objects. I gave these skulls a sparkly transformation with Mod Podge and turned them into this fun Halloween Skull Wreath. This is a fun and easy project for any crafting level to create, and best of all, it's budget-friendly!
Saturday, February 7, 2015

Easy Pom Pom Valentine Wreath

Saturday, February 7, 2015

Easy Pom Pom Valentine Wreath

Read more »
Easy Pom Pom Valentine Wreath Tutorial at artsyfartsymama.com #ValentinesDay

Valentine wreaths are so much fun to make, and look adorable! This Valentine Pom Pom Wreath is SO simple to make, and you can get all the supplies for less than $10 (even more savings if you already have a wreath form)!!
Wednesday, October 22, 2014

Paper Flower Wreath

Wednesday, October 22, 2014

Paper Flower Wreath

Read more »
Sponsored by FloraCraft Make It: Fun®

Paper Flower Wreath Tutorial at artsyfartsymama.com

Handmade gifts are the best. I love giving them and, of course, receiving them. This paper flower wreath is something you can make for a friend, sister, or even your mom. You can also make it for yourself (because you deserve to treat yourself, too)!! Since there are few supplies needed to make the wreath, it will also cost you a whole lot less than purchasing it already made. It's also simple to customize because of paper colors and flower shapes, so every wreath is unique!!

Paper Flower Wreath Tutorial at artsyfartsymama.com

To make this wreath, you'll need:
FloraCraft® Make It: Fun Foam Wreath 12"
White Ribbon: 1.5" wide, at least 8 yards
Cricut Explore (or hand cut with scissors)
Glue Gun

Paper Flower Wreath Tutorial at artsyfartsymama.com

Foam wreaths can get pretty messy, so I like to wrap the wreath form with ribbon to help keep the foam flakes from getting everywhere. Start by pinning or adding some hot glue to the end of the ribbon and attach it to the wreath. Then, carefully wrap the ribbon around the wreath, overlapping the ribbon a little until the entire form is covered. If you run out of ribbon, don't worry - just glue or pin the end in place, then start a new roll where you left off!

Paper Flower Wreath Tutorial at artsyfartsymama.com

I bought packages of textured cardstock and chose seven different colors to work with. Using my Cricut Explore, I cut out four different flower patterns in multiple sizes and ended up with around 75 flowers when I was done.

If you don't have a Cricut, you could easily cut these by hand. Cut a spiral, then add a scalloped, fringed, or triangle edges to get different flower designs. Sure, it might take a little longer and is a little more work, but your wreath would still look amazing.

Paper Flower Wreath Tutorial at artsyfartsymama.com

Assembling the flowers is fairly simple, but a little time consuming:
  1. Start rolling the end of the flower. Add drops of glue as needed if you keep dropping the flower or if it slips and keeps coming undone.
  2. Once you get to the end, there's a small circle. Bend it out and add a drop of hot glue, then fold it over the spiraled paper. Be careful not to burn yourself!
    *Other glues will work fine, but I've found that hot glue dries quicker and will hold everything in place more effectively.
  3. Turn your flower over, and spread the petals out and make your flower look more like, well, a flower.

Learn to make paper flowers with your Cricut Explore at artsyfartsymama.com

Repeat the flower making process until all your flowers are assembled! Toss them all into a pile and get yourself some chocolate. You deserve it!

Paper Flower Wreath Tutorial at artsyfartsymama.com

Arrange the flowers on your wreath to get an idea of where things will fit and to see if you need to cut any more flowers to fill in any empty spots. Once everything is where you want it, heat up your glue gun and glue them in place.

You don't have to arrange them if you don't want to - you can also just glue as you go! The result will be fantastic either way.

Paper Flower Wreath Tutorial at artsyfartsymama.com

Now your wreath is ready for gift giving, or hanging up on display. I wouldn't recommend hanging the wreath outside or somewhere that will have direct sunlight since it is paper and can fade or be ruined if it gets wet.

For more foam craft ideas, visit the Make It: Fun site and follow FloraCraft on Pinterest and Facebook.

Check out what the rest of the Make It: Fun Team has been making this month:
Foam Block Snowman by Create.Craft.Love
Money Topiary by Sugar Bee Crafts
Teenage Mutant Ninja Turtle Wall Decor by 733
Succulent Tin Can Gift by Simply Designing
Mini Pine Cone Kissing Ball Ornament by Uncommon Designs
Plastic Spoon Peppermint Inspired Holiday Wreath by Club Chica Circle
DIY Christmas Ornament Foam Sign by Love the Day
DIY Rustic Christmas Gift Idea by Pink When
Flower Bulb Gift by Crafting in the Rain
10 Minute Gift Idea – Tic Tac Toe Game! by Tatertots & Jello

Monday, September 22, 2014

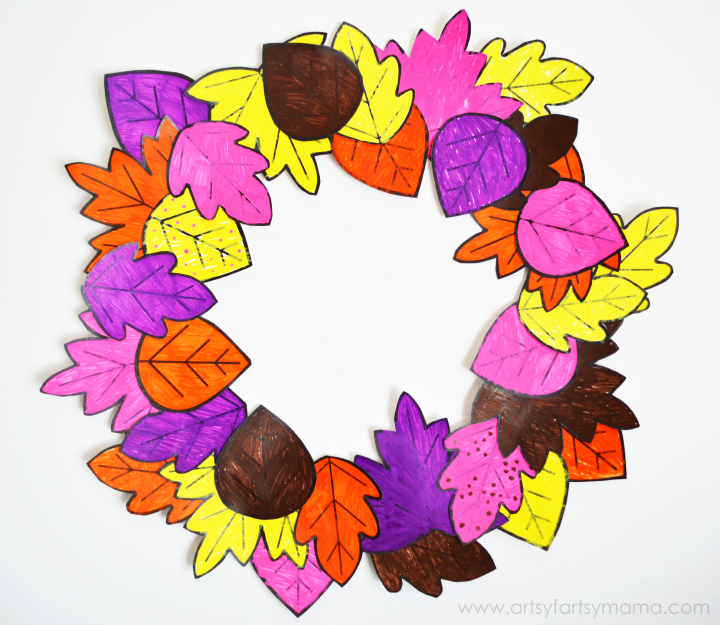
Printable Autumn Leaf Wreath

Monday, September 22, 2014

Printable Autumn Leaf Wreath

Read more »
Kids DIY Autumn Leaf Wreath with Free Leaf Printable at artsyfartsymama.com #fall #kidscraft #Elmers

It's starting to look more like autumn around my house, and we're so excited!! My daughter knows the names of the different seasons and that winter is cold and summer is hot, but was asking what exactly happens in the fall. I explained that besides the weather getting a little cooler, the biggest change would be that the leaves change color and fall off the trees.
Saturday, May 10, 2014

DIY Yarn Wreath

Saturday, May 10, 2014

DIY Yarn Wreath

Read more »
DIY Yarn Wreath at artsyfartsymama.com #wreath #yarn

We just moved into a new home, and I decided I needed a new piece of home decor to accent our entry wall. To make this wreath, you only need a few simple supplies (some of which you might already have on hand), and it comes together really quickly! It's easy to customize for any personality or color scheme, and it's the type of craft that is practically fool-proof (as long as you can manage using a glue gun!).

DIY Yarn Wreath at artsyfartsymama.com #wreath #yarn

I wanted my wreath to be thicker than the usual wreath form, so I bought two styrofoam wreath forms. One that is 12 inch and the other is a 7 inch. The 7 inch form didn't fit perfectly inside the larger wreath form, but with a little effort, I was able to push it in without a problem.

DIY Yarn Wreath at artsyfartsymama.com #wreath #yarn

Once the wreath forms were put together, I started wrapping the wreath in Lion Brand Yarn in Vanna's Choice Yarn: Silver Heather. I found it easiest to tape the end of the yarn down on the back of the wreath, and then carefully pull it around up through the center. This process took the longest, but if you put a movie in while you wrap, it goes a lot faster!!

DIY Yarn Wreath at artsyfartsymama.com #wreath #yarn

The flowers are all cut out of felt, and are super easy and quick to put together. The loopy flowers are the most work of all the flowers, but is really simple!! I bought sheets of craft felt in yellow, blue, and white. The great thing about making these flowers is that you don't have to cut perfectly!! You won't even be able to tell if you cut crooked!!

1. To make the loopy flower, cut a strip of felt about 2-3 inches wide (adjust width for different size flowers), and the longest length of the felt sheet (about 9 inches).
2. Fold it in half lengthwise, and glue the open sides shut with a glue gun.
3. With scissors, cut every 1/8 inch apart on the folded edge along the entire length of felt, being careful not to cut all the way through the glued edge.
5. Roll the strip tightly, adding a little glue to the bottom edge while rolling to keep it from slipping & unrolling.
6. Turn the pom pom over and fluff it out. The back will be flat, so it's easily attachable to the wreath.

The other flowers (on the sides that are white and blue), are all just 5 circles cut out. One circle is the base, then you fold the other circles in half. Glue the pointed edges of the folded circles on the center of the base circle. Add one more to the center, then fluff out the flower. You get different size flowers from cutting different size circles. You can see a photo tutorial from some hair clips I made here.

The tighter rosettes (like the one with the silver bead center) is just one large circle. Then, you start on the edge of the circle and cut a spiral to the center. Start at the outer edge, and roll the spiral tightly, gluing along the way to keep it from coming unrolled. When you get to the end, glue the edge down, and leave the rosette as-is, or glue a small bead to the center for some visual interest.

DIY Yarn Wreath at artsyfartsymama.com #wreath #yarn

Arrange the flowers on the wreath, THEN glue them down. I'm indecisive when it comes to arrangements, so gluing them down first would not be the best idea if you want to change your mind later. The flowers definitely can be rearranged or removed after they've been glued, but it is a little work and you risk stretching the yarn. So, just trust me when I say to lay it out first, then glue once you've decided!

When the wreath is just how you want it, hang it up on a wreath hanger or a nail on the wall and enjoy!!

Monday, October 14, 2013

Spider Web Wreath

Monday, October 14, 2013

Spider Web Wreath

Read more »
My husband probably doesn't agree, but I think you can ever have have enough wreaths. My favorite kinds to make are the wreaths that just an hour or two - which might be why my collection is growing. This spider web wreath was pretty simple to make, and it took just an evening to put together. I also spent less than $10 on the whole project!

Easy Spider Web Wreath at artsyfartsymama.com #wreath #Halloween #spider