I don't even know where to begin with the importance of having a watermark on your photos. Whether they are photos of a project tutorial, or family photos you share on your family blog, you need to protect your images!! Especially now with Pinterest being all the rage - your images are shared within minutes.
Your watermark can be as "fancy" as being a professional logo, or as simple as basic text with your name on it. Either way, take a few minutes and protect your work!! I've been the victim of plagiarism myself, and it's frustrating to have someone claim your work as theirs with no credit to you whatsoever.
House of Hepworths wrote a fantastic post about this topic.
See what I mean? IMPORTANT!! So, if you currently aren't watermarking your photos - start now!
Lucky for me, I'm a graphic designer. So adding watermarks to my images is not a problem with the help of Photoshop. I realize not everyone is so lucky, so I have put together and easy way to create and add a watermark to your photos. I promise it is simple and will be worth it in the long run!!
Creating a Watermark
We will be creating a logo out of text that you can save and add to your photos.
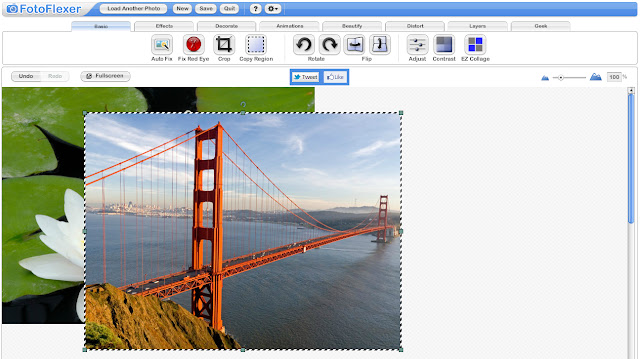
Step 1:
Open a sample photo. Any of them will do. We will delete it in a minute.
Step 2:
Up next to the FotoFlexer logo, select the option to "Load Another Photo".
Step 3:
Add another sample photo. Any of them. {Sigh. Yes, again.}
Step 4:
Your screen should look like this now - with the light gray and white checkered border behind both images.
Step 5:
Under the "Layers" tab {second-to-last one on the right}, click on the third option to "Select All"
Click "Delete" on your keyboard. Both of the images are now gone and you are left with a gray & white checkered background. This means the background is transparent.
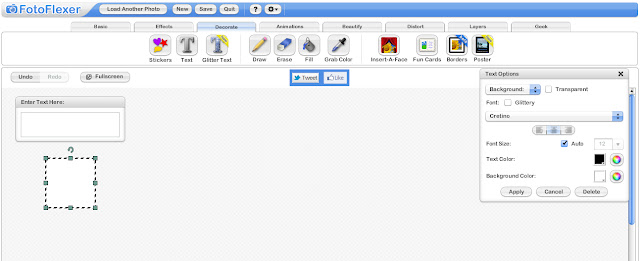
Step 6:
Under the "Decorate" tab {third one from the left}, select the "Text" tool.
A white box will pop up like in the image above. Type in your name or whatever words you want in the text box.
Step 7:
You will see a small window for "Text Options" on the right hand side of the screen. Make sure that the box next to "Transparent" is selected to have the background behind your text invisible. If you want some words in a different font or size, just add in more text boxes.
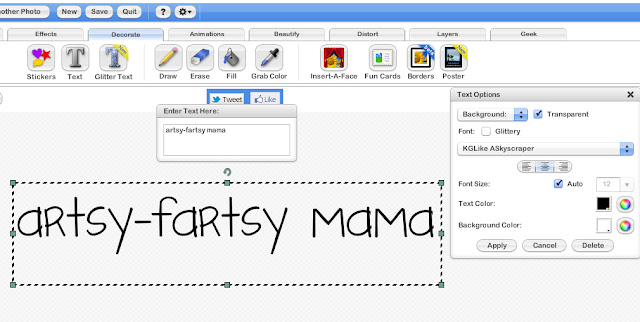
I would recommend choosing a font that fits your blog style/design. There are a lot of fonts to choose from, so I'm sure you will find something great! You don't need to worry about the text color or the background color options.
Click "Apply" when you're done.
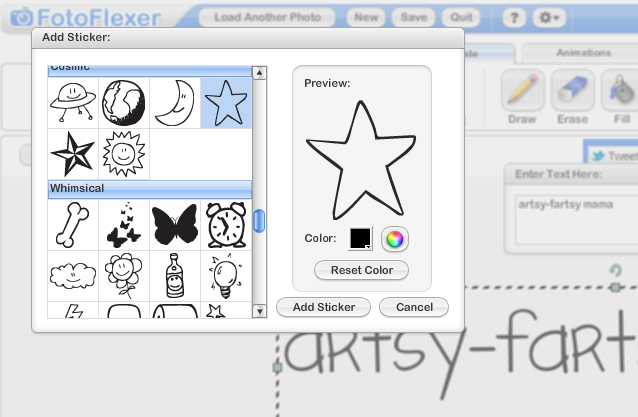
Step 8:
If you want to add a little something else to go with your new logo/watermark design, there are some fun sticker designs to choose from. You can find these under "Decorate" and choose the "Sticker" tool. Color can be changed by clicking on the black box next to the "Color" option.
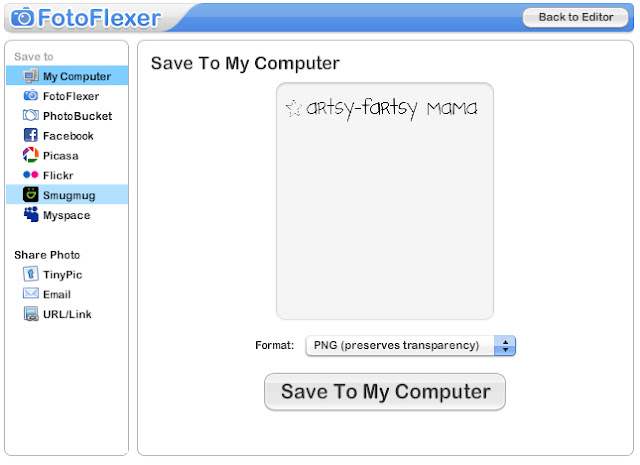
Step 9:
Once you have your design just how you want it, click save up at the top.
Make sure to choose the PNG format to keep the background behind your logo transparent.
• • • • • •
Adding an Image Watermark
Now it's time to add your new watermark to your photos!
{If you'd like a custom watermark design, I am happy to help you design one for $10}
Step 1:
{You can create a login if you want to, but it's not required.}
Click on the "Upload Photo" icon {if loading image from your computer} or load your image from any of the locations on the bottom if you store them somewhere else.
Step 2:
Your image will now show in the main window.
Click on the "Layers" tab {second-to-last one on the right} and click the "Add Images" option.
Step 3:
A window will come up for you to upload an image.
Click the "Edit from My Computer" button to upload the watermark image you created earlier in this tutorial.
*If you have a custom logo, make sure it is a PNG file with a transparent background.
Step 4:
Resize your logo/watermark to fit to your photo by dragging one of the corners and holding down the shift key. You can also rotate your image by clicking on the arrow above the logo. You can make the logo as big or as small as you'd like.
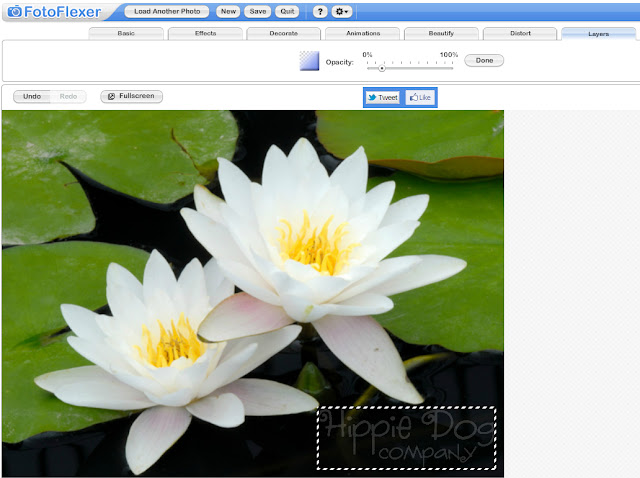
Step 5:
Your logo doesn't have to stand out if you don't want it to. To have it blend in a little bit to your image, select the "Opacity" tool under the "Layers" tab. Move the slider towards 0 to make it more transparent, and towards 100 to make it more opaque. Click "Done" when you're finished. You can select the "Opacity" tool again if you decide to make any changes.
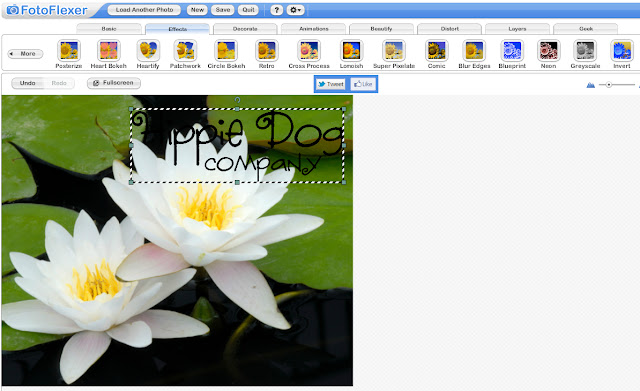
Step 6:
Sometimes a white logo won't work for a light colored photo. Easy to change!
Make sure your logo is selected. Under the "Effects" tab, select the "Invert" effect. This will change your logo from white to black, making it easier to see on lighter images.
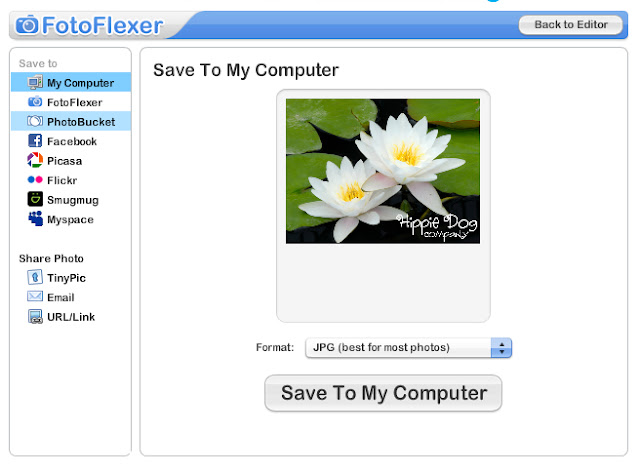
Step 7:
When you're done editing, click "Save" up by the FotoFlexer logo. You can save this in JPG format since you won't need it to have a transparent background.
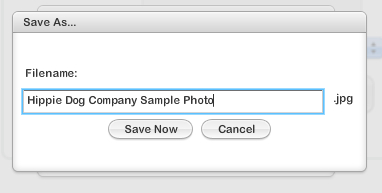
Step 8:
Save your new image.
Now you're on your way to better branding and a step closer to protecting your images!


 Here at Artsy-Fartsy Mama, you'll find a little bit of everything: crafts (even ones for the kids), FREE printables and SVG cut files, easy recipes, educational ideas, travel tips, sewing tutorials, and so much more to add creativity to your life!


