
Get started on your next creative adventure with the xTool S1 Enclosed Diode Laser Cutter machine!

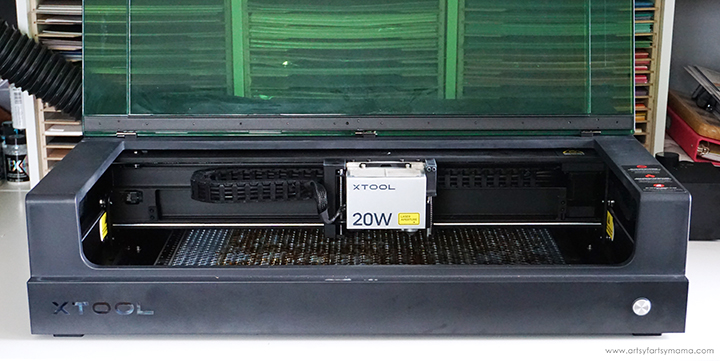
Luckily, the xTool S1 comes pre-assembled, so you don't have to do much to get it up and running! The xTool S1 instructions walk you through every step of unboxing and setup, and is actually a pretty quick and simple process
When purchasing a machine, there are multiple packages available to fit your needs. Packages vary from just the machine to all-in-one kits that include different accessories and material kits. The must-have accessories I recommend most to pair with the machine are the Smart Air Assist, and Honeycomb Panel.
Now that the machine is ready to go, let's make something!

xTool has their own free software, Creative Space (XCS), which I found it to be quite similar to Cricut Design Space. It's user-friendly and simple to create using basic shapes, text, and other design elements and can customize to your heart's content. You can also upload your own designs and images.
Upload a laser cut file or project into XCS. For this post, I am making sets of crayon earrings to share with all of the teachers at the school my husband works at. These earrings require both engraving and cutting.
After uploading the design, select the type of material you will be using. Then, click on the parts of the design to cut, like the outer crayon earring border. With the item selected, click on the "Cut" tab on the right menu bar to change it to be cut. The program automatically adjusts the settings for your material, but you can customize it if necessary. I've found that the program is pretty spot-on though!


Place your material in the machine (I'm using plywood) and manually pull the laser box with your hand so that the red "+" is overtop of the material - it doesn't have to be centered.
In the program, you will see "Distance (mm)" in the menu bar of the right side of the machine. Click on the target icon to the right of that space, and the machine will automatically measure the an accurate distance to your material for the perfect outcome.

Now that the project is ready to go in the program, we need to tell the machine where the material actually is. Unlike the xTool M1, the xTool S1 does NOT have a built-in camera to show you where to place your design on the material. Instead, you are going to tell the machine where the material is via a couple of simple steps.
Under the "Mark Processing Area" on the right menu bar, you will see a "Start marking" button. Click this to move on to the next step to mark the area where your material is placed in the machine.
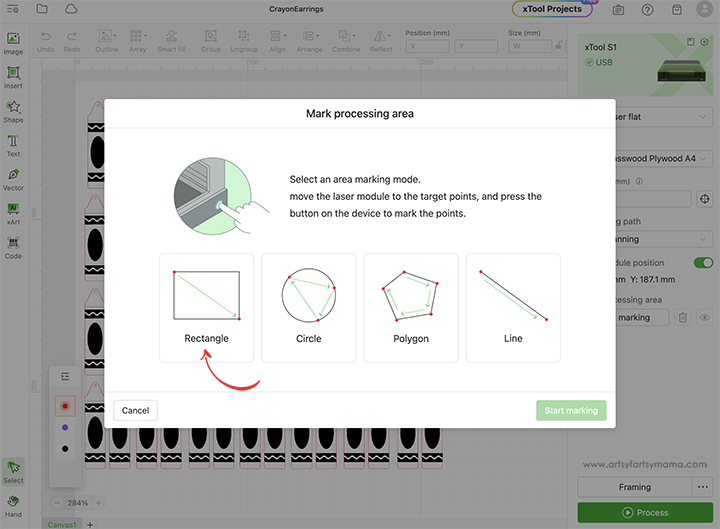

To mark your material "rectangularly", you need to make two points: one in each opposite corner. Manually move the laser head so that the red "+" is squared in the top left corner of the material. Once it's in place, press the large button on the front of the machine. The machine will beep, and then will record the point.
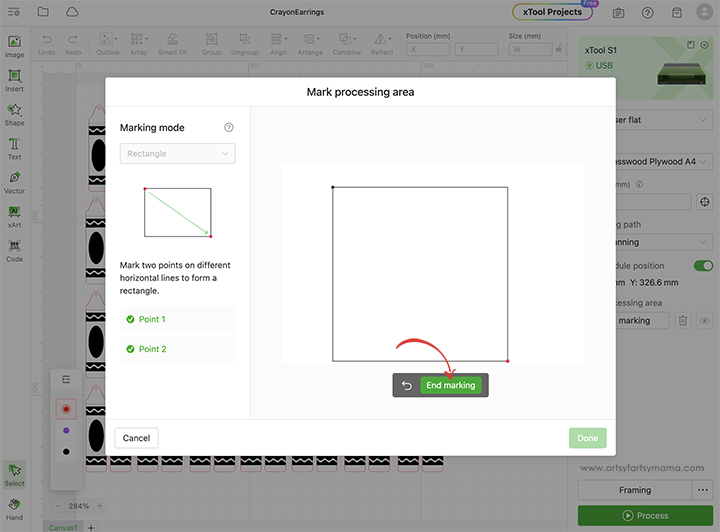
Next, move the laser to the bottom right corner and push the button again to record the second point. Once you have both points marked, click on the "End Marking" button. Now your machine knows where the material is, how big it is, and is now loaded into XCS.
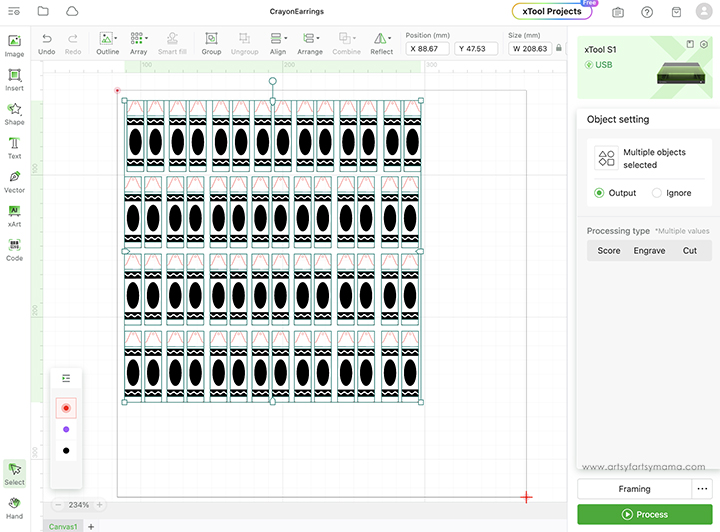
Once you're ready to go, I suggest clicking on the "Framing" option. This will move the laser around the material and shows you exactly where it's going to put your design. It's pretty accurate to the XCS screen, but it's always a good idea to double-check. If you're happy with the framing, click the green "Process" button to start cutting and engraving.

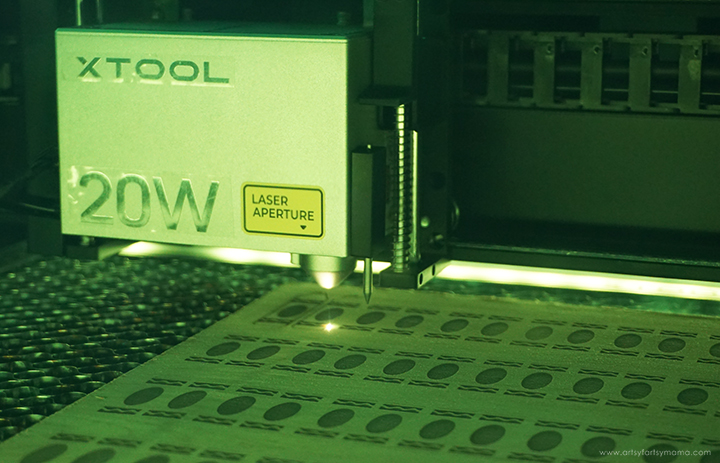


It was so cool to watch the machine in action. The engraving process was twice as fast as the M1, and it looks perfect!
The cutting process was quick and efficient. I was so impressed with how accurately everything was cut, and all of the intricate details. Again - the speed at which these earrings were made truly blew my mind.
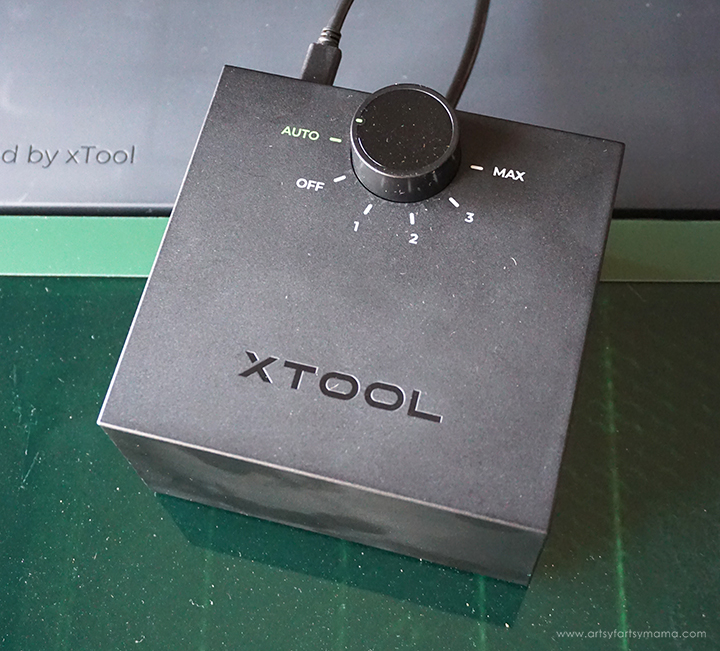
Earlier I mentioned that I highly recommend the Smart Air Assist. This is such a lifesaver when cutting and engraving by providing consistent airflow to help remove smoke quickly and helps the laser provide a cleaner cut on your material. As you can see, there are different settings on the air assist, but leaving it on Auto has been perfect for me so far.
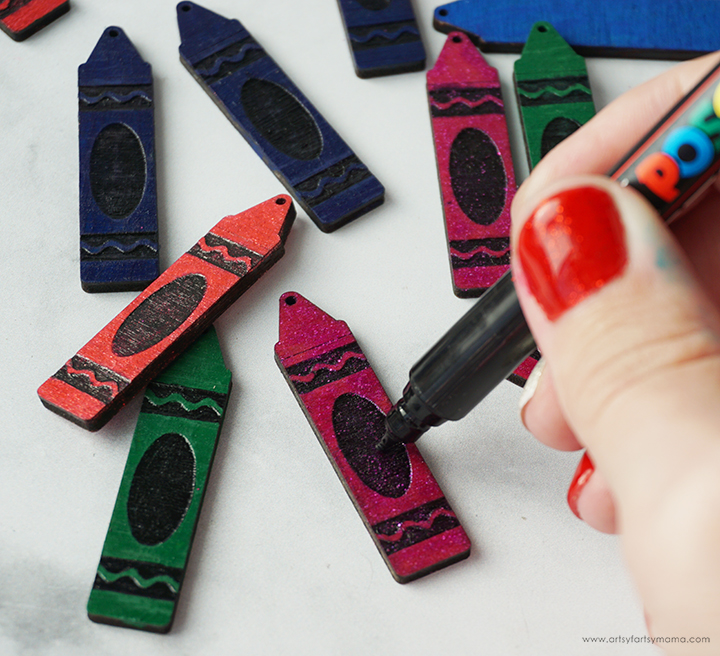
Look at all of these plywood crayon earrings! Each crayon looks exactly the same, which is what you want when creating projects for gift-giving or for your small business.
Now you can paint the crayon earrings (I used Unicorn SPiT Gel Stain) and fill in the engraved areas with an acrylic paint pen. I always finish my earrings with a coat of clear sealant to keep them looking their best.
Lastly, open the jump rings and hook them through the hole in the top of the earrings. Attach the earring hooks to the jump ring and make sure they are completely closed so that they don't come off! I absolutely love how these earrings turned out, and would love to hear what you think. If you are looking to start a small business using the xTool S1 machine, these would also be a great product to sell. As always, if you make any of these projects for yourself, I'd love to see your creations! Tag me on Instagram and Facebook, or leave a comment/photo on the project pin on Pinterest!
Don't forget to Pin, Like, and Share!


