Posts may contain affiliate links (see Disclosure). Thank you so much for supporting Artsy-Fartsy Mama!
foil
Showing posts with label foil. Show all posts
Thursday, March 14, 2024

Polymer Clay Cactus Earrings

Thursday, March 14, 2024

Polymer Clay Cactus Earrings

Read more »

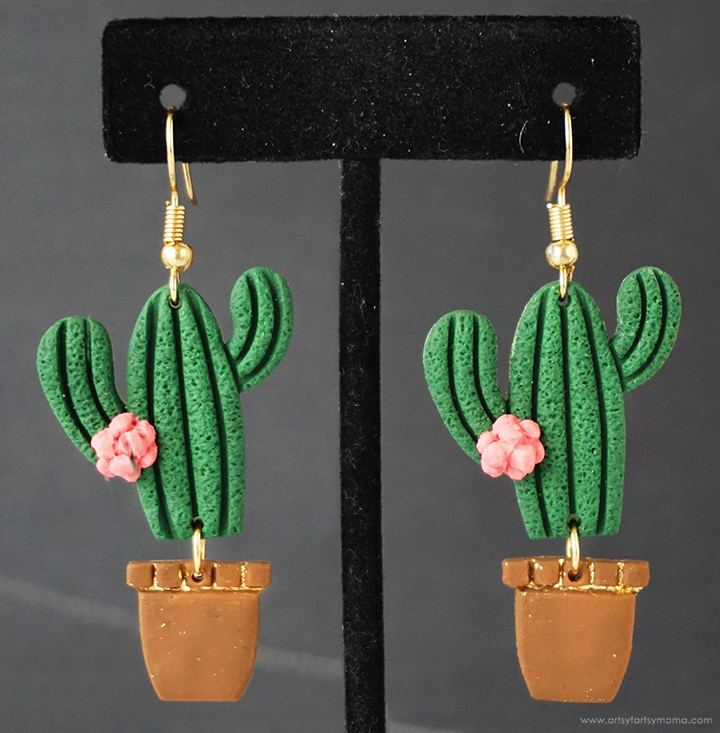
Create an eye-catching pair of handmade Cactus Earrings using polymer clay!


Polymer Clay Cactus Earrings

Creating jewelry is one of my favorite things to do with polymer clay. One of my best friends lives in Southern Utah, which is basically a desert. For her birthday, I decided to make this stunning pair of custom Cactus Earrings using polymer clay and a little bit of foil. The textured clay paired with the shimmery gold foil is such a fun look that can be paired with anything in your wardrobe. These earrings are a simple project that can be customized with different colors of clay and foil to fit your personal style, and will definitely be a great gift idea.
Monday, October 24, 2022

Foil "Happy Everything" Cards

Monday, October 24, 2022

Foil "Happy Everything" Cards

Read more »
Making foiled cards for any "happy" occasion couldn't be easier!

Easy Foil Happy Cards

Creating handmade cards is a lot of fun, and it's a great way to spend an afternoon. Life can get busy, so I like to whip up a bunch of cards to keep on-hand for any occasion. I was inspired to make "Happy Everything" cards using the new Deco Foil "Happy Everything" Stamp & Die Set and Adhesive Transfers. These are the cutest cards, and are so easy! I hope that you feel inspired to create some simple "Happy Everything" Cards to share with everyone you know!
Monday, August 15, 2022

Stamped Mini Canvas Art

Monday, August 15, 2022

Stamped Mini Canvas Art

Read more »
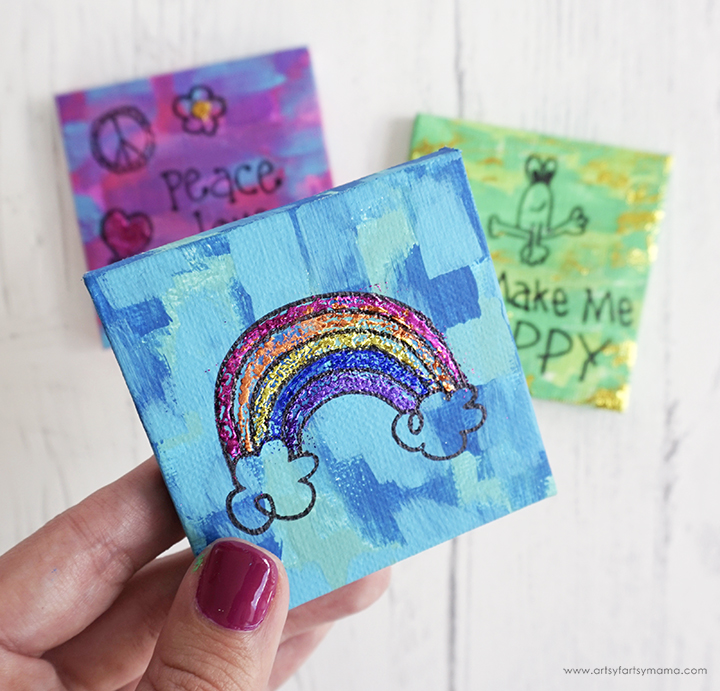
Create a small piece of art using your favorite stamps and paint colors on a mini canvas!

Stamped Mini Canvas Art

Want to make some art, but feel a little overwhelmed at the thought of painting something large? Create your own tiny works of art using acrylic paint, stamps, foil, and a mini canvas! It's a quick way to make art, and it feels so satisfying when it's complete. When you are done with your artwork, you can put it on display, sell it, or give it away as a gift to friends and family. What are you waiting for? Let's get creating!!
Saturday, February 5, 2022

Easy Stamped Pop-Up Cards + Free Printable Template

Saturday, February 5, 2022

Easy Stamped Pop-Up Cards + Free Printable Template

Read more »
Learn to make Easy Stamped Pop-Up Cards (with Free Printable Template) for any occasion!

Easy Stamped Pop-Up Cards + Free Printable Template

I've always enjoyed making handmade cards, and especially loved making pop-up cards for friends when I was a kid. One of my goals for this year is to be a little more on top of things, so I decided to whip up a bunch of cards to keep on-hand for any occasion. As I was getting supplies out, I decided to make a bunch of pop-up cards using stamps and foil - and I am so glad I did!! These are the cutest cards, and they are so easy! I'm also sharing a free printable template that you can use to make pop-up cards for your own collection.
Saturday, December 11, 2021

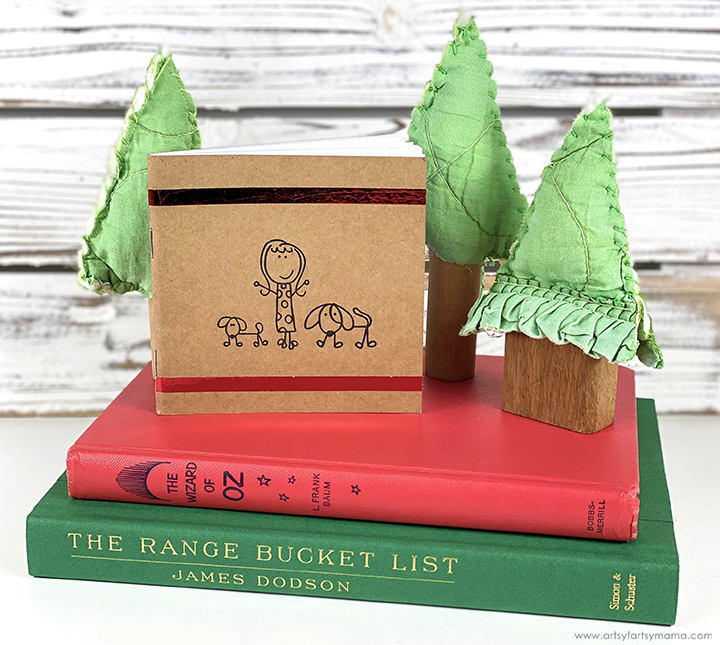
Hand-Stamped Foil Notebooks

Saturday, December 11, 2021

Hand-Stamped Foil Notebooks

Read more »
Kids of all ages will love making their own Hand-Stamped Foil Notebooks!

Foil Stamped Notebook

If you're looking for a simple and sweet gift for your child to make for their teachers and friends, these Hand-Stamped Foil Notebooks are just the thing! We used the Laura Kelly Designs Therm-O-Web Collection to make these notebooks, and had such a fun time. Kids will love combining different character stamps to represent the people they love, and can apply foil in a mess-free way!
Thursday, August 12, 2021

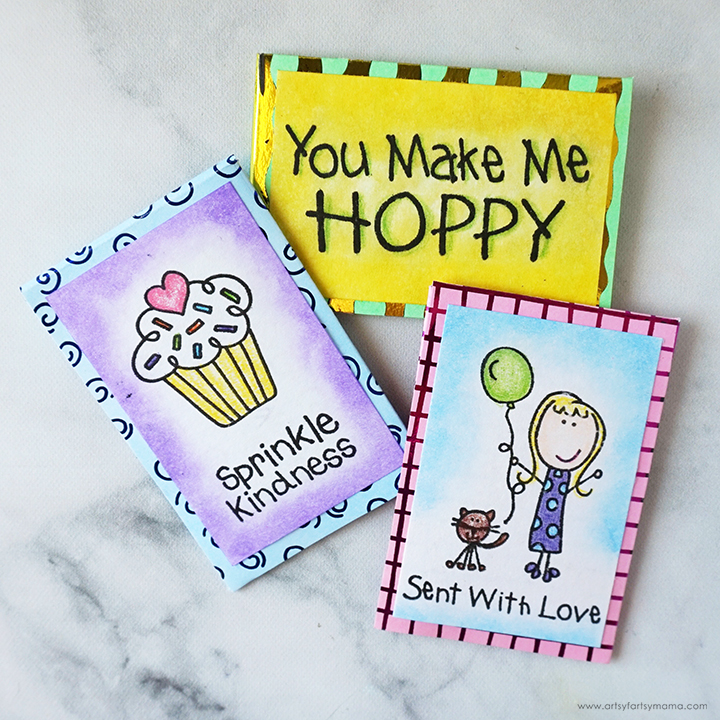
Stamped Gift Card Envelopes

Thursday, August 12, 2021

Stamped Gift Card Envelopes

Read more »
Turn a gift card into something special with these Stamped Gift Card Envelopes!

Stamped Gift Card Envelopes

Gift cards have the reputation for being a "boring" gift idea, but there are so many ways you can make a gift card be a more personal gift. For example, these Stamped Gift Card Envelopes made using the Laura Kelly ThermOWeb line is such a fun and unique way to "wrap" gift cards for the special people in your life. I'm even sharing a free printable template so that you can be giving creatively wrapped gift cards in no time!
Friday, June 4, 2021

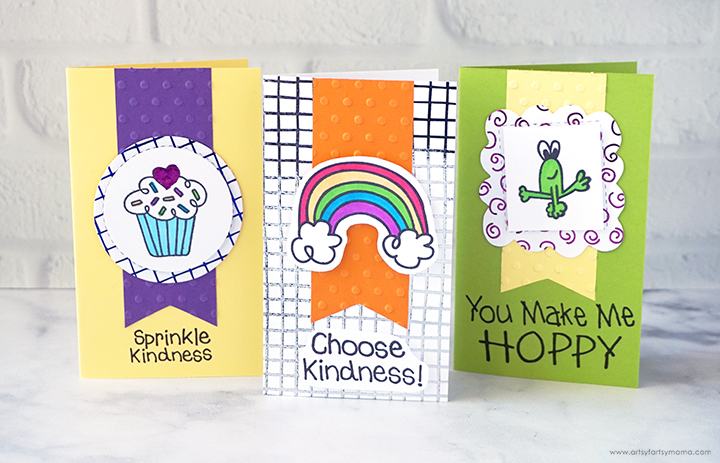
Handmade Kindness Cards

Friday, June 4, 2021

Handmade Kindness Cards

Read more »
Sprinkle kindness wherever you go with Handmade Kindness Cards!

Handmade Kindness Cards with Therm-O-Web

Spreading kindness with others is a great way to help others smile, and it also makes you feel better yourself. Laura Kelly's Kindness on Purpose book has inspired me to become more creative in the ways that I am sharing kindness with others that I come in contact with. Therm-O-Web just launched a new line with Laura, and I am so excited about it! I decided to use the items in the collection to create some simple Handmade Kindness Cards that anyone can make, and will be fun to share with everyone you know!
Monday, November 2, 2020

4-Ingredient Dog Treats

Monday, November 2, 2020

4-Ingredient Dog Treats

Read more »
These 4-ingredient dog treats are sure to be a hit with your four-legged friends!

4-Ingredient Dog Treats

The dogs are always sitting by as we've been baking lately, patiently waiting for crumbs to drop as we go. I felt kind of bad, so I decided to bake up a treat just for them. These homemade dog treats are cheap, easy, and only need FOUR simple ingredients (that you probably already have)! I hope your pups love them as much as my dogs, Lulu and Penny, do!
Tuesday, October 13, 2020

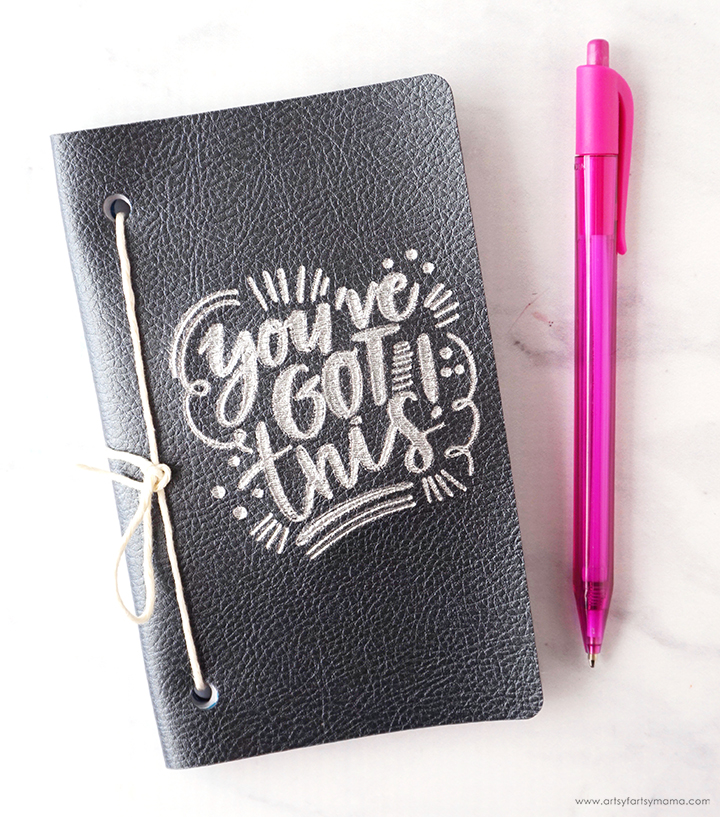
DIY Foil Leather Journal

Tuesday, October 13, 2020

DIY Foil Leather Journal

Read more »
Make your own foil-covered leather journal to keep track of plans or creative thoughts and ideas!

DIY Foil Leather Journal with Pen

I am always making lists. Grocery lists, to do lists, lists of project ideas, and the literal list goes on and on. Just the other day, I was cleaning out my purse and ended up with a large handful of paper scraps full of scribbled checklists. To keep myself a little more organized, I decided to make myself this leather-bound journal (using my Cricut) with a foil design to keep all of my lists in one place. The journal fits perfectly in my purse, and the pages can be easily refilled or replaced to keep my lists going as long as I need them to.
Tuesday, September 29, 2020

You've Got This Card with Free Single Line SVGs

Tuesday, September 29, 2020

You've Got This Card with Free Single Line SVGs

Read more »
Download this collection of Free Single Line SVGs to make your unique own foil creations!

Foiled "You've Got This" Card with FREE Single Line SVG

Have you been wanting to try making foil projects? It's a lot of fun and SO simple to make things using foil, like cards, stationery, home decor, and so much more! After the exciting release of the new Cricut Foil Transfer Tool, my Totally Free SVG crew decided to put a collection of files together specifically to use with the foil tool. I hope you love them as much as I do, and we would love to see your SHINY, new creations!
Friday, September 25, 2020

Cricut Foil Cactus Gift Tag and Card

Friday, September 25, 2020

Cricut Foil Cactus Gift Tag and Card

Read more »
Learn all about the new Cricut Foil Transfer Tool and make your own Foiled Cactus Gift Tag and Card!

Cricut Foil Cactus Gift Tag and Card

Have you been wanting to add foil to your Cricut projects? Cricut's new Foil Transfer System is the easiest way to apply foil to a wide variety of materials using your Cricut Explore and Cricut Maker machines! Just like any Cricut project, you’ll use Design Space to add foil settings on pre-made or your own custom designs. It's also easy to apply foil along with any other action (cutting, scoring, debossing, etc.).

I'm also sharing a free Cactus SVG to download to go along with two step-by-step project tutorials using the design. This will be perfect for you to try once you get your own Cricut Foil Transfer Tool! You'll also be able to see just how easy foiling on your Cricut machine can be!
Tuesday, March 27, 2018

Foiled Mother's Day Card

Tuesday, March 27, 2018

Foiled Mother's Day Card

Read more »
Tell mom how much you love her with a handmade Foiled Mother's Day Card!


No matter what you decide to give for Mother's Day, you probably should include a card. This gorgeous, foiled Mother's Day card looks just as good as any card you can find in a store, but your mother will love it even more because you made it for her! With a little help from Deco Foil, this card is simple to make even if you are new to the art of foiling.
Tuesday, November 14, 2017

DIY Fabric Advent Calendar

Tuesday, November 14, 2017

DIY Fabric Advent Calendar

Read more »
Count down the days to Christmas with this colorful DIY Fabric Advent Calendar!

Count down the days to Christmas with this colorful DIY Fabric Advent Calendar!

Advent calendars are a tradition in our home. Counting down the days until Christmas build the anticipation and makes the magic of the holidays last throughout the entire month. You can fill the pockets with whatever surprises work for your family: treats, activity ideas, quotes or scriptures, and even little toys. This DIY Fabric Advent Calendar is the first one I've ever sewn. It was a lot of fun to make, and I am excited to put it up with my other Christmas decorations!
Monday, August 21, 2017

DIY Magnetic Classroom Attendance & Lunch Count Board

Monday, August 21, 2017

DIY Magnetic Classroom Attendance & Lunch Count Board

Read more »
Make classroom management easier with a DIY Magnetic Classroom Attendance & Lunch Count Board!

DIY Magnetic Classroom Attendance & Lunch Count Board

My husband's classroom is ready to go! The last thing he needed was something that would help him be able to record student attendance and lunch counts in an easier and faster way. He's a big fan of allowing the students to become independent in his classroom, so I think this DIY Magnetic Classroom Attendance & Lunch Count Board is going to be really helpful!
Tuesday, September 29, 2015

Free Printable Foil Recipe Cards

Tuesday, September 29, 2015

Free Printable Foil Recipe Cards

Read more »
I received product in exchange for this post. All opinions shared are 100% my own.

It's getting to be that time of year to cook and bake all kinds of delicious food! I like to go through all of my family's favorite holiday recipes and write them down for my own recipe collection. It's also fun to include my favorite recipes on cute recipe cards to pair with cooking utensils as wedding or Christmas gifts. I've designed a recipe card that can be dressed up a bit by the Minc that will really make your favorite recipes stand out!

Free Printable Foil Recipe Cards at artsyfartsymama.com #HSMinc

There are tons of ways to foil projects, but none are as easy and quick as using the Minc, especially for this project!! If you haven't heard of this yet, the Minc is an incredible crafting tool designed by Heidi Swapp that turns laser printed items (with Minc products or your own custom designs) into a beautifully foiled creation in just seconds. You can see more about the Minc and all it can do in my previous post introducing the Minc!

Free Printable Foil Recipe Cards at artsyfartsymama.com #HSMinc

Of course, to give your projects touches of colorful shimmer, you need foil. You can find reactive foil made just for the Minc in a rainbow of colors! Using sharp scissors, cut a piece of foil in the color of your choice to cover the recipe card.

Free Printable Foil Recipe Cards at artsyfartsymama.com #HSMinc

Open the carrier sheet and place the recipe cards inside face up. Carefully lay the foil pieces over the cards (color side up) and lightly press down and make sure none of the text is uncovered. Carefully lay the top of the carrier sheet down over your project and smooth it out with your hand.

Tip: Sometimes static on the carrier sheet can cause the foil to shift, so just work slowly and try to keep everything in place as best you can.

Free Printable Foil Recipe Cards at artsyfartsymama.com #HSMinc

Place the carrier sheet into the Minc until the rollers grab it to pull it through the machine. Let it run all the way through, then carefully open the carrier sheet. Remove the paper and foil, then slowly peel the foil off the paper starting at one corner. Now your recipe card is foiled and looking gorgeous! It really is as simple as that.

Free Printable Foil Recipe Cards at artsyfartsymama.com #HSMinc

Depending on the colors of foil you choose, your new recipe cards can range from chic to colorful and fun! My recipe book is a lot more fun to look through now, and I can't wait to create more to give away this holiday season. What color(s) would you make your recipe cards?

Download Free Printable 3x5 Recipe Cards
Download Free Printable 4x6 Recipe Cards

Some things you should know before downloading:
*Artsy-Fartsy Mama printables are for PERSONAL USE ONLY.
*You may NOT modify, re-sell, redistribute, or claim the design as your own.
*Please do not remove the credits/watermarks.
*If you share this on the internet, credit must be given to Artsy-Fartsy Mama & linked back to this post.

Don't you just want to foil everything now? You can find the Minc starter kit and accessories at Hobby Lobby and Jo-Ann, as well as at some local stores and online shops.

Tuesday, August 25, 2015

Free Printable After School Checklist

Tuesday, August 25, 2015

Free Printable After School Checklist

Read more »
I received product in exchange for this post. All opinions shared are 100% my own. #HSMinc

In an effort to get the school year off to a good start, I know I need to stay organized. To help with that, I've created a fun and FREE Printable After School Checklist as a reminder for kids to stay on task when the school day is done.

Free Printable After School Checklist at artsyfartsymama.com #HSMinc #FoilAlltheThings

To personalize the print, I decided to let my daughter help add foil with the Minc. The Minc machine does require some adult supervision, but kids can definitely have a ton of fun turning laser printed items (both pre-made or custom designs) into a beautifully foiled creation in just seconds. You can find the Minc starter kit and accessories at Hobby Lobby and Jo-Ann, as well as at some local stores and online shops.

To create the beautiful foil look on the checklist, set the Minc heat setting to 3 or 4. Then cut a piece of Minc foil to cover the sections. We used teal for the top and pink for the check boxes and the list. Open the carrier sheet and place the checklist face up inside the sheet. Carefully lay the foil over the paper (color side up). Carefully lay the top of the carrier sheet down over the print and smooth it out with your hand.

Tip: Sometimes static on the carrier sheet can cause the foil to shift, so just work slowly and try to keep everything in place as best you can.

Free Printable After School Checklist at artsyfartsymama.com #HSMinc #FoilAlltheThings

Place the carrier sheet into the Minc until the rollers grab it to pull it through the machine. Let it run all the way through, then carefully open the carrier sheet. Remove the paper and foil, then slowly peel the foil off the paper. Now your after school checklist is foiled and looking gorgeous! It really is as simple as that.

Free Printable After School Checklist at artsyfartsymama.com #HSMinc #FoilAlltheThings

The checklist is now ready for use! The color options are endless when it comes to using foil. Just use your imagination and be creative! As you can see, the checklist includes basic reminders for most children in school, such as: unpacking a lunch box (for obvious reasons), unpacking a backpack so important papers and reminders aren't missed, eating a snack, doing homework and reading (you can add however many minutes in the blank), plus getting their chores done at home. To help things go a little smoother in the mornings, kids can get clothes and shoes ready for the next day, and getting to bed on time on a school night is a must!

Free Printable After School Checklist at artsyfartsymama.com #HSMinc #FoilAlltheThings

Place the checklist into a frame behind the glass to keep the foil looking beautiful and use a dry erase marker to check things off the list as they get done each day. The marker wipes clean off the glass with a cloth or use a little alcohol or glass cleaner when it gets really dirty.


Free Printable After School Checklist at artsyfartsymama.com

For those who don't have a Minc machine (yet), I've also created a free printable after school checklist in primary colors. Put in a frame, and it's ready to use!


Free Printable After School Checklist at artsyfartsymama.com

For something a little different, I've also created a bright colored free printable after school checklist.


Some things you should know before downloading:
*Artsy-Fartsy Mama printables are for PERSONAL USE ONLY.
*You may NOT modify, re-sell, redistribute, or claim the design as your own.
*Please do not remove the credits/watermarks.
*If you share this on the internet, credit must be given to Artsy-Fartsy Mama & linked back to this post.

Tuesday, July 21, 2015

DIY Foil Notebooks

Tuesday, July 21, 2015

DIY Foil Notebooks

Read more »
I received product in exchange for this post. All opinions shared are 100% my own. #HSMinc

DIY Foil Notebooks at artsyfartsymama.com

In my opinion, you can never have enough notebooks! Being able to make some yourself for a fraction of the cost of buying them in the store is even more of a bonus. These DIY Foil Notebooks are really fun and quick to put together with some printables and the Minc machine. The notebooks are a both stylish and functional way to organize your shopping lists, and as a journal or back to school notebook for the kids!

DIY Foil Notebooks at artsyfartsymama.com

To create your notebook, you'll need to start with the cover. Simply print out the notebook cover (free printable available at the end of this post) on cardstock using a laser printer and trim. Make it fun by printing on any color of cardstock, then choose a coordinating color foil!

Using a ruler and a bone folder, make a crease along the center of the cover. This will make things a lot easier later on.

DIY Foil Notebooks at artsyfartsymama.com

There are tons of ways to add foil to your projects, but none are as easy and quick as using the Minc!! The Minc is one of my favorite crafting tools that turns laser printed items (both pre-made or your own custom designs) into a beautifully foiled creation in just seconds. You can find the Minc starter kit and accessories at Hobby Lobby and Jo-Ann, as well as at some local stores and online shops.

To create the beautiful foil look on the notebooks, set the Minc heat setting to 3 or 4. Then, cut a piece of Minc foil in a coordinating color to cover the paper. Open the carrier sheet and place the notebook cover face up. Carefully lay the foil over the paper (color side up) and lightly press down and make sure none of the text is uncovered. Carefully lay the top of the carrier sheet down over your project and smooth it out with your hand.

Tip: Sometimes static on the carrier sheet can cause the foil to shift, so just work slowly and try to keep everything in place as best you can.

DIY Foil Notebooks at artsyfartsymama.com

Place the carrier sheet into the Minc until the rollers grab it to pull it through the machine. Let it run all the way through, then carefully open the carrier sheet. Remove the paper and foil, then slowly peel the foil off the paper. Now your notebook cover is foiled and looking gorgeous! It really is as simple as that.

DIY Foil Notebooks at artsyfartsymama.com

Now that your cover is ready, you need some paper to go inside the notebook! I've created 3 different designs that you can print on regular copy paper:
  1. Large lined, for kids to be able to draw a picture and write a short sentence below.
  2. Standard lined paper, which is great for journaling or making lists!
  3. Blank, for when you just want to do what you want.
Each notebook will need no more than 8 sheets of paper. You can print the sheets double sided, or mix things up. It's your notebook, so create it to work best for you!! Once the pages have been printed, crease the center fold of each page with a ruler and bone folder.


DIY Foil Notebooks at artsyfartsymama.com

Now it's time to assemble the notebook! Lay the pages flat and align the creases of each page, including the cover. Make sure everything is centered, and use binding clips to hold the pages together.

DIY Foil Notebooks at artsyfartsymama.com

Turn the notebook over, and use a sewing machine to bind the book together. Set the machine to the longest stitch and sew VERY slowly along the fold line. Be sure to back stitch at the beginning and the end.

If you don't have a sewing machine, no problem! You can hand sew (punch small holes along the fold line with a thumbtack), or even use staples along the fold line. Just make sure to keep the pages together with binding clips so the pages don't shift and make for a crooked notebook.

DIY Foil Notebooks at artsyfartsymama.com

Once the book has been sewn, trim the excess thread. Now your notebook is finished and ready to be written in!! These notebooks will make great gifts, or would be a unique back to school notebook!!

DIY Foil Notebooks at artsyfartsymama.com

When you first close the notebooks, they will probably pop right back open. Press along the seam with the bone folder a few times, and that should help the notebooks stay closed. I have two different printable cover designs to share with you so you can create your own DIY foil notebooks!

Download the "Be Silly Be Honest Be Kind" Notebook Cover
Download the "The Best Ideas" Notebook Cover

Some things you should know before downloading:
*Artsy-Fartsy Mama printables are for PERSONAL USE ONLY.
*You may NOT modify, re-sell, redistribute, or claim the design as your own.
*Please do not remove the credits/watermarks.
*If you share this on the internet, credit must be given to Artsy-Fartsy Mama & linked back to this post.
Tuesday, June 16, 2015

Foil Watercolor Gift Tags

Tuesday, June 16, 2015

Foil Watercolor Gift Tags

Read more »
I received product in exchange for this post. All opinions shared are 100% my own.


Free Printable Foil Watercolor Gift Tags at artsyfartsymama.com

I've always loved watercoloring, and pairing that look with foils is simply gorgeous. With the Minc machine, some free printables and watercolors, you can create some uniquely stunning foil watercolor gift tags and artwork in just minutes!!

Free Printable Foil Watercolor Gift Tags at artsyfartsymama.com

Start by printing out the "You Are My Sunshine" gift tags on heavy cardstock or watercolor paper with at little texture as possible. Cut the gift tags out and grab some watercolors. Any kind of watercolors will do!! You'll also need a paint brush and a small cup of water.

Free Printable Foil Watercolor Gift Tags at artsyfartsymama.com

For best results painting on cardstock, wet the watercolors, then paint on the dry paper. Get creative! Paint in any colors, make messy or clean paint strokes, and paint a section of the tag, or the entire thing!

**Very important: let the paper dry completely before adding foil in the next step! When the tags have dried, take a damp cloth or paper towel and wipe the front of the tags. This will help remove some of the paint off the printed text.

Foil Gift Tags in a snap at artsyfartsymama.com #HSMinc #foilallthethings

There are tons of ways to foil projects, but none are as easy and quick as using the Minc, especially for this project!! The Minc is an incredible crafting tool that turns laser printed items (both pre-made or your own custom designs) into a beautifully foiled creation in just seconds. You can see more in my previous post introducing the Minc and showing what it can do!

Turn on the Minc machine and set the heat setting to 3. The Minc foils come in a variety of colors, so it's fun to be able to coordinate them with the watercolor colors I used on the tags. Cut the foils with sharp scissors to cover the wording on the gift tags.

Open the carrier sheet and place the painted gift tags face up. Carefully lay the foil pieces over the tags (color side up) and lightly press down and make sure none of the text is uncovered. Carefully lay the top of the carrier sheet down over your project and smooth it out with your hand.

Tip: Sometimes static on the carrier sheet can cause the foil to shift, so just work slowly and try to keep everything in place as best you can.

Free Printable Foil Watercolor Gift Tags at artsyfartsymama.com

Run the carrier sheet through the Minc, then remove the tags and foil. Peel up the foil, and voila! Foiled, watercolored tags in just minutes!!

**The reason you need to find a watercolor paper with little to no texture is because the foil won't stick properly on textured paper. The smoother the paper, the better.

Free Printable Foil Watercolor Gift Tags at artsyfartsymama.com

To finish turning the tags into usable tags, simply use a standard hole punch to punch a hole in the center of the beveled side of the tag.

Free Printable Foil Watercolor Gift Tags at artsyfartsymama.com

Use some baker's twine, ribbon, or jute and thread it through the hole in the tag so you can easily attach it to any gift or package.

Free Printable Foil Watercolor Gift Tags at artsyfartsymama.com

I love the unique look these tags give to any gift, and will really "brighten" someone's day! Even though I don't have a lot of gifts to give out right now, I just can't stop making these tags because it's so easy and fun!!


Make your own Foil Watercolor "You Are My Sunshine" Print at artsyfartsymama.com

I've also made the "You Are My Sunshine" into a printable 8x10 for you to frame and put on display! Print it out on cardstock or untextured watercolor paper, then paint to your heart's content. Let it dry, then run it through the Minc the same way as the gift tags.

Make your own Foil Watercolor "You Are My Sunshine" Print at artsyfartsymama.com

Peel the foil, and place your print in a frame or hang on a clipboard. It really adds some color and shine to your space and it's fun to create custom decor for your home!


If you want to make your own foil creations, the Minc starter kit and accessories are available at Hobby Lobby and Jo-Ann, as well as local stores and online shops.

Tuesday, May 26, 2015

Foil Butterfly Wall Art

Tuesday, May 26, 2015

Foil Butterfly Wall Art

Read more »
I received product in exchange for this post. All opinions shared are 100% my own.

Foil Butterfly Wall Art Tutorial at artsyfartsymama.com #HSMinc

My daughter loves butterflies, so I decided to create some foiled wall art for her to hang in her bedroom using the oh-so-amazing Minc machine!! I'm so excited to share this project tutorial with you and hope that you love it as much as I do! 

If you haven't heard, the Minc is an incredible a crafting tool that turns laser printed items (both pre-made or your own custom designs) into a beautifully foiled creation in just seconds. You can see more in my previous post introducing the Minc and showing what it can do! Though there are tons of ways to foil projects, none are as easy and quick as using the Minc.

Foil Butterfly Wall Art Tutorial at artsyfartsymama.com #HSMinc

For this project, I used the Minc machine and gorgeous Minc foils in mint, hot pink, pink, and rose gold. I also used Minc 3D Paper Butterflies, and my own design for inside the frame. You'll also need a frame, paint (if your frame is unpainted), and Glue Dots or tape runner.

Foil Butterfly Wall Art Tutorial at artsyfartsymama.com #HSMinc

The Minc 3D Paper Butterflies pack comes with 32 butterflies in multiple sizes and patterns to create lots of unique butterfly combinations. I also designed a butterfly quote to go inside my frame, and wanted to share it with all of you as a free printable. If you have a Minc, feel free to print this printable out on a laser printer and cover it in your favorite color foils!!


Now, let's get started! Turn on the Minc machine and set the heat setting to 3. Cut pieces of foil to cover all the butterflies with sharp scissors (dull scissors do not cut the foil well).

Open the carrier sheet and place the butterflies face up. Carefully lay the foil pieces over the butterflies (color side up) and lightly press down and make sure none of the black parts of the butterflies are uncovered. Carefully lay the top of the carrier sheet down over your project and smooth it out with your hand.

Tip: Sometimes static on the carrier sheet can cause the foil to shift, so just work slowly and try to keep everything in place as best you can.

Foil Butterfly Wall Art Tutorial at artsyfartsymama.com #HSMinc

Place the carrier sheet into the Minc machine until you feel the rollers grab it. The machine will do all the work - all you have to do is sit back and wait for it to completely run through the machine. After it cools (it only takes a few seconds), carefully lift the top of the carrier sheet and remove the butterflies.

Starting at one corner, slowly pull up the foil. Remove the foil from the rest of the butterflies. Now the butterflies have gone from black and white to shiny, gorgeous, and chic!!

Foil Butterfly Wall Art Tutorial at artsyfartsymama.com #HSMinc

Since the butterflies come in different shapes, sizes, and patterns, it's fun to mix and match unique butterfly creations. To give the butterflies a more 3D effect, slightly bend the wings up. If using two layers, I kept the bottom layer flat, and placed the bent butterfly on top.

Foil Butterfly Wall Art Tutorial at artsyfartsymama.com #HSMinc

Stick your butterflies together with Glue Dots or a tape runner. Next, paint your frame (if you need/want to) and arrange the butterflies to your liking.

Foil Butterfly Wall Art Tutorial at artsyfartsymama.com #HSMinc

Once you have the butterfly arrangement you want, place a Glue Dot or a little bit of tape runner on the back of the bottom butterflies and stick them to the frame. This will stick them on really well, but will still give you the option to remove them later if you decide to use them for something else.

Foil Butterfly Wall Art Tutorial at artsyfartsymama.com #HSMinc

For the print, I wanted to make it multi-colored. So, I cut pieces of foil to cover each of the words in the colors I wanted them to be. I used rose gold on the smaller letters, and mint and hot pink on the "changed" and "butterflies".

I'll be completely honest - with this smaller print, it was a little tricky to keep the foil in place while on carrier sheet because of the static. But don't give up - it's definitely doable!! Just be patient and try to hold smaller pieces down while you slowly place the top part of the sheet back down.

Foil Butterfly Wall Art Tutorial at artsyfartsymama.com #HSMinc

Place the print into the frame, hang  it on the wall and enjoy your beautiful foil butterfly wall art!! This is one of the reasons why the Minc is one of my new favorite craft tools - your only limitations with this machine is your imagination! You can find the Minc machine and accessories (like the 3D paper butterflies) are available at Hobby Lobby and Jo-Ann, as well as local stores and online shops.