Posts may contain affiliate links (see Disclosure). Thank you so much for supporting Artsy-Fartsy Mama!
upcycle
Showing posts with label upcycle. Show all posts
Monday, October 21, 2024

Flocked Trinket Dish

Monday, October 21, 2024

Flocked Trinket Dish

Read more »

Give a thrifted piece of decor new life with this clever Flocked Trinket Dish tutorial!


DIY Flocked Trinket Dish

While thrifting, I often bring a lot of things home that need a little extra love. I don't really have a plan for them, so I set them aside until inspiration strikes. This $1 metal leaf dish was one of those finds. The metal leaf dish was dingy, scratched, and just asking for a makeover. As soon as I got my hands on Plaid's new Velvet Crush, I knew that that was what this leaf tray needed to bring it back to life! This Flocked Trinket Dish was so easy to create, and the velvety finish is so smooth, and - most importantly - stays in place!
Thursday, May 2, 2024

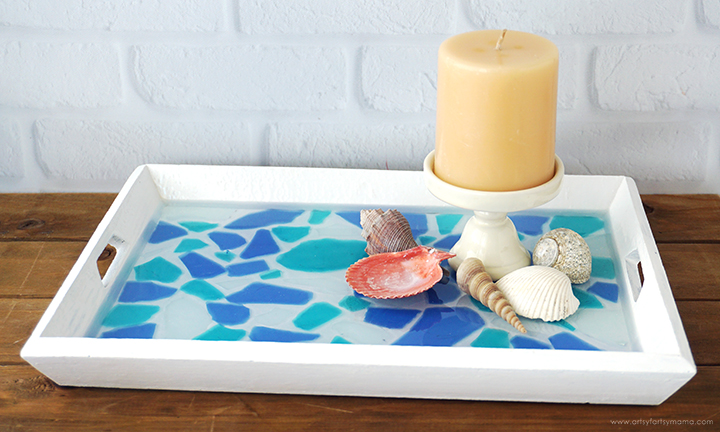
Sea Glass Mosaic Tray

Thursday, May 2, 2024

Sea Glass Mosaic Tray

Read more »

Transform a thrifted tray into a beautiful and beachy Sea Glass Mosaic Tray to put on display or to serve your guests!


Sea Glass Mosaic Tray

The beach is one of my favorite places to be, but alas, I live in the mountains. If you're like me and don't live near a beach, you can bring that vibe into your home with handmade decor! This Sea Glass Mosaic Tray is made using a thrifted wooden tray, real sea glass, and resin. This is such a fun project for any level of resin crafters, and is a whole lot easier than you'd think. This stunning tray will make such a statement, whether it's on display in your home or used for charcuterie.

New to resin? Be sure to check out Resin 101: Getting Started with Resin!
Friday, July 7, 2023

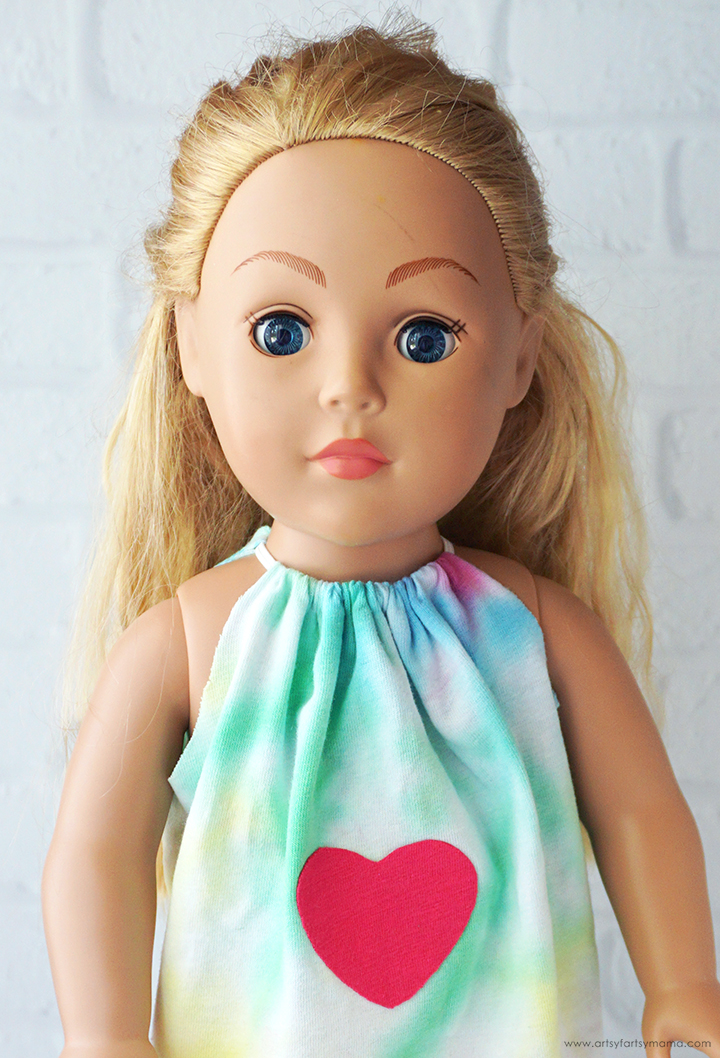
No-Sew 18" Doll Pillowcase Dress

Friday, July 7, 2023

No-Sew 18" Doll Pillowcase Dress

Read more »

Upcycle an old t-shirt into a new no-sew Pillowcase Dress for your 18 inch doll!


No-Sew 18" Doll Pillowcase Dress

Making clothes and accessories for 18 inch dolls is so much fun! My daughter had a Dolly & Me Tie-Dye Party, complete with matching pillowcase dresses made from t-shirts for all the girls. We had the best time, and the kids loved making the custom matching outfits with their tiny BFFs. After the party, my daughter has spent hours making more dresses for her dolls using old shirts, which has saved us so much money! This 18" Doll Pillowcase Dress is SO easy to make, and has both a sewing or no-sew option so that anyone can make one with ease.
Sunday, December 5, 2021

Upcycled Christmas Gift Tags

Sunday, December 5, 2021

Upcycled Christmas Gift Tags

Read more »
Upcycle old cereal boxes into unique Christmas Gift Tags!

Scrappy Recycled Gift Tags

We usually have piles of recyclable boxes taking over our house this time of year. Recycling is always a good thing, and giving new life to something that would otherwise be in the trash is so satisfying! These scrappy Upcycled Christmas Gift Tags made with E6000 are a fun and mess-free holiday craft that the whole family can enjoy while helping the environment at the same time.
Friday, April 9, 2021

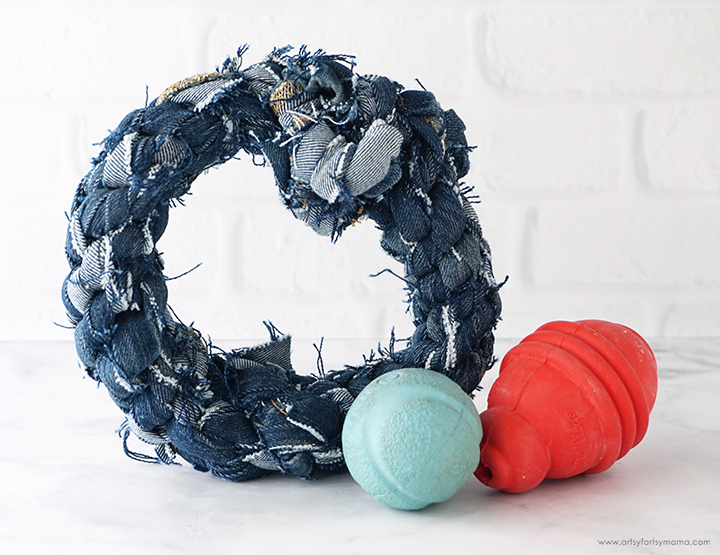
No-Sew Denim Dog Toy

Friday, April 9, 2021

No-Sew Denim Dog Toy

Read more »
Recycle old jeans to make durable no-sew denim dog toys!

No-Sew Denim Dog Toy

Most dog toys don't stand a chance at surviving more than a couple of days at my house. Sure, my dogs have a blast destroying them over that time, but I'm not really a big fan of trying to find something that is both affordable and "indestructible" for them to play with all the time. Instead of heading to the store again, I decided to give some old, ratty jeans new life by transforming them into a fun and durable toy for the dogs to play with! It's actually pretty easy to make, and best of all, FREE!
Friday, April 2, 2021

Duck Tape Book Cover

Friday, April 2, 2021

Duck Tape Book Cover

Read more »
Give an old book cover new life with a colorfully patterned roll of Duck Tape!

DIY Book Recover with Duck Tape

Did you know that there are all different colors and fun patterns of Duck Tape available right now?! There is literally something for everyone out there! Plus, you can do so many things with it - like actually fixing things, crafting, or giving ordinary items an extraordinary makeover! For example, we decided to give an old book new life with some unicorn-patterned tape, which turned out to be really simple and my daughter couldn't be more excited about it!
Friday, October 9, 2020

DIY Star Butterfly Boots

Friday, October 9, 2020

DIY Star Butterfly Boots

Read more »
Create your own pair of Star Butterfly Boots to complete a Star vs. the Forces of Evil costume!

DIY Star Butterfly Boots

Have you ever watched Star vs. the Forces of Evil? My daughter absolutely loves it, and plans on dressing up like the main character, Star Butterfly, for Halloween this year. Before I show you the complete Star Butterfly costume, I wanted to share how to make some of the parts of the ensemble so that the costume post isn't too long. I'm so excited with how our Star Butterfly boots turned out and to share how you can make your own if you want to dress up like her, too!
Sunday, July 5, 2020

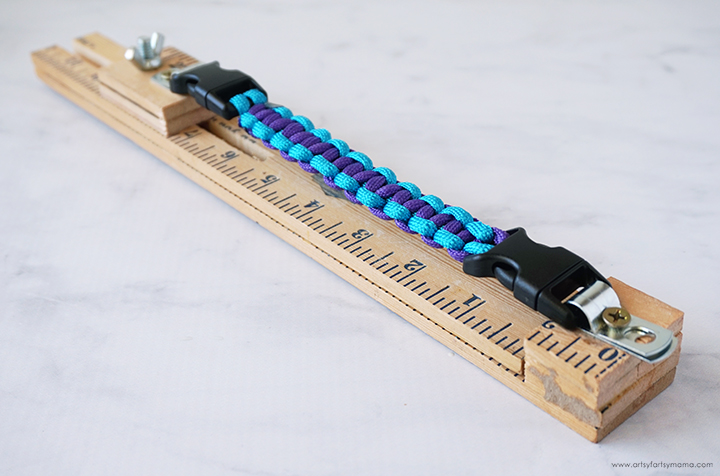
DIY Yardstick Paracord Jig

Sunday, July 5, 2020

DIY Yardstick Paracord Jig

Read more »
Build your own Paracord Jig from a yardstick to help make paracord projects a breeze!

DIY Paracord Jig with Paracord Bracelet

My daughter just got into making paracord bracelets, and was getting frustrated by trying to tie freehanded or with the clips taped to the table. I found a bunch of paracord jigs for sale online, and knew there was some way we could make one. Then I found an amazing trick for making one out of a yardstick - genius! It costs almost nothing to make, and can be completed in an afternoon. The bonus is that my daughter is SO happy using this jig for her paracord projects, and is completed in half the time!!
Tuesday, June 9, 2020

DIY Shrink Charms with Recycled Plastic

Tuesday, June 9, 2020

DIY Shrink Charms with Recycled Plastic

Read more »
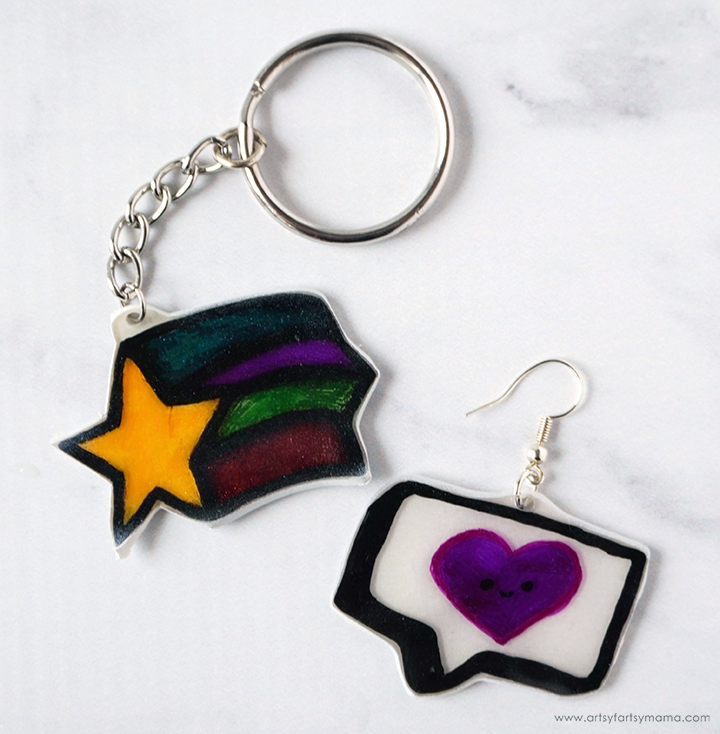
Make your own Plastic Shrink Charms from recyclable plastic containers!

Shrink Charms with Keychain and Jewelry Findings

Looking for something fun to do with the kids? These shrink charms are a great way to spend the afternoon, and costs almost nothing! Sure, you can purchase kits or special shrink paper made especially for this kind of craft, but did you know that you can recycle plastic that is probably already in your home? Why not use up that garbage instead of adding to the landfill, and make your very own shrink charms to create colorful jewelry, bags or backpacks, and keychains!
Tuesday, February 20, 2018

Taco Valentine Card Box

Tuesday, February 20, 2018

Taco Valentine Card Box

Read more »
Taco 'bout awesome! Collect your Valentines in this adorable Taco Valentine Card Box!

Taco 'bout awesome! Collect your Valentines in this adorable Taco Valentine Card Box!

When it comes to Valentine's Day, it has become a fun family tradition to come up with creative ideas for my daughter's Valentine card box. The past few years we have made a Puppy Dog Valentine Card Box, a Panda Valentine Card Box, and and the infamous Unicorn Valentine Card Box. This year my daughter and I laughed and laughed when we decided on making the this awesome Taco Valentine Card Box to hold all those sweet notes from classmates from her Valentine's Day party!

Tuesday, December 19, 2017

Vintage Gumball Machine Makeover

Tuesday, December 19, 2017

Vintage Gumball Machine Makeover

Read more »
This post is sponsored by Goodwill Industries. As always, all opinions are my own.
#GoodwillDIY #ShopGoodwill

Transform a thrifted Vintage Gumball Machine into a a custom piece of decor!

Transform a thrifted Vintage Gumball Machine into a a custom piece of decor! #GoodwillDIY #ShopGoodwill

Hunting for treasures at Goodwill® has become a favorite pastime for me and my husband. We're always looking for vintage items, books to fill the classroom library, and finding average items to transform into custom treasures that will be loved for years! I could spend hours perusing through the store, adding items in my cart that I can upcycle into something fabulous.
Thursday, December 7, 2017

Upcycled Snow Globe

Thursday, December 7, 2017

Upcycled Snow Globe

Read more »
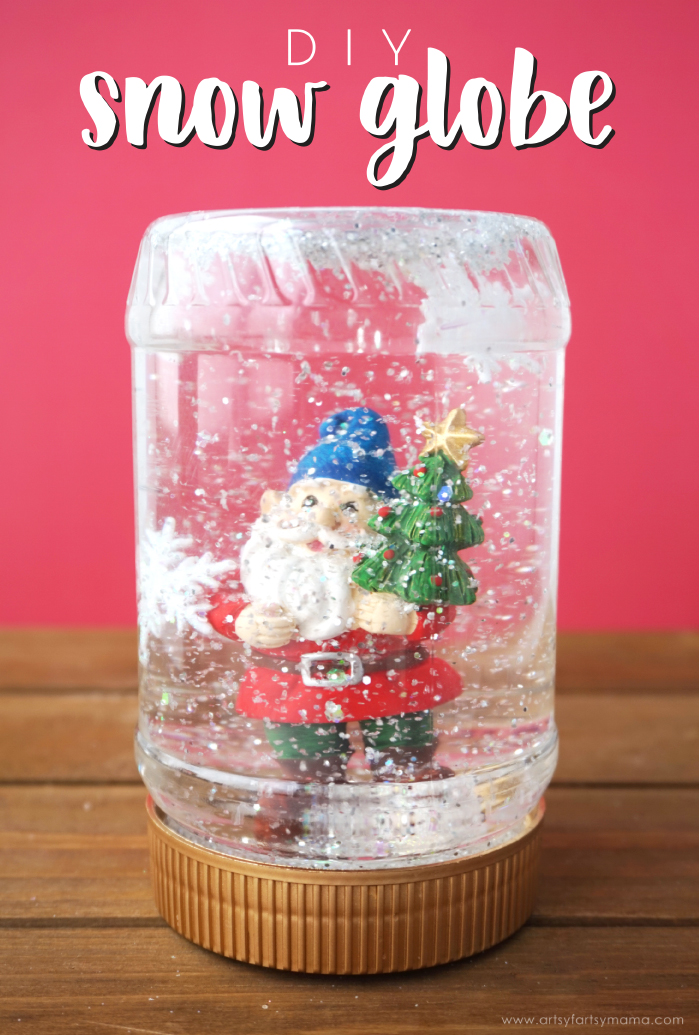
Create your own winter wonderland with an easy-to-make DIY Snow Globe!

Thanks to Peanut Butter & Co. for sponsoring this post. As always, all opinions are my own.

Upcycle a peanut butter jar to create your own DIY Snow Globe winter wonderland!

Snow globes are so beautiful and magical. It's like your own winter wonderland, even if it doesn't snow in your area! This is an easy project that even the kids will love helping with, and would also make a sweet gift to share with someone else. All you need are a few simple supplies that you might already have on hand.

Upcycle a peanut butter jar to create your own DIY Snow Globe winter wonderland!

First, start out with some peanut butter. Any kind will do, but Peanut Butter & Co. Smooth Operator Peanut Butter has been my go-to lately. It tastes great, has 7g of protein per serving, and is gluten-free. The peanut butter is perfect for easy lunches and I also use it in baking (watch for some recipes coming at you soon)!

...The point is, eat that peanut butter so you have an empty jar to work with. A plastic jar will be best, especially if kids are handling the snow globe since it's not as fragile as a glass jar.

Upcycle a peanut butter jar to create your own DIY Snow Globe winter wonderland!

Wash out the jar and the lid really well with soap to remove all of the peanut butter. Dry them both completely. Use some spray paint to cover both the top and bottom of the lid. I used a metallic gold. Let the paint dry, and add another coat if you think it needs more coverage.

While the paint dries on the lid, remove the label from the peanut butter jar. If you have some stubborn adhesive that just won't come off, use a paper towel with a little bit of vegetable oil on it. Rub it on the adhesive and it comes off like magic!! Wash the jar again to remove any oil and let the jar dry completely.

Upcycle a peanut butter jar to create your own DIY Snow Globe winter wonderland!

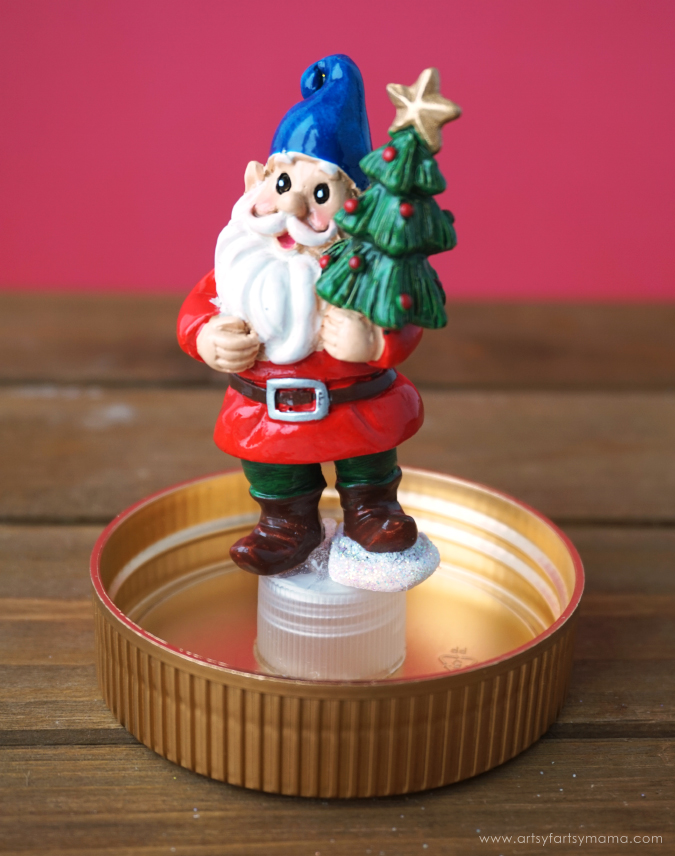
Now for the fun part: collecting supplies to fill your snow globe with! I browsed the miniatures and Christmas village accessories section in the craft store - make sure to look for things that will fit in the jar! I found this adorable 3" tall gnome holding a Christmas tree and a package of glittery snowflakes. I also grabbed a container of chunky, white glitter.

Upcycle a peanut butter jar to create your own DIY Snow Globe winter wonderland!

To prep the gnome figure before adding him to water, I painted a coat of clear spray paint to make sure it was sealed. Ceramic figures should be fine to use as-is, but I just wanted to make sure the paints didn't bleed (you never know), and that the glitter near his foot stayed in place. Let the figure dry completely.

Find a small lid similar to a soda bottle lid. Use some strong craft glue (E6000, Super Glue, Gorilla Glue, Beacon 3-in-1, etc) and attach the figure to the top of the lid.  Let it dry completely - overnight, if necessary. I know it's hard to wait, but this is extremely important in the long run!

Upcycle a peanut butter jar to create your own DIY Snow Globe winter wonderland!

Add a line of adhesive around the bottom of the soda lid. Turn the peanut butter jar lid upside down, and place the gnome/lid in the center of the lid. Hold in place for a minute or two. Again, let it dry completely - overnight, if necessary!

Upcycle a peanut butter jar to create your own DIY Snow Globe winter wonderland!

I didn't want the lid to show too much, so I added some hot glue around the base. I added a bunch of glue all around the gnome base, but make sure to leave some space around the edge! While the glue was still wet, I sprinkled some white glitter on it. Once the glue dried, I added another couple layers of glue and glitter to build it up and make it look like the gnome was standing in a bunch of snow instead of one little mound.

Upcycle a peanut butter jar to create your own DIY Snow Globe winter wonderland!

Once the glue has set, place the jar upside-down over the figure and make sure you can twist the jar closed. If the glue is in the way, you can carefully cut it away with a craft knife. It's very important that you can get the jar closed completely.

Upcycle a peanut butter jar to create your own DIY Snow Globe winter wonderland!

Now we're ready to make some magic! Fill up the jar almost to the top with hot water and add 1-2 tablespoons of glycerin (found in baking sections or at a pharmacy) or light corn syrup. Stir well to combine. Plain water will work great, but the glycerin will help the glitter to fall to the bottom of the snow globe a bit slower.

*I've heard that some people use baby oil in place of glycerin, so I did a test in a different jar. It failed miserably, trapping the glitter in between the oil and water at the top of the jar. I highly recommend that you don't use this method.

Upcycle a peanut butter jar to create your own DIY Snow Globe winter wonderland!

Add the snowflakes and sprinkle in the glitter. I recommend chunky glitters instead of fine glitters. Fine glitters seemed to just cloud up the water and you can't see them fall as well as the chunkier glitters. Carefully stir the glitters into the water a little bit to combine them with the water and help remove some of the air bubbles.

Upcycle a peanut butter jar to create your own DIY Snow Globe winter wonderland!

Slowly place the lid onto the jar. Watch the water - if it looks like it's about to overflow, take off the lid and remove a spoonful of water. Keep repeating until you can screw the lid on tightly without any water leaking. This will help prevent any large air bubbles at the top of your snow globe.

Shake the snow globe up and watch the snow fall around the figurine. If you feel like you need more glitter, snowflakes, or anything else, now is the time to do so. Once you're happy with the snow globe, carefully remove the lid and dry the rim of the jar and the edges of the inner lid with a q-tip. Add some strong craft glue and close the lid one last time to seal it closed. This is my best tip if kids will be playing with the snow globe. You definitely don't want this coming open! Set the snow globe somewhere it won't be bothered lid-side up to let the glue dry before shaking it up again.

Enjoy your homemade winter wonderland! The possibilities are endless with all of the fun items you can find to place inside your snow globe, and kids will love making some snow globes of their own!

What would you put inside a snow globe?

Tuesday, December 15, 2015

Customize Store-Bought Stockings with Vinyl

Tuesday, December 15, 2015

Customize Store-Bought Stockings with Vinyl

Read more »


Monday, July 13, 2015

DIY Pie Stand

Monday, July 13, 2015

DIY Pie Stand

Read more »
DIY Pie Stand Tutorial at artsyfartsymama.com

Whether you are throwing a party or just want to enjoy some dessert with the family, EDWARDS® Whole Pies are an affordable and delicious way to celebrate. Your pie will look even more appetizing on this easy DIY Pie Stand, and it will only cost you a few dollars to create!
Wednesday, April 29, 2015

Easy Girl and Doll Matching Shirts

Wednesday, April 29, 2015

Easy Girl and Doll Matching Shirts

Read more »
Vinyl Palooza: 20 amazing vinyl projects from 20 bloggers at artsyfartsymama.com

I'm absolutely thrilled to be a part of Vinyl Palooza with 19 other bloggers this week!! There's also an amazing giveaway involved, so be sure to read all about it at the end of the post. Heat transfer vinyl from Expressions Vinyl is my favorite to work with, and I've created some matching girl and doll t-shirts with it to share with you today!!

Easy Girl and Doll Matching Shirts at artsyfartsymama.com

My daughter loves dressing to match her 18 inch doll. Unfortunately, I can't afford to buy the matching clothes in the store. So by making matching t-shirts myself for the two of them, we can easily coordinate their wardrobe for not a lot of money! I also love using heat transfer vinyl to customize their outfits!

Monday, April 27, 2015

DIY Glitter Shoes

Monday, April 27, 2015

DIY Glitter Shoes

Read more »
DIY Glitter Shoes at artsyfartsymama.com

If there's one thing to know about me, it should be that I absolutely love glitter. Even though it's one of the messiest craft supplies out there, I just can't resist it. I bought a pair of glittery shoes a couple of years ago, and absolutely loved them. However, the glitter would shed and leave a glittery trail everywhere I went... I think it's pretty cool, but others will disagree.
Tuesday, April 14, 2015

Easy 18 Inch Doll Socks

Tuesday, April 14, 2015

Easy 18 Inch Doll Socks

Read more »
Easy Doll Socks you can make for your 18 inch or AG Dolls at artsyfartsymama.com
Now that my daughter's 18 inch doll is all set with doll leggings, she now needs some socks! They are easy for anyone to make, especially if you have a child who wants to learn to sew! The socks take about 5 minutes to make, and can cost less than $1!! If your child has a friend with a doll, this would be a fun project for them to do together to end up with matching pairs of socks for each doll!

Easy Doll Socks for 18 inch or AG Dolls at artsyfartsymama.com

First, get a pair of adult crew socks. No ankle socks, no knee socks. Just the regular crew socks will do, and you'll only need one. I've been able to find all kinds of cute socks in clearance bins (especially holiday socks), and a ton at the dollar store. You can also use socks that have already been worn. This is a perfect way to use that sock with a missing match or one with a hole in the toe..

Lay the sock out flat, and cut straight across just above the heel. You can throw the foot section away. You won't need it anymore.

Easy Doll Socks for 18 inch or AG Dolls at artsyfartsymama.com

Turn the sock inside out and lay it flat. Sew the bottom of the sock closed. You can use a matching thread, or basic white or black work great as well. Once the bottom is sewed closed, fold the sock in half vertically. Unfold and mark the fold line with a marker or pins.

Next, sew on each side of the line about 1/8" inch or so. Now you should have two vertical lines sewn and still be able to see the marked center line.

Easy Doll Socks for 18 inch or AG Dolls at artsyfartsymama.com

Cut along the marked fold line, being careful not to cut through the lines you just sewed.

Once the sock has been cut, turn them right side out, and your socks are done!!

Easy Doll Socks for 18 inch or AG Dolls at artsyfartsymama.com

Try them on your doll, and they should fit like knee socks. They are thin enough that your doll can still wear shoes, and it's easy enough to make lots more socks in different colors and patterns. The fashion possibilities are endless!!

Monday, March 30, 2015

Faux Chocolate Easter Bunny

Monday, March 30, 2015

Faux Chocolate Easter Bunny

Read more »
Faux Chocolate Easter Bunnies at artsyfartsymama.com

Chocolate bunnies are a must-have at Easter time. I think they are absolutely adorable and of course, usually taste amazing. I wanted to add a cute chocolate Easter rabbit to my Easter & spring decor, but I didn't want to deal with the chocolate breaking and/or melting while on the shelf or in storage. Instead of dealing with the "what if", I decided to create my own faux chocolate bunnies that look just like the real thing and will hopefully be on the shelf during the Easter season for years to come!!
Monday, March 9, 2015

Easy 18 Inch Doll Leggings Tutorial

Monday, March 9, 2015

Easy 18 Inch Doll Leggings Tutorial

Read more »
My daughter got this adorable 18 inch doll for Christmas from my mom, including all kinds of matching clothes and pajamas for the two of them. They have become BFFs and do everything together. We're pretty lucky that grandma likes sewing new clothes for the doll, because purchasing clothing and accessories for these dolls can cost a lot of money that this mama doesn't have!!

Easy Leggings for 18 Inch or American Girl Dolls with Free Printable Pattern at artsyfartsymama.com

Wednesday, February 4, 2015

Unicorn Valentine Card Box

Wednesday, February 4, 2015

Unicorn Valentine Card Box

Read more »
This is a sponsored post with Plaid and Blueprint Social. All ideas and opinions are my own.

Unicorn Valentine Card Box at artsyfartsymama.com #plaidcrafts #modpodge #applebarrel

My daughter loves everything unicorn. Every. Thing. I designed her some unicorn valentines to give to her friends, and when I told her we were celebrating Valentine's Day with Plaid Crafts by making a fun Valentine card box, you can guess what her answer was. With a little help from Apple Barrel Paints, Mod Podge, and a few other supplies, I think we came up with a pretty cute Unicorn Valentine Card Box that she will love showing off at her Valentine's Day party!!

To make your own Unicorn Valentine Card Box, you'll need:
  • Cardboard Box (we used a corn dog box)
  • White Tissue Paper (5-10 sheets)
  • Matte Mod Podge
  • Extreme Glitter Mod Podge (or Mod Podge & iridescent glitter)
  • Mod Podge Collage Clay
  • Apple Barrel Paints
  • Clear Tape
  • Iridescent Gift Wrap Ribbon
  • White Cardstock
  • Glitter Paper (we used pink & silver)
  • Unicorn Eye Printable

Unicorn Valentine Card Box at artsyfartsymama.com #plaidcrafts #modpodge #applebarrel

Start by cutting a hole in the top right side of the box with a utility knife for the Valentine cards to be dropped in. Mine measured about 3x2 inches. Also, cut a door in the back for larger Valentines and to be able to remove all the cards later.

You can paint the box, but I was having a hard time getting all the packaging covered even after three coats of paint... so I decided to just wrap it instead! So much easier, and way less time!! Start with 5 sheets of tissue paper and check if you can still see the packaging through the paper. If you can, add more sheets. I used 10 just to be sure nothing would show through.

Wrap the box like you would a regular present, but keep the seams on the back and the sides so they won't show on the front. Use clear tape, and try to keep all the edges as smooth as you can.

Unicorn Valentine Card Box at artsyfartsymama.com #plaidcrafts #modpodge #applebarrel

Once the box is wrapped, you need to be able to access the holes you cut. You'll be able to feel the edges of the holes with your fingers, so just kind of press around it to lightly mark where the edges are. Then, take an Xacto knife and cut an "X" from corner to corner in the top hole. Then, you can bend the 4 triangles into the box and stick them down with a piece of tape.

For the door in the back, cut around the door edges, then just tape the 3 edges down. If you cut a hole instead of a door, do the same as the top hole. This way, all the edges are covered, and you won't have tissue paper ripping off.

Unicorn Valentine Card Box at artsyfartsymama.com #plaidcrafts #modpodge #applebarrel

Using Extreme Glitter Mod Podge (or some Matte Mod Podge mixed with some glitter), paint a light coat on all sides of the box. It will crinkle a little, but I like how it looks. Once the first coat is dry, you can add a second light coat of you want a little more sparkle. I did one coat on the sides and back, and two on the front.

Unicorn Valentine Card Box at artsyfartsymama.com #plaidcrafts #modpodge #applebarrel

Next, I cut out two hearts out of some silver glitter paper for the nostrils. You can easily cut them with a Cricut machine, a paper punch, or by hand. To stick them on, I painted a light coat of Mod Podge on the back and stuck them on.

Unicorn Valentine Card Box at artsyfartsymama.com #plaidcrafts #modpodge #applebarrel

For the ears I cut an ear shape out of white cardstock, and an inner ear piece from pink glitter paper. Then, I flipped them over, and cut out a second set. Paint a light coat of Extreme Glitter Mod Podge (or some Matte Mod Podge mixed with some glitter) on the white cardstock, then just put the pink glitter paper piece on while it's still wet. Let dry completely. If it warps at all, just carefully bend it back to lay flat.

Once the ears are dry, glue them on the top front corners of the box with a little Mod Podge. Let dry completely before doing anything else to ensure they stay in place.

Unicorn Valentine Card Box at artsyfartsymama.com #plaidcrafts #modpodge #applebarrel

While the ears are drying, roll a piece of white cardstock into a cone, trim the excess and stick together with tape. Then, paint stripes onto your unicorn horn with Apple Barrel paints. We used Pink Parfait, Key West, and Purple Pansy. I only had to paint 1-2 coats, and the stripes looked great!

Once the paint was dry, I painted a couple light coats of Extreme Glitter Mod Podge (or some Matte Mod Podge mixed with some glitter) on the horn, letting each coat dry completely before adding another one. It turned out sparkly and magical, just as a unicorn horn should be!!

Unicorn Valentine Card Box at artsyfartsymama.com #plaidcrafts #modpodge #applebarrel

While the unicorn horn is drying, start cutting pieces of ribbon. I cut 20-30 pieces at all different lengths. Curl all the pieces using scissors or a ribbon curler. Then, attach two or three pieces together with a small piece of tape at one of the ends. You'll now have 10-15 pieces of hair!

Trace the unicorn horn on the top where you want it to go. Then, attach all 10-15 pieces of hair around the circle using pieces of tape.

Unicorn Valentine Card Box at artsyfartsymama.com #plaidcrafts #modpodge #applebarrel

Next, you'll need to use some Mod Podge Collage Clay. This was my first time using this product, and it is so much fun!! It's like frosting, but in craft form. It totally keeps its shape if you are using it for decorating, and comes with three different tips for a different look. It also made it super simple for me to securely attach the horn to our unicorn's head!!

Unicorn Valentine Card Box at artsyfartsymama.com #plaidcrafts #modpodge #applebarrel

Use the regular round tip for the Mod Podge Collage Clay. Pull the ribbon ends out of the way with your fingers (or ask a friend for help), and trace the circle you drew with a thick layer of Collage Clay. Then, place the horn into the collage clay, and hold in place for a few seconds. Make sure it's level, then leave it to dry for a few hours.

Unicorn Valentine Card Box at artsyfartsymama.com #plaidcrafts #modpodge #applebarrel

Now all you need are some eyes!! Print and cut out the Unicorn Eye Printable. You could also easily create some eyes from paper scraps/circle punches, add some big googly eyes, or draw them on with marker.

Unicorn Valentine Card Box at artsyfartsymama.com #plaidcrafts #modpodge #applebarrel

Once everything is dry, your Unicorn Valentine Card Box is ready to take to your Valentine party!! My daughter absolutely loves her new unicorn, and can't wait to fill it up with Valentine cards from her friends!!