Posts may contain affiliate links (see Disclosure). Thank you so much for supporting Artsy-Fartsy Mama!
Friday, October 27, 2017

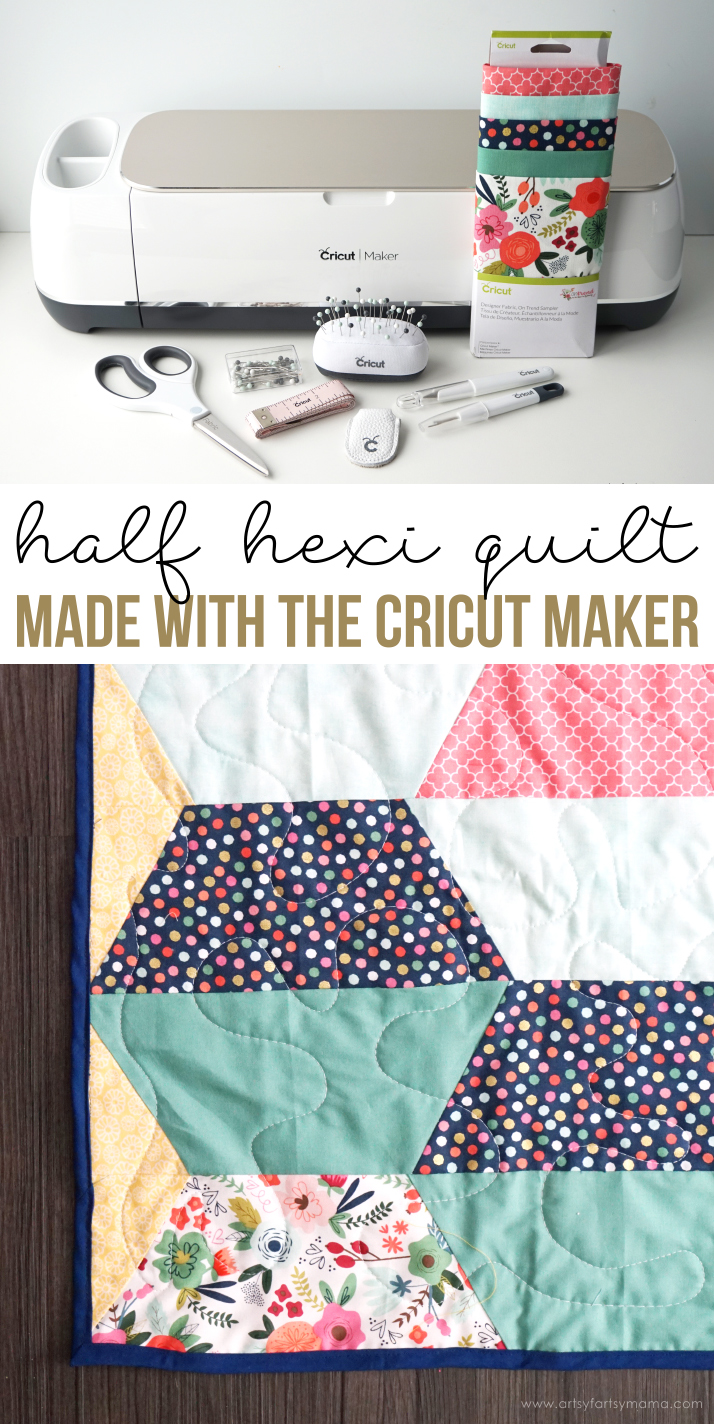
Half Hexi Quilt with the Cricut Maker

Friday, October 27, 2017

Half Hexi Quilt with the Cricut Maker

Read more »
Creating a Half Hexi Quilt is easy when you use the Cricut Maker machine!

Creating a Half Hexi Quilt is easy when you use the Cricut Maker machine! #CricutMade

My mother-in-law is an amazing quilter. Whenever we go to visit, she shows me her latest projects and I am always in awe of her work. I've always wanted to learn to quilt, and have even gone as far purchasing fabrics to get one started. Then I get overwhelmed thinking about the cutting process and crossing your fingers that the pieces are going to line up properly once you sew them together.
Wednesday, October 25, 2017

5 Ski Trip Tips with LEGO Friends

Wednesday, October 25, 2017

5 Ski Trip Tips with LEGO Friends

Read more »
These 5 Ski Trip Tips are sponsored by LEGO. As always, all opinions are my own.

5 Ski Trip Tips with LEGO Friends

Monday, October 16, 2017

DIY Dead Rose Wreath

Monday, October 16, 2017

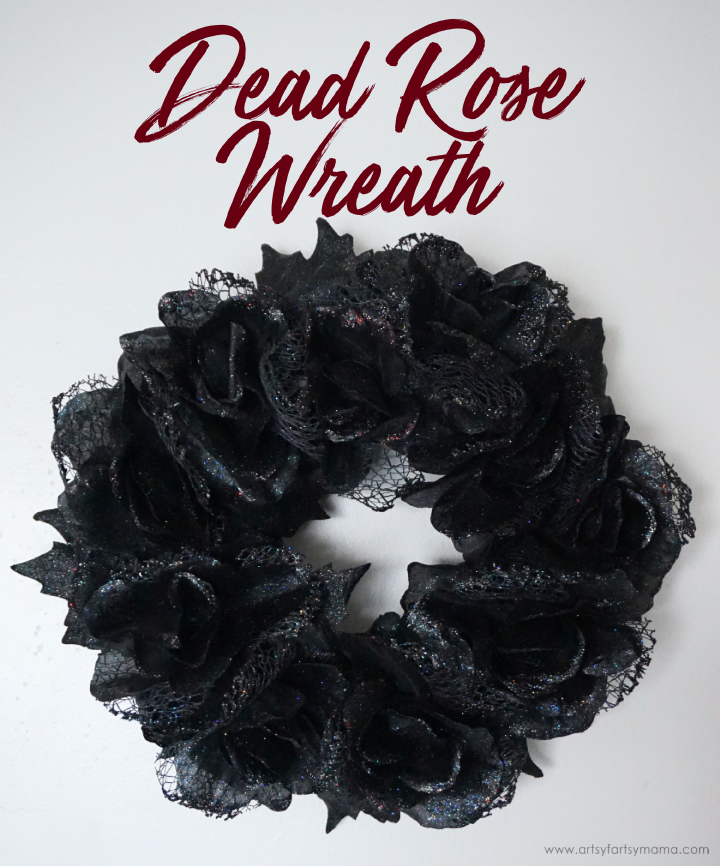
DIY Dead Rose Wreath

Read more »
Make a Dead Rose Wreath out of items from the dollar store to display this Halloween!

DIY Dead Rose Wreath made with dollar store supplies


DIY Dead Rose Wreath made with dollar store supplies

Here's what you'll need to make this Dead Rose Wreath:
• 8" Foam Wreath Form
• 3-4 Black Rose Bunches
• Black or Gray Ribbon
• Glue Gun & Glue Sticks

DIY Dead Rose Wreath made with dollar store supplies

Foam wreaths are awesome for projects like this, but the hot glue can melt the foam if you add something directly to it. So first you need to cover the wreath with some ribbon. It doesn't matter what kind or color, but I usually go with a wide ribbon in a coordinating color. Add a glob of hot glue to the wreath and attach one end of the ribbon to the wreath form. Wrap the ribbon all the way around the wreath so you don't see any foam showing. Glue the other end of the ribbon down.

DIY Dead Rose Wreath made with dollar store supplies

Cut the flowers from the stem using some wire cutters. If your stems don't have wire, you can use regular craft scissors. I also cut off the leaves from the stems. Add some glue to the bottom of a rose and place it down on the front of the wreath. Next I would place another rose right next to it (without glue) to see where it looked/fit best. Then add some glue and stick it down. Repeat until the wreath is covered and looks how you want it. For any empty spaces or in places that need a little something extra, I stuck leaves down and in between the flowers.  

The best part about making a wreath for Halloween? You don't have to worry about removing all of those glue gun strings! They will look like cobwebs tangled between all of the dead roses, lace and leaves. 

DIY Dead Rose Wreath made with dollar store supplies

Hang the wreath up to decorate your home, office, or favorite space for Halloween. I hope this tutorial has left you feeling inspired to make on for yourself. The wreath is spookily beautiful for only spending about $5 for everything!

Friday, October 13, 2017

Halloween Trick or Treat Yo' Self Gift Idea

Friday, October 13, 2017

Halloween Trick or Treat Yo' Self Gift Idea

Read more »
Surprise your friends with this Halloween Trick or Treat Yo' Self Gift Idea and Free Printable Gift Tag!

Halloween Trick or Treat Yo' Self Gift Idea #PopcornBoxParty2017

Why play tricks when you can share treats this Halloween? I love putting together gifts at Halloween time for people we're close to. They don't have to be big or fancy! This year is the 5th Annual Popcorn Box Party, and it's all about telling your favorite teachers, friends, and co-workers to "Treat Yo' Self" with a box full of spookily-awesome surprises! 

Halloween Trick or Treat Yo' Self Gift Idea #PopcornBoxParty2017

To make this gift, the first thing you'll need is a box to put your goodies in. It might not look the part right now, but this World Market Popcorn Box is a unique and fun way to package up some treats for a Halloween gift. All it needs is a little paint and a touch of sparkle!!

Halloween Trick or Treat Yo' Self Gift Idea #PopcornBoxParty2017

To completely cover up the red and white stripes, I added 2-3 of coats of gold spray paint to both sides of the box while it was still folded flat. Each coat of paint needs dry completely before you add another one. Because you can never have enough sparkle, I added some gold FloraCraft Spray Glitter once the spray paint had dried.

*If you choose to use spray paint, keep in mind that any food that is added to the box MUST be packaged. Using acrylic paints or paper to cover the box would make a better food-safe option.

Halloween Trick or Treat Yo' Self Gift Idea #PopcornBoxParty2017

Next, I cut a piece of black and white polka dot ribbon to fit the popcorn box vertically. Carefully burn the ends of the ribbon with a lighter so that the ribbon won't fray. You'll also need some Aleene's Clear Gel Tacky Glue. It's one of my favorite clear craft glues that dries quickly and sticks perfectly every time.

Halloween Trick or Treat Yo' Self Gift Idea #PopcornBoxParty2017

Add a small amount of glue along the back of the ribbon. Fold one end of the ribbon over the top of the popcorn box and hold it in place. Center the ribbon down the popcorn box and stick the other end to the bottom of the box. Use a clothespin to hold the end of the ribbon in place while it dries.

Halloween Trick or Treat Yo' Self Gift Idea #PopcornBoxParty2017

Print out the Trick or Treat Yo' Self Gift Tag on cardstock and cut it out with a 2" circle punch or use some scissors.


Some things you should know before downloading:
*Artsy-Fartsy Mama printables are for PERSONAL USE ONLY (home, school, libraries, etc).
*You may NOT modify, re-sell, redistribute, or claim the design as your own.
*Please do not remove the credits/watermarks.
*If you'd like to share this project, credit must be given to Artsy-Fartsy Mama & linked back to this post.

Halloween Trick or Treat Yo' Self Gift Idea #PopcornBoxParty2017

To stick the tag onto the popcorn box, you'll need some glue or tape. I really love using Aleene’s Instant Tacky Double-Sided Adhesive Roller for projects like this because it holds strong and is easy to use (not sponsored - I really do love it!).

Halloween Trick or Treat Yo' Self Gift Idea #PopcornBoxParty2017

Center the tag on the front of the popcorn box over the ribbon.  Press it down well and hold in place until the tag adheres to the box.

Halloween Trick or Treat Yo' Self Gift Idea #PopcornBoxParty2017

Fill the box with some green shredded crinkle paper and add some goodies that are "Treat Yo' Self" worthy. I added some nail polish, Udderly Smooth hand cream, lip balm, some Halloween surprises from Oriental Trading, and more! Now the gift is ready to share with your favorite friends, teachers, or whoever might need a little treat in their lives!
Since this is a Popcorn Box Party, here are the rest of the awesome projects other talented bloggers created using the same popcorn box that I used in my project! You can also check out more ideas on social media using the hashtag #PopcornBoxParty2017


Tuesday, October 10, 2017

Free Printable Halloween Activity Pack

Tuesday, October 10, 2017

Free Printable Halloween Activity Pack

Read more »
Have Halloween fun at home or in the classroom with this Free Printable Halloween Activity Pack for kids!

Free Printable Halloween Activity Pack

Halloween is "creeping" up on us, so I decided to put together a printable activity pack to help with planning parties at home and in the classroom that kids are going to have a lot of fun coloring, solving, and getting them in the Halloween mood. Halloween also seems to be a crazy day at school, so hopefully this can help some of you teachers out there keep the kids entertained throughout the day!
Wednesday, October 4, 2017

Zombie Punch Recipe

Wednesday, October 4, 2017

Zombie Punch Recipe

Read more »
This Zombie Punch recipe served in a Zombie Mug is sponsored by As You Wish Pottery.

Easy Zombie Punch recipe for Halloween served in a custom-painted Zombie Mug from As You Wish Pottery!

Painting pottery projects at As You Wish has become a new favorite hobby of mine. This Zombie Mug was especially a fun one for me to paint since I am a bit of a zombie nerd and love watching zombie movies and television shows. Making this Zombie Punch for Halloween is delicious and so easy - you could almost say it's a no-brainer!

Easy Zombie Punch recipe for Halloween served in a custom-painted Zombie Mug from As You Wish Pottery!

As soon as I saw this zombie mug on the shelf, I knew it needed to come home with me! I love all of the little details: like holding his own arm up to form the mug handle, and how the zombie is attempting to smile.

Easy Zombie Punch recipe for Halloween served in a custom-painted Zombie Mug from As You Wish Pottery!

Creating custom projects at As You Wish couldn't be easier. All you have to do is show up, choose a piece of pottery and get painting. If you ever need painting tips or inspiration, the staff is there to help you. You also won't need to bring anything to the studio except your creativity! The paints, brushes, and anything else you need are included the studio fee.

Easy Zombie Punch recipe for Halloween served in a custom-painted Zombie Mug from As You Wish Pottery!

Painting pottery is so relaxing to me. You can work at your own pace, and are free to make your project your own. I mixed a few shades of green for the zombie's skin, and made the inside of the mug a little more "zombified".

Easy Zombie Punch recipe for Halloween served in a custom-painted Zombie Mug from As You Wish Pottery!

After a few days, my zombie mug was ready to be picked up. I am so thrilled with how it turned out, and am so excited to use it throughout the Halloween season and beyond. No matter who paints the project, each mug will come out with its own unique look.

Easy Zombie Punch recipe for Halloween served in a custom-painted Zombie Mug from As You Wish Pottery!

Like I mentioned before, I added a bit of a zombie theme to the inside of the mug as well! I used two shades of red: one more of a bright red for the base, then I dripped a darker red along the rim to run down the inside of the mug.

Easy Zombie Punch recipe for Halloween served in a custom-painted Zombie Mug from As You Wish Pottery!

Zombie Punch can be made in single servings by mixing it up in a glass or Zombie Mug. You can also mix up an entire batch in a punch bowl for serving a crowd.

For a single serving: Add a 3-4 scoops of raspberry sherbet into a glass. Slowly pour some red soda (we used Strawberry Fanta) into the glass over the sherbet. It will foam up, so don't fill the glass to the top immediately.

In a punch bowl: Empty the entire container of sherbet into a large punch bowl, a scoop at a time. Pour in 1 liter of red soda (any kind). Stir gently and serve immediately.

Easy Zombie Punch recipe for Halloween served in a custom-painted Zombie Mug from As You Wish Pottery!

The sherbet will float to the top. You can enjoy immediately, or wait a few minutes to stir and it will become more frothy and have a smoothie or milkshake consistency.

Easy Zombie Punch recipe for Halloween served in a custom-painted Zombie Mug from As You Wish Pottery!

See what I mean about it foaming? It makes a mess, but it sure looks cool overflowing out of a zombie's head!! 

Easy Zombie Punch recipe for Halloween served in a custom-painted Zombie Mug from As You Wish Pottery!

MMM...BRAAAIIINNNSSS.... It's looks just gross enough, but still tastes great and is a fun recipe that will be a hit on Halloween!

For those of you near As You Wish locations in Utah, Arizona and California, don’t forget to check out all the upcoming painting classes or plan your next birthday party!

Monday, October 2, 2017

Cricut Maker "I Arted" Canvas Sign

Monday, October 2, 2017

Cricut Maker "I Arted" Canvas Sign

Read more »
This "I Arted" Canvas Sign is one of 50 FREE projects that you can make with the Cricut Maker!

"I Arted" Canvas Sign is one of 50 FREE projects made with the Cricut Maker machine! #CricutMade
Sunday, October 1, 2017

DIY Nightmare Before Christmas Sally Costume

Sunday, October 1, 2017

DIY Nightmare Before Christmas Sally Costume

Read more »
Thanks to Therm O Web for sponsoring this post. As always, all of the opinions and text are my own. This post also contains affiliate links.

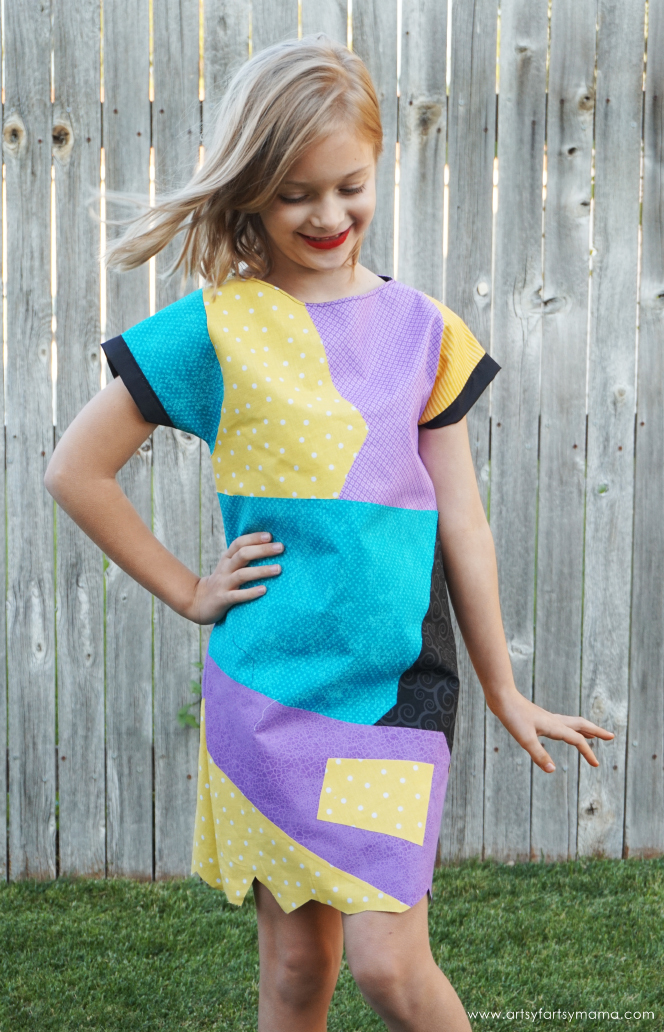
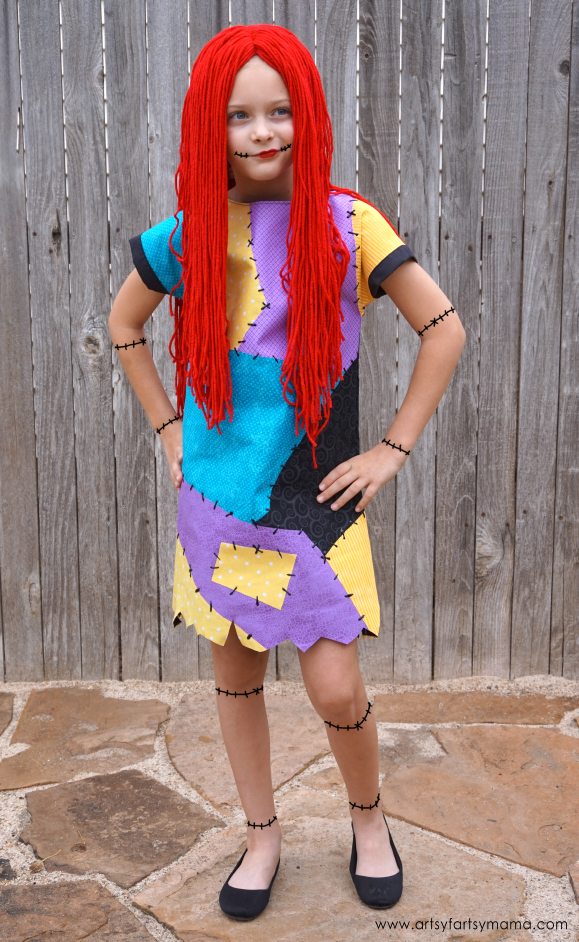
Bring Sally from The Nightmare Before Christmas to life this Halloween with this DIY Sally Costume Tutorial!

DIY Nightmare Before Christmas Sally Costume - Dress and Wig Tutorial

The Nightmare Before Christmas is one of our all-time favorite movies. We watch it all year long, but especially around Halloween and Christmas. I really enjoy making my daughter's Halloween costumes, and this year she is thrilled to go trick-or-treating as Sally from The Nightmare Before Christmas

DIY Nightmare Before Christmas Sally Costume Dress and Wig Tutorial

For Sally's dress, I used an easy-to-follow and FREE pattern from Scattered Thoughts of a Crafty Mom. It's a simple A-line pullover dress that fits sizes 4-10.  You can use any basic dress pattern you want, but I think this pattern worked fantastically! The pattern is designed to be sewn with a knit fabric, so I would recommend sizing up for this costume since you won't be using knits.

I started by cutting out the dress pattern pieces in my daughter's size out of a plain black cotton fabric. Print out an image of Sally to use as a reference to choose the other fabrics you will need for the dress. Besides the plain black fabric for the base of the dress, I chose 6 other cotton fabrics: mustard yellow with stripes, yellow polka dot, teal, purple checked-ish, purple textured, and a black fabric with The Nightmare Before Christmas-looking swirls.

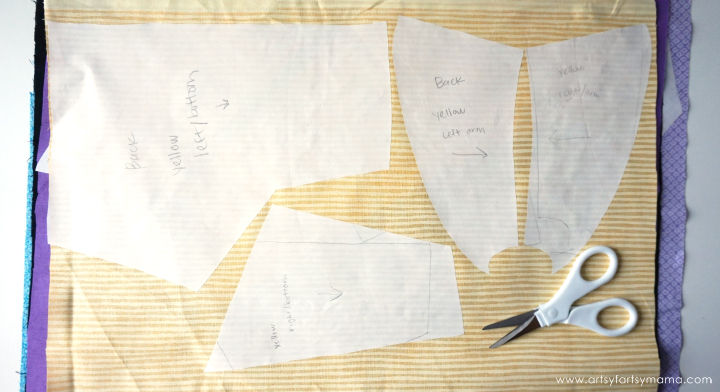
Sally's dress is pieced together, so you'll need to create a pattern for each color of fabric. Lay the front dress piece down (you can tell the difference from the front/back by the necklines). To create the dress pattern pieces, I used some copy paper to draw the shapes for each piece and marked what color and where the pattern piece belongs.

Cut the pattern piece out and lay it on the dress. Draw the next pattern piece that borders the previous one (i.e. draw left sleeve, then left chest, etc). Draw and cut out all of the pieces for the front and back of the dress to resemble Sally. The shapes don't have to be perfect by any means, but I would do your best to make sure the pieces fit together well (see image above).

DIY Nightmare Before Christmas Sally Costume Dress and Wig Tutorial

Once all of the pattern pieces have been created, you'll need some iron-on adhesive. For my cotton fabrics, I used HeatnBond Lite. It's sewable and creates a strong bond to hold those fabrics together. The HeatnBond Soft Stretch Lite is also sewable and strong, but is made for fabrics with stretch! Use whichever one works best for your project.

DIY Nightmare Before Christmas Sally Costume Dress and Wig Tutorial

Unroll the HeatnBond so that it is paper-side up. Use a pencil to trace your pattern pieces to best fit on the paper. Be sure to mark the fabric color, placement, and front/back on each piece!! Cut the pieces out and organize the pieces by fabric color.

DIY Nightmare Before Christmas Sally Costume Dress and Wig Tutorial

Place the HeatnBond glue-side down on the fabric marked on the pattern. Grab your iron and press it down for a few seconds. This will heat up the glue on the HeatnBond and adhere the pattern pieces to the fabric. Let the fabric cool completely.

Tip: Be sure that when you use a fabric where direction matters (like stripes), mark the pattern pieces which direction the pattern needs to be placed!

DIY Nightmare Before Christmas Sally Costume Dress and Wig Tutorial

Cut out all of the pattern pieces. Peel the paper backing off of the fabric to reveal the adhesive.

DIY Nightmare Before Christmas Sally Costume Dress and Wig Tutorial

Lay out the pattern pieces on top of the base dress pieces to make sure they fit well before ironing. Be sure to check the neckline for the front and back!!

DIY Nightmare Before Christmas Sally Costume Dress and Wig Tutorial

Lay down the base dress and iron to remove any wrinkles. To make sure that everything went where it was supposed to, I started ironing with the left sleeve and worked to the right, then left to right until I got to the bottom. If any of the fabric peels up, press the iron down for another couple of seconds. Repeat for the back of the dress.

DIY Nightmare Before Christmas Sally Costume Dress and Wig Tutorial

Follow the tutorial for sewing the dress together. Because the HeatnBond holds on strong, you don't need to sew the pieces down at all! I also skipped hemming the bottom of the dress and made it a bit raggedy to resemble Sally.

DIY Nightmare Before Christmas Sally Costume Dress and Wig Tutorial

To give the appearance of stitches without doing all the work, I used some black Tulip Slick Dimensional Fabric Paint! Start on one side of the dress and add random dashes and x's along all of the "seams". Carefully hang it up to dry somewhere it won't be disturbed for at least 4 hours. Then lay the dress down and add stitches to the other side of the dress. Let it dry completely.

DIY Nightmare Before Christmas Sally Costume Dress and Wig Tutorial

Now that the dress is complete (whew!), we need to create Sally's iconic long, red hair!

DIY Nightmare Before Christmas Sally Costume Dress and Wig Tutorial

Wigs can be tough, so I recommend the great tips from this 4 yarn wigs tutorial. For our Sally wig, I found a red beanie at Walmart for less than $2, and grabbed a skein of red yarn. This skein ended up being the perfect amount, but I would get two just in case you need a little more.

DIY Nightmare Before Christmas Sally Costume Dress and Wig Tutorial

Use a marker to make a line down the center of the beanie from around the middle to the front of the hat. This is where the part in the hair is going to be. I also marked a semi-circle around the hat horizontally where I would add another layer for some thickness to the wig.

DIY Nightmare Before Christmas Sally Costume Dress and Wig Tutorial

I measured how long we needed the hair to be (about 24"). Luckily, I had a blank metal sign that was just long enough. You could also cut a piece of cardboard to 24" that would also work great. Wrap the entire skein of yarn around the board. Cut one end of the yarn so that you have a bunch of long strands of "hair".

I took about 10 strands of yarn and folded them in half. I used a piece of washi tape (because it's less sticky than regular tape) to hold the strands together. Using red thread, I sewed the strands to one end of the semi-circle guideline using a straight stitch near the folded ends of the yarn. You only need to backstitch at the beginning of the guideline and at the end. Gather another 10 strands and butt them up against the end of the strands you just sewed. Repeat until you get to the other end of the semi-circle.

Next, take another 10 strands and hold them tightly together at the center, but don't fold them! Place the center of the yarn on the guideline to start the center hair part. Sew the strands down with a straight stitch at the back end of the marker line. Grab another 10 strands and butt them as close as you can to the end of the strands you just sewed. Repeat until you get to the front of the hat. You only need to backstitch at the beginning of the line and at the end.

DIY Nightmare Before Christmas Sally Costume Dress and Wig Tutorial

Place the hat on your child's head and finger-comb the hair to lay straight. Put on some black shoes, add a little red lipstick and draw some stitches on face/arms/legs using black make-up or washable markers to complete the look. This was such a fun costume to make, and my daughter can't wait for the Halloween parties to begin!


What are you/your kids going to be for Halloween this year?