
Celebrate National Best Friends Day with a DIY Friendship Bracelet tutorial inspired by LEGO Friends!
Today is National Best Friends Day, and what better way to celebrate than with the LEGO Friends group?! These girls are great examples of being a good friend and supporting each other. We've got some fun, new sets that you can get in the LEGO Friends line, as well as an awesome DIY Friendship Bracelet tutorial so that you can tell your own BFFs just how much you appreciate them!
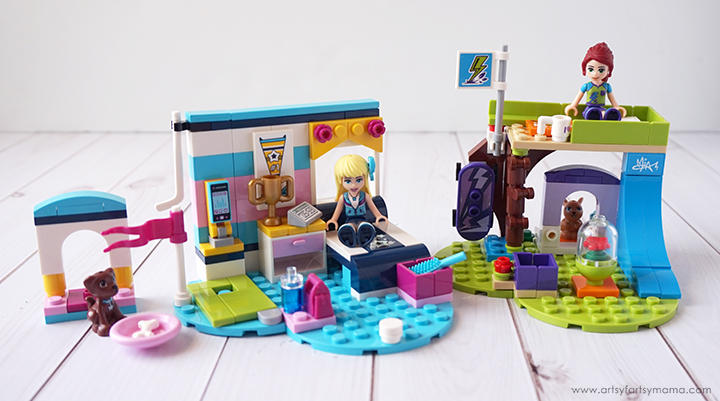
The first sets we collected after the Friends "makeover" were the bedrooms of Mia and Stephanie. These sets are a lot of fun to build, and I love how each of the Friends bedroom sets reflect each of their personalities and hobbies!
Stephanie's Bedroom Set has a blue heart-shaped base and perfectly reflects Stephanie’s sporty personality. It has its own mini golf putting green with a ball and golf club, plus a little doghouse for her pet dog, Dash! Her nightstand drawer opens to store accessories, and she's also got a crate to hold her sporting supplies. This 95-piece set comes with a Stephanie and Dash figure, and includes accessories like a mobile phone, trophy, alarm clock, golf club, golf ball, water bottle, bag, dog bowl, and a bone.
Mia's Bedroom Set has a green heart-shaped base to perfectly reflect Mia’s outdoorsy spirit. She has a treehouse-style bed with steps, a little house for her pet bunny underneath, and has a skateboard and ramp to practice new tricks! This 86-piece set comes with a Mia figure, her pet bunny, Twister, and includes accessories like a skateboard, paddle, walkie-talkie, carrot and a basket.

Emma's character is creative, caring, and loves to craft! Recommended for ages 6-12, Emma's Art Stand contains 210 pieces and offers age-appropriate build and play experience. The pieces come in separate pre-packed bags, and include stickers and instructions.

The art stand is colorful and is full of tiny details! My daughter was able to build the set all on her own with the easy-to-follow instructions, and was so proud of herself once she finished building!
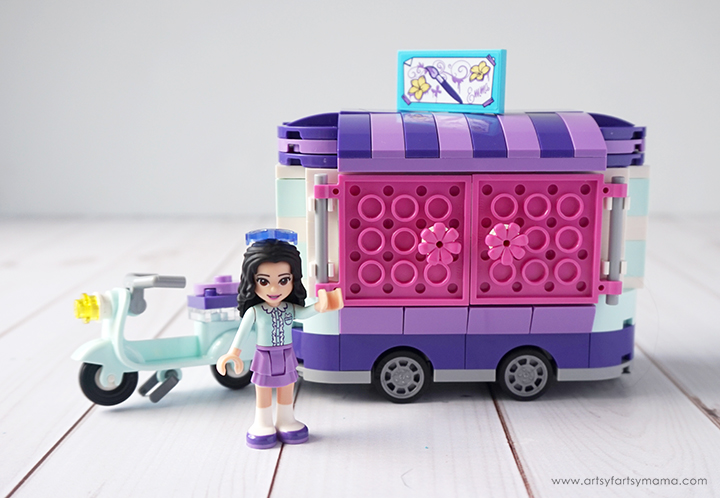
Emma's art stand trailer is filled with her artwork, which she can tow throughout Heartlake City when inspiration strikes or for setting up shop to sell art pieces to friends! This little trailer can be hitched up to the back of her mint scooter for easy transport.

While in the park, Emma can sit at the easel to work on her latest masterpiece - her best friends are always her greatest inspiration! My daughter was excited to put her LEGO Friends figures together in the background so that Emma could draw them all as a group before the art sale.

Swing the windows open on the trailer to display Emma's paintings for sale. If you look closely, you can see that all of her paintings are inspired by her best friends. There is one painting of Andrea singing, another of Stephanie kicking a soccer goal, one of Mia's Treehouse, and a painting of Olivia's Mission Vehicle!

If you open the back of the art stand, you can help Emma run the cash register. Inside the art stand, there's a bed for her cat, Chico, to take a nap. She can also keep her helmet on a stand and out of the way. You can also remove the top of the art stand for easier access during play.

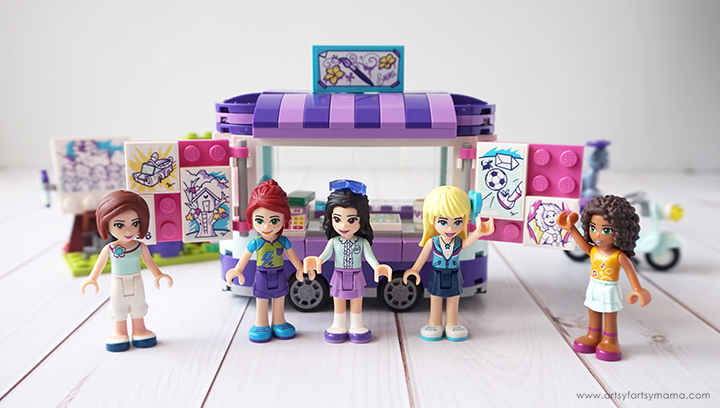
Good friends are always supporting each other. So we gathered a bunch of LEGO figures to come and support Emma's art sale! I love how LEGO inspires imagination and creativity. My daughter has spent hours playing with this set, lining people up to pay for art, chatting around the easel, and even combining other Friends sets to create her own little LEGO Friends world.
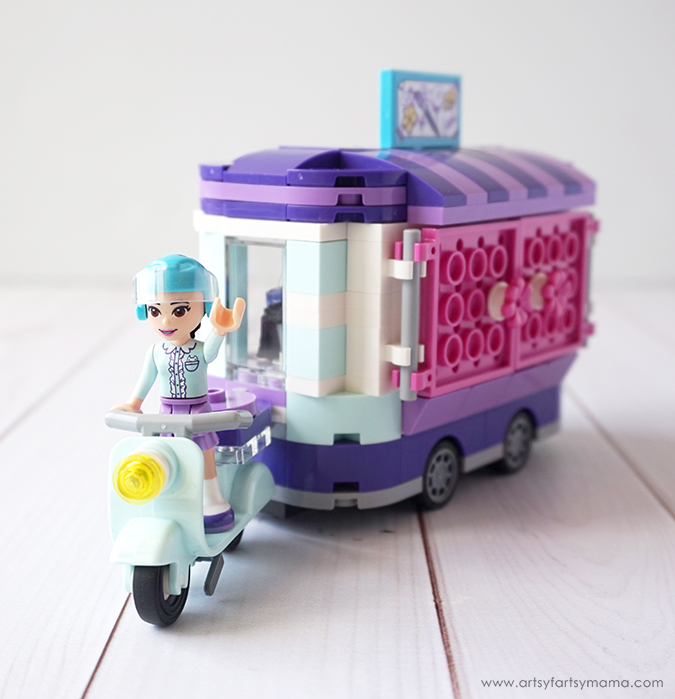
When Emma's art sale is complete, she can close up the art stand trailer, hook it up to her scooter, and head home! She's got a separate helmet headpiece (with a cute braid in the back) to wear for safety. Her cat, Chico, can also ride along on the back of the scooter.
DIY Friendship Bracelet Tutorial
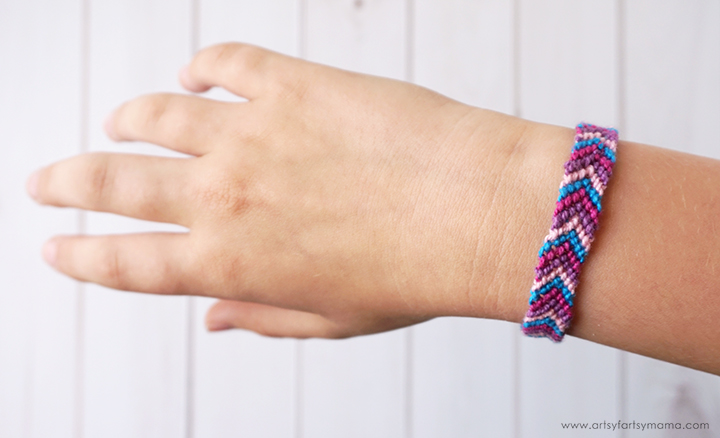
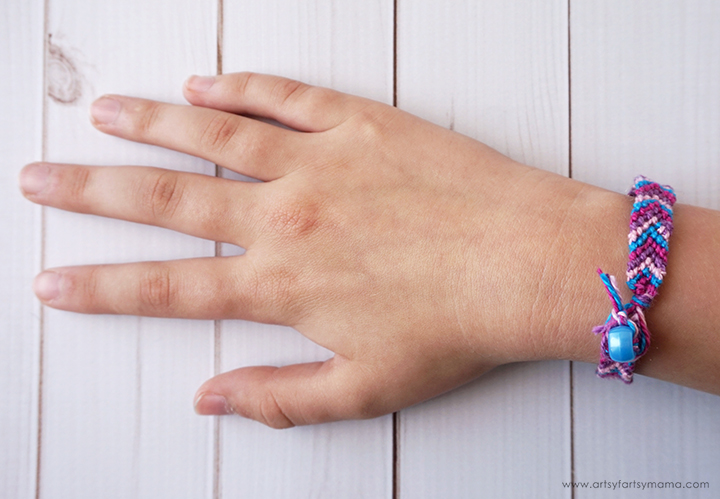
When I was growing up, Friendship Bracelets were all the rage. Since today is officially National Best Friends Day, we were inspired by the friendship between the LEGO Friends characters to make a friendship bracelet to share with all of YOUR best friends! These Chevron Friendship Bracelets are so fun to make and are a craft you can take anywhere.

The only supply you really need to make Friendship Bracelets is thread. This pack of Rainbow Friendship Thread is similar to embroidery thread and comes in brilliant colors to make bracelets to fit every personality.

When making Friendship Bracelets, it works best to use at least 3 colors. Inspired by LEGO Friends, we decided to use light and darker pinks, a purple and a blue like a lot of the bricks in the Friends sets.

For a kid-sized bracelet, cut a length of each thread to about 70 inches long. Hold all of the threads together and fold them in half. At the fold, tie a knot about 1/2 - 3/4" down to leave a loop above the knot.
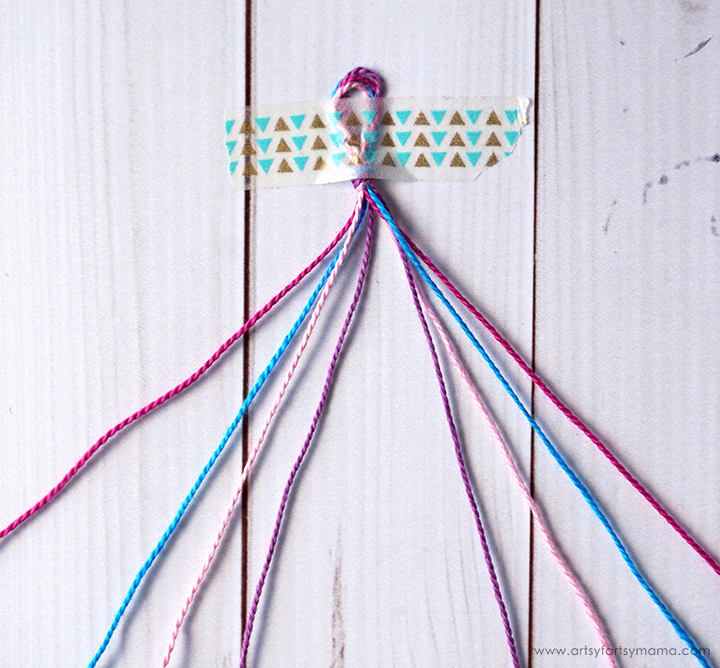
Hold the loop and knot down on a table with some take, or poke a safety pin through the knot and stick it through your jeans (or stable fabric) to keep it steady.
Spread out all of the threads. Arrange the four different colors of thread in whatever order you'd like on the left side, then mirror that same color pattern on the right side. Now your bracelet is prepped and ready for you to begin!
Use the pattern image below to guide you through the steps of assembling the bracelet. The instructions are also written out step-by-step underneath the image.

Step 1: Starting with the string at the far left (dark pink), tie a knot over the string to its right by bending the first (dark pink) string at a 90º angle and lay it over the second (blue) string, making the two look like a "4" shape.
Step 2: Bring the end of the first string under the second string, then back up and through the "4" loop, creating a knot. Hold the second (blue) string taut and pull the first (dark pink) knot all the way to the top of the second (blue) string. Tie TWO of these knots.
Step 3-4: The first string (dark pink) will now be between the second and third strings on the left-hand side. Tie two more knots following step 1 and 2 to the third (light pink) string.
Step 5-6: The first string (dark pink) will now be between the third and fourth strings on the left-hand side. Tie two more knots following step 1 and 2 to the fourth (purple) string. The first (dark pink) string will now be in the center.
Step 7: This time, start with the string at the far right (dark pink) and bend it at a 90º angle and lay it over the second (blue) string, making the two look like a backwards "4" shape.
Step 8: Bring the end of the first string under the second string, then back up and through the backwards "4" loop, creating a knot. Hold the blue string taut and pull the pink knot all the way to the top of the blue string. Tie TWO of these knots.
Step 9-10: The first string (dark pink) will now be between the second and third strings on the right-hand side. Tie two more knots following step 1 and 2 to the third (light pink) string.
Step 11-12: The first string (dark pink) will now be between the third and fourth strings on the right-hand side. Tie two more knots following step 1 and 2 to the fourth (purple) string. The first (dark pink) string will now be in the center.
Step 13: Now you need to tie the two first (dark pink) strings together. Bend the right-hand string at a 90º angle and lay it over the left-hand string, making the two look like a backwards "4" shape.
Step 14: Bring the end of the right-hand string under the left-hand string, then back up and through the "4" loop, creating a knot. Hold the left-hand string taut and pull the knot all the way to the top of the left-hand string. Tie TWO of these knots.
Step 15: One line (dark pink) of the bracelet has been completed! Repeat all of the steps, starting with the outer strings and working your way in. This will create lines in each of the colors. You will start to see the chevron shape form as you keep knotting lines.

Keep working on the bracelet until it is at the right length to fit your wrist. Ending the bracelet is very easy, and you have a few options. You can tie the ends of the bracelet together, or you can braid the loose ends and tie it on that way.

Another fun way to end the bracelet is to add on a bead! Almost any shape or size bead could work for these bracelets. My daughter chose to use a shiny blue Bright Pearl Pony Bead.

Pull 4 of the strings (from either side) through the bead.
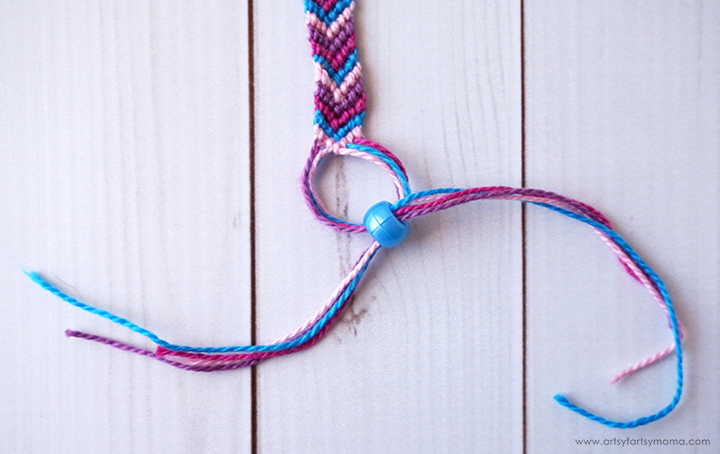
Bring the other four strings through the bead, but going the opposite direction. Pull both ends of the groups of strings to bring the bead to the end of the bracelet.

Tie a knot below the bead and pull it tight, then tie it again so that the knot is secure. Trim the ends near the knot to look neat and short.
Put the bracelet on by bringing the ends together and threading the bead through the loop.
The more you practice, the faster and easier it will be to make Friendship Bracelets. Have fun making all kinds of colorful bracelets this summer for your friends. You could even make yourself bracelets to represent each of the LEGO Friends in their signature colors! The possibilities are endless.
Who is your favorite LEGO Friend character?


