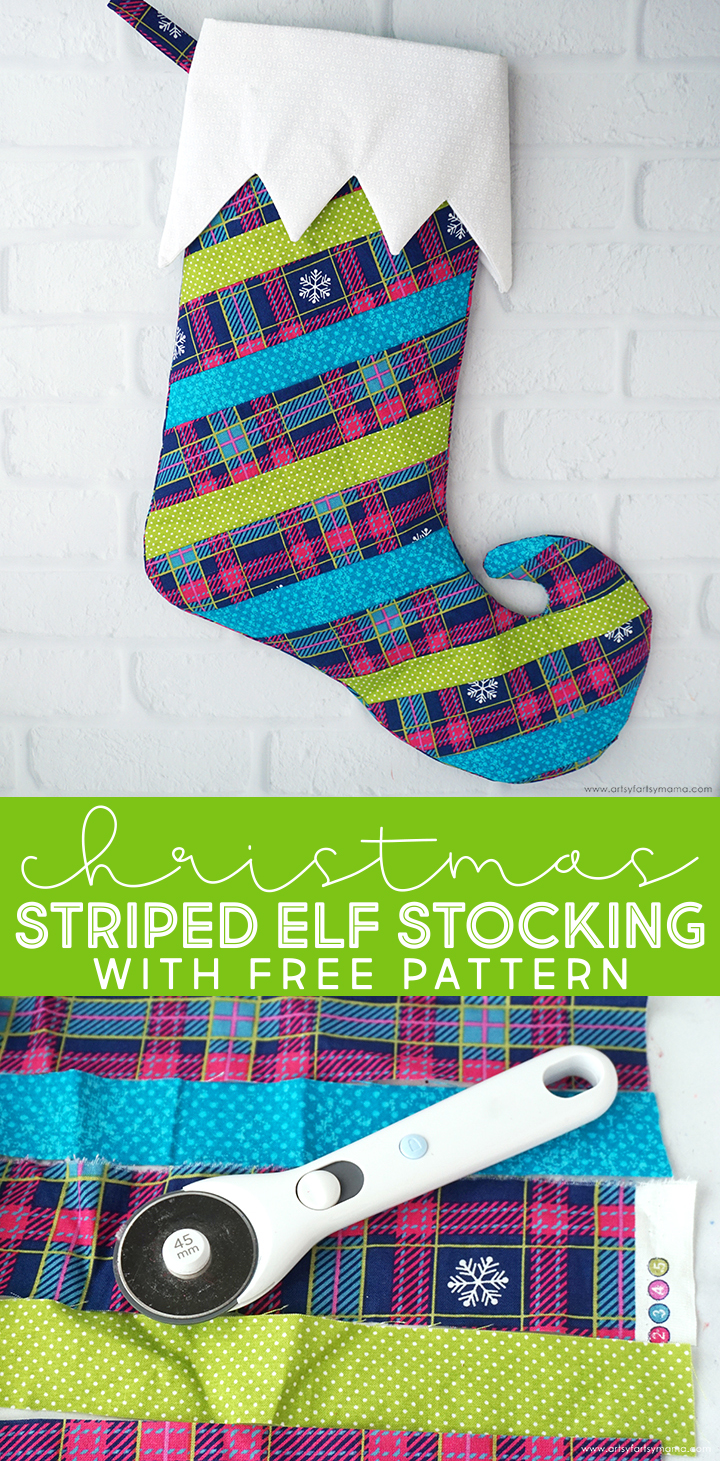
Use this FREE pattern to make a set of unique Striped Elf Christmas Stockings to hang on the chimney with care!

One of my very first posts here at Artsy-Fartsy Mama were the handmade Christmas stockings you see in the image below! Back then, it was more about sharing the project and I didn't really explain how to make them very well. If you want to try making your own set of Striped Elf Christmas Stockings, today's your lucky day!! I've finally put together a FREE pattern and will show you step-by-step how to make them!

I made these Christmas stockings when my daughter was just a year old! I remember how much fun I had choosing the fabric, drawing out the pattern, and working hard to bring my idea to life. Once they were finished, I was so proud of myself for creating such a unique set of stockings for my family.

To make your own Striped Elf Stocking, you will need these supplies:
- Elf Stocking Pattern (for personal use only)
- Fat Quarters - at least 3 coordinating fabrics
- White Cotton Fabric (for liner)
- HeatnBond Fusible Interfacing
- Fabric Scissors
- Rotary Cutter + Mat
- Sewing Pins or Sewing Clips
- Fabric Marker
- Iron or EasyPress 2
- EasyPress Mat
- Sewing Machine
Printables, patterns, and cut files from Artsy-Fartsy Mama are for personal use only. You may use these files for personal projects, but you may not sell them. If you'd like to share this project digitally, share a link to this post/website only. Do not share a direct link to the file.

HeatnBond Fusible Interfacing is used to help stiffen the fabric, and will help the stockings keep their shape. Trace the stocking and cuff pattern pieces onto the rough side of the interfacing using a pencil or fabric marker. Cut the pieces out and set them aside to use later.

Choose at least 3 coordinating patterns from a fat quarter bundle or singles. Cut the fabrics into strips across the entire width, but vary them in length. For example, I used three fabric patterns for this stocking tutorial: the plaid fabric strips are about 2"x22", and the two dotted fabrics are about 1"x22".
When it comes to this stocking, the fabric strip length has no rules! You can cut each strip into different lengths or make them ALL the same. Honestly, just have fun with it.
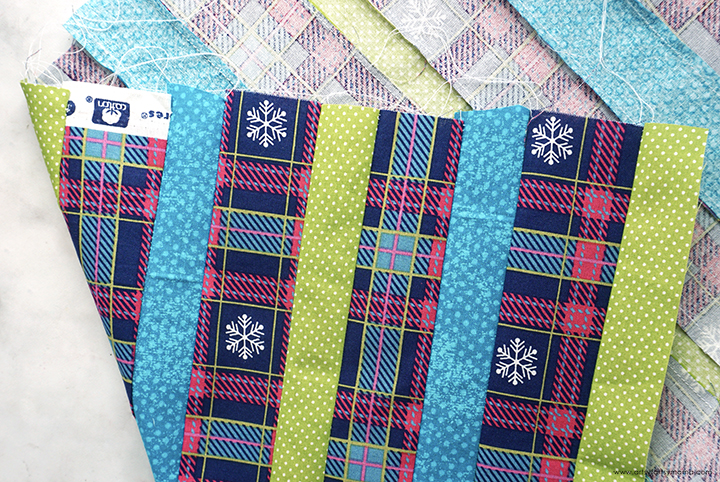
Next, decide on the layout of the stripe pattern. You can arrange them in a set pattern, like the one in this tutorial - or go totally random, like my original stockings. Again, there are no rules for this part of the project except to create something you'll love.
Sew the strips together with a 1/4" seam allowance. If you are a beginner to sewing, this is GREAT practice for sewing straight lines!
Once sewn, turn the fabric over and press the seams down so that they are all laying flat.

Place the stocking pattern over the sewed fabric strips and trace around it using a fabric marker. You can either place the pattern down so that the stripes are straight, or you can do like I did, and place it so that the stripes are diagonal. Once completely traced, use fabric scissors to cut the front of the stocking out.
Choose a coordinating fabric (or one of the same used on the front) to use for the back of the stocking. Flip the stocking pattern piece over (this is important), and trace it onto the fabric. Cut the piece out and set it aside.

Turn the front stocking piece over, and line the piece of interfacing on top, with the textured side facing down on the fabric. Place both pieces on an EasyPress Mat, and use an iron or EasyPress to attach the interfacing to the fabric.

Line up the stocking pieces right sides together. Use pins or clips to hold the fabric in place. Sew around the edges with 1/4" seam allowance, and leave the top open. Make small cuts around the toe and heel of the stocking, being careful not to cut through the seam. This will help the curves look smooth and beautiful! Turn the stocking right-side out, and press the seams all the way around.
Next, cut a 14"x14" piece of lining fabric. Fold it in half, vertically, and sew the long edge only. This will be the inner lining of the stocking that will hold all of those smaller Christmas goodies.

Next you need to create to stocking cuff to fit on the top of the stocking. Cut two cuff pieces out of the lining fabric, and two "outer" cuff pieces using a coordinating, but contrasting, fabric to match the front of the stocking.

Turn one of the outer cuff pieces over so that it's face-down on the EasyPress Mat and place the interfacing piece on top with the textured side against the fabric. Use an iron or EasyPress to attach the interfacing to the fabric.

Place the outer cuff with the interfacing on top of one of the lining cuff pieces so that the right sides are facing each other. Sew along the bottom "pointy" edges and up about an inch on each side. Repeat this for the other set of cuff pieces.
Turn the cuff pieces right side out, and use something like a chopstick to push the pointed corners out. Press the seams so that they are nice and flat.
Cut out a rectangle measuring about 1"x5" for the stocking hanger. Fold it in half vertically (so it measures 1/2"x5") and sew along the long edge. Turn it right-side out and press it nice and flat.
Line up the cuff pieces, right sides together. Use pins or clips to hold the fabric in place. Fold the stocking hanger in half, with the raw edges at the bottom. With the cuff interfacing piece on top, tuck the hanger with the folded end between the cuff pieces on the left side, and leave the raw edges sticking out. Sew along both side edges of the cuffs with 1/4" seam allowance, and leave the top open.

Turn the stocking cuff right-side out, and press the seams. Make sure the stocking hanger is on the left side of the stocking!
Slide the cuff over the stocking, and line up the top edges of both the stocking and cuff. Use pins or clips all around to keep them in place.
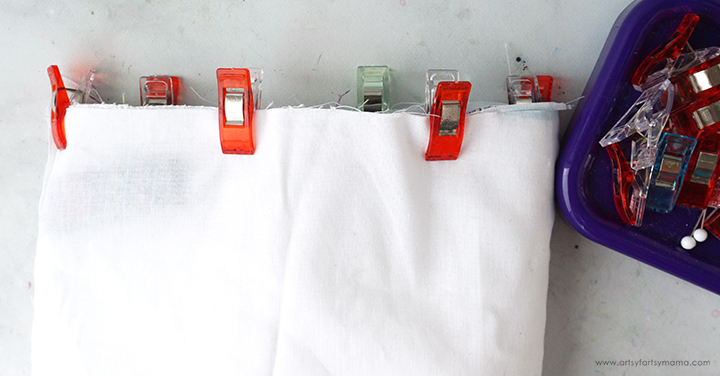
Next, slide the stocking liner over the top of everything and line up the top edge with the stocking and cuff. Pin or clip all three layers together.
Sew around the entire top edge of the stocking with a 1/4" seam allowance. Flip the stocking liner up above the stocking, and sew the opposite end of the liner closed. Hold the seam, and tuck the liner down into the inside of the stocking.

Press the seam at the top of the stocking down well for a crisp line. Congratulations! The stocking is now complete! You can easily personalize Christmas stockings using fabric and HeatnBond Adhesive or HTV.
Don't forget to Pin, Like, and Share!