
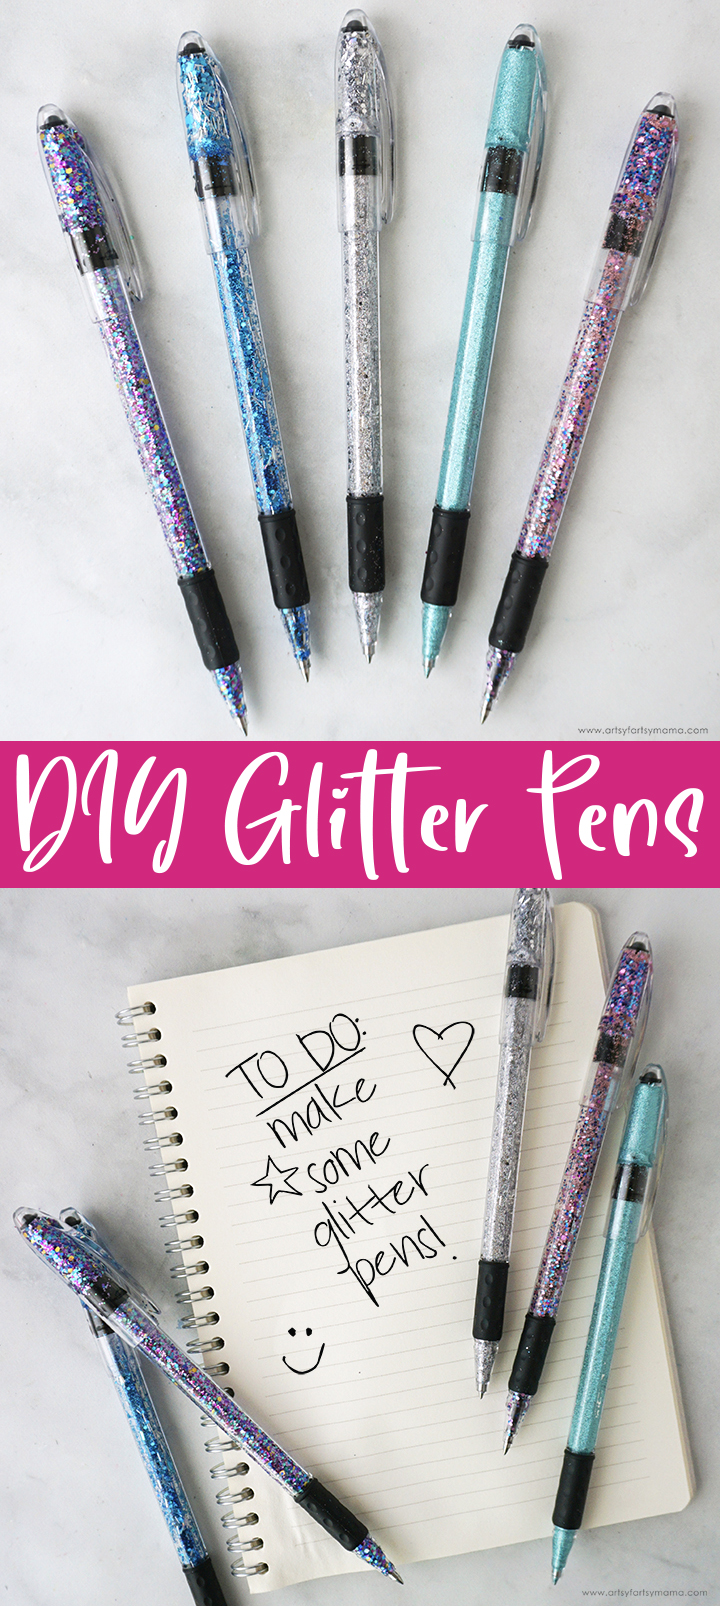
Create a sparkling new set of Glitter Pens for the office or back to school!

If there's just one thing to know about me, it's that I absolutely LOVE glitter! I'm often covered in it (unintentionally), and use it on just about any crafts that I can get away with. Needless to say, when I saw Color Made Happy's glitter pens, I just HAD to give it a try! I am so happy I did, because these are my favorite new accessory to use in the office, and will make my daughter her own set for back to school! They are SO easy to make, and there are so many ways to customize these pens to fit your style.

To make your own sparkly Glitter Pens, you will need these supplies:
- Clear Pentel RSVP Pens
- Beacon Glitter-It Adhesive
- Glitter - fine, chunky, or mixed
- Glitter Funnel - optional, but helpful!
- Toothpick

First, take the pen(s) apart. Twist the black cap at the end of the pen to remove it and the ink. Set the pen pieces, lid, and toothpicks aside, keeping them all together.
Making glitter pens is quite similar to making glitter ornaments at Christmastime! With your thumb or finger blocking the pen opening, pour a little bit of alcohol into the pen. You can put the toothpick in, but I didn't have any luck getting it to stay put. Gently swirl it around and then pour it out. Another option is to dip a cotton swab into alcohol and clean the pen out that way. This will remove any dust or particles from the inside of the pen, which will help the adhesive (and glitter) to stick better.
Make sure that the pen is completely dry before moving on to the next step.
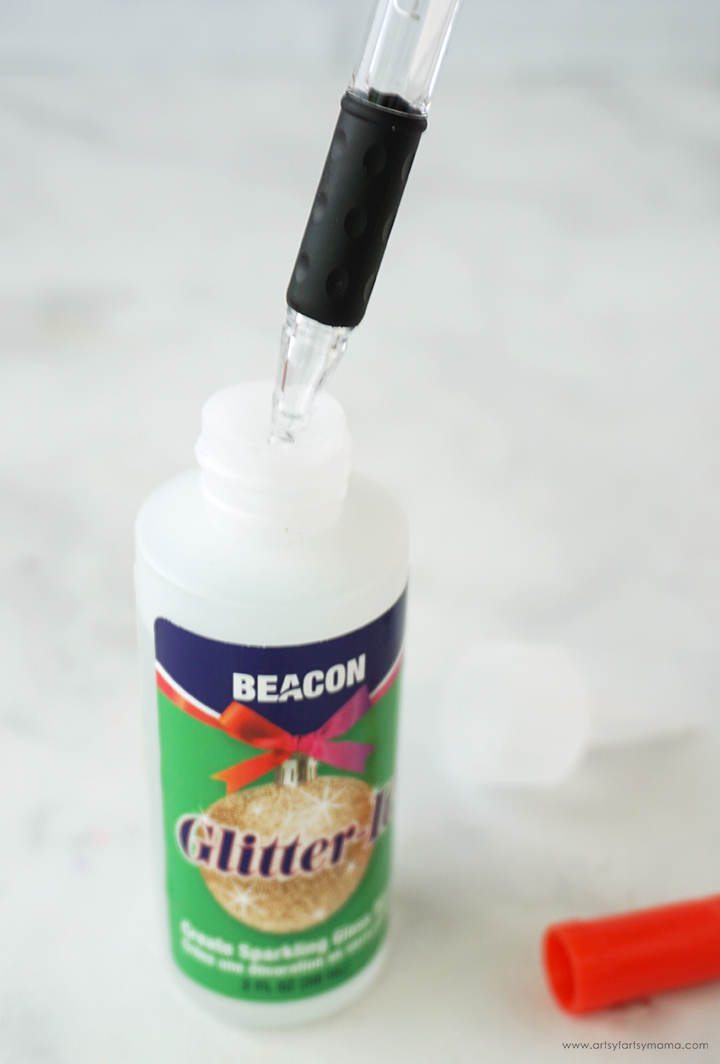
Plug the end of the pen again with a thumb or finger, and then carefully pour some Beacon Glitter-It Adhesive inside. Gently swirl the clear liquid around until every spot inside the pen has been coated. I don't recommend shaking it, because it can leave a lot of bubbles on the surface.
Take the lid off of the adhesive bottle, and remove your finger to pour the liquid back into the bottle. Hold it over the bottle for a minute or two for the excess to drip out. Repeat this process for each pen, and then make sure to wash your hands thoroughly.

Add a small funnel into the opening of the end of the pen. With the opposite end plugged, slowly pour glitter into the pen and fill it about 1/2-3/4 full. Swirl and/or shake the glitter around until every area has been covered. If necessary, pour more glitter in and shake it around.
After the pen is covered, pour the glitter back into the original bottle. Gently tap the pen a few times to get rid of any excess.

Aren't these pens gorgeous?! I used a fine holographic glitter for my first pen (teal) and it looks great! However, after making multiple pens, I would recommend using a mix of fine and chunky glitters instead for the best coverage. The chunky glitters cover most of the area, and then the fine glitter fills in the rest for a perfect finish!
Excess glitter can get stuck down at the end of the pen. You'll know if the pen is clogged if you look down the tube and cannot see through the opposite end. To clean it out without ruining the project, here's a helpful trick: hold the pen upside-down over your glitter container or a garbage can. Carefully poke a toothpick into the end of the pen, and push the glitter clog out of the way. Look down the pen tube again, and repeat as necessary.
*I would recommend waiting about 20 minutes for the adhesive to fully set before reassembling the pens.

I decided to give the pen lids the same treatment to make them match! The bottom half of the lid fits tightly against the pen, you need to only cover the top half of the lid.
Pour some Glitter-It into the pen lid, and swirl it around to cover the inside. Pour the excess back into the bottle, and let it drip for a minute or two. To clean the adhesive from the bottom half of the pen, use a cotton swab to wipe it away.
Fill the lids with the matching glitter and swirl or shake it around until the area is fully covered. Pour the excess glitter back out and tap it a few times. Wipe the inner half of the lids again with the clean swab to remove any glitter that has stuck to the area. Let the lids dry for about 20 minutes.

If you are having a hard time getting the ink/pen tip back in place, make sure you don't have a glitter clog at the end of the pen! If you notice a clog once the ink is already inside the pen, you can poke through the tip with the toothpick and shake the pen upside down to get the excess glitter out.

Don't forget to Pin, Like, and Share!


Can another adhesive be used? The Glitter-it is expensive. Love the pens!
ReplyDeletePolycrylic can be used and you get a TON of it
Deletedo you sell these
ReplyDelete