
Create a colorful Rainbow Plaid Friendship Bracelet to wear with pride and share with friends!
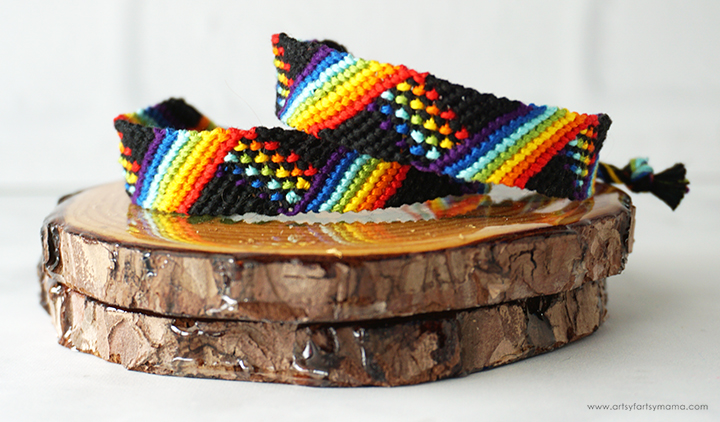
My daughter and I have been friendship bracelets together for years, and I'm so excited about this one! Not only is this Rainbow Plaid Friendship Bracelet colorful, but it's so easy to make. It may look complicated, but you really only need to know how to do two simple knots to complete it. I love that this bracelet adds a bright pop of color to your wardrobe. It's also a creative way to show support for the LGBTQ+ community and to wear and share during Pride week/month.

To make your own Rainbow Plaid Friendship Bracelet, you will need these supplies:
- Embroidery Floss - black, red, orange, yellow, green, teal, blue, purple
- Scissors
- Ruler
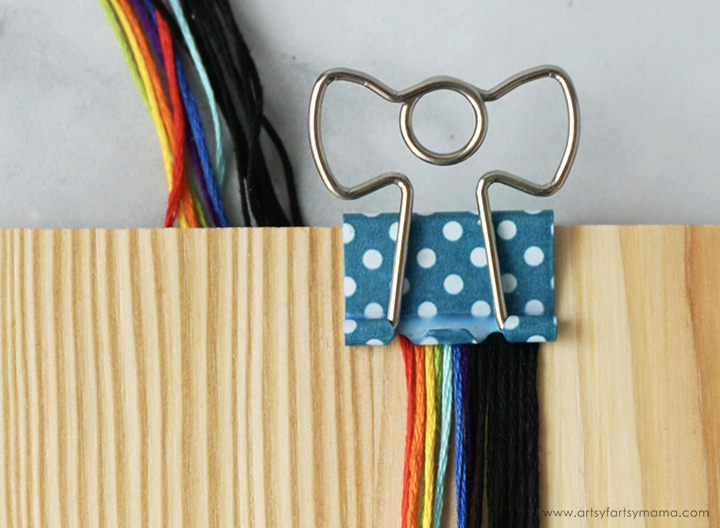
- Tape, Binder Clip, or Clipboard
To make this Rainbow Plaid Friendship Bracelet, you'll need to be able do a simple forward knot and backward knot. If you need some help, my Chevron Friendship Bracelet tutorial shows you step-by-step how to do those two knots. I also highly recommend this visual lesson from Masha Knots, who is a friendship bracelet genius!
First, you need to cut the lengths of Embroidery Floss for your bracelet:
- Black: 7 pieces, 40 inches
- Red: 1 piece, 40 inches
- Orange: 1 piece, 40 inches
- Yellow: 1 piece, 40 inches
- Green: 1 piece, 40 inches
- Teal: 1 piece, 40 inches
- Blue: 1 piece, 40 inches
- Purple: 1 piece, 40 inches
Arrange the floss in rainbow order, followed by all of the black floss pieces. Leave about 10"-15" at the top for the bracelet end, and then use tape, a binder clip and board, or a clipboard to hold the floss in place.
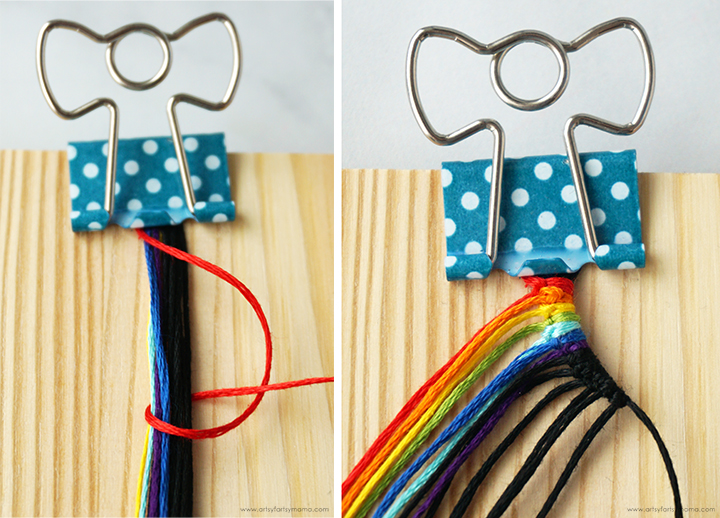
Step 1: Starting with the red floss, you're going to tie a backward knot around the entire group of floss. Repeat tying backward knots around the entire group with each thread, going in rainbow order, and then with each length of black floss. Stop when you are done tying the last length of black floss.
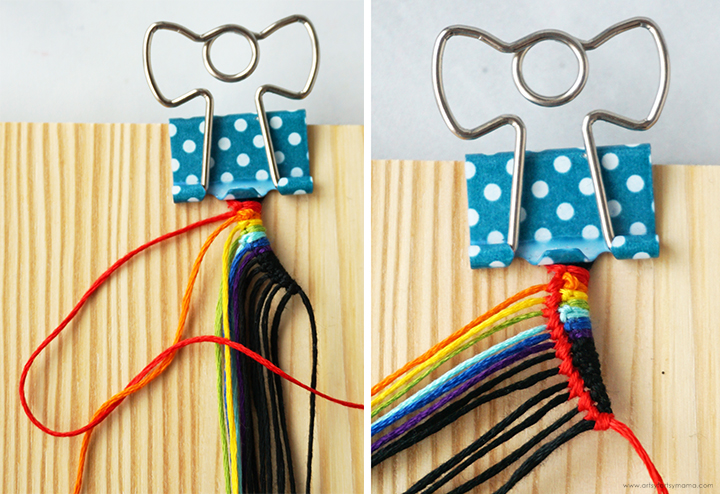
Step 2: The next step is starting the lines of the rainbow in the bracelet. Starting with the red floss, tie a forward knot around the orange floss. Continue on to the next piece of floss, in order until you tie a knot on the last black piece. Repeat tying the knots in rainbow order.
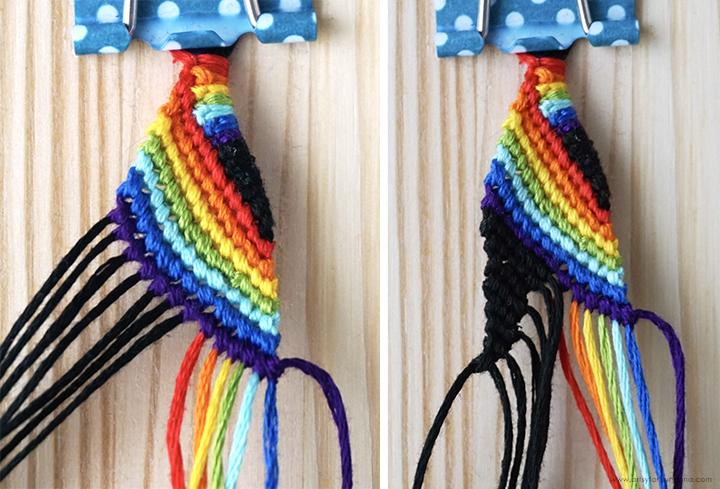
Step 3: When you finish tying knots with the purple floss, stop and congratulate yourself on completing this first section of the bracelet!! You should now have what looks like the image on the left: all 7 black floss pieces on the left, and the rest (in rainbow order) on the right.
Step 4: Now, you're going to tie a section that forms a black triangle on the left side of the bracelet. Like the previous rainbow stripes, you are going to start with the first piece of black floss on the left, and tie a forward knot around each of the following pieces of black floss.
Instead of tying each one around every piece, you are going to tie 7 knots with the first piece, 6 with the next, and continue on with this pattern until you tie one knot at the end. Do NOT tie any of the black around the colored floss at this time. Once finished, the bracelet should look like the image on the right.

Step 5: Now, it's time to make the "plaid" part of the bracelet! Starting with the first black floss at the top, alternate tying forward and backward knots around each of the colored floss pieces. For the second black piece, alternate the knots again, but start with a backward knot this time. You'll see that every backward knot hides the colored floss behind the black, creating the "plaid" look.
Repeat this process, alternating starting knots and backward/forward knots until you have tied a row with the last piece of black floss.

Step 6: With the black floss pieces all on the right side of the bracelet now, you are going to tie another triangle section like the one on the right. Except this time, the triangle is going to be tied in the "opposite" direction, meaning it starts with one knot, and ends with seven.
Starting with the first black piece at the top, tie one knot. Move to the next piece, and tie two knots. Keep following this pattern, until you have seven knots tied with the bottom black piece of floss.

Now that you've completed that last step - Congratulations!! You've made the first set of the bracelet pattern! Repeat steps 2-6 until the bracelet is the length you want. I would recommend stopping at the end of a rainbow stripe section.

Finishing the bracelet is a lot like how you started the bracelet. Start with the second black piece of floss, and tie a forward knot around the piece to the left of it. Next, take the third piece of floss, and tie a forward knot around BOTH pieces to the left. Continue on this pattern, tying the next piece around the previous group of floss pieces.
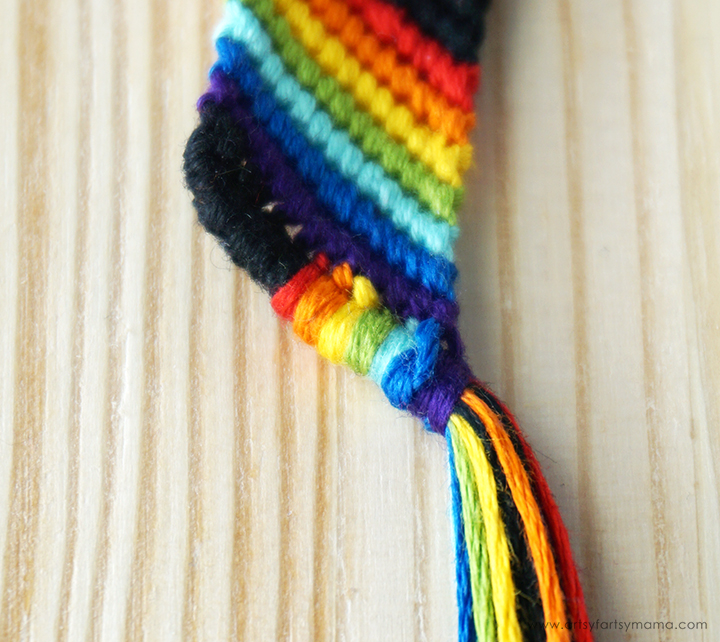
Keep going when you get to the colored floss, tying knots the same way until you get to the end. Once you are done, all of the floss should be in one bundle, and should look similar to the top of the bracelet.
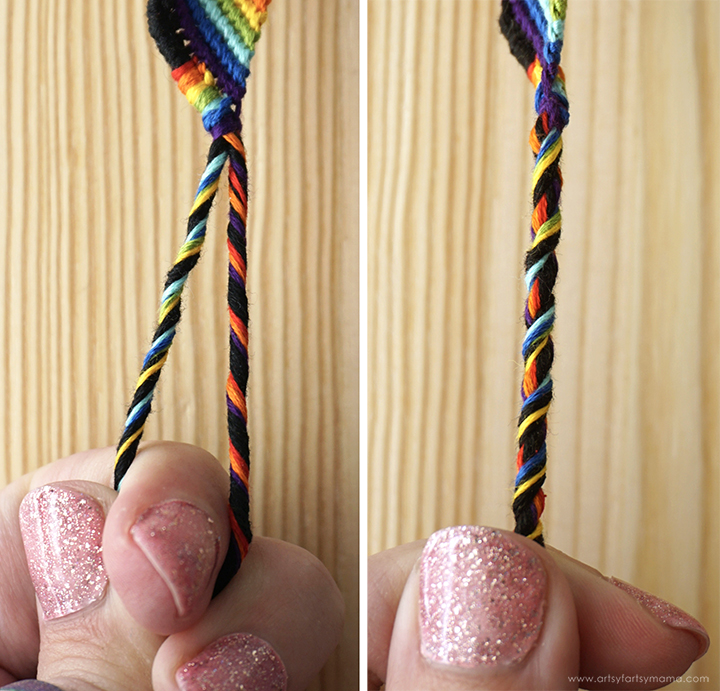
There are a lot of ways you can finish the ends of the bracelet. I decided to do a twist braid because I like how the colored floss looks blended with the black. Split the bundle of floss into two, with 7 pieces in each section.
Twist each section of floss, but hold it tight so that it doesn't start to curl up onto itself. Next, wind the twisted pieces together, making sure to keep them both from loosening up. When you get to the end, tie the bundle together in a tight knot and trim the ends.

Remove the bracelet from your workspace, and repeat the same braid for the other end of the bracelet. Try your best to have both bracelet ends trimmed to about the same length.
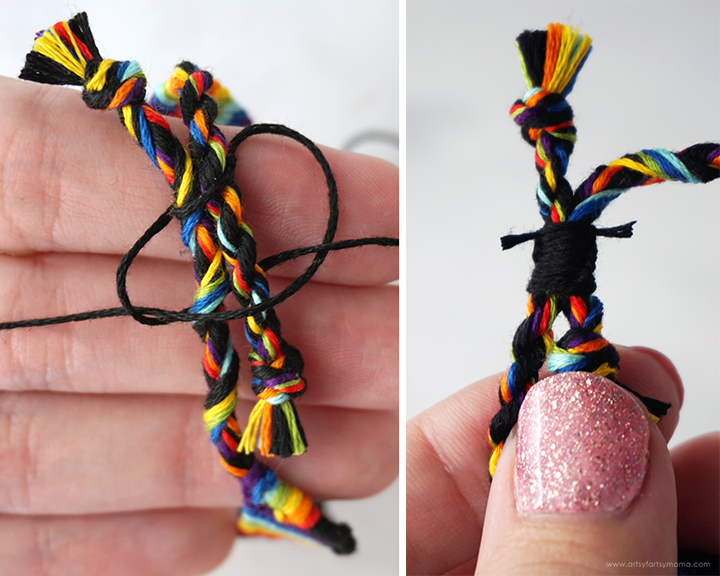
Cut a piece of floss about 10 inches long (any color). Lay the floss underneath the bracelet ends and tie it in a simple knot. Next, you are going to do a series of basic macrame knots over the bracelet ends:
- Lay the floss with the ends out straight.
- Bring the floss on the left over the bracelet ends, and make a "4".
- Bring the floss on the right over the end of the first floss, and then underneath the bracelet ends. Bring the end up through the loop on the left side.
- Grab both ends of the floss and pull it tight.
- Repeat this process, but alternate the over/under for each side. Keep tying knots until you are satisfied with the length.

Trim the ends of the floss, and hold them down with a little bit of adhesive. Now you can slide the ends through this section to tighten or loosen the bracelet without having to tie anything! With this done, your bracelet is officially complete!!

To wear the bracelet, simply slide it over the hand and onto the wrist. Gently pull both ends of the bracelet evenly to tighten to your level of comfort.

I love the way this Rainbow Plaid Friendship Bracelet turned out!! It would be a creative handmade gift to share with friends for St. Patrick's Day, and especially for Pride Week! I'm thinking of making another bracelet, but using white embroidery floss instead of black. What do you think? As always, I would love to see your creations! Share yours on Instagram, Facebook, or leave a comment/photo on the project pin on Pinterest! #AFMCrafts
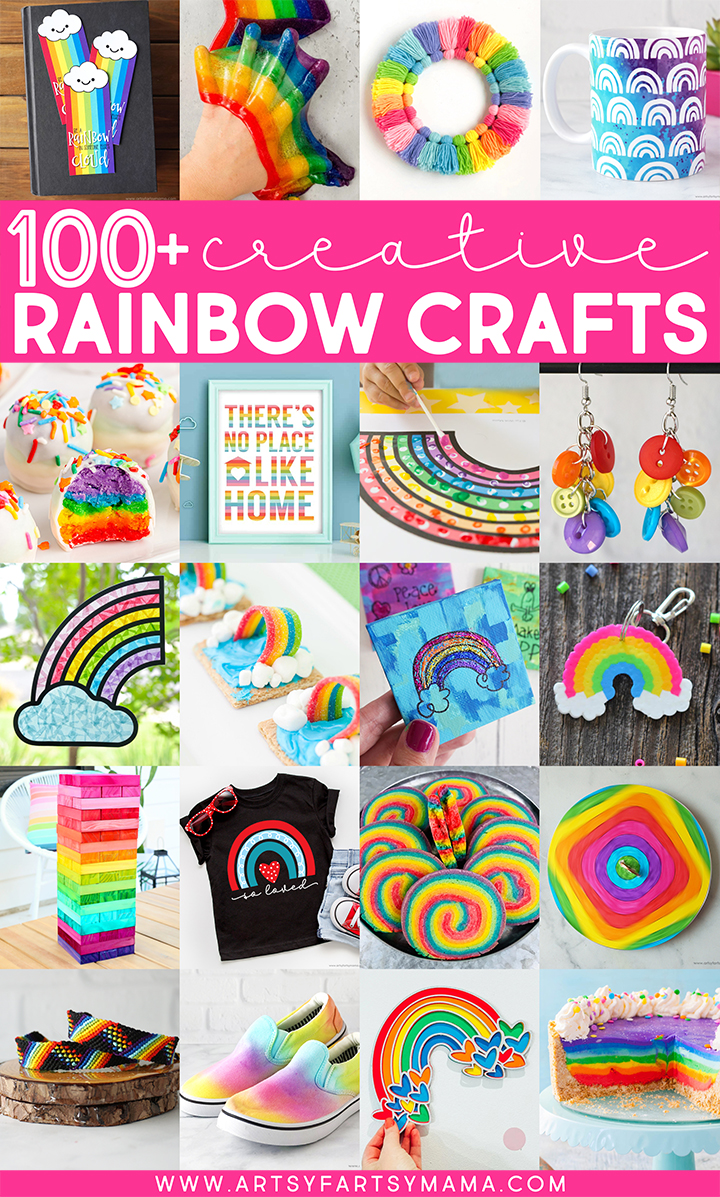
Looking for more Rainbow inspiration?
Check out this collection of OVER 100 creative rainbow crafts and recipes!!
Don't forget to Pin, Like, and Share!


