
Make your own Star Butterfly Costume (inspired by Star vs. the Forces of Evil) to wear for Halloween or cosplay!

For Halloween this year, my daughter asked me to help her put a Star Butterfly costume together inspired by Disney XD's Star vs. the Forces of Evil. We both love the show, and I always have a great time making her costumes, so of course I was up for the challenge! I was able to DIY everything for this costume, and have been so excited to share it with you. If you're a fellow Star fan, this costume is perfect for Halloween and cosplay!

Star Butterfly Horned Headband
Star is the kind of princess to toss away the tiara and replace it with horns! This headband is SO simple to make (not to mention adorable) and really finishes the costume. As a bonus, you can wear it LONG after Halloween is over!!
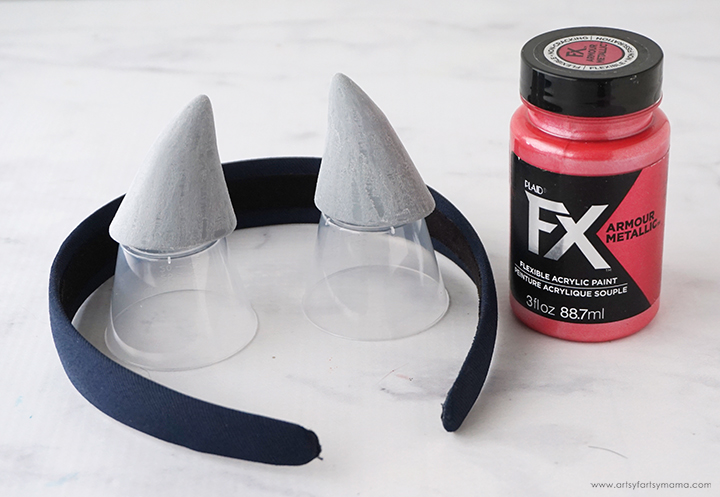
To make the Star Butterfly headband, you will need a wide headband, two 1 1/2" horns (I printed these with our 3D printer), and some red metallic PlaidFX Paint.
After the horns have been printed, use a Dremel tool and/or some sandpaper to get the pieces as smooth as possible. If you don't have access to a 3D printer, you could carve your own horns out of styrofoam or epoxy clay!

Paint both the horns and the headband with the red metallic PlaidFX Paint. Be sure to let the paint dry for about an hour before adding another coat. Both the headband and horns needed 2 coats each.
Mark the headband where the horns need to be placed with a marker. Dampen both the marks and the bottom of the horns with water, and add a SMALL drop of Gorilla Glue to the bottom of the horns. It's VERY important that it is a small drop, because it can expand about 3 TIMES the size of the drop and will make a mess if you use too much. Place the horn down over the marker and hold in place until the glue becomes tacky enough for the horn to stay in place on its own. Leave the headband somewhere that it won't be disturbed for the glue to completely set overnight. Cover any glue that is showing (if necessary) with the paint.
Star Butterfly "Bag"
Star Butterfly is always carrying around her crossbody star-shaped bag! Instead of making an actual bag, we decided to make the star into a plush with a crossbody strap. It's VERY simple to make, especially if you have a Cricut machine since I already put the design together for you.

Open the Star Purse/Bag Project in Design Space. Click on the green "Make It" button to go straight to cutting the project out as-is. If you want to make any adjustments to the bag size or change colors, click on the "Customize" button. Once you are ready to make the project, click on the green "Make It" button in the top right corner.
Lay yellow fabric face-down on the FabricGrip (pink) mat, and use a brayer to press it down well. Place the rotary blade in the Maker (or the fabric blade in the Explore) to cut the fabric. Be sure to select the cotton fabric option in the material settings, load the mat into the machine, and then press the Cricut icon to cut star shapes out. Cut the face out of black HTV and the eyes out of white glitter HTV.
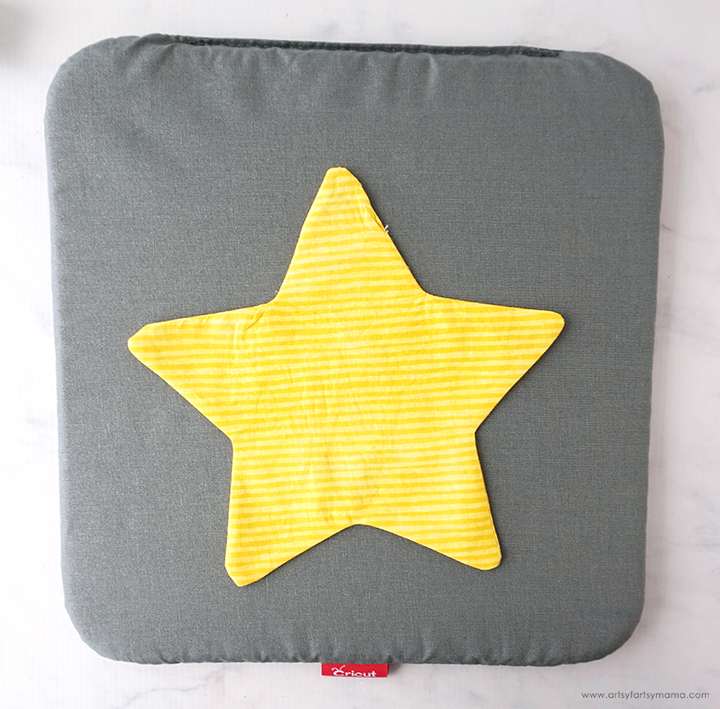
Line the star pieces up with the right sides together. Sew around the edges, and leave an opening. Clip around the entire star without cutting through the stitches. Turn the star right-side out and iron the entire star using the EasyPress.
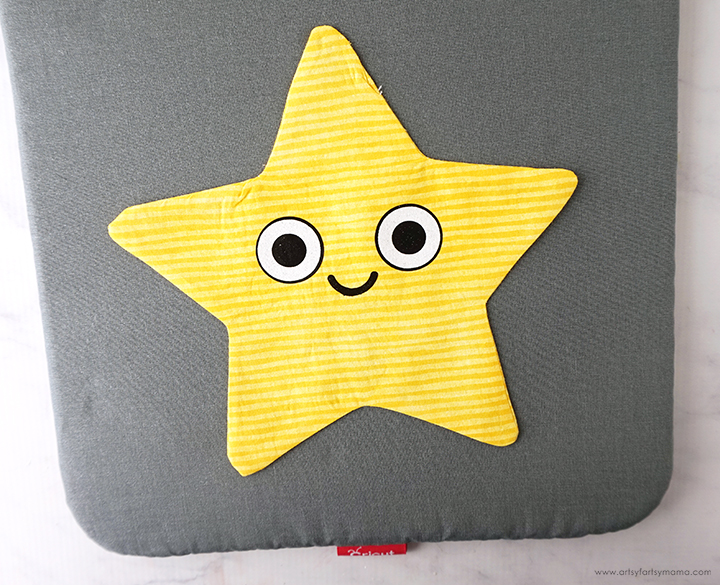
Keep the EasyPress out, and place the HTV face on the star. Put the black HTV down first, and then put the white glitter HTV on top (never put regular HTV on top of glitter HTV). Be sure to use an Iron-On Protective Sheet to protect the uncovered vinyl!

Stuff the fabric with small handfuls of Poly-fil until it's as full as you want it to be. Squish the plush in your hands in all directions to even out the stuffing and see if there are any other areas that need to be filled. Once you are happy with the plush, sew the opening in the fabric closed using a needle and thread in a ladder stitch.

If I had thought ahead, I would have sewn the ends of the strap into the star. However, I totally spaced it and came up with another option. Measure around you/your child to see how long the strap needs to be, and cut a piece of black paracord to the desired length. Add a drop of Fabri-Tac to the ends of the paracord, and place them into the top two corners of the star. Hold the ends in place with clips until the glue dries.

Star Butterfly Striped Leggings
Star Butterfly wears the cutest striped leggings or tights underneath her dress. It's easier than you think to make your own striped leggings. They are comfortable, fashionable, and look magical with any outfit!

The fabric paint in Grapefruit color is the *perfect* color for this project, but unfortunately I was all out. Instead, I used a mix of white, pink, and yellow fabric paint to make a salmon color.
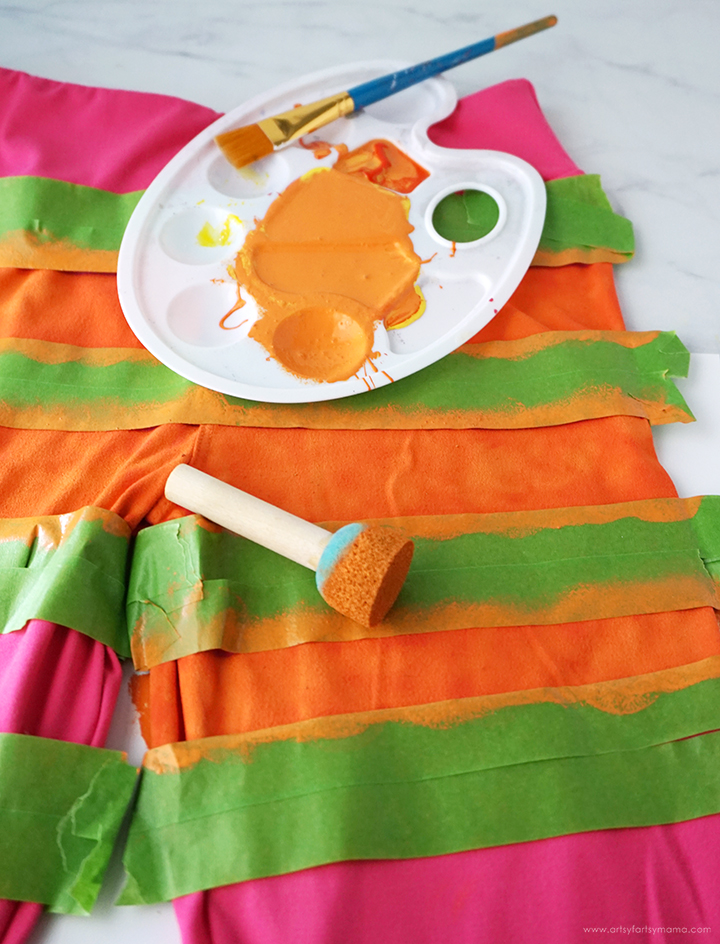
Find a soft and comfortable pair of bright pink leggings. Painting these was a lot like the Vanellope von Schweetz tights we made a couple of years ago. Lay down the leggings on a silicone craft mat to protect your workspace and lay down painter's tape where the pink stripes need to be on both legs.
Use a round sponge brush to carefully apply the fabric paint to the un-taped areas. Peel the tape away while the paint is still wet. Lay or hang the leggings up to dry for a few hours. Turn the leggings over, tape the stripes again on the back and paint them the same way you did on the front. Hang the leggings to dry for at least 24 hours.
*Try to ignore the color of paint I used here. It needs to be more of a salmon color, NOT this bright orange! If you make your own color mixture, test it out in a small area first to make sure it looks right before you get this far. If you make the same mistake I did, you can easily paint over the first color without a problem.

After 24 hours, you need to heat-set the painted fabric. I found it easiest to use my EasyPress Mini for this project. Heat it up to the highest setting, and lay a pressing cloth over the leggings and press down for 30 seconds. Move up the leggings and press again until all of the paint has been heat-set.
Once heat-set, the leggings can be machine washed on the gentle cycle. However, I would recommend to always hand-wash the leggings in cold water and allow to air-dry to keep them in their best shape.
Star Butterfly Boots
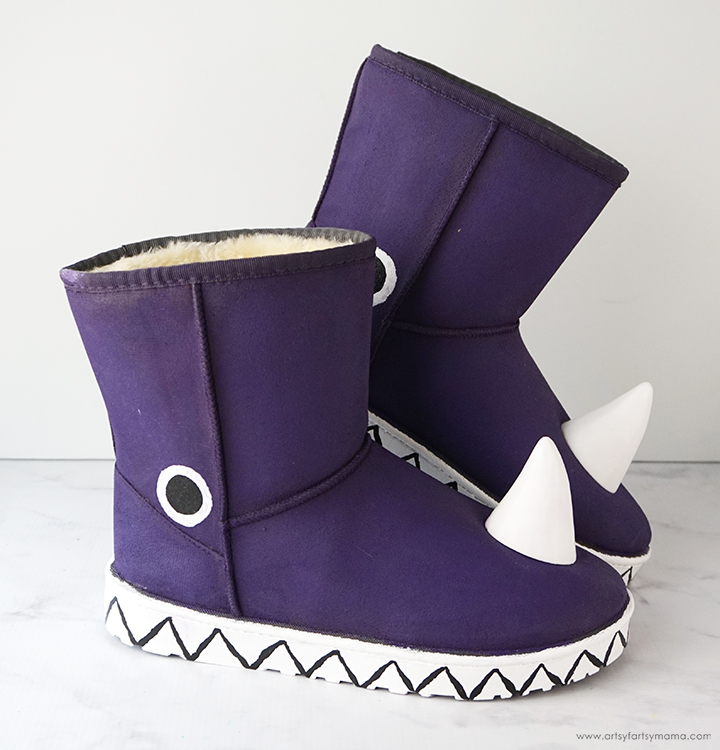
It was a lot of fun making these boots, and they are actually pretty simple. Be sure to check out our Star Butterfly Boots tutorial to make a pair to complete your costume!

They may not be perfect, but I think the pants and boots look so fun together! Usually Halloween night is pretty chilly around here, so the leggings and warm boots are a great option for kids to keep warm while trick or treating!
Star Butterfly Dress
Star Butterfly's dress was pretty simple to make. I created a pattern from tracing a skater dress my daughter loves wearing from Walmart, and then made the dress from a sea foam green knit fabric. If you don't want to make a dress, you could purchase a plain green/teal skater dress and then add the Peter Pan collar and hem embellishments with Fabri-Tac.

For the little creature on the front of Star's dress, I drew up the cut file and cut it out of pink metallic HTV and dark pink glitter HTV. Use your weeding tools to remove the excess vinyl (parts of the design you don't need).
*Download the Star Butterfly Dress Cut File (for PERSONAL USE only)

Lay the metallic HTV down on the center of the dress. Place an Iron-On Protective Sheet on top and then use the EasyPress to apply the vinyl. Remove the cover sheet, and then line the glitter HTV on top. Cover and press the vinyl again.

Doesn't that look SO cute? I love the touch of sparkle from the glitter HTV, and think this dress looks just like the one that Star Butterfly wears! My daughter actually wants to wear this almost every day because it's just so comfortable and fits just like her other dresses. I'd call that a win!!

Put on the dress, leggings, and all of the accessories - and don't forget the Star Butterfly Wand to complete the outfit! Use face paint to add some big, pink hearts to your cheeks, and the costume is ready to go! Even though it was a little more work than other years, this was such a fun costume to make. My daughter is absolutely thrilled with the costume, and is currently marking the calendar for any Halloween event we can attend so that she can wear it as much as possible.
What do you think of the costume? If you decide to make your own costume to wear for Halloween, cosplay, or just for fun, I would LOVE to see it! Please tag me on Instagram and Facebook, or leave a comment/photo on the project pin on Pinterest to show off your amazing work!
Don't forget to Pin, Like, and Share!


What about the wand?
ReplyDeleteHere is how I made the wand: https://www.artsyfartsymama.com/2020/10/diy-star-butterfly-wand.html
DeleteCan I buy this from you because I am NOT that crafty! LOL
ReplyDelete