
Make your own foil-covered leather journal to keep track of plans or creative thoughts and ideas!

I am always making lists. Grocery lists, to do lists, lists of project ideas, and the literal list goes on and on. Just the other day, I was cleaning out my purse and ended up with a large handful of paper scraps full of scribbled checklists. To keep myself a little more organized, I decided to make myself this leather-bound journal (using my Cricut) with a foil design to keep all of my lists in one place. The journal fits perfectly in my purse, and the pages can be easily refilled or replaced to keep my lists going as long as I need them to.
To make your own Leather-covered journal with foil design, you will need these supplies:
- Notebook Cut File (PERSONAL USE ONLY)
- Cricut Maker or Cricut Explore machine
- StandardGrip (green) and LightGrip (blue) Mats
- Cricut Foil Transfer Tool with Fine Tip
- Cricut Foil Transfer Sheet - Silver
- "You've Got This" Single Line SVG (PERSONAL USE ONLY)
- Faux Leather - Black
- Corrugated Cardboard - any color
- White Cardstock, Copy Paper, or Lined Paper
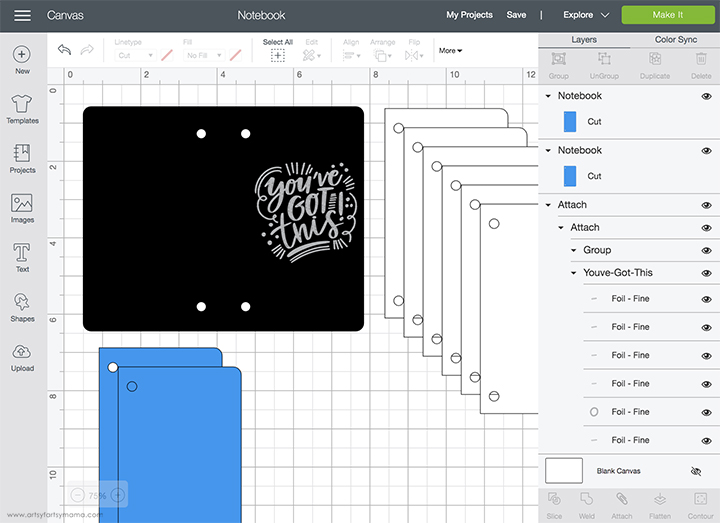
Open the Notebook cut file (personal use only) in Design Space. Duplicate the colored page so that you have 2 copies. Make duplicates of the white page for however many pages you want the notebook to have (I made 6).
Next, upload the "You've Got This" SVG and add it to the canvas. Size it to fit on the cover of the notebook. With the image selected, click the Linetype drop-down menu in the top menu bar. At the bottom of the list, you will see "Foil" as a selection. Mouse over it and choose Fine. Change the color of the foil by clicking the colored box next to the Linetype in the top menu bar and select silver (or whatever color you want to use). Select the cover and the image, and click "Attach" in the bottom right menu to keep these images together.
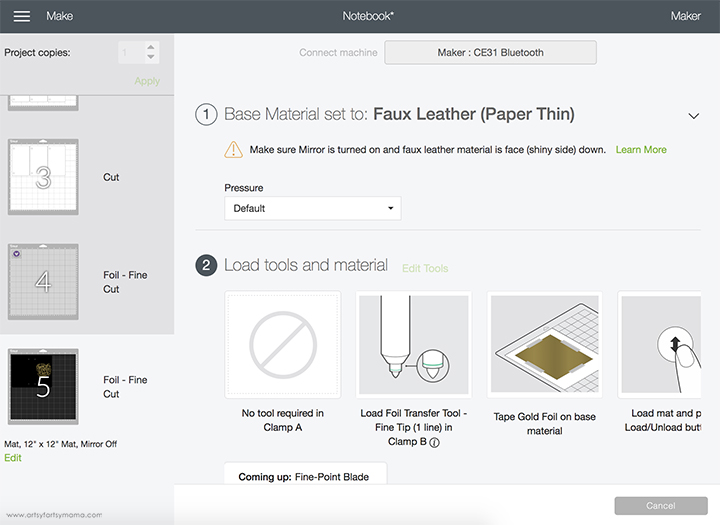
Choose your material from the list of Material Settings. Not all materials will work well with foil, so be sure to click on "Compatible" at the top of the list to show you everything that will make your project a successful one. For the cover, I used black Faux Leather, which is the only kind of leather that works with the Cricut Foil Transfer Tool.
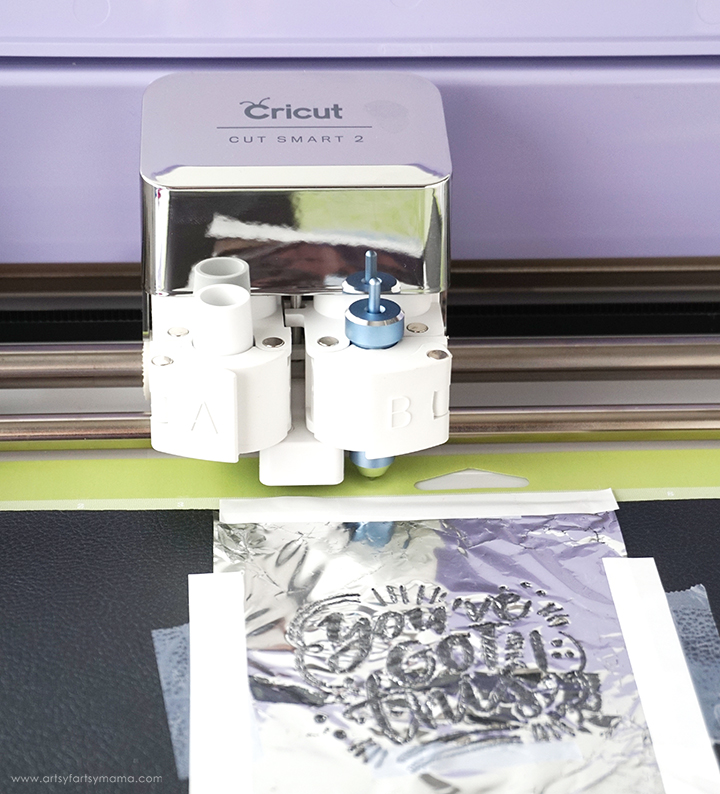
Lay the sheet of faux leather face-up on the StandardGrip mat. You will see that you need to place the Foil Transfer Tool housing with Fine Tip (1 line) into Clamp B first. On your mat, lay the Cricut Foil Transfer Sheet down on the leather where it is shown in the mat preview. Tape the foil down with the included tape strips on all four sides. Make sure it is completely smooth. If it's not, the foil can rip and ruin your project. Load the mat into the machine and press the flashing Cricut icon.
Once the Foiling Tool is finished, do NOT unload the mat. Carefully peel the tape away and lift the foil away from the leather to reveal the design. Place the Fine-Point Blade into Clamp B, and press "Go" to finish the cut.
*For more detailed instructions, here's a helpful tutorial for using the Cricut Foil Transfer Tool

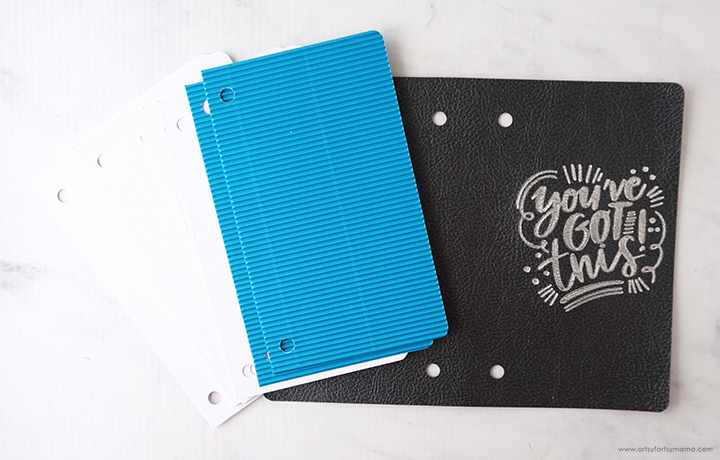

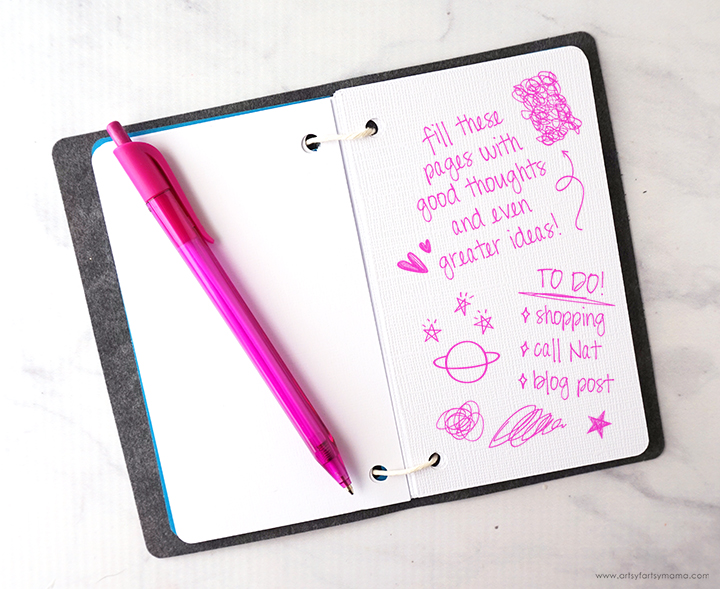
Sandwich the stack of white cardstock, copy paper, or lined paper in between the two pieces of corrugated cardboard with the holes lined up on the left side. Place the cover around the paper "sandwich" and thread some twine or cord up through the holes in the back and tie the ends together in the front.


Love this foiled journal, Lindsay, especially against that black leather! Shared and will be featured at this weeks Creative Crafts Linky Party. Have a great week! Creatively, Beth
ReplyDelete