
Add a pop of color to your space with these Dyed Seashell Resin Coasters!

New to resin? Be sure to check out Resin 101: Getting Started with Resin!


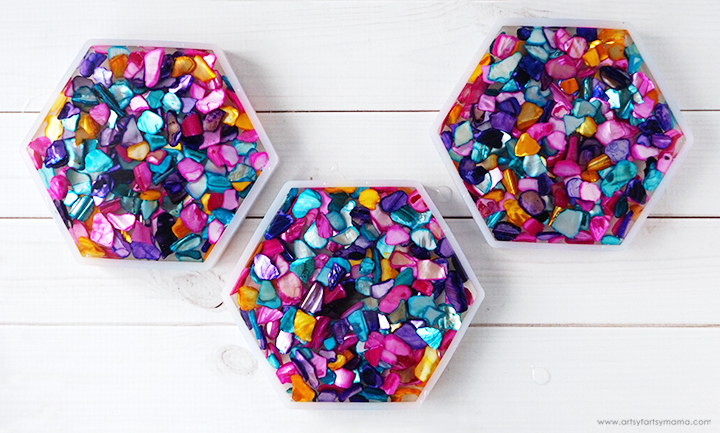
I am SO excited about these coasters! I especially love how the the bright colors and shimmer make the coasters look like stained glass. These gorgeous coasters are a simple project that you can make to share as a gift with someone special, or to add some color to your own desk or coffee table at home.

To make your own Dyed Seashell Resin Coasters, you will need these supplies:
- EasyCast Clear Casting Epoxy
- Measuring Cups
- Stirring Sticks
- Disposable Gloves
- Resin Brush
- Silicone Coaster Molds – I used hexagons, but you can use any shape!
- Dyed Seashell Chips
*Save 10% on resin supplies when you shop ETI with code AFM
Prepare the EasyCast Clear Casting Epoxy according to package directions. Be sure to work in a well-ventilated area and wear disposable gloves!
Add equal parts resin and hardener to the mixing cup (I used about 3 oz of each). Stir the resin mixture together with a stir stick for two minutes, making sure to scrape the bottom and sides of the mixing cup. Pour the resin into a clean mixing cup and stir the resin again for another minute or two with a clean stir stick.

Pour resin into each of the coaster molds, being careful not to overfill. Let the resin sit for a few minutes, then use a straw, lighter, or heat gun to remove any air bubbles that rise to the top.
Fill up a small mixing cup with some of the dyed shell chips. Pick out any that are too large or don’t belong (for example, I found a couple of lava rock pieces in mine). Pour the shells evenly over the resin, a little bit at a time. Use a clean stir stick or a resin brush to move the pieces around, press pieces down, and to coat with resin. You don’t want any shells sticking up out of the resin, otherwise the coasters won’t lay flat when finished.
Pop any bubbles that rise to the top using a lighter, heat gun, or by blowing through a straw. Leave the resin to cure in an undisturbed area for 24 hours. You will know that the resin is completely cured when it is no longer tacky.

Carefully remove the coasters from the mold and admire your work. I love how each coaster turns out a little bit different! Remove any over-poured resin with scissors, and sand down edges, if necessary.
I am SO excited about these coasters! I especially love how the the bright colors and shimmer make the coasters look like stained glass. These gorgeous coasters are a simple project that you can make to share as a gift with someone special, or to add some color to your own desk or coffee table at home.
I would love to hear what you think about these coasters! As always, if you make this project, I would love to see your creations! Tag me on Instagram and Facebook, or leave a comment/photo on the project pin on Pinterest!
Don’t forget to Pin, Like, and Share!


Thank you for sharing.
ReplyDeleteLindsay, your resin projects always blow me away! Just gorgeous! I'd love for you to share over at our Creative Crafts Linky Party https://creativelybeth.com/creative-crafts-linky-party-5-join-in-the-fun/
ReplyDeleteHave a great rest of your week!
Creatively, Beth
Great idea! Very bright and beautiful. Perfect for a gift!
ReplyDelete