
Display your love of Disney with your own Mickey Mouse Shaker Charm made with resin!

This Mickey-themed shaker charm is my latest resin project, and I am SO excited about it! Made with epoxy resin, this shaker can be used as a purse charm or keychain, and makes a fantastic gift idea. There are quite a few steps, but these charms are relatively simple to make and have adorable results! I hope you love this project as much as I do!!
New to resin? Be sure to check out Resin 101: Getting Started with Resin! 
What you will need to make your own Mickey Mouse Resin Shaker Charm:
- EasyCast Clear Casting Epoxy
- Measuring Cups
- Stirring Sticks
- Disposable Gloves
- Mickey Head Shaker Silicone Mold
- Mica Powder or Castin’ Craft Opaque Pigments - Black, White
- Fine Glitter – black, dark silver, iridescent white
- Transparency Film
- Permanent Marker
- Mickey-Shaped Glitter, Chunky Glitter, Confetti Glitter, etc
- Hand Drill Tool
- Unscented Baby Oil or Glycerin
- Oiler Bottle
- Super Glue
- Jewelry Bail
- Key Ring
*Save 10% on resin supplies when you shop ETI with code AFM

Wear gloves to protect your hands, and pour equal amounts of resin and hardener into a mixing cup. Use a stirring stick and mix the resin well for 2 minutes. Pour the resin into a clean mixing cup and stir for another minute.
Add in a small scoop of black pearl mica powder or a drop of Castin’ Craft Opaque Pigment. Mix well to distribute the color. Pour in a generous amount of black and dark silver glitter and stir until the glitter is evenly distributed.

Use the stir stick to help you carefully fill the mold until it reaches the top of the circle in the center. If you want the charm to be two-toned (like mine), be sure that you don't go above the circle. If you want the whole charm to be black, you can fill the mold the rest of the way and skip the next step.
Pop any bubbles that rise to the top using a lighter or by blowing through a straw. Leave the resin to cure in an undisturbed area for 24 hours. You will know that the resin is completely cured when it is no longer tacky. **DO NOT REMOVE THE RESIN FROM THE MOLD!**
Mix up a batch of white resin the same way as the black, except using white mica powder or a drop of Castin’ Craft Opaque Pigment and iridescent glitter. Pour the resin over the top of the cured black resin and fill the mold the rest of the way.
Pop any bubbles that rise to the top using a lighter or by blowing through a straw. Leave the resin to cure in an undisturbed area for 24 hours.

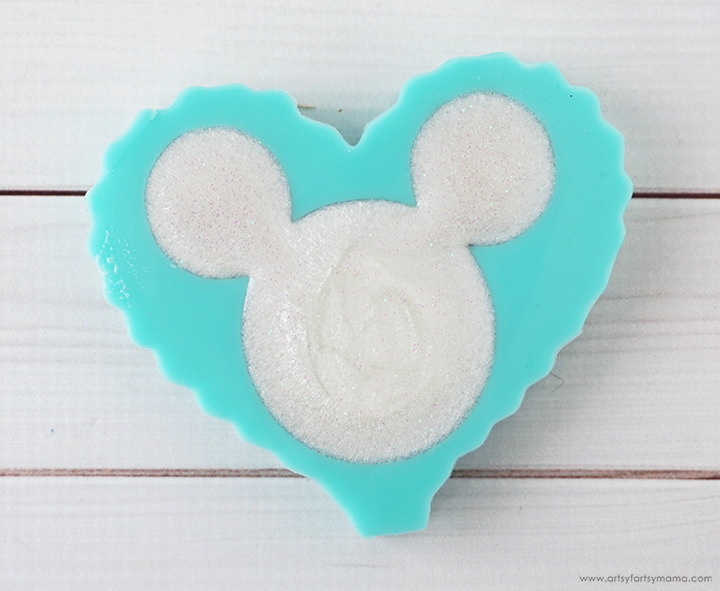
Once the resin is completely cured, carefully remove the piece from the mold. I love the two-toned look with the Mickey head shape in black and the background in white!

Cut a small square of transparency film and place it on top of the charm. Carefully trace the circle opening with a permanent marker.

Cut the transparency film a little bit outside of the traced circle. Remove the marker lines with a little bit of alcohol and a lint-free cloth.

Fillers are what make shaker charms so much fun, and there are SO many options out there! You can use all kinds of chunky glitter, microbeads, small resin shapes, and even tiny polymer clay creations. Get creative and have fun with it!

Because this shaker charm is all about Mickey Mouse, I had to add some Mickey-Shaped Glitter! I also added some small, holographic confetti glitter for more sparkle. Pour all of your shaker elements into the open center of the charm.

You can keep the charm as is and give it a shake, but I prefer to give the shaker charm a "waterfall" effect, which makes the fillers slowly float back down. To do this, you need to fill the charm with baby oil (I prefer unscented) or glycerin.
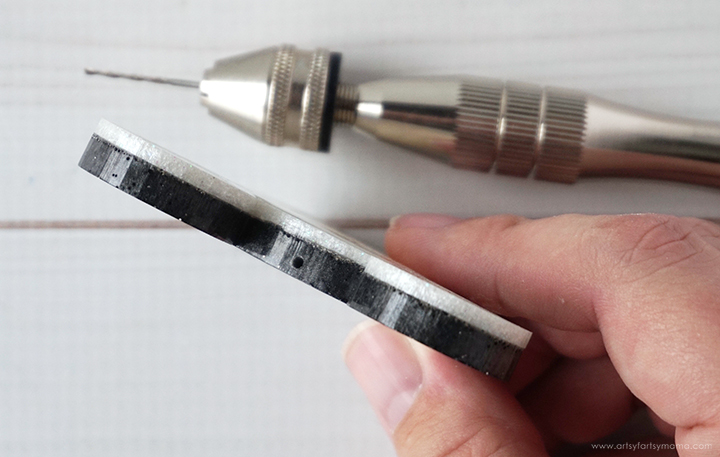
Since the opening of the charm has been sealed off, we need to make an opening to fill it. Use a hand drill tool to carefully drill down through the top (between the ears) toward the opening.

Fill an oiler bottle with baby oil or glycerin. Put the needle through the opening and slowly squeeze the bottle to fill the charm with the oil. Take your time - sometimes the oil will go back up through the hole and will spill oil everywhere!

Once the charm is full, wipe the top off well to remove any oil residue. Cover the hole with a couple drops of super glue to seal it off. Let it dry completely, and then give the charm a good shake to test out the waterfall effect and repair any leaks, if necessary.


Lay the charm down on its back. Mix up a small amount of resin, but leave it clear. Carefully cover the top of the charm with resin without going over the edges. This will give your charm a domed top that also completely seals the front of the charm.
Pop any bubbles that rise to the top using a lighter or by blowing through a straw. Leave the resin to cure in an undisturbed area for 24 hours.
Hook a jump ring through the loop in the bail, and hook the key ring chain to the jump ring. Close the jump ring to connect the key ring to the charm. Now the keychain is ready to go! This is such a unique gift idea that any Disney fan will love, and I think you will find that shaker charms can be a lot of fun to make.
I'd love to hear what you think in the comments, and who you would share a Mickey Mouse Resin Shaker Charm with! If you'd like even more resin project inspiration, come visit me at the Resin Crafts blog!
Don't forget to Pin, Like, and Share!


Wow, I LOVE this Mickey Mouse key chain and the waterfall effect. I have never made anything like this but plan to as soon as Christmas is over, thanks so much for showing us how to do it!
ReplyDeleteThat is absolutely adorable! Pinned.
ReplyDeleteThis is SO adorable. It's hard to find new ideas on blogs these days and this is one I've never seen. Love it!
ReplyDeleteWhere did you get your Mickey mold?
ReplyDeleteHi Carlene! I found it here on Etsy: https://www.etsy.com/listing/696565298/medium-mickey-head-shaker-silicone-mold
Deletesuper cute. thanks for all the details. sometimes people skip steps but you were very thorough. cant wait to try it
ReplyDeletehow do you keep the smooth edges once removed? When I remove from molds, it seems I have to file, then I have to trim, then re epoxy to cover the dull sides
ReplyDeletehow do you keep your sides smooth once removed from mold? I find I have to file, sand, then reapply epoxy to those areas
ReplyDeleteWhen you put the clear dome over the top, are you going over the clear plastic or just over the black edges?
ReplyDeleteGreat question! Cover the entire top of the piece with resin.
DeleteWow just beautiful. I have loved Mikey mouse from child. Still do. Thanks for sharing. Where can l find the mold and the Mikey m fillers.
ReplyDeleteLisa