
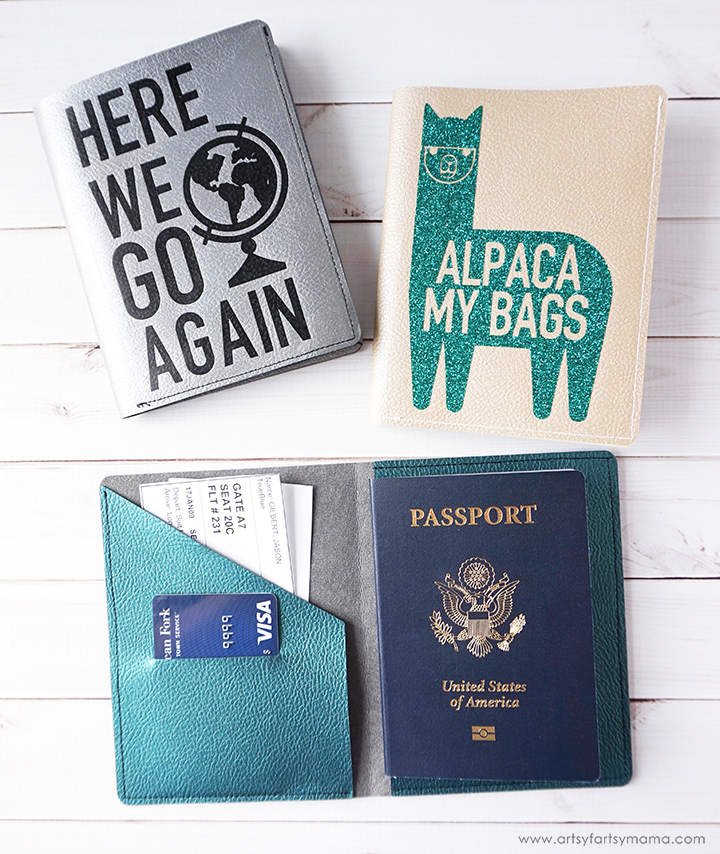
Travel in style with your own DIY Leather Passport Cover made with the Cricut Maker!
First, you'll need to gather the basic supplies for this project:
- Cricut Maker or Cricut Explore Air machine
- Passport Covers Design Space File
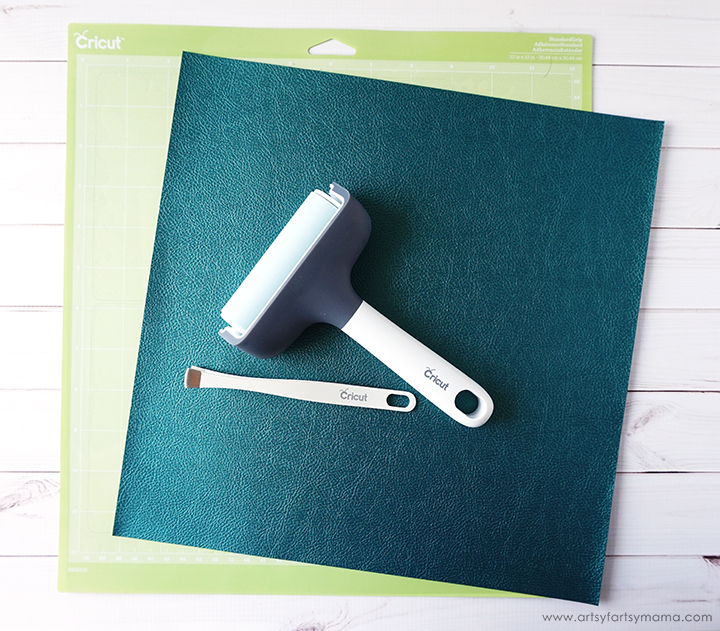
- Green StandardGrip Mat
- Pebbled Faux Leather
- Brayer and Tweezer Set
- HTV (iron-on vinyl)
- Weeding tool
- EasyPress 2
- EasyPress Mat
- Iron-On Protective Sheet

Lay the sheet of faux leather face-down on the mat. If you put it facing up, the backing will leave a bunch of felt residue on your mat and it won't be as sticky. Use the brayer tool to press the leather onto the mat to remove any air bubbles and give the leather a more secure hold. If you don't press it down well, your leather could shift during the cutting process and will ruin your project. No one wants that!

Open the Passport Covers cut file in Design Space. Click "customize" to make adjustments to colors, or click "Make It" to take you straight to cutting the project. Before you cut the covers, make sure to select "Cricut Faux Leather" in the material settings and mirror the images. The machine has an Adaptive Tool System for professional-level cutting of hundreds of materials.
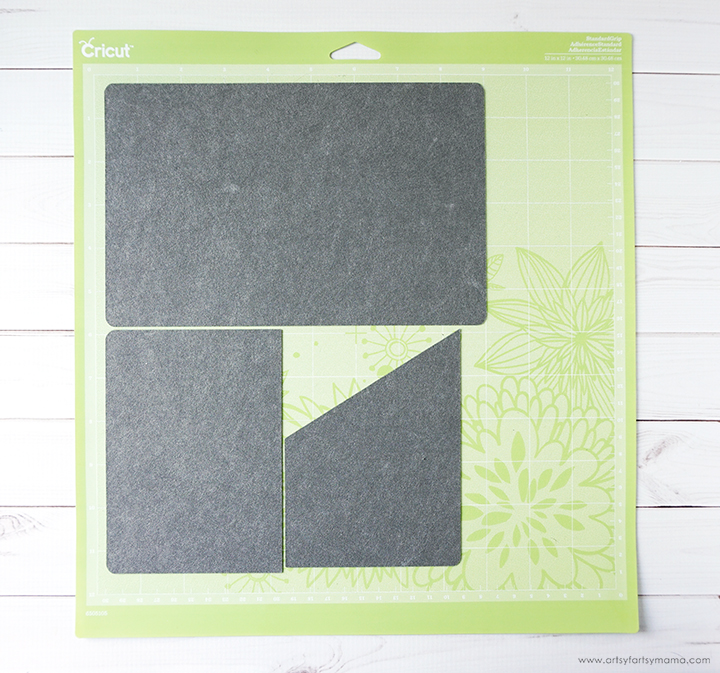
Once the leather has been cut, carefully remove the three pieces from the mat using your hands or tweezers. Another great trick to remove leather from the mat is to turn the mat face-down, then peel the mat away from the material. This will curl the mat (which is stronger) instead of bending or curling your material.
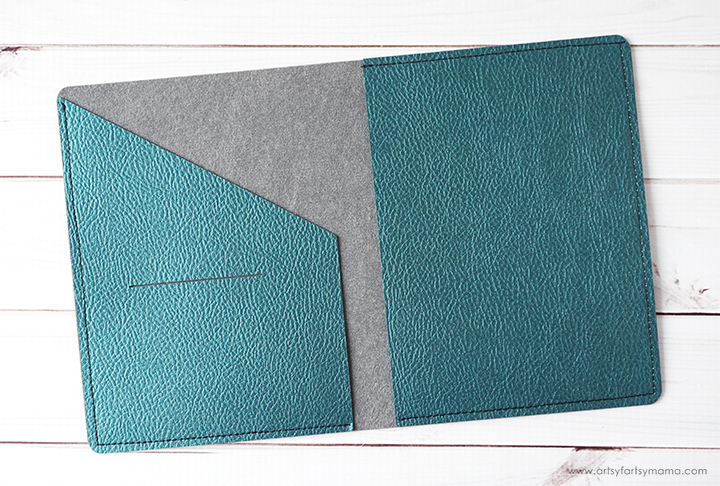
Line the smaller leather pieces up on both ends of the larger leather piece with wrong sides together. The piece with the slit goes on the left side, and the rectangle goes on the right. Start with the right rectangle piece and topstitch along the top, right, and bottom edges. The left side only needs to be sewn along the left and bottom edge.
The other designs in the cut file are to customize the front of the passport covers. For the front of this cover, I used Rose Gold foil HTV.
When cutting your iron-on vinyl, make sure to mirror your images and place the vinyl face-down on the mat. If you don't, your design will be backwards when you put it on your passport cover. Click on each mat thumbnail and click the Mirror toggle to reverse the image on the mat.
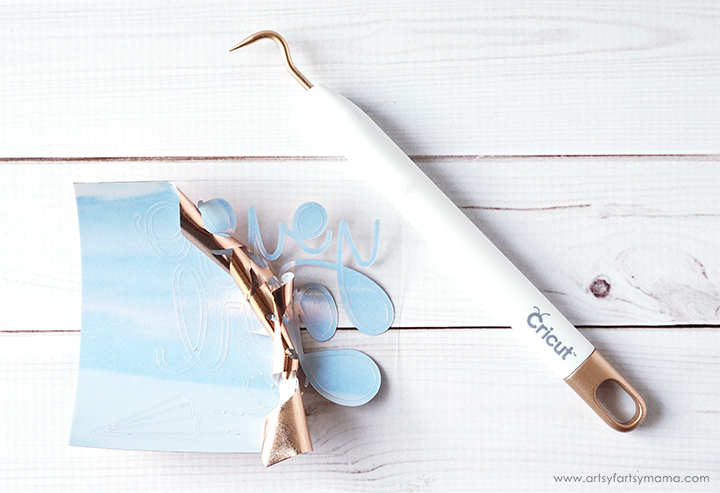
"Weed" the excess vinyl by removing all of the parts that don't belong in the design. I usually start with the outer edges first by peeling away at the corner and working my way around the design. Then I use a weeding tool to remove smaller pieces of the design, like the insides of letters.
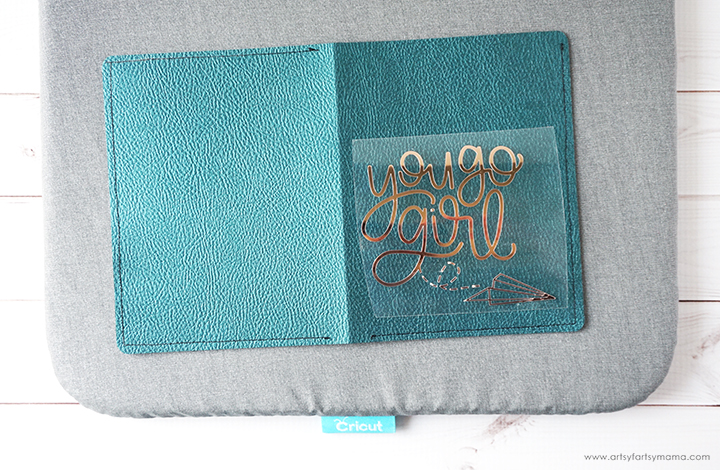

Heat up your EasyPress. Each kind of HTV combined with different materials has a different heat and time setting, so be sure to check the recommended EasyPress settings. For example, to apply foil iron-on to faux leather while using the EasyPress Mat, the recommended temperature is 255º for 30 seconds.
I found out through some experimentation that the faux leather can be a little sensitive to direct heat from the EasyPress. It seems to flatten the texture, can leave lines from the edge of the EasyPress, and the leather ends up with a more shiny finish. To prevent this from happening, I highly recommend using an Iron-On Protective Sheet. You don't need to make any heat or time setting adjustments.
I found out through some experimentation that the faux leather can be a little sensitive to direct heat from the EasyPress. It seems to flatten the texture, can leave lines from the edge of the EasyPress, and the leather ends up with a more shiny finish. To prevent this from happening, I highly recommend using an Iron-On Protective Sheet. You don't need to make any heat or time setting adjustments.

Let the foil iron-on cool before removing the protective liner. Each kind of vinyl has their own instructions on when to remove the protective liner, so again, be sure to check the recommended settings.

Now you can fill the passport cover with all of your important items! Slide the back cover of your passport into the pocket on the right side. You can keep important papers like plane tickets in the left pocket, and you can fit a credit card or ID through the slit.

Fold the passport cover closed, and press along the fold to get a good crease. You can press it again with the EasyPress if necessary.
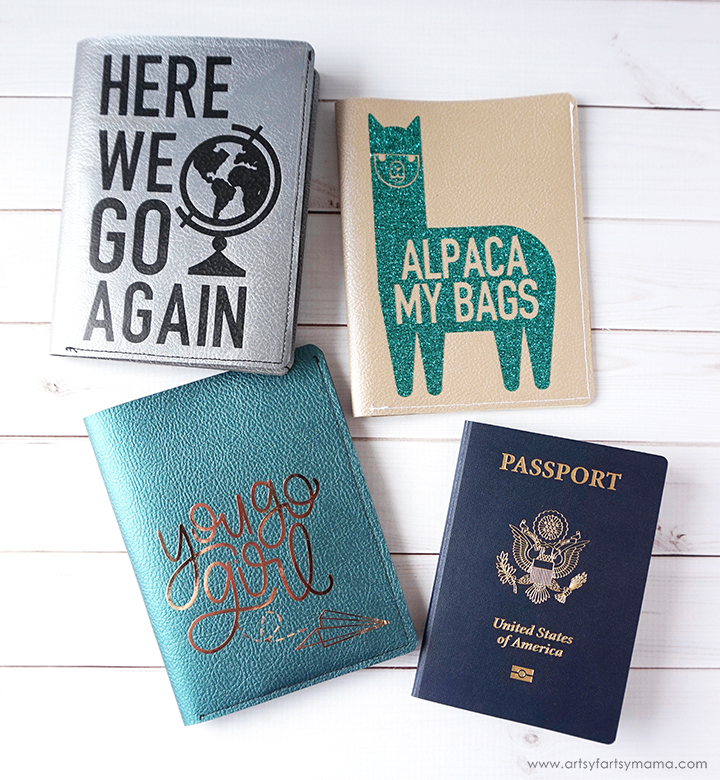
I am SO thrilled with how these passport covers turned out, and the leather was a dream to work with. This makes me even more excited for an upcoming family vacation that we've been planning. These passport covers would make a great custom gift idea for the traveler in your life, or would be a fun way to surprise the family with an exotic vacation!


Where can I find the cut file?
ReplyDeleteWhy can’t I access the cut file?
DeleteI love the passport covers- they turned out great! Where can I find the Alpaca a good file? Is it for sale? I could not find it on your site.
ReplyDeleteWhere did you find the cut file for the cover?
Deletewhere is just the passport cover file?
ReplyDeleteis there a way to get this file?
ReplyDeleteHow can I get the file >?
ReplyDeleteGreetings from Kenya, I'm looking forward to getting a cricut maker3 God willing, and start my cricut journey to crafting. I'm a single mother with 6 children, hope to get more design ideas from you. Thank you
ReplyDeleteDo I need a special leather needle to sew Cricut pebbled leather on my sewing machine for this project?
ReplyDeleteHi. Where can I get this svg cut file?
ReplyDeleteFor people who are thinking about using this project, the faux leather in the link is not the correct size to use for the cut file. Just a heads up
ReplyDelete