
Let the kids create a backpack that's truly unique with some tie-dye and vinyl!

This post contains affiliate links (see disclosure page for details). As always, all opinions are my own.

When it comes to tie-dye, I would highly recommend picking up the Tulip One-Step Tie Dye Party Kit for this project. There's 14 brilliant colors to choose from, and supplies like gloves, plastic tablecloth, rubber bands are included! It also helped us to read the instructions thoroughly and check out some tie-dye inspiration before we got started.


Along with the tie-dye, you'll also need a white canvas backpack. Set up your workspace (I recommend going outside) by covering a table with the plastic tablecloth. We also laid out our dyes, gloves, rubber bands, and paper towels on the table so everything was within reach. Trust me on this one.
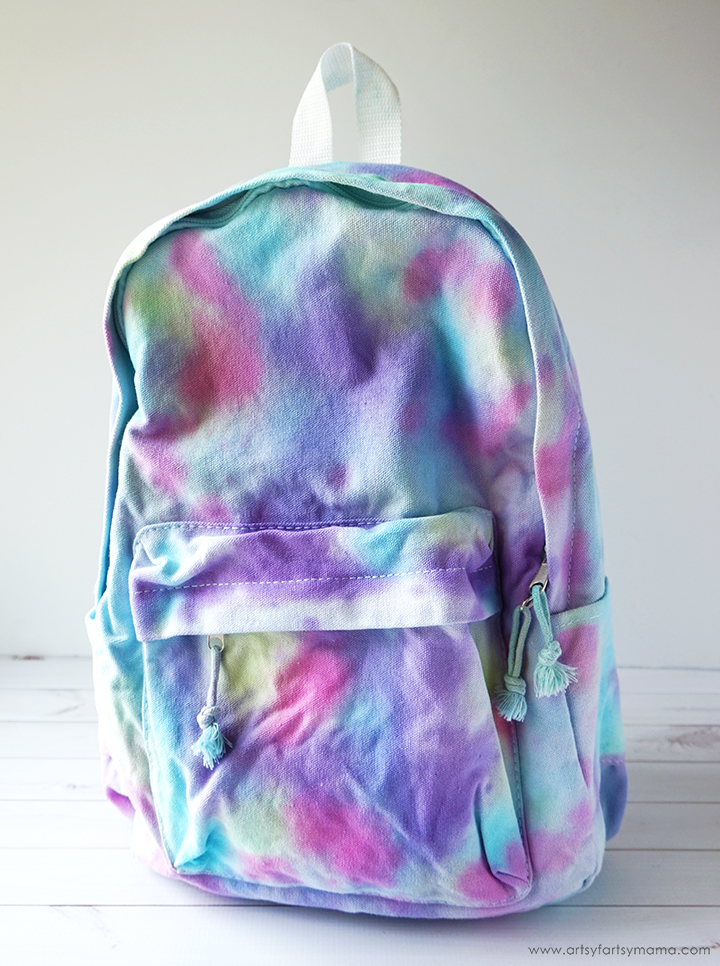
Get the backpack wet and wring out the excess water until it is just damp. This will help the dyes fully absorb into the material, making your project more vibrant in the end. Lay the backpack flat on the table and put on your gloves.

Instead of traditional tie-dye techniques using rubber bands, my daughter wanted to try doing some drip-dying. It's such a fun way to dye, especially for beginners, and it's a great way to use up any of your leftover dyes. Using one color at a time, tip the tie-dye bottle upside down and simply drip the dye randomly on the backpack!

*Because the backpack is wet, the dyes will spread a little as it dries. So, I recommend trying to leave a little bit of white space in between drips if you can.

Once you are done dying the backpack, you need to keep it covered with plastic* to prevent it from drying out. If the fabric that dries before the dye is finished setting, it can result in weaker color concentration and less intensity. Let the backpack sit in the plastic for at least 6-8 hours. We usually wait overnight.
*Zippered bags work great, but a backpack is too big for that. We used a garbage bag and closed it up tight.
When the time is up, remove the backpack from the bag and rinse it under cold water to remove the excess dye. Keep rinsing it until the water runs clear. Immediately wash the backpack on the largest load setting with hot water and a small amount of detergent. Our backpack has a liner inside, so we dried it on a cooler setting. Once it's dry, it's ready to use!

Now that the backpack has been dyed, it's time to personalize the backpack to make it even more your own! My daughter and I came up with a fun design (Make It here) in Cricut Design Space and we cut it out of silver glitter HTV (iron-on vinyl) with the Cricut Maker machine. Since we are using iron-on vinyl, make sure to mirror the image before you cut!!
"Weed" the excess vinyl by removing all of the parts that don't belong in the design. I usually start with the outer edges first by peeling away at the corner and working my way around the design. Then I use a weeding tool to remove smaller pieces of the design, like the insides of letters.

The new EasyPress 2 came in handy for me to attach the vinyl to the backpack. Measuring 6"x7", this smaller version of the original EasyPress is perfect for smaller projects like this! It heats up in 60 seconds, and can get up to 400º F. The raspberry color is pretty cute, too.
Each kind of HTV paired with cotton canvas material has a different heat and time setting, so be sure to check the recommended EasyPress settings. For example, to apply glitter HTV to canvas while using the EasyPress Mat, the recommended temperature is 270º for 40 seconds.
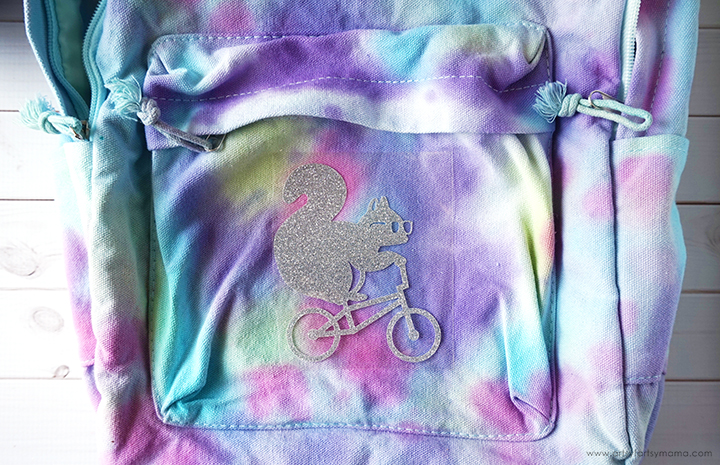

Next, place the EasyPress 2 over the vinyl and press the green "C" button. Hold firmly in place while the timer counts down.

Let the pocket cool for a minute or two, then carefully peel away the carrier sheet. The vinyl should be completely stuck down. If you have any edges peeling up, lay the carrier sheet back down and press again.
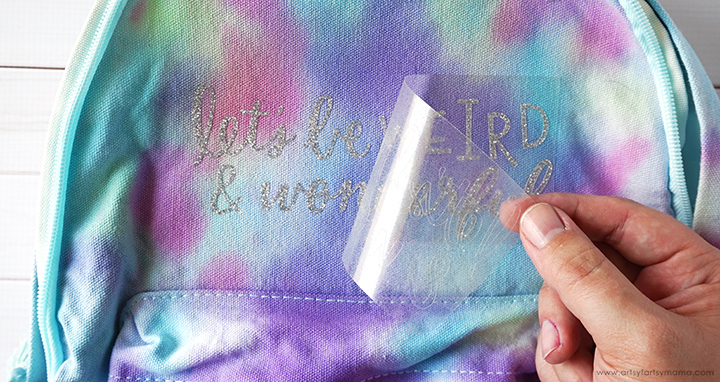
Repeat the same steps with the word design. Place the EasyPress Mat inside the backpack, and use the EasyPress 2 to attach the vinyl. Let the vinyl cool for a minute, then peel the carrier sheet away.
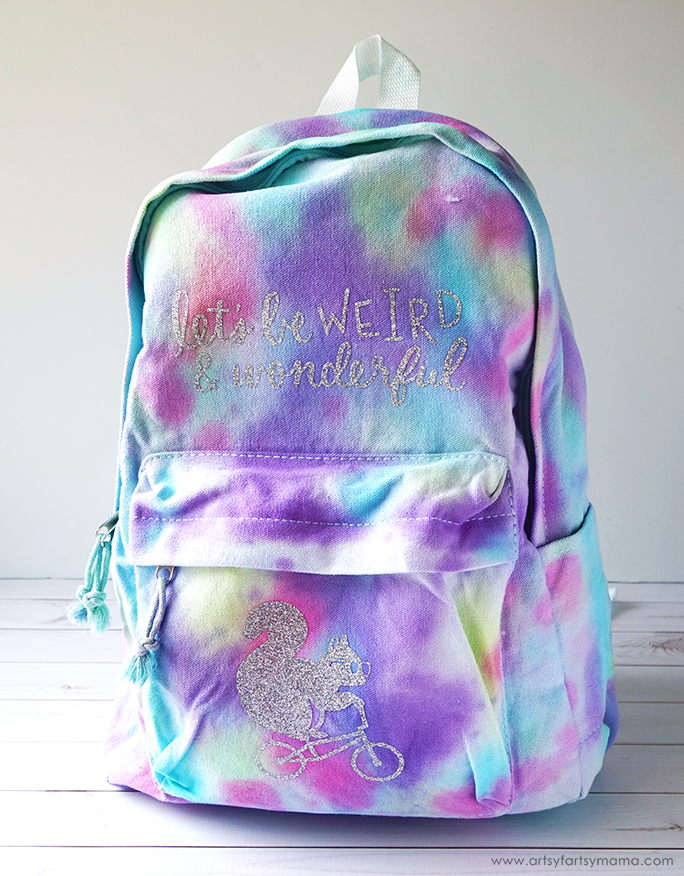
As you can see, we totally embrace our "weird" around here and this backpack is everything my daughter wanted! Even though we homeschool, my daughter is so excited to wear this backpack to co-op days when she meets up with her other homeschooling friends. I hope we have inspired you to create your own custom school backpack this year!


