
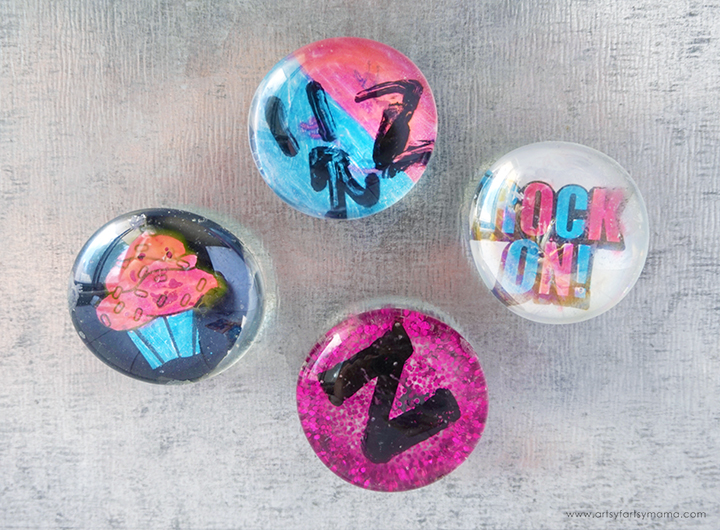
Encourage girls to make DIY Glass Gem Magnets with this kit from Creative Girls Club!
This is a sponsored post and contains affiliate links. As always, all opinions are my own.

This is a sponsored post and contains affiliate links. As always, all opinions are my own.
Summer's here and we're always looking for things to keep busy over these next few months. Along with the educational, it's important to also encourage creativity throughout the school break. My daughter had a blast making her own custom glass gem magnets using the Clearly Cool Magnet Kit from Creative Girls Club!

My daughter wanted to put a video together to show how fun this kit is. If you'd like, head on over to YouTube and leave her a comment!

Each kit includes all of the materials you need to complete the project. It also includes easy-to-follow instructions with photos of every step so that girls can create with little to no supervision needed. This will help girls to learn new creative skills, work independently, and most importantly, gain confidence!

Start making your magnets by coloring in one of the die cut circles with the provided pens. There are 9 printed die cut designs, and 3 blank circles if you want to draw and color your own design. There is also a black marker included in the kit. Please note that the marker will bleed through the paper, so protect your surface!


Use some white school glue or your favorite craft glue and add a small amount to the flat side of the glass gem. Don't be afraid to get messy and spread it around with your finger! Place your design face down on the gem. Press well, especially around the edges to get any air bubbles out.
*Try not to use too much glue, otherwise it can ruin the paper and take too long to dry.


When you turn the gem over, the magnets will have a hazy, white look. Don't worry! They will clear up as they dry.

Encouraged by the instructions, my daughter wanted to make her own custom magnet design using some of the other supplies. She drew a backwards "Z" on the magnet using the black marker. The reason it is backwards is because when the magnet is turned over, the Z will be the right direction.


My favorite part! Place the glue-covered gem on a scrap piece of paper. Open up a corner of a glitter packet, and pour it right over the gem. Gently tap the pile over the gem to pack the glitter into the glue. Let it set for a minute or two to let the glue dry a little. Pick up the gem and tap it on its side a few times to remove the excess glitter. Set aside to finish drying.
Tip: to prevent glitter from flaking off every time you touch the magnet, spray a layer of clear spray paint over the gem!

Add a little bit of glue to a magnet and stick it to the glittered side of the gem. Hold in place for a minute or two for the glue to set.

At first, the magnet will look white and you'll barely see any glitter. Again, don't panic. Once the glue dries completely, it will go clear and the glitter will shine through.

Leave the magnets to dry overnight in a flat area. Make sure they are spaced apart from each other! Otherwise the magnets will pull themselves away from the gems if the glue hasn't dried enough.
After the magnets have had time to dry, they are ready to put to use! These magnets are great as fridge or locker decor, a creative way to hang up your favorite photos, and are fun DIY gifts to make for friends and family.

This kit was a ton of fun, and kept my daughter busy all afternoon. I love that it was easy for her to make all on her own, and that she felt so confident as she showed off her finished creations.
To subscribe to receive your own kits, visit Creative Girls Club. Girls can also check out fun project ideas, take polls & quizzes, and more! Follow on Instagram and Facebook for more creative inspiration.
How do you encourage creativity through the summer?


