Posts may contain affiliate links (see Disclosure). Thank you so much for supporting Artsy-Fartsy Mama!
Sunday, February 25, 2018

Free Printable Lorax Corner Bookmark

Sunday, February 25, 2018

Free Printable Lorax Corner Bookmark

Read more »
Celebrate Dr Seuss' birthday with Free Printable Lorax Corner Bookmarks!

Celebrate Dr Seuss' birthday with Free Printable Lorax Corner Bookmarks!

Books by Dr. Seuss were my favorites growing up and I still love reading them with my daughter now. Whether you are just learning to read or have been reading for years, Dr. Seuss books are always a good read. The Lorax is one of my favorite books, so I made a printable Lorax bookmark to save your spot. These bookmarks are easy to make. All you have to do is print it out and fold to save your place or to share with your friends, family, or classroom!

Celebrate Dr Seuss' birthday with Free Printable Lorax Corner Bookmarks!

Download and print out the Lorax Corner Bookmark by clicking the link below. Use scissors to cut out the bookmark. Take your time when cutting around that crazy mustache!

Celebrate Dr Seuss' birthday with Free Printable Lorax Corner Bookmarks!

Use a scoring tool and a ruler to crease the guidelines. This will help make the paper easier to fold.

Celebrate Dr Seuss' birthday with Free Printable Lorax Corner Bookmarks!

Fold the bookmark along the lines and crease well.

Celebrate Dr Seuss' birthday with Free Printable Lorax Corner Bookmarks!

Add some glue or use a tape runner to add adhesive to one of the blank triangles of the bookmark.

Celebrate Dr Seuss' birthday with Free Printable Lorax Corner Bookmarks!

Fold the other side over and press the paper together well.

Celebrate Dr Seuss' birthday with Free Printable Lorax Corner Bookmarks!

To use the bookmark, place the corner of the page into the pocket of the bookmark. Now you can close your book and your place is saved! Such an easy and fun bookmark to make! For best results, print the bookmarks on cardstock.


Some things you should know before downloading:
*Artsy-Fartsy Mama printables are for PERSONAL USE ONLY (home, school, libraries, etc).
*You may NOT modify, sell, redistribute, or claim the design as your own.
*Please do not remove the credits/watermarks.
*If you'd like to share this project, you may use ONE photo and credit must be given to Artsy-Fartsy Mama and linked back to this post.

What's your favorite Dr. Seuss book?

Thursday, February 22, 2018

Breakfast Sundaes

Thursday, February 22, 2018

Breakfast Sundaes

Read more »
This shop has been compensated by Collective Bias, Inc. and its advertiser. All opinions are mine alone. #CelebrateGoodness #WakeUpRight #CollectiveBias

Healthy Breakfast Sundaes are a delicious way to brighten up your day!

Healthy Breakfast Sundaes are a delicious way to brighten up your day!

Mornings are hard. We're always in a frenzy trying to get up and get ready to get out the door on time. When it comes to breakfast, we are trying to come up with ways to make it a little easier to wake up with a smile. Who wouldn't want to start their day out right with dessert for breakfast?

Layered with yogurt, fresh fruit, cereal and your favorite toppings, Breakfast Sundaes look like a special treat but is really a healthy breakfast that is fun to eat! Kids will love making their own sundaes and you can whip one up in just a few minutes.

Healthy Breakfast Sundaes are a delicious way to brighten up your day!

Malt-O-Meal® cereals come in over 30 delicious varieties that are less expensive than other brands. With that many choices, there's definitely something for every taste bud in the family! If for some reason you don’t love them, they’ll refund your money. The newest additions to the MOM family are Double Chocolate Brownie Crunch, Cinnamon Dyno-Bites, and Golden Honey O’s. They are perfect for Breakfast Sundaes! Save even more on these cereals with this Ibotta offer when you shop at Walmart!

Healthy Breakfast Sundaes are a delicious way to brighten up your day!

Breakfast Sundaes begin with a delicious waffle bowl. Like waffle cones, these are sturdy and will be a great finish to your meal. You can usually find the bowls with the other ice cream cones in the store.

Healthy Breakfast Sundaes are a delicious way to brighten up your day!

The next step is to add yogurt to the waffle bowl. You can use any type of yogurt that you like. We really like using vanilla yogurt in our breakfast sundaes because it reminds me of vanilla ice cream and is a more neutral flavor for toppings. Strawberry is another flavor that works really well with most cereals and toppings.

Healthy Breakfast Sundaes are a delicious way to brighten up your day!

Malt-O-Meal Double Chocolate Brownie Crunch cereal delivers a devilishly delicious dose of chocolatey flavor. Crispy corn puffs made with real cocoa topped off with chocolatey marshmallow pieces will delight you any time of day. You better get the milk!

Healthy Breakfast Sundaes are a delicious way to brighten up your day!

Sprinkle the cereal on the yogurt. My daughter loved arranging the chocolatey marshmallows all around the cereal pieces! For those who like chocolate, this cereal is a dream come true for this breakfast sundae.

Healthy Breakfast Sundaes are a delicious way to brighten up your day!

Last, but not least is to dress up the sundae with toppings! Slice up your favorite fruits; like strawberries, bananas, and blueberries and add them to the yogurt. Additional toppings like sprinkles and mini chocolate chips are a fun way to make your sundae look like a dessert. For less sugary options, you could add ingredients such as dried fruit, sliced almonds or other nuts, and shredded coconut.

Healthy Breakfast Sundaes are a delicious way to brighten up your day!

Malt-O-Meal Cinnamon Dyno-Bites is a sweet, cinnamon-y sensation! These sweet little crispy rice puffs are GLUTEN-FREE and made with REAL cinnamon! So pour yourself a bowl, and have a super sensational, cinnamon-filled day!

Healthy Breakfast Sundaes are a delicious way to brighten up your day!

The addition of Cinnamon Dyno-Bites to the yogurt makes it taste a lot like fried ice cream! So to complete the effect, I added a drizzle of chocolate syrup and placed a strawberry on top. You could also add a dollop of whipped cream with a cherry on top to make it more like the real thing. Either way, it's just like a dessert that you can eat for breakfast!

Healthy Breakfast Sundaes are a delicious way to brighten up your day!

What could be better than Malt-O-Meal Golden Honey O’s for breakfast? Made with corn, oats and rice and packed with honey flavor, Golden Honey O’s cereal is part of an irresistibly delicious breakfast or snack any time of day.

Healthy Breakfast Sundaes are a delicious way to brighten up your day!

Golden Honey O’s cereal combined with strawberry yogurt, sprinkles and strawberries makes for one delicious bowl. The honey from the cereal adds an extra sweetness and the crunch is great texture. This is a breakfast that kids of all ages are sure to love.

Healthy Breakfast Sundaes are a delicious way to brighten up your day!

Breakfast Sundaes
Makes 4 servings

Ingredients:
4 waffle bowls
4 cups yogurt
1/2 cup chopped/sliced fruit
1 cup Malt-O-Meal® cereal
1 tablespoon toppings

Directions:
1. Spoon about 1 cup of yogurt into each waffle bowl.
2. Divide the fruit up evenly among the four bowls and add it to the yogurt. Stir in if desired.
3. Top yogurt with 1/4 cup cereal.
4. Sprinkle on desired toppings (sprinkles, mini chocolate chips, almonds, etc).
Serve immediately. 

Check out Post on Pinterest for more cereal recipe ideas. Don't forget to use this Ibotta offer to save more on your favorite Malt-o-Meal cereals!

What cereal & topping combination would you add to your Breakfast Sundae?

Tuesday, February 20, 2018

Taco Valentine Card Box

Tuesday, February 20, 2018

Taco Valentine Card Box

Read more »
Taco 'bout awesome! Collect your Valentines in this adorable Taco Valentine Card Box!

Taco 'bout awesome! Collect your Valentines in this adorable Taco Valentine Card Box!

When it comes to Valentine's Day, it has become a fun family tradition to come up with creative ideas for my daughter's Valentine card box. The past few years we have made a Puppy Dog Valentine Card Box, a Panda Valentine Card Box, and and the infamous Unicorn Valentine Card Box. This year my daughter and I laughed and laughed when we decided on making the this awesome Taco Valentine Card Box to hold all those sweet notes from classmates from her Valentine's Day party!

Thursday, February 15, 2018

3-Ingredient Monster High Slime

Thursday, February 15, 2018

3-Ingredient Monster High Slime

Read more »
Have some "Fang"-tastic fun with 3-Ingredient Monster High Slime!

Have some "Fang"-tastic fun with 3-Ingredient Monster High Slime!

This 3-Ingredient Monster High Slime is easy enough for anyone to mix up. The best part is that it can keep kids entertained for hours using their imaginations and making up new adventures. For you homeschoolers, this also makes for a great science project!

Have some "Fang"-tastic fun with 3-Ingredient Monster High Slime!

Kids everywhere are obsessed with making slime, and for good reason! It's simple, fun, and a great science experiment. To make this sparkly Monster High-inspired Slime, you'll only need these 3 ingredients:

4 oz Elmer's Glue (Clear or Gel)
4 oz Warm Water (makes a stretchier slime)
½ Tablespoon Baking Soda
1½ Tablespoons Contact Lens Solution (HAS to have boric acid ingredient or it won't work)

You can also make slime using Borax. Check out this tutorial to see how!

*While it looks pretty and is a lot of fun, slime is NOT edible. Because of that, I don't recommend letting small children play with it if there's a chance they will try to eat it. Be sure to also wash your hands and play space well after playing.

Have some "Fang"-tastic fun with 3-Ingredient Monster High Slime!

To add some sparkle and shine to the slime, you'll need some glitter. Packages like this mega pack of Glitter Shakers gives you 12 color options to work with at a price you can definitely afford for projects with kids. 

Have some "Fang"-tastic fun with 3-Ingredient Monster High Slime!

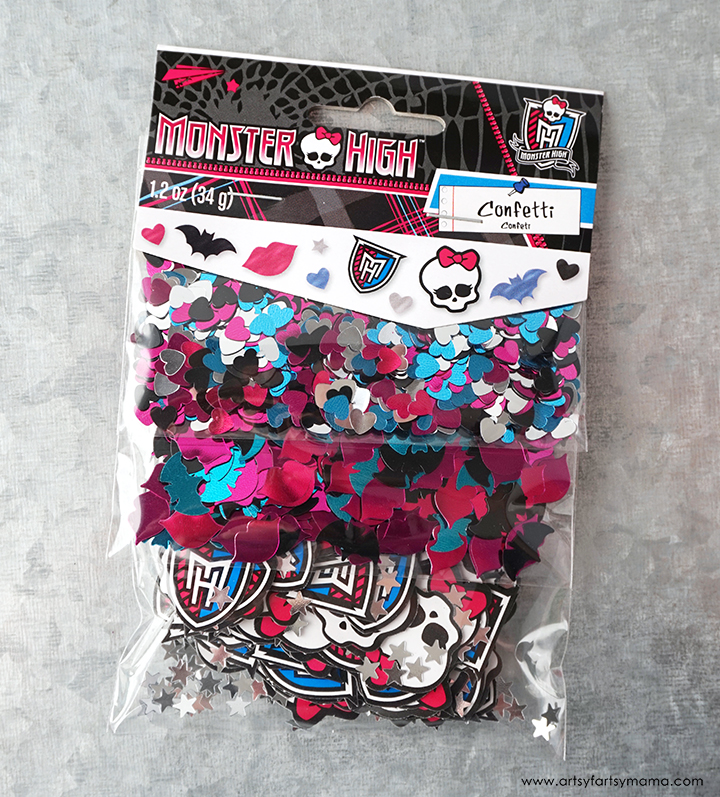
To turn our slime into something that screams Monster High, I found this package of freaky-fab Monster High Confetti! In this pack there are 3 packs of foil confetti in different shapes: hearts, bats, smoochy lips, stars, Skullettes, and Monster High badges in the Monster High signature colors (blue, pink, silver, and black).

Have some "Fang"-tastic fun with 3-Ingredient Monster High Slime!

Start by pouring out the entire bottle glitter glue into a mixing bowl. If you want a stretchier slime, fill the empty glue container with some hot or warm water and put the lid back on. Shake well the bottle well. This will get all of the excess glue out of the bottle and is an easy way to measure the water you need! Pour the water into the mixing bowl and stir until combined.

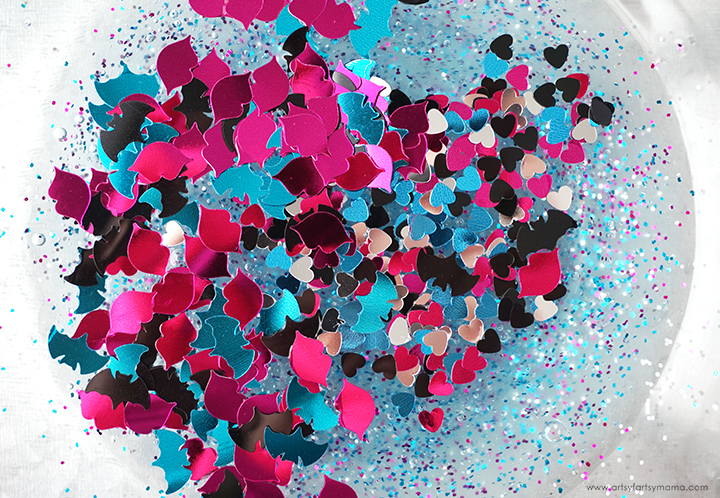
Pour in any colors of glitter you want to use and some of the confetti. I didn't use any of the Skullettes or the Monster High badges because I felt that they were a little too large. Use a spoon to distribute the glitter and confetti.

Have some "Fang"-tastic fun with 3-Ingredient Monster High Slime!

Add the baking soda and mix it in thoroughly. Slowly stir in contact lens solution a Tablespoon at a time. As you stir with a spoon, you'll see that it almost immediately becomes thick and clumps together.

Have some "Fang"-tastic fun with 3-Ingredient Monster High Slime!

Once the slime thickens up, remove it from the bowl and use your hands to mix it all together. Add a little more solution if it's too sticky. Keep squishing the slime with your hands and kneading it like a dough until it's smooth and no longer sticky.

Keep kneading the slime for a minute or two before adding any more solution. If you add too much, the slime will be too stiff and isn't much fun to play with.

Have some "Fang"-tastic fun with 3-Ingredient Monster High Slime!

Stretch it, squish it, and have fun! This glittery slime is moldable, but won't hold it's shape for long. Squish your hands into it and leave a hand print, or create a shape and watch it melt into a blob. Your kids will be entertained for quite a while.

Store the slime in an airtight container or Ziploc bag. It will stay good for quite a while as long as you keep it sealed. I've also heard that keeping it in the fridge will help it stay useable longer (but I've never tried it).

Have some "Fang"-tastic fun with 3-Ingredient Monster High Slime!

My daughter loves playing with her Monster High Minis in the slime. You can press them in, cover them, and play and the slime shouldn't stick to them. It's so much fun!

Have some "Fang"-tastic fun with 3-Ingredient Monster High Slime!

Want to know the science behind slime? Here's our favorite scientist, Frankie Stein to tell you all about it:

Slime is a fang-tastic learning tool that is fun to make, play with, and personalize. It's gooey, yet it doesn't stick to your skin. You can shape it into a solid shape and then it almost immediately melts like a liquid. Why does this happen?

First, let me tell you a secret: while there are multiple slime recipes out there, did you know that they are all made the same way?! All you need to form a basic slime is 2 important ingredients: polyvinyl alcohol (a main ingredient in washable school glue) and borate ion (which is found in borax/sodium tetraborate, or boric acid). Isn't that CLAW-some?!

In case you're wondering, borax and boric acid are slightly different molecules, but both change to borate ion when mixed with with water! That's why you need to dilute Borax detergent in water, or use detergents/solutions that already have water mixed in to make a successful slime.

How it works: when the polyvinyl alcohol (glue) is mixed together with borate ion (contact solution/Borax/etc), the two molecules form long chains. When you have a bunch of those chains, it creates the slime we all know and love!

Experiment: next time you make slime, try using different ratios of polyvinyl alcohol and borate ion. Not enough borate ion creates a looser slime that is more sticky and gooey. Too much borate ion, and you've got a stiff ball of slime that doesn't "melt" as fast or as well!

Have some "Fang"-tastic fun with 3-Ingredient Monster High Slime!

For my daughter's Monster High Birthday Party, we mixed up some of this Monster High Slime and put them into heart-shaped containers to give to her guests as party favors. The kids loved it and it was a fun project for my daughter to do for her friends. With the recipe above, we were able to fill about twelve 2" containers.

Have some "Fang"-tastic fun with 3-Ingredient Monster High Slime!

We have been having so much fun with this Monster High Slime. My daughter has been entertained for hours recreating scenes from Monster High and making up new adventures of her own.

For more Monster High fun, check out this Free Printable Monster High Bingo:

Free Printable Monster High Bingo

I would love to hear if you decide to make some Monster High Slime with your kids!

Do your kids love slime, too?

Tuesday, February 13, 2018

Free Printable Monster High Bingo

Tuesday, February 13, 2018

Free Printable Monster High Bingo

Read more »
Right now my daughter is obsessed with everything Monster High. The characters are just "claw"-some! She's slowly building up her doll collection and has even made a bottle cap necklace to show her Monster High spirit. For those of you who also have a Monster High fanatic at home, here's a Free Printable Monster High Bingo for you to play at a party or just for fun!

Download and print Free Printable Monster High Bingo to play at parties and just for fun!

Monster High Bingo includes all of your favorite characters, including Frankie Stein, Draculaura, Clawdeen, Cleo de Nile, and a whole lot more! The bingo set includes ten bingo cards, so it's easy to print and use for parties. It's fun for every age to play, and the calling cards include the names of the characters in case you don't know who they are.

(Set includes 10 bingo cards and calling cards in a single PDF file)

Download and print Free Printable Monster High Bingo to play at parties and just for fun!

The blank set works a little differently. You get one bingo card with empty spaces (except for the "free" spot). Then print and cut out the bingo pieces so you can assemble the bingo cards yourself. Just glue the pieces in place and you're ready to play!

This is a great option for little hands that want to be creative, or if you have a larger group of people and don't want multiple cards that are the same. The blank bingo set includes all the same characters as the full set, but you can create your own bingo card setup.

(Set includes one blank bingo card, bingo pieces, and calling cards in a single PDF file)

Game Instructions
1. Pick some kind of object to mark your squares (candy, glass gems, buttons, etc)
2. Give each player a bingo card and markers (or put your own card together with the blank set).
3. Have each player put a marker over the free space.
4. Have one person choose a calling card and say it out loud. Each player will cover that item on their card with a marker.
5. Once a player has 5 squares covered in a row (horizontally, vertically, or diagonally), call out "BINGO!" and win the game!

Some things you should know before downloading:
*Artsy-Fartsy Mama printables are for PERSONAL USE ONLY.
*You may NOT modify, re-sell, redistribute, or claim the design as your own.
*Please do not remove the credits/watermarks.
*If you'd like to share this printable, credit must be given to Artsy-Fartsy Mama & linked back to this post.

To lengthen the life of the prints, I would recommend printing the bingo cards and calling cards on cardstock. All sets are 8.5x11 inches and combined in a single PDF format.

Who's your favorite Monster High character?

Friday, February 9, 2018

Monster High Bottle Cap Necklace

Friday, February 9, 2018

Monster High Bottle Cap Necklace

Read more »
"Ghouls" everywhere will have fun making their own Monster High Bottle Cap Necklace!

Thanks to Fizzy Pops for making this post possible. As always all opinions are my own.
This post contains affiliate links.

"Ghouls" everywhere will have fun making their own Monster High Bottle Cap Necklace!

Have a Monster High fan in your life? These Monster High Bottle Cap Necklaces are GORE-geous and surprisingly simple to make. My daughter can't wait to show off these latest jewelry creations and I'm excited to share how you can create some Monster High jewelry for yourself!

"Ghouls" everywhere will have fun making their own Monster High Bottle Cap Necklace!

To make a creepy-cool Monster High Bottle Cap Necklace, you'll need:
Elastic Cord
Beads - we used solid and striped gumball beads, flower beads, faceted beads, and silver spacer beads
Binder Clips
Bottle Cap Pendants
Epoxy Stickers
Free Printable Monster High Bottle Cap Images
1" Circle Punch
Super Glue

"Ghouls" everywhere will have fun making their own Monster High Bottle Cap Necklace!

Cut two pieces of elastic cord about 9" long and tie the ends together on one side. Doubling the elastic cord will make the necklace stronger, and tying them together will keep them from slipping apart. Place a binder clip over the knot.

"Ghouls" everywhere will have fun making their own Monster High Bottle Cap Necklace!

Thread the beads on in any pattern you'd like. As you string the beads, make sure to place the bottle cap pendant in the center.

"Ghouls" everywhere will have fun making their own Monster High Bottle Cap Necklace!

Carefully remove the binder clip and tie the ends of the elastic cord together. Tie in multiple knots. Hold the elastic on both sides of the knot and pull tight. Add a drop of super glue over the knot and keep holding until the glue dries (doesn't take too long). This will help prevent the knot from coming undone and the beads falling all over the floor around you! (...ask me how I know)

"Ghouls" everywhere will have fun making their own Monster High Bottle Cap Necklace!

Add some super glue or clear, strong craft glue (E6000 and Beacon are my faves) to the center of the bottle cap pendant. You don't need very much.

"Ghouls" everywhere will have fun making their own Monster High Bottle Cap Necklace!

Print out the 5"x7" Free Printable Monster High Bottle Cap Images on photo paper. Choose which image you want to use and cut it out with a 1" circle punch. My daughter's first choice was a hot pink Frankie-inspired heart!

"Ghouls" everywhere will have fun making their own Monster High Bottle Cap Necklace!

Carefully place an epoxy sticker over the design. Be careful not to touch the back of the epoxy sticker or touch the image too much. You'll be able to see your fingerprint on the finished product!

Use a popsicle stick or something with an edge to rub the back of the image to help get the air bubbles out. Press the epoxy image into the bottle cap. Let it dry for a few hours.

"Ghouls" everywhere will have fun making their own Monster High Bottle Cap Necklace!

Trim the tied ends of the elastic cord about 1/2" away from the knot. Now you can put the necklace on to show off your inner Monster High fashionista!

"Ghouls" everywhere will have fun making their own Monster High Bottle Cap Necklace!

This is another necklace my daughter made using the Monster High Skullette image. She wears it all the time and is so proud of putting the entire thing together herself. We have always enjoyed making chunky bead bottle cap necklaces, and are looking forward to showing you how we made more at her Monster High Birthday Party!

Who is your favorite Monster High character?

Wednesday, February 7, 2018

Free Printable Superhero Ring Valentines

Wednesday, February 7, 2018

Free Printable Superhero Ring Valentines

Read more »

Calling all superheroes! Save the day with these Free Printable Superhero Ring Valentines!


Calling all superheroes! Save the day with these Free Printable Superhero Valentines!

My family is all about superheroes, especially my husband. He's even got a superhero-themed classroom! He wanted some Valentines to share with his students, so we teamed up with Oriental Trading to put together something FANTASTIC! Kids will love giving and receiving these Free Printable Superhero Valentines.
Tuesday, February 6, 2018

Teach Kids About Money with Board Games

Tuesday, February 6, 2018

Teach Kids About Money with Board Games

Read more »
Teach kids about money by playing board games and download a Free Printable Savings Worksheet!

This post is sponsored by Hasbro and contains affiliate links. As always, all opinions are my own.

Teach kids about money by playing board games and download a Free Printable Savings Worksheet!

Teaching kids about finances might not sound like the most exciting subject, but it's an important one that kids need to learn about. One thing my dad taught me from a young age was to only purchase what you can afford. Time and time again, I've witnessed how important this advice is and it has saved me a ton of times from getting over my head in debt.

My daughter is getting older and is starting to learn the value of money. By doing chores and other helpful actions, she is earning an allowance and has earned enough to open her own savings account. To reinforce these teachable moments, we've started to incorporate board games that involve money to help her better understand how money works in the real world.

Teach kids about money by playing board games and download a Free Printable Savings Worksheet!

Monopoly is a board game that most of us grew up playing. It's a competitive game of buying and selling properties, building houses or hotels, and collecting rent. Monopoly is a great game to help kids learn how to count money and make decisions. It's also a fun way to introduce to the concept of investments and long-term payoffs - especially since the game can potentially last for hours!

Teach kids about money by playing board games and download a Free Printable Savings Worksheet!

This version of the Monopoly game welcomes the Rubber Ducky, Tyrannosaurus Rex, and Penguin into its family of tokens (replacing the classic boot, thimble and wheelbarrow tokens). You can also choose from the Scottish Terrier, Cat, Top Hat, Racecar, and Battleship!

Teach kids about money by playing board games and download a Free Printable Savings Worksheet!

Along with making money, Monopoly also has expenses such as rent on properties and utilities that have to be paid throughout the game. This is a great way to start a discussion with your child about your household budget and how we might take things for granted. Your utility bills may be considered small when compared to other costs, but they still cost money. You may even be able to encourage changes simple habits, like remembering to turn the lights off when they leave a room!

Teach kids about money by playing board games and download a Free Printable Savings Worksheet!

In the beginning of the game, everyone starts with the same amount of money. Remind your child throughout the game that they should only purchase what they can afford. For example, it is perfectly fine to choose not to buy the property they have just landed on if it is too expensive or if it would make them risk bankruptcy. Talk about how sometimes quality is better than quantity when it comes to Monopoly properties.

While you're managing financial and investment choices, the game throws in a twist with the use of Community Chest and Chance cards. This is a good life lesson in that things can change quickly and always be prepared for the unexpected.

Teach kids about money by playing board games and download a Free Printable Savings Worksheet!

Every round of Monopoly is full of excitement in the highs as well as frustration when properties are lost or you find yourself at risk of going bankrupt. While the game is helpful in teaching finances and math skills, Monopoly is also hours of fun and is a great way to spend quality time together.

Teach kids about money by playing board games and download a Free Printable Savings Worksheet!

In Pay Day, kids learn to have a job and Pay Day comes at the end of the month. To make it there without going broke, players will have to manage their money wisely. Earn cash, find bargains, sell items for a profit, and be the player with the most cash in the end to win the game!

Teach kids about money by playing board games and download a Free Printable Savings Worksheet!

While making money is the name of the game, you'll also run into unexpected expenses. The board is set up like 31 day calendar. As you move through the month, players may encounter bills for outstanding loans, emergencies, and sudden cash windfalls. With all of this, you might need some extra cash and need to take out a loan, which has to be paid back. This opens the discussion to talk to your children about the importance of setting money aside for the "unexpected" before spending it all on the "fun" items.

Free Printable Savings Worksheet for kids

After playing the games and talking about money, kids can print out this Free Printable Savings Worksheet to make their own savings plan to buy something they want. At the top, write in the savings goal - what do you want, and how much does it cost? Then, figure out a few ways that you can raise that money. Yard work? Chores? Once you start saving money, keep track of it all in the form until you reach your goal!


Some things you should know before downloading:
*Artsy-Fartsy Mama printables are for PERSONAL USE ONLY (home, school, libraries, etc).
*You may NOT modify, re-sell, redistribute, or claim the design as your own.
*Please do not remove the credits/watermarks.
*If you'd like to share this project, you may use ONE photo and credit must be given to Artsy-Fartsy Mama and linked back to this post.

What's your favorite board game to teach money management?