
This handmade Resin Jar with Flower Lid is great for storing jewelry, candy, and other small keepsakes!

Resin jars and trinket boxes are a gorgeous piece of decor that's also a great way to keep your favorite jewelry items, candies, and small keepsakes in one place. This Resin Jar with Flower Lid is one of my latest creations, and I love how it turned out. It's convenient to keep on a desk or nightstand, and would also make a beautiful gift since it can easily be customized with different colors and glitter mixes. No matter what level your resin skills are at, you can definitely create this jar set with confidence. I love how this sparkling, heart-shaped rose trinket box turned out, and I hope you feel inspired to give it a try!
New to resin? Be sure to check out Resin 101: Getting Started with Resin!

To make your own Resin Jar with Flower Lid, you will need these supplies:
SAFETY FIRST: Before getting started, wear disposable gloves, protect your workspace, and be sure to work in a well-ventilated area!

Prepare 10 oz of resin according to package directions. Pour in equal parts of resin and hardener to a large mixing cup. Slowly stir the resin together with a stir stick for two minutes or until combined. If the resin looks cloudy or has any streaks running through it, you need to keep stirring it until it becomes clear.
Split the resin into three mixing cups:
- Cup 1: 1oz Keep this resin as-is - clear, no mix-ins.
- Cup 2: 3oz Add a generous amount of glitter. For best results, I recommend using a mix of both fine and chunky glitter. Stir well until fully combined. Add more, if necessary.
- Cup 3: 6oz Add a couple of drops of blue resin pigment. A little bit goes a long way! Stir the resin until the dye is fully combined. Add more a little at a time until you get the color you want.

Pour a little bit of the glitter resin into the lid mold. You don't need a lot, just enough to cover the bottom and sides. Spread the resin out to the edges using the stir stick.

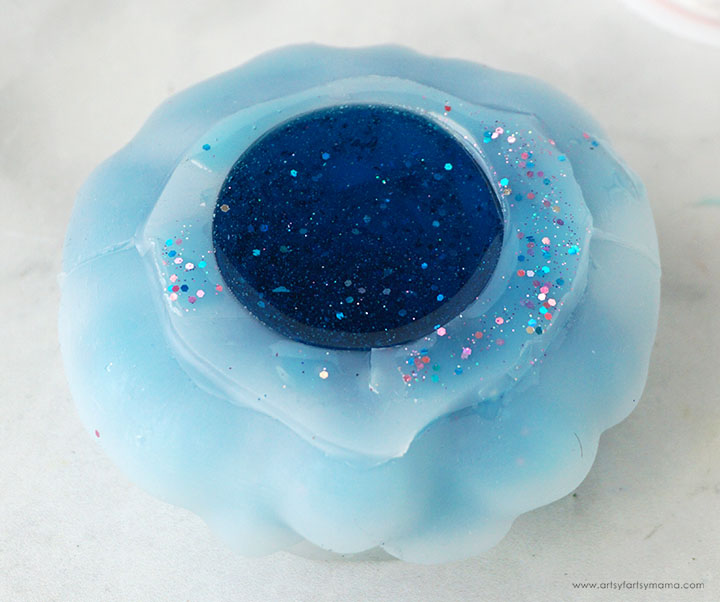
Next, fill the lid mold up to the top with blue resin. Give the resin a minute or two, and then spritz the resin with alcohol to remove any surface bubbles.

Pour the rest of the glitter resin into the jar mold, over the center section of the mold. The resin will run down the sides on its own, so you don't need to do anything except pour the resin.

Next, pour the clear resin in the center of the mold, over the top of the glitter resin. Give the resin a minute or two, and then spritz the resin with alcohol to remove any surface bubbles.

Lastly, pour dyed resin over the center of the mold until it is filled to the top.
Allow the air bubbles to rise to the top and spritz the resin with alcohol to remove any surface bubbles. You may need to spritz it a few times over the next 30 minutes or so.
Scrape any residual glitter resin into the flower mold and spread it around a bit with the stir stick so that it's not all in one spot. Pour the remaining dyed resin about ¾ full, and work out any air bubbles that are trapped in the ends of the petals. Fill the mold up the rest of the way.
Some air bubbles take more time to rise to the surface, so come back every 10 minutes or so for the next hour to check each of the molds to spritz with alcohol to remove bubbles. Leave the molds to cure in an undisturbed, well-ventilated area for at least 24 hours.

Now for my favorite step in the process: demolding! You will know that the resin is cured when it is no longer tacky to the touch and easily pulls away from the edges of the molds. Carefully remove the cured base and lid from the molds. Trim away any excess resin with scissors or a craft knife. Sand down rough corners or edges, if necessary, and bring back the shine with clear spray sealant.

Place the lid on top of the jar to make sure it fits. The resin can still be pliable after demolding, which can warp the jar a little. If the lid was over-filled, you may have some fitting issues.
For an over-filling problem, gently sand down any problem areas until you have a good fit. For pliable resin, fit the pieces together, and then gently take them apart to finish curing. If the jar finishes curing while the lid is still on, the pieces will stick together - possibly permanently.

Add some strong adhesive to the bottom of the flower and center it on the top of the lid. Press it into place and allow it to set completely. For a stronger hold, you can attach the two pieces with resin, though it will take about 24 hours to set.

Now the jar can be filled with any of your favorite trinkets; like jewelry, small keepsakes, treats, or even small office supplies! Trinket boxes and jars are a lot of fun to make, and can be customized to fit any style or personality with a simple change of colors and additions to the resin. Because of this, these jars make fantastic gifts!!

Don't forget to Pin, Like, and Share!


