Thanks to Therm O Web for sponsoring this post. As always, all of the opinions and text are my own. This post also contains affiliate links.
Bring Sally from The Nightmare Before Christmas to life this Halloween with this DIY Sally Costume Tutorial!
The Nightmare Before Christmas is one of our all-time favorite movies. We watch it all year long, but especially around Halloween
and Christmas. I really enjoy making my daughter's
Halloween costumes, and this year she is thrilled to go trick-or-treating as Sally from
The Nightmare Before Christmas!
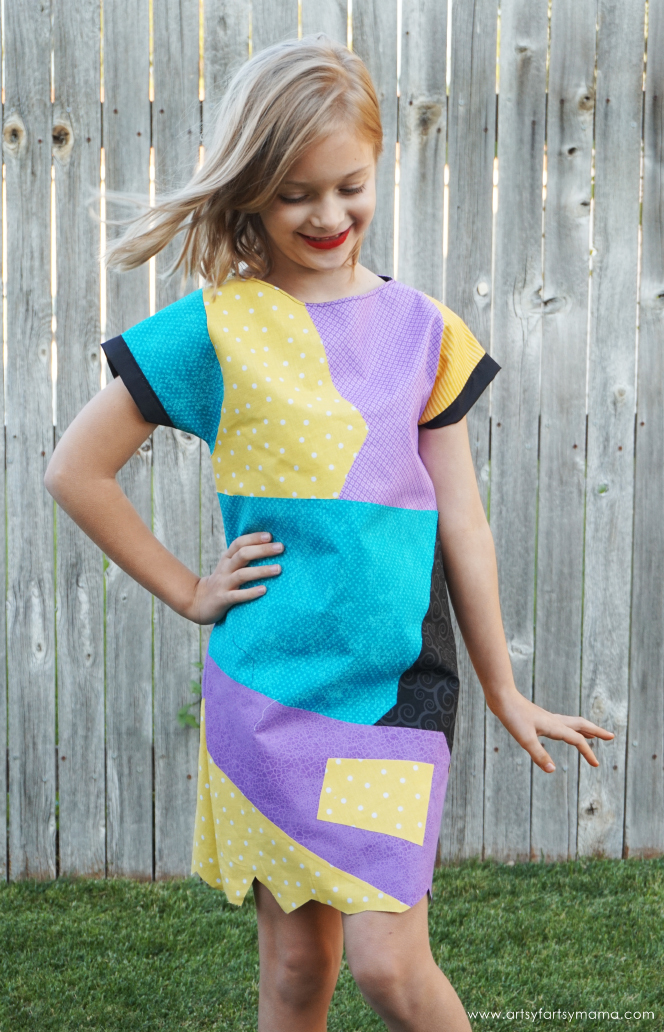
For Sally's dress, I used an easy-to-follow and FREE pattern from
Scattered Thoughts of a Crafty Mom. It's a simple A-line pullover dress that fits sizes 4-10. You can use any basic dress pattern you want, but I think this pattern worked fantastically! The pattern is designed to be sewn with a knit fabric, so I would recommend sizing up for this costume since you won't be using knits.
I started by cutting out the dress pattern pieces in my daughter's size out of a plain black cotton fabric. Print out an image of Sally to use as a reference to choose the other fabrics you will need for the dress. Besides the plain black fabric for the base of the dress, I chose 6 other cotton fabrics: mustard yellow with stripes, yellow polka dot, teal, purple checked-ish, purple textured, and a black fabric with The Nightmare Before Christmas-looking swirls.
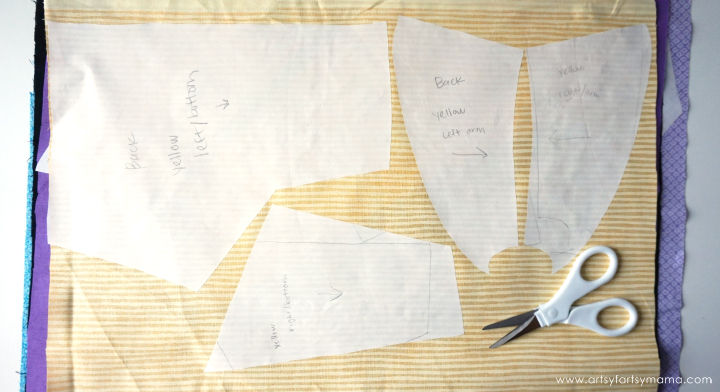
Sally's dress is pieced together, so you'll need to create a pattern for each color of fabric. Lay the front dress piece down (you can tell the difference from the front/back by the necklines). To create the dress pattern pieces, I used some copy paper to draw the shapes for each piece and marked what color and where the pattern piece belongs.
Cut the pattern piece out and lay it on the dress. Draw the next pattern piece that borders the previous one (i.e. draw left sleeve, then left chest, etc). Draw and cut out all of the pieces for the front and back of the dress to resemble Sally. The shapes don't have to be perfect by any means, but I would do your best to make sure the pieces fit together well (see image above).
Once all of the pattern pieces have been created, you'll need some iron-on adhesive. For my cotton fabrics, I used
HeatnBond Lite. It's sewable and creates a strong bond to hold those fabrics together. The
HeatnBond Soft Stretch Lite is also sewable and strong, but is made for fabrics with stretch! Use whichever one works best for your project.
Unroll the
HeatnBond so that it is paper-side up. Use a pencil to trace your pattern pieces to best fit on the paper. Be sure to mark the fabric color, placement, and front/back on each piece!! Cut the pieces out and organize the pieces by fabric color.
Place the
HeatnBond glue-side down on the fabric marked on the pattern. Grab your iron and press it down for a few seconds. This will heat up the glue on the
HeatnBond and adhere the pattern pieces to the fabric. Let the fabric cool completely.
Tip: Be sure that when you use a fabric where direction matters (like stripes), mark the pattern pieces which direction the pattern needs to be placed!
Cut out all of the pattern pieces. Peel the paper backing off of the fabric to reveal the adhesive.
Lay out the pattern pieces on top of the base dress pieces to make sure they fit well before ironing. Be sure to check the neckline for the front and back!!
Lay down the base dress and iron to remove any wrinkles. To make sure that everything went where it was supposed to, I started ironing with the left sleeve and worked to the right, then left to right until I got to the bottom. If any of the fabric peels up, press the iron down for another couple of seconds. Repeat for the back of the dress.
Follow the
tutorial for sewing the dress together. Because the
HeatnBond holds on strong, you don't need to sew the pieces down at all! I also skipped hemming the bottom of the dress and made it a bit raggedy to resemble Sally.
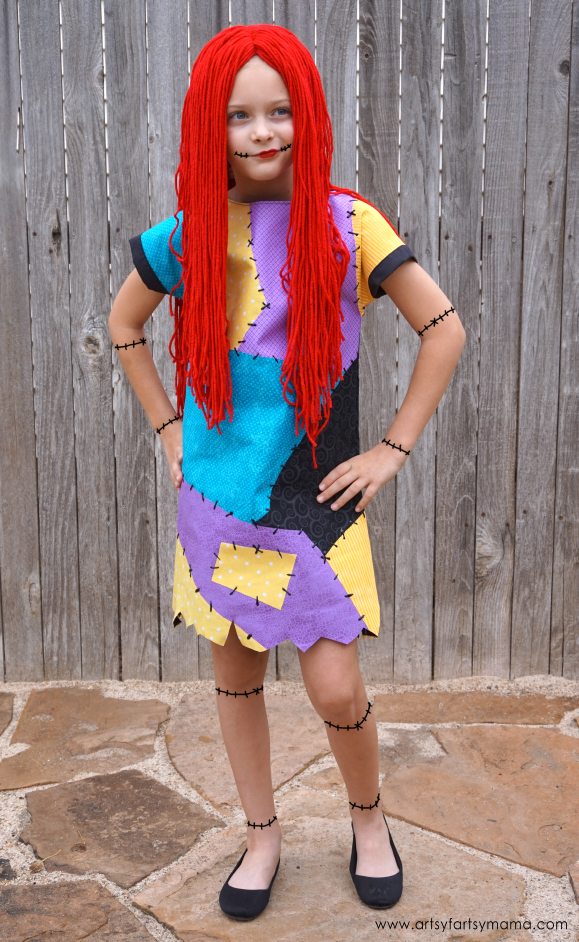
To give the appearance of stitches without doing all the work, I used some black Tulip Slick Dimensional Fabric Paint! Start on one side of the dress and add random dashes and x's along all of the "seams". Carefully hang it up to dry somewhere it won't be disturbed for at least 4 hours. Then lay the dress down and add stitches to the other side of the dress. Let it dry completely.
Now that the dress is complete (whew!), we need to create Sally's iconic long, red hair!
Wigs can be tough, so I recommend the great tips from this
4 yarn wigs tutorial. For our Sally wig, I found a red beanie at Walmart for less than $2, and grabbed a skein of red yarn. This skein ended up being the perfect amount, but I would get two just in case you need a little more.
Use a marker to make a line down the center of the beanie from around the middle to the front of the hat. This is where the part in the hair is going to be. I also marked a semi-circle around the hat horizontally where I would add another layer for some thickness to the wig.

I measured how long we needed the hair to be (about 24"). Luckily, I had a blank metal sign that was just long enough. You could also cut a piece of cardboard to 24" that would also work great. Wrap the entire skein of yarn around the board. Cut one end of the yarn so that you have a bunch of long strands of "hair".
I took about 10 strands of yarn and folded them in half. I used a piece of washi tape (because it's less sticky than regular tape) to hold the strands together. Using red thread, I sewed the strands to one end of the semi-circle guideline using a straight stitch near the folded ends of the yarn. You only need to backstitch at the beginning of the guideline and at the end. Gather another 10 strands and butt them up against the end of the strands you just sewed. Repeat until you get to the other end of the semi-circle.
Next, take another 10 strands and hold them tightly together at the center, but don't fold them! Place the center of the yarn on the guideline to start the center hair part. Sew the strands down with a straight stitch at the back end of the marker line. Grab another 10 strands and butt them as close as you can to the end of the strands you just sewed. Repeat until you get to the front of the hat. You only need to backstitch at the beginning of the line and at the end.
Place the hat on your child's head and finger-comb the hair to lay straight. Put on some black shoes, add a little red lipstick and draw some stitches on face/arms/legs using black make-up or washable markers to complete the look. This was such a fun costume to make, and my daughter can't wait for the Halloween parties to begin!
What are you/your kids going to be for Halloween this year?