Learn all about the HTVRONT Auto Heat Press 2 and how to create 4 bookish projects, including custom shirts, hoodies, pouches, and bookmarks!

If you’ve been on the fence about upgrading your heat press or are curious about how an auto press works, you’re in the right place! The HTVRONT Auto Heat Press 2

I love that the HTVRONT Auto Heat Press 2 comes completely assembled and ready to go right out of the box! In addition to the machine, you’ll find a Teflon sheet to protect your projects and a card with three super helpful QR codes to access the user and troubleshooting guide, download the HTVRONT Bluetooth app, and to join their active Discord community of crafters.
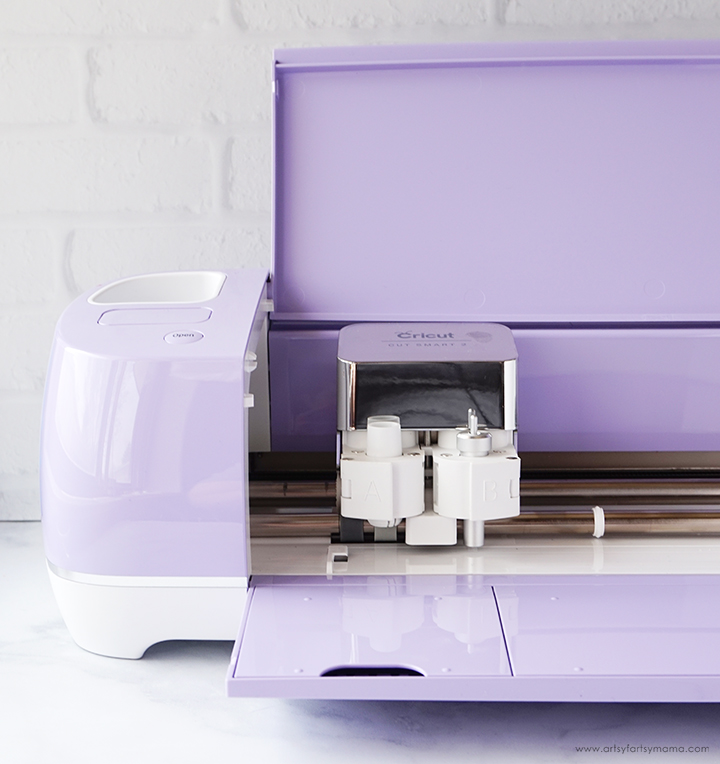
I also love that the Auto Heat Press 2 color matches my Cricut Explore Air 2 machine!

The press comes with a heat-resistant mat secured to the bottom plate with elastic cords on both sides so you don't have to worry about it shifting around. The 15x15-inch pull-out drawer makes loading and unloading your projects super easy and safe, and the larger clearance area makes it so you can press items as thick as 4.5cm (think hoodies, blankets, and so much more!).
If you ever forget to power down the machine, it automatically turns off after 15 minutes!

The digital display is located right on top of the machine, and I really like that it’s large, easy to read, and that it tilts to adjust the screen angle! All of the buttons are clearly labeled and simple to navigate, making customizing your settings super quick and convenient.

Each button has a simple icon to help make it easy to adjust your temperature, time, and pressure settings! Working from left to right, here’s a quick overview of what each button does:
- Power: Turns the heat press on and off
- Time: Use the + and – buttons to adjust the pressing time
- Temperature: Use the + and – buttons to raise or lower the heat settings
- Mode: Toggles through the 4 preset modes (which you can customize using the Custom button)
A total time-saver when you frequently craft the same items and don't want to re-enter the settings every single time. - Pressure: Use the + and – buttons to raise or lower the 7 pressure levels
- Custom: Pairs with the Mode button so you can save and customize your favorite settings
- Auto: Switches the press to Auto mode, allowing it to automatically start or stop the press cycle
This is especially helpful if you're pressing a large batch of projects with the same time and heat settings! - "R" Start Button: Manually starts or stops the press cycle
"Buy Me Books and Tell Me I'm Pretty" DTF Shirt

Crafting with DTF (Direct-to-Film) transfers is surprisingly quick and easy! If you're new to DTF, it works by printing full-color designs onto a special transfer film coated with a heat-activated powder adhesive. When heat pressed, the design fuses directly onto the fabric with zero weeding or layering required!
Some heat presses can be a bit finicky with DTF prints, so I really wanted to test it out on the Auto Heat Press 2! I don't own a DTF printer myself, but it’s so easy to order custom prints online or from local small businesses.
Here’s everything you’ll need to make your own "Buy Me Books and Tell Me I'm Pretty" shirt using the HTVRONT Auto Heat Press 2.
Supplies:
- Blank T-Shirt
- "Buy Me Books and Tell Me I'm Pretty" SVG Cut File
- DTF Print
- Shirt Ruler Guide
- Heat Resistant Tape
- Teflon Sheet
- HTVRONT Auto Heat Press 2 (use code Lindsay10 for $52 OFF)

Set the heat press to 310°F–320°F (150°C–160°C) with medium to heavy pressure (130–170 lbs). For the pre-press, set the timer to 3-5 seconds.
Find the center of your DTF transfer by gently folding it in half and creasing only the top and bottom of the carrier sheet.
Pull out the press drawer and lay the shirt flat on the heat mat. Push the drawer all the way in and push the R button to pre-press the shirt for 3–5 seconds to eliminate wrinkles and moisture.
Pull the drawer back out. Use a shirt ruler guide to find the center, then lay the design face-up and secure it with heat-resistant tape. Finally, slide the drawer in and adjust the timer setting to press again for 15–20 seconds.


I couldn't have asked for a better experience pressing this DTF print onto a basic shirt. It was so straightforward, and the settings worked perfectly for this project. It definitely makes me want to pick up more DTF transfers to see what else I can customize!
"Late Night Readers Club" Flock HTV Hoodie

Here’s everything you’ll need to make your own "Late Night Readers Club" hoodie using the HTVRONT Auto Heat Press 2.
Supplies:
- Hoodie
- "Late Night Readers Club" SVG Cut File
- White Flock HTV
- Cricut Maker or Cricut Explore Air 2 machine
- Shirt Ruler Guide
- Heat Resistant Tape
- Teflon Sheet
- HTVRONT Auto Heat Press 2 (use code Lindsay10 for $52 OFF)
Cut out the "Late Night Readers Club" SVG using a Cricut or other cutting machine. Place the flock HTV shiny side down on your mat and cut using the recommended material settings - don't forget to mirror the image before cutting!
"Weed" the excess vinyl by removing all of the parts that don't belong in the design. I usually peel away the outer edges first (starting at the corner), and then work my way around the design. Then I use weeding tools to help remove the smaller pieces of the design.

Set the heat press to 300°F–315°F (149°C–157°C) with light to medium pressure (50–110 lbs). For the pre-press, set the timer to 10-15 seconds.
Find the center of the vinyl by gently folding it in half and creasing only the top and bottom of the carrier sheet.
Pull out the press drawer and lay the hoodie flat on the heat mat. Push the drawer all the way in and push the R button to pre-press the shirt for 3–5 seconds to eliminate wrinkles and moisture.
Pull the drawer back out. Use a shirt ruler guide to find the center of the hoodie, then lay the design face-up and secure it with heat-resistant tape. Finally, slide the drawer in and adjust the timer setting to press again for 15–20 seconds.

Even with the thicker fabric and bulky sleeves, the hoodie fit on the drawer without any trouble. As long as you smooth everything out nicely, the drawer slides right into place with zero issues!

If you notice any part of the design hasn't fully adhered to the shirt, just lay the carrier sheet back down and give it another short press.

I'm so impressed with how well this hoodie turned out! Even with the extra thickness and flock HTV, the transfer adhered perfectly with clean, professional results. I’m so excited to experiment with more thick fabric projects - like tote bags, aprons, or blankets maybe?


Having put the HTVRONT Auto Heat Press 2 to the test with different fabrics, thicknesses, and press techniques, I can honestly say that it lives up to the hype! It’s reliable, user-friendly, and looks great sitting next to my Cricut. These four bookish crafts were so much fun to create, and this press has definitely reignited my crafting spark!
"Bookaholic" Holographic HTV Pouch
Next up is this adorable "Bookaholic" canvas pouch using holographic HTV! I was really excited for this project because I wanted to test how well the heat press handles items that aren't clothing.
Here’s everything you’ll need to make your own "Bookaholic" pouch using the HTVRONT Auto Heat Press 2.
Supplies:
- Canvas Pouch
- "Bookaholic" SVG Cut File
- Holographic HTV
- Cricut Maker or Cricut Explore Air 2 machine
- Heat Resistant Tape
- Teflon Sheet
- HTVRONT Auto Heat Press 2 (use code Lindsay10 for $52 OFF)
Set the heat press to 300°F–320°F (149°C–160°C) for 15-30 seconds with medium to heavy pressure (170 lbs).
Pull out the press drawer and lay the pouch flat on the heat mat with the zipper end hanging off the edge*. Push the drawer all the way in and push the R button to pre-press the pouch for 10 seconds to eliminate wrinkles and moisture.
*Having the zipper hanging off the edge of the mat keeps your pressing surface completely flat, giving you nice, even pressure across the whole pouch.
Find the center of the vinyl by gently folding it in half and creasing only the top and bottom of the carrier sheet.
Pull the drawer back out. Use a ruler to find the center of the pouch, then lay the design face-up and secure it with heat-resistant tape. Finally, slide the drawer in and adjust the timer setting to press again for 15–30 seconds.
Holographic HTV is a cold peel, so let be sure to let the vinyl cool completely before peeling away the carrier sheet. If you notice that any part of the vinyl hasn't fully adhered to the pouch, just lay the carrier sheet back down and give it another short press.
Canvas pouches are easily one of my favorite quick craft projects because they can be customized for literally any occasion! They make fantastic teacher gifts, birthday favors, or themed organizers for your own craft space. This "Bookaholic" design is so fitting for me, and I’m planning to use this pouch to store my favorite bookmarks so they’re always handy when I start a new read!
Sublimation Bookmarks
Last, but not least, I wanted to see how the HTVRONT Auto Heat Press 2 handles sublimation. I struggle sometimes with wanting to go the sublimation route because of how you have to keep consistent pressure when pressing, and I've messed up so many projects because of this!
Here’s everything you’ll need to make your own sublimation bookmarks using the HTVRONT Auto Heat Press 2.
Supplies:
- Bookmark Sublimation Blanks
- Infusible Ink Transfer Sheets or Printed Sublimation Design
- Heat Resistant Tape
- Heat Resistant Gloves
- Scissors
- HTVRONT Auto Heat Press 2 (use code Lindsay10 for $52 OFF)
*Want to create your own sublimation prints? Check out how I converted a Epson EcoTank into a sublimation printer!
Measure the bookmark blank and cut a piece of Infusible Ink transfer sheet to match its size. Try to avoid touching the printed side too much so oils from your fingers don't leave marks on the design! Next, peel off the protective plastic film from one side of the bookmark and wipe away any dust or lint using a microfiber cloth.
Place the Infusible Ink sheet face-down on top of the bookmark and tape all of the edges down using heat-resistant tape. If you printed your own sublimation design, you can trim and tape it to the blank following these same exact steps!
To press sublimation projects on the HTVRONT Auto Heat Press 2, select the built-in preset (Mode 4) or manually set the press to 390°F (199°C), 40 seconds, and heavy pressure (170 lbs). Just keep in mind that other blanks like fabric or ceramic coasters may require different time, temperature, or pressure settings, so always double-check before pressing!
Next, pull the drawer out and place your unfolded parchment paper onto the heat mat. Position your bookmark blanks on the paper with the Infusible Ink transfer taped face-down on top, then fold the top half of the parchment paper over to sandwich everything together.
Wrapping your project in parchment paper keeps residual ink off your mat and press, so it's definitely a step you don't want to skip!
Once the timer goes off, put on your heat-resistant gloves and carefully remove the bookmarks from the press. Gently peel back the tape and transfer paper to reveal your freshly sublimated design underneath. Be VERY careful - the metal blanks hold heat for a bit!
Let the bookmarks cool completely, then flip them over and repeat the entire process to sublimate the back side!
After letting the bookmarks cool down completely, finish them off by looping a tassel through the hole at the top! If you’ve been hesitant to try sublimation because of uneven pressure or patchy transfers, this press makes the process so much easier. I got vibrant and consistent results on every single bookmark without any guesswork!
Saving this for your next craft session? Don't forget to Pin, Like, and Share!