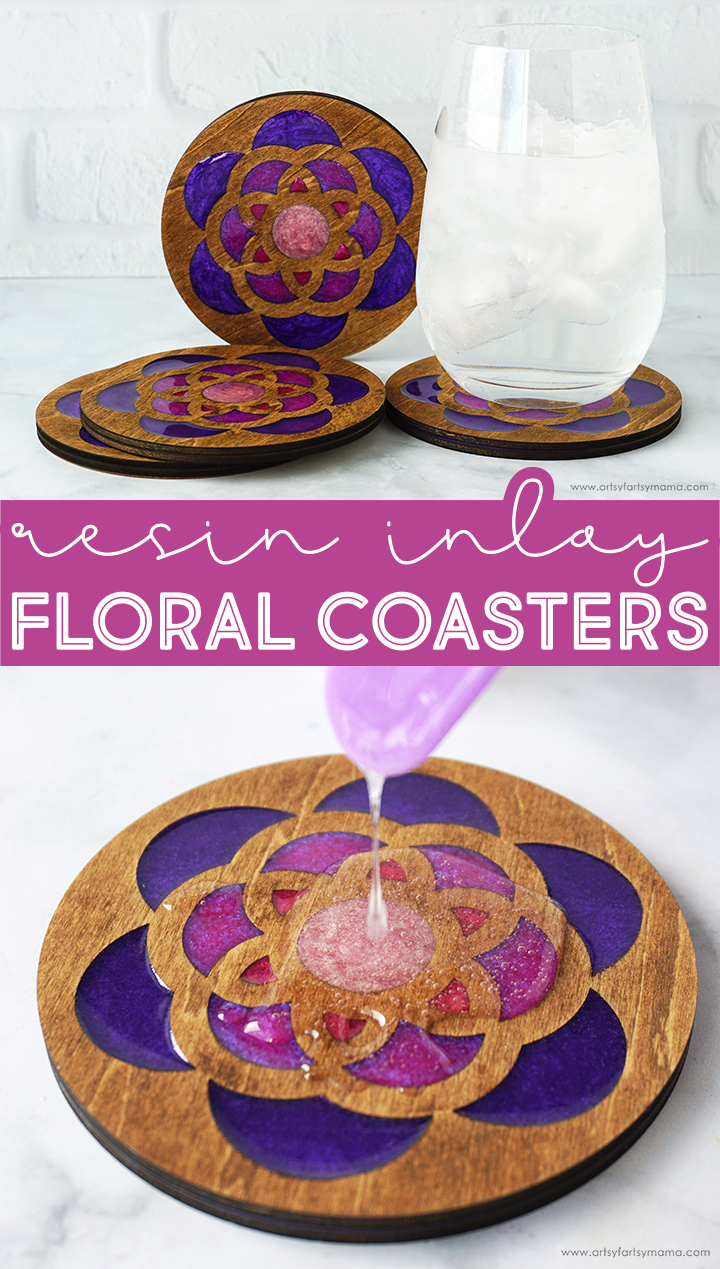
Combine wood cut with the xTool S1 and colorful resin to make a stunning set of Resin Inlay Floral Coasters!

One thing I really enjoy about crafting is how you can combine different techniques and types of crafts to create something new and different. For example, these stunning Resin Inlay Floral Coasters are made using resin crafting and laser cutting! The wood coaster base is cut using my xTool S1 laser cutting machine and the cutout sections are filled with colorful resin. The coasters are absolutely gorgeous, and they are surprisingly simple to make! Even if you are a beginner to laser crafting and working with resin, you can easily complete this project with confidence. I hope this tutorial inspires you to make a set of these floral coasters for your home or to give as a gift.
New to laser cutting? Be sure to check out how to get started with the xTool S1 Laser Machine!
The crafting possibilities are endless when it comes to using the xTool S1 laser cutting machine, and it's actually very easy to use! Once you have one of these, the hardest thing you'll have to do is decide what to make first. If you want to learn more about how this incredible machine works, be sure to check out my complete xTool S1 review.

To make your own set of Resin Inlay Floral Coasters, you will need these supplies:
- xTool M1 or xTool S1 laser cutting machine
- Floral Coaster Laser Cut File (personal use only)
- 3mm Basswood
- Stain or Chalk Paint Wax
- Adhesive
- Amazing Clear Cast Resin
- Mica Powder - Gold Pink, Fuchsia, Orchid, Dark Violet
- Measuring/Mixing Cups
- Stirring Sticks
- Disposable Gloves
*Save 10% on resin supplies when you shop Polytek with code AFM
*Save extra 15% off on xTool selected materials: AFFMTRS15
Printables and cut files from Artsy-Fartsy Mama are for personal use only. You may use these in a personal setting, but you may not sell them. If you'd like to share this printable/cut file digitally, share a link to this post/website only. Do not share a direct link to the printable/cut file.

Upload the Floral Coaster design into xTool Creative Space. When you upload an SVG design, you need to make sure each part of the design is set for cutting, scoring, and engraving. For this project, you only need to cut, so don't even worry about scoring or engraving this time! In the right menu bar, change the material setting to 3mm Basswood.
Duplicate the design to create how ever many coasters you want in your set. I am making four coasters, so make sure there are four floral coasters and four solid coasters.
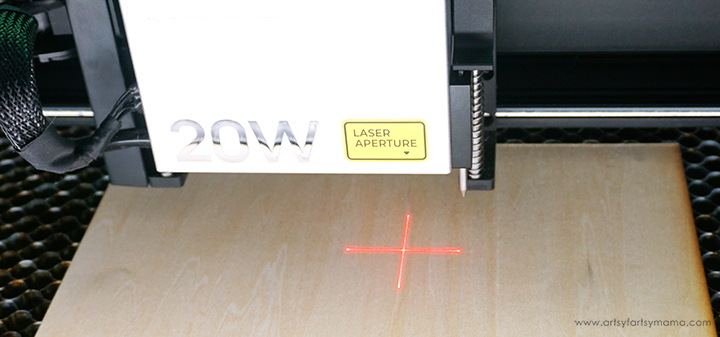
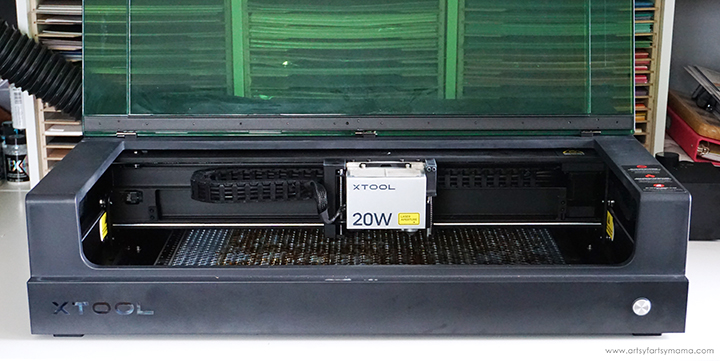
Place a piece of 12"x18" 3mm basswood into the xTool S1 machine. Manually pull the laser box with your hand so that the red "+" is located on the material - it doesn't have to be centered.
In XCS, you will see "Distance (mm)" in the right menu bar. Click on the target icon to the right of that space, and the machine will automatically measure your material.
For more details on how this machine works, be sure to check out my review of the xTool S1 Laser Machine!
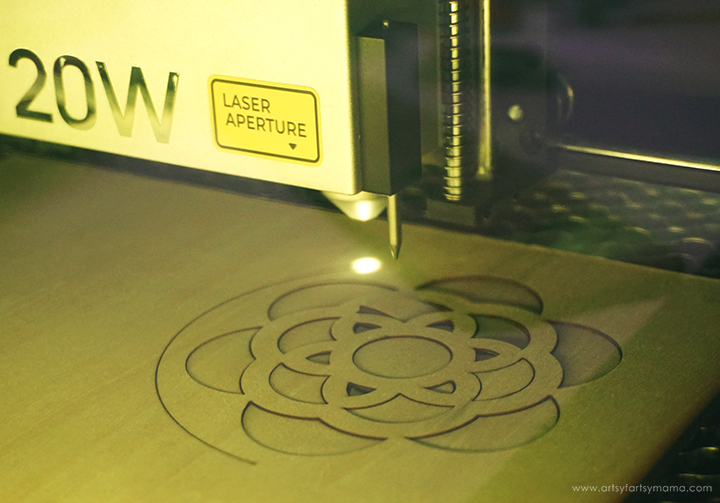
Make sure that the coaster design elements are within the marked bounding box in XCS, and then proceed to cutting out the project. Close the green laser hood, and watch the xTool S1 go to work! The process took about 5 minutes, which is so much quicker than I expected!

Remove the coaster pieces from the machine. Before assembling the project, I would highly recommend cleaning the soot away from around the edges of the wood using a Magic Eraser or baby wipes to prevent making marks all over your hands and workspace.

Now it's time to stain the coasters. Pick out your favorite stain, or use an antique chalk paint wax like I did. If you're using the wax, paint a thick coat over the surface of both coaster pieces (cutout and solid) and let the wax dry. Repeat the process for all of the coaster pieces.

Use a paper towel to buff away the excess wax from the surface of the coasters. You can see the difference of the painted wax and the buffed wax on the cutout coaster on the right. If you want the finish to be darker, you can apply another coat.

Apply a thin layer of strong adhesive or wood glue to the bottom side of the cutout coaster piece. Center the top coaster layer on the base, and hold the pieces together with small clamps or clips. Allow the adhesive to dry completely (refer to package directions). It's okay if a little excess adhesive comes out from under the top layer. Just make sure any adhesive is wiped away from around the outside edges.

Once the adhesive has completely dried, larger clumps of dried adhesive on the coaster can be cut away with a craft knife. Make any touch-ups, if necessary. Now you are ready to move on to the next step: adding resin!
SAFETY FIRST: Before getting started working with resin, wear disposable gloves, protect your workspace, and be sure to work in a well-ventilated area!
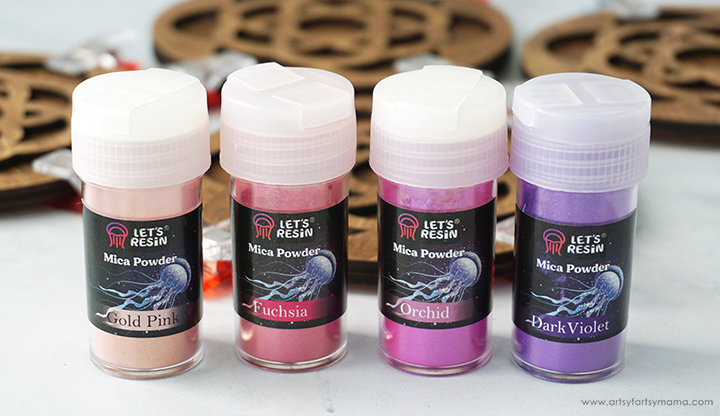
I decided to use shades of pink and purple mica powders to create a kind of ombré effect. You could do this with any shades and colors to create a gorgeous set of coasters.
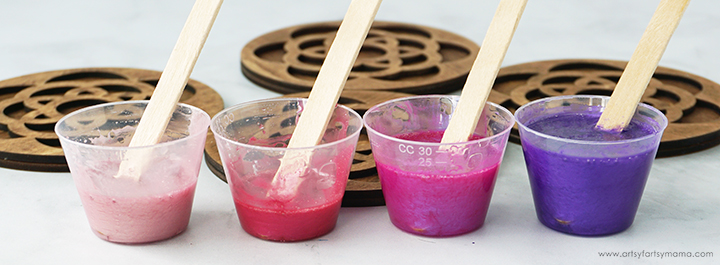
Prepare about 60ml/1oz of Amazing Clear Cast according to package directions. This should be plenty of resin to fill 4 coasters. Pour in equal parts of resin and hardener to a mixing cup. Slowly stir the resin together with a stir stick for two minutes or until combined. If the resin looks cloudy or has any streaks running through it, you need to keep stirring it until it becomes clear.
Split the resin into four mixing cups, but with different measurements (these don't have to be exact, just close): 10ml, 5ml, 15ml, 20ml. Add a little bit of mica powder to each of the resin cups and stir together until evenly incorporated:
Split the resin into four mixing cups, but with different measurements (these don't have to be exact, just close): 10ml, 5ml, 15ml, 20ml. Add a little bit of mica powder to each of the resin cups and stir together until evenly incorporated:
- 10ml: Gold Pink
- 5ml: Fuchsia
- 20ml: Orchid
- 25ml: Dark Purple

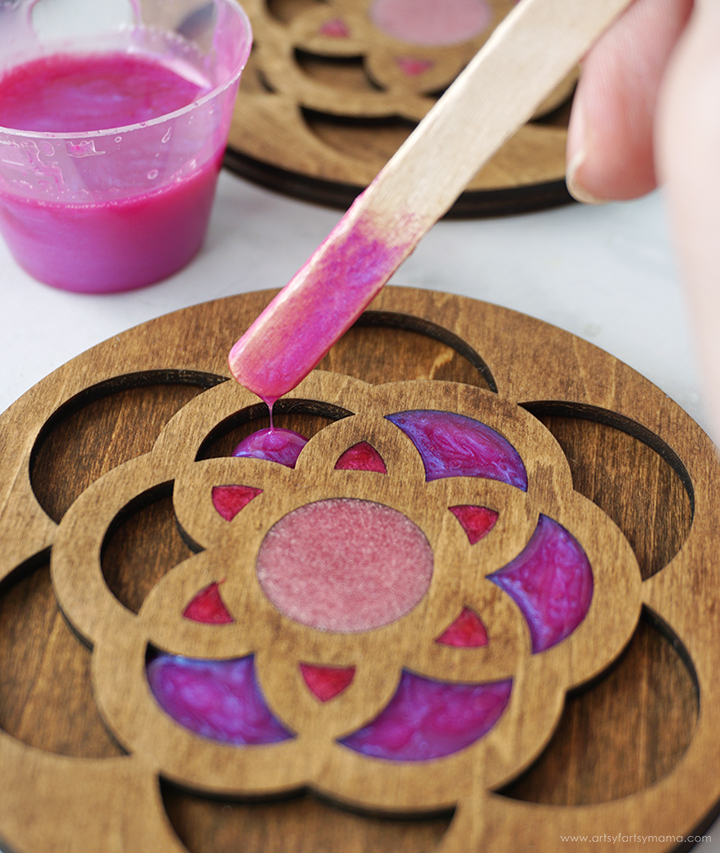
Use your stir stick to add the light pink resin to center circle in the coaster. Since the spaces are so small, my best advice is to work slowly and to add small drops at a time. You could use a toothpick instead if that makes you more comfortable. Fill the circle opening to the top, but make sure that you DO NOT overfill it!
If you notice any resin seeping underneath the top layer and into neighboring spaces, don't panic. Let it "ooze" while you finish pouring, and fill the other coasters in the set. Once the circle spaces are all filled, dip the end of a cotton swab into some alcohol and gently wipe away any excess resin that leaked into any other openings.

Next, use the stir stick, or preferably a toothpick, to fill the small triangle shapes with the fuchsia resin. Again, fill each space to the top, but do not overfill. If you see any seepage between layers, clean it up when you can.
Fill the next set of openings with the orchid resin. Use the stir stick, and work slowly so that you don't accidentally drip into any of the other filled spaces. If you do, you can gently scoop out the resin with a clean stir stick and then add some of the other color of resin to refill the area.
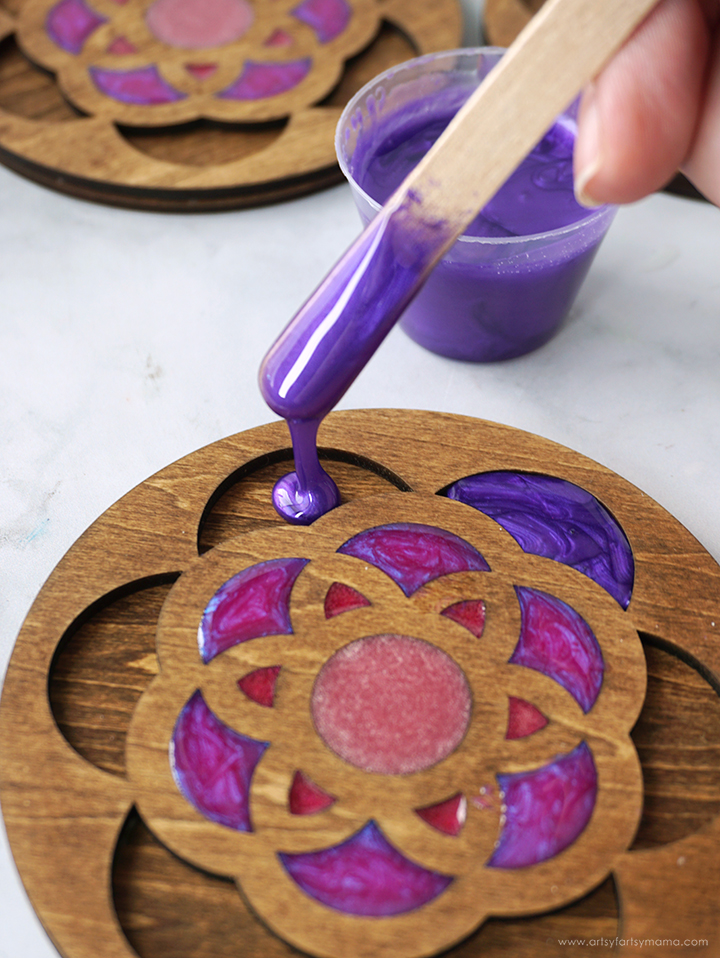
Lastly, fill the outer openings of the coaster with the dark purple resin. Take your time, and fill the openings all the way to the top.
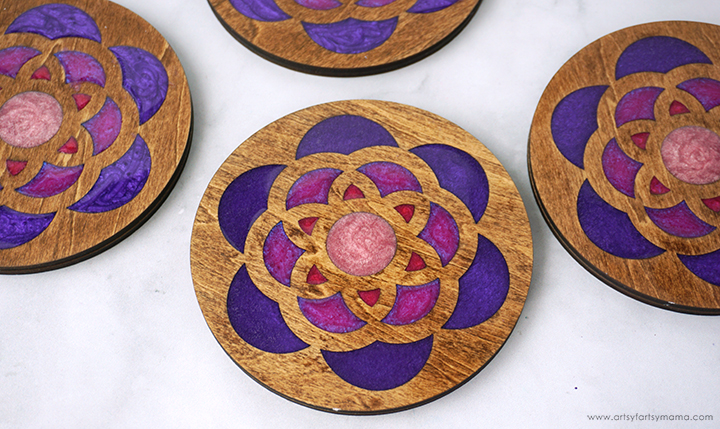
Let the resin rest for 10-15 minutes, and then pop any bubbles that rise to the top by spritzing with alcohol. Do NOT use a heat gun - especially since the coaster is made of wood. You don't want anything burning by accident! Leave the resin to cure in an undisturbed, well ventilated area for at least 4 hours.
To protect the surface of the coasters, you need to add a layer of clear resin on top. This layer also gives the coasters glossy finish that makes the colors really pop.
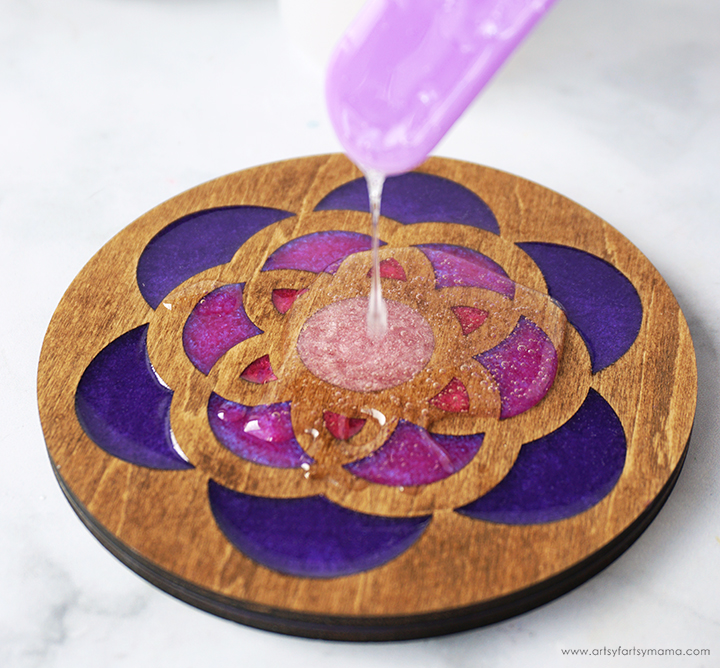
Prepare 20ml of Amazing Clear Cast resin according to package directions. Pour in equal parts of resin and hardener to the mixing cup. Slowly stir the resin together with a stir stick for two minutes. If the resin looks cloudy or has any streaks running through it, you need to keep stirring it until it becomes clear. Do not add any pigments.
Use the stir stick to gently bring the resin near the edges of the coaster. To prevent the resin from spilling over the sides, you need to carefully bring the resin to *just* the edge. If you see any drips going down the side, wipe it away immediately.
If you tilt your head or angle yourself to see the light reflecting in the resin, you will be able to see any "bald spots" or areas that aren't covered in the resin top coat yet. Use the stir stick to fill in the areas.
Add enough resin to the coaster so that the entire top is covered, but do NOT overfill. Let the resin sit for a few minutes, then spritz the surface with 91% alcohol to remove any air bubbles that rise to the top.
Repeat this process for the rest of the coaster set. Leave the resin to cure in an undisturbed, well ventilated area for 12-24 hours (depending on humidity, it could be longer).
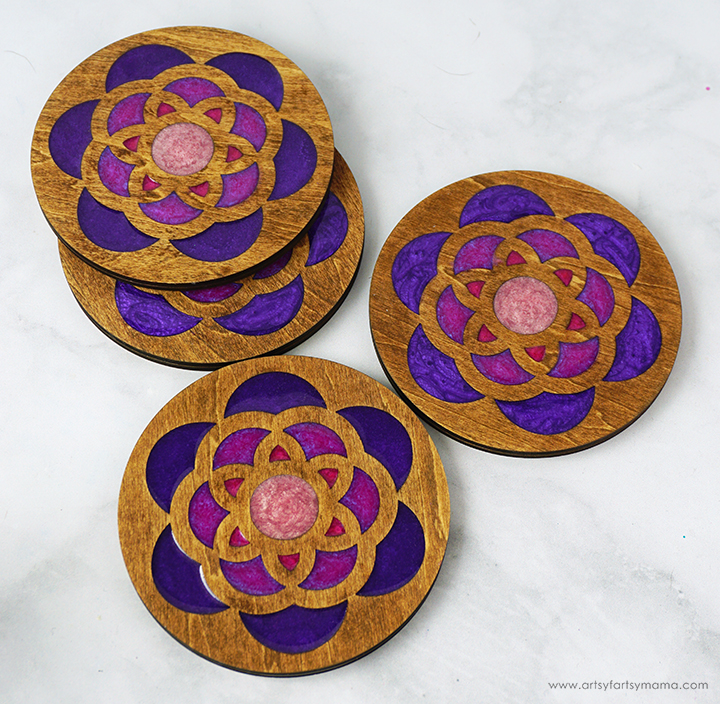
Once the top coat has cured completely, it should be hardened and no longer tacky to the touch. If it still feels soft and/or sticky, the resin needs more time to cure. If you have any problems with bubbles on the surface or fingerprints from touching the uncured resin, you can sand the resin and pour another thin coat of resin over the top. Just make sure to allow it to completely cure before using.
To clean the coasters, wipe the top surface with a damp cloth. Because of the wood, do NOT immerse the coasters in water and don't use any cleaning agent other than water.

These Resin Inlay Floral Coasters are a lot of fun to make, and think they are a great project for both resin AND laser craft beginners. I loved being able to combine two different crafting techniques to make one gorgeous project, and hope you are inspired to give it a try. As always, if you make any of these projects for yourself, I'd love to see your creations! Tag me on Instagram and Facebook, or leave a comment/photo on the project pin on Pinterest! #AFMCrafts