
Create an eye-catching pair of handmade Cactus Earrings using polymer clay!
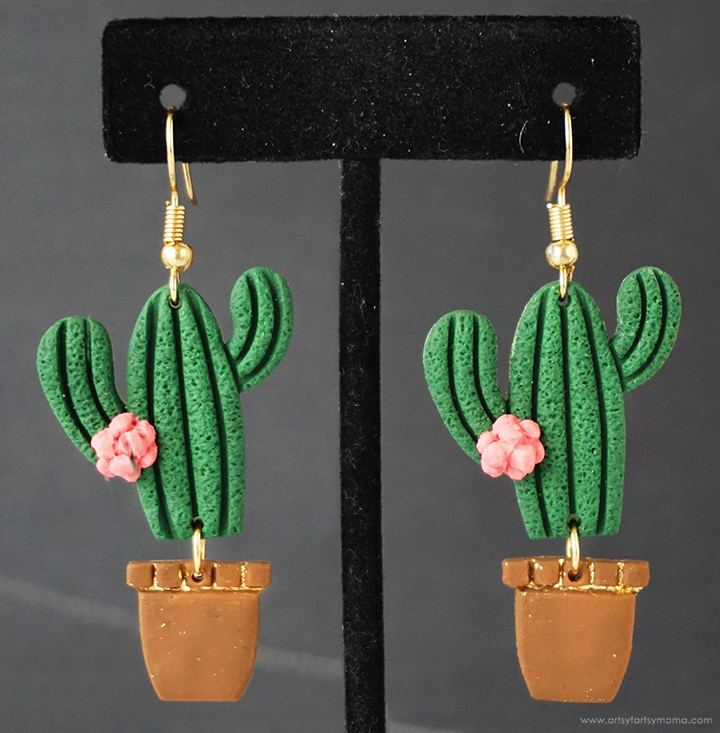
Creating jewelry is one of my favorite things to do with polymer clay. One of my best friends lives in Southern Utah, which is basically a desert. For her birthday, I decided to make this stunning pair of custom Cactus Earrings using polymer clay and a little bit of foil. The textured clay paired with the shimmery gold foil is such a fun look that can be paired with anything in your wardrobe. These earrings are a simple project that can be customized with different colors of clay and foil to fit your personal style, and will definitely be a great gift idea.

To make your own set of Polymer Clay Cactus Earrings, you will need these supplies:
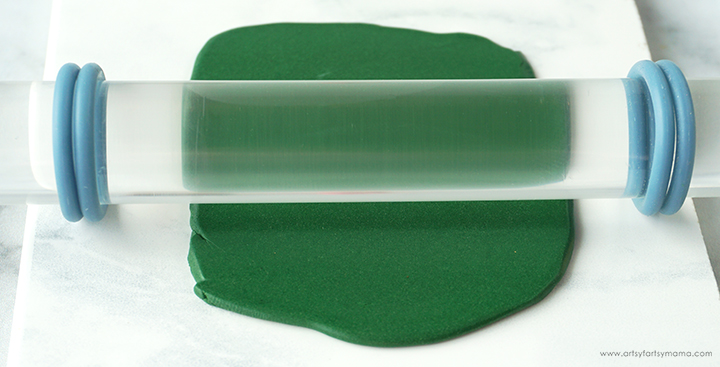
Take one section of green polymer clay and knead it well to get it into a smooth, pliable texture. Use a clay roller with 3mm thickness roller guides (or 2 craft sticks parallel to each other with the clay in between) to flatten the clay into a large oval or rectangle.
Tip: If you work directly on a baking mat or ceramic tile, you don't have to worry about transferring your project when it's time to bake the clay. This also helps reduce the chances of you accidentally ruining your project in the process.

Next, give the clay some texture by using a piece of sandpaper. Place the sandpaper over the clay, and gently roll over the top of it. Slowly peel the sandpaper away to reveal the textured clay! I used 80 grit for a more obvious texture, but have fun trying other grits for different looks.
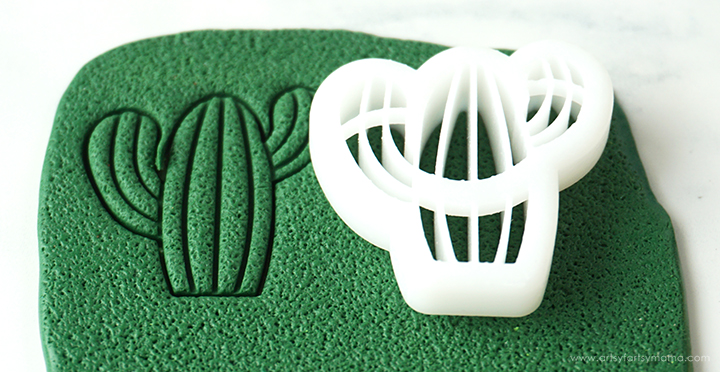
Place the cactus cutter over the clay and gently press it straight down. Pull the cutter straight up. If the clay stays down, leave it there. If it comes up with the cutter, be careful how you remove it. Poking through the top to push the clay out can leave dents or holes in your work. If necessary, you can re-roll the clay and start over.
Here's a few tricks & tips for cutting clay that have worked for me:
- Place a piece of plastic wrap over the clay first, and then cut the clay.
- Dip the cutter in corn starch, talcum powder, or even water before cutting.
- Your clay or workspace might be too warm. Put the clay in the fridge or freezer to cool it down before cutting.
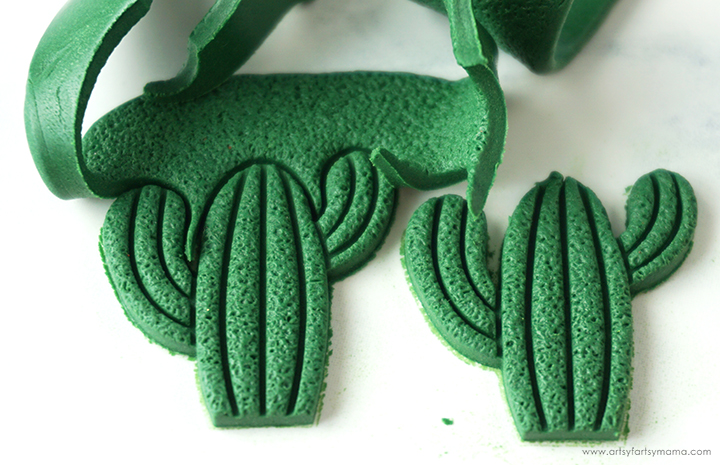
Carefully peel away the excess clay and leave the cactus pieces in place. It's okay if the edges of the earrings look a little rough. Just make sure to remove all of the excess clay.
If you are working on a ceramic tile or baking mat, don't peel or scrape the earring pieces up! Leave them in place until after they've baked. I have too many problems with misshaped pieces or ruining the pieces altogether when I try to move them.

Use a toothpick or a small circle cutter to make holes in both the top and bottom of the earring pieces.
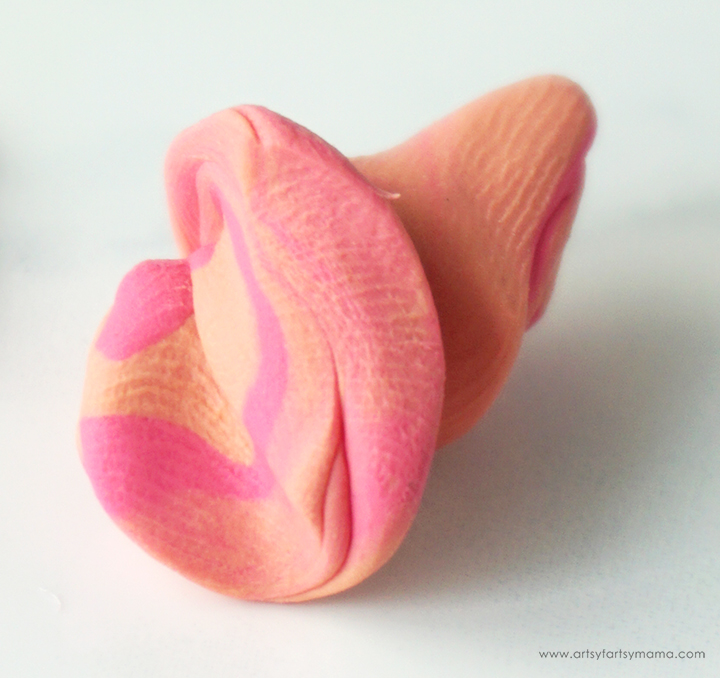
Next, roll out a small ball of pink polymer clay. You can use any shade you want. I didn't have clay in the color I wanted to use, so instead I blended a bright pink color with a light orange to create a coral-like shade of pink.

Roll out the pink polymer clay using a clay roller with 3mm thickness roller guides (or 2 craft sticks) to flatten the clay into an oval or rectangle.
Use a small flower clay cutter to cut out two pieces for each cactus.
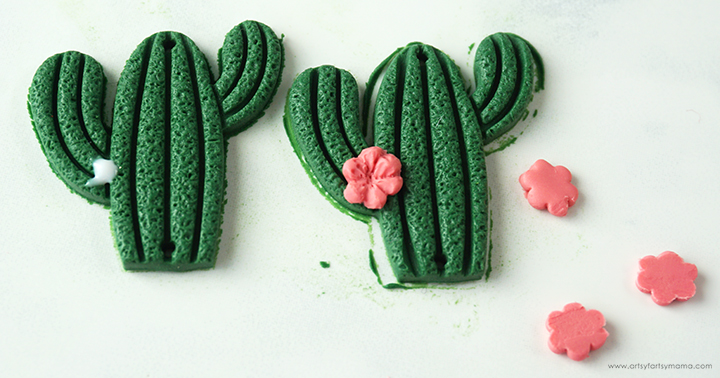
Apply a small drop of bakeable clay adhesive on the cactus where you are going to place the flower. This is totally optional, but I like how it gives the flower a more secure hold once the clay has been baked.
Gently flatten and widen the flower piece a little, and then place the clay over the adhesive. Use a dotting tool to press the flower down a little in the center and separate the petals a little.
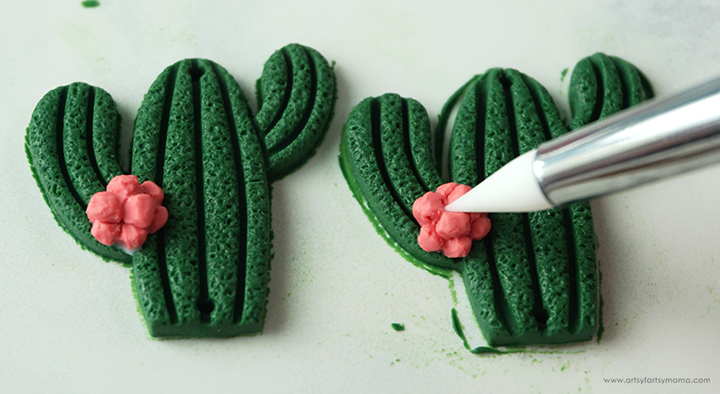
Trim off three of the petals of the other flower piece, making almost a triangle shape with the three remaining petals. Apply a small dot of adhesive in the center of the flower already on the cactus, and then carefully place the new flower piece on top. Use a pointed silicone-tipped sculpting tool to shape the flower into a rounded, succulent-like look.

Next, knead and roll out a piece of brown polymer clay with the clay roller and 3mm thickness roller guides (or 2 craft sticks).
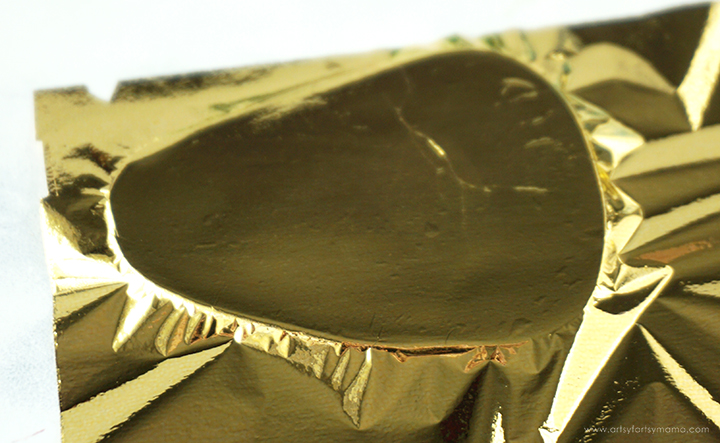
Lay a gold foil sheet on top of the clay and gently smooth it down against the surface of the clay. Remove the excess foil to save for another project.

Place the plant pot cutter over the foiled clay and press it straight down, then slowly pull it back up. Cut two pots out of the clay. Peel away the excess clay and save this extra foil-covered clay to use on another shiny project!
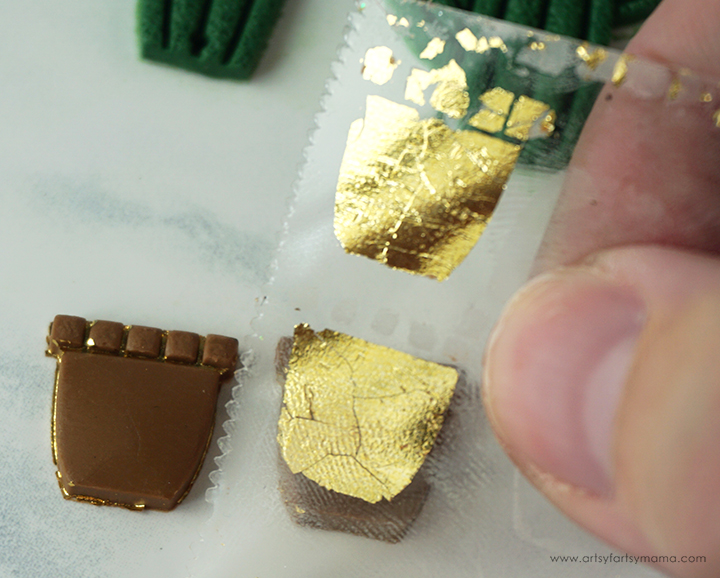
For these earrings, I only want foil in the impression of the clay instead of on the whole piece. Removing the foil from the surface of the clay is surprisingly simple! Place a piece of packaging tape over the clay and gently press it onto the surface. Pull the tape away, and the foil comes up along with it.
Use a clean section of tape or even a new piece of tape to remove any foil that you may have missed. I found it best to use the corners of the tape to pick up around any small areas.

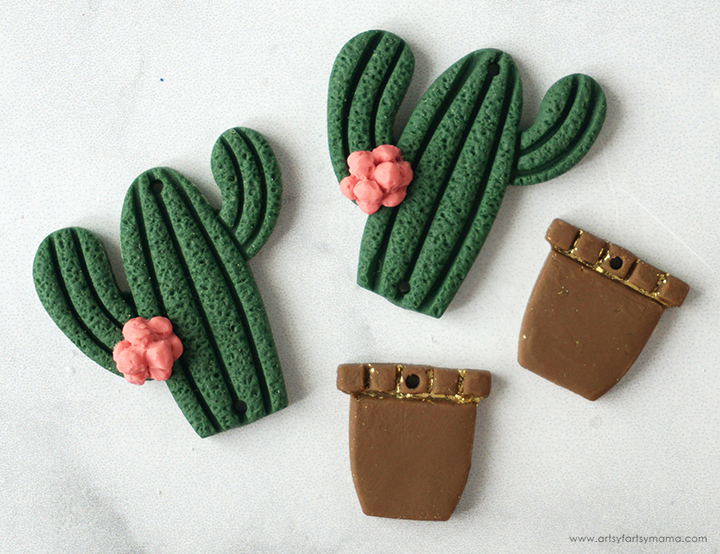
Aren't these plant pots beautiful? I love the pops of foil in the indentations of the design. Use a toothpick or a small circle cutter to make a hole at the top of the earring pieces to easily connect them to the cactuses.
Preheat your oven and bake the clay earring pieces. Most polymer clays are usually baked at 275º for 15 minutes per quarter inch thickness, but refer to your specific clay packaging directions to make sure. Once baked, let the pieces cool completely before handling.
Once cooled, remove the clay from the baking mat or ceramic tile. Use a fine sandpaper to clean up the rough edges of the earring pieces.

Use pliers to open a 10-12mm jump ring for each earring. Hook the rings through the holes in the bottom of the cactus and then through the hole in the plant pots to connect them together. Close the jump rings with the pliers.
Next, attach the earring hooks through the top of the cactus pieces. Make sure they are completely closed using the pliers so that they don't come off!
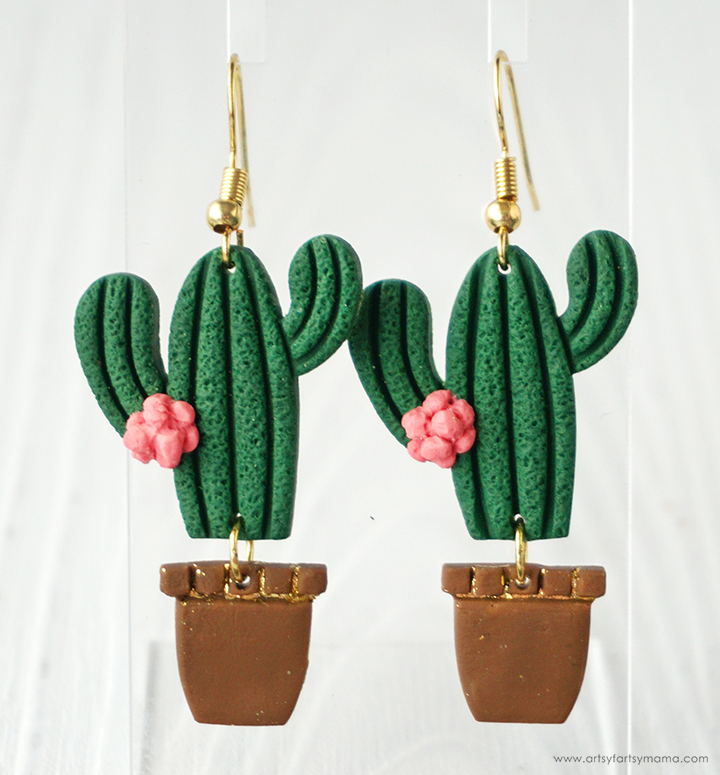
I absolutely LOVE how these cactus earrings turned out! They are the perfect accessory that goes with any outfit, and the earrings would make such a great handmade gift. Making jewelry out of polymer clay is a lot of fun, and so easy! I would love to hear what you think about these Polymer Clay Cactus Earrings. As always, I would love to see your creations! Tag me on Instagram and Facebook, and leave a comment or photo on my project pin!
Don't forget to Pin, Like, and Share!


