
Use a custom silkscreen stencil to create a stunning pair of Snowflake Polymer Clay Earrings!

The winter season can feel a little gloomy with the constant gray skies and early nightfalls. To cheer myself up, I've decided to brighten up my wardrobe with some literal winter blues! I think it's so fun to experiment with combining different crafting techniques, and one of my favorites lately is using stencils with polymer clay. The process is easier than you'd think, and I hope you get inspired by this tutorial to try making a pair of Polymer Clay Snowflake Earrings for yourself using a custom silkscreen stencil using Ikonart.
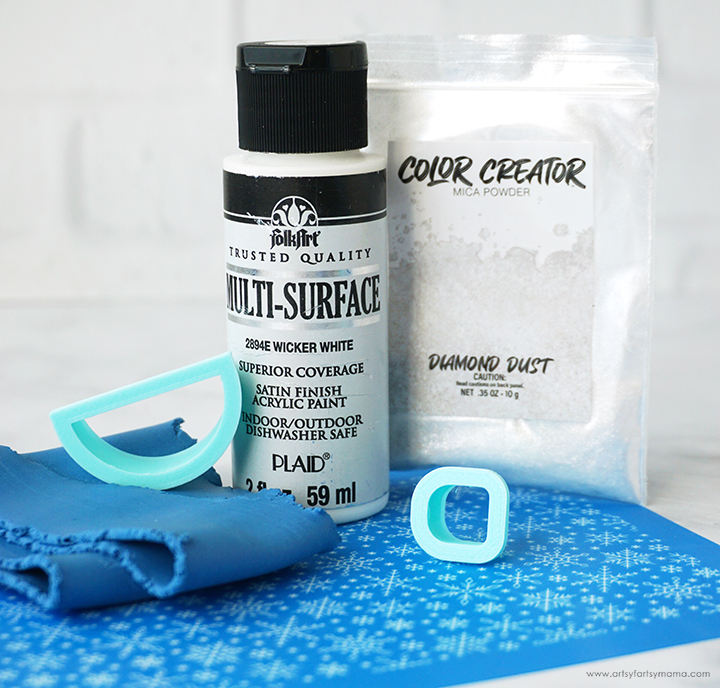
To make your own Polymer Clay Snowflake Silkscreen Earrings, you will need these supplies:
- Snowflake Pattern Printable (for personal use only)
- Ikonart Custom Stencil Kit
- Polymer Clay - blue and white
- Baking Mat or Ceramic Tile
- Clay Roller or 2 Craft Sticks
- Acrylic Paint
- White Metallic Mica Powder
- Snowflake Clay Cutter
- Earring Shape Clay Cutter
- Gloss Glaze or UV Resin
- 10mm Jump Rings
- Earring Posts
- Jewelry Pliers
*Save 15% on Ikonart supplies when you shop with code AFM15
The first step in making a stencil with the Ikonart Kit is to print the design. Download the design and print using your favorite printing program on either inkjet or laser Ikonart Printer Film. For best results, make sure to adjust your settings to print as dark as possible.

The next step in the process is exposing the stencil film. Set up the Ikonart exposure stand by following the directions included in the kit. Ikonart Stencil Film is light sensitive, so be careful to keep it out of sunlight and bright lights before exposure! Cut the film to the same size or slightly larger than the design print.
Lay the piece of film down on the base of the stand with the textured side facing up. Place the printed design on top of the stencil film.
Lastly, place the clear exposure sheet (found in the stencil film pack) on top and press it down well to seal the design tight against the stencil film. Turn the exposure light on and expose the film for 35 seconds.
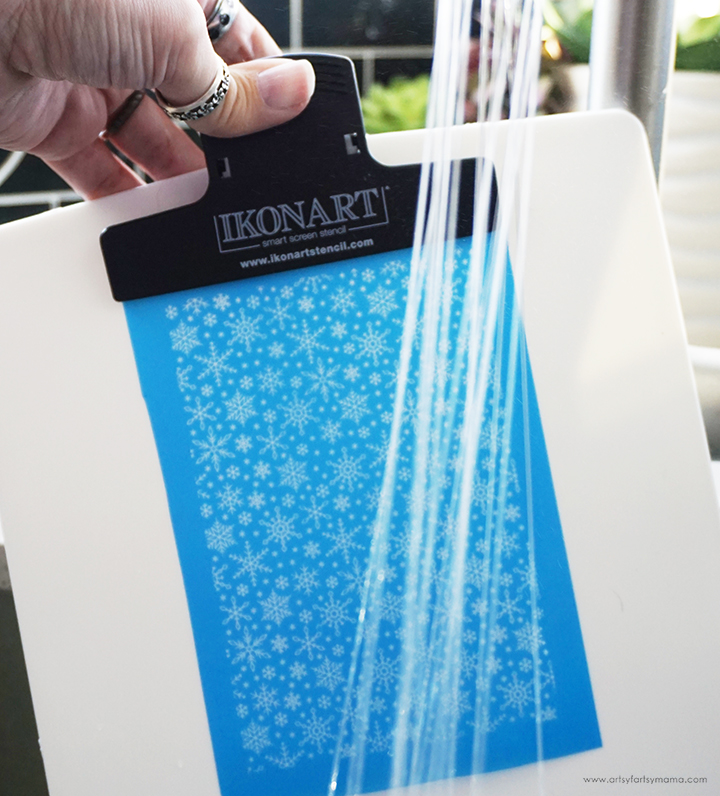
The final step in the stencil-making process is to washout, or rinse, the stencil. Clip the exposed stencil film to the Ikonart clipboard with the shiny side (carrier sheet) touching the clipboard. Use a kitchen sink sprayer to rinse the stencil film with warm/hot water until the design shows through and becomes completely clear. The washout process shouldn't take more than 3 minutes.
Gently blot any excess water off the stencil, and hang or lay flat to dry for about 45 minutes. When the stencil is dry, you shouldn't see any water spots or discoloration. Once dried, place the stencil back on the exposure stand and expose it again for at least 2 minutes. This extra exposure time will increase the durability of the stencil so you can get as much use out of it as possible.
Use a permanent marker and write "back" on the carrier sheet (shiny side) on the back of the stencil.

Take one section of blue polymer clay and knead it well to get it into a smooth, pliable texture. Use a clay roller with 3mm thickness rings (or line 2 craft sticks parallel to each other with the clay in between) to flatten the clay into a large rectangle.
Tip: If you work directly on a baking mat or ceramic tile, you don't have to worry about transferring your project when it's time to bake the clay. This also helps reduce the chances of you accidentally ruining your project in the process.
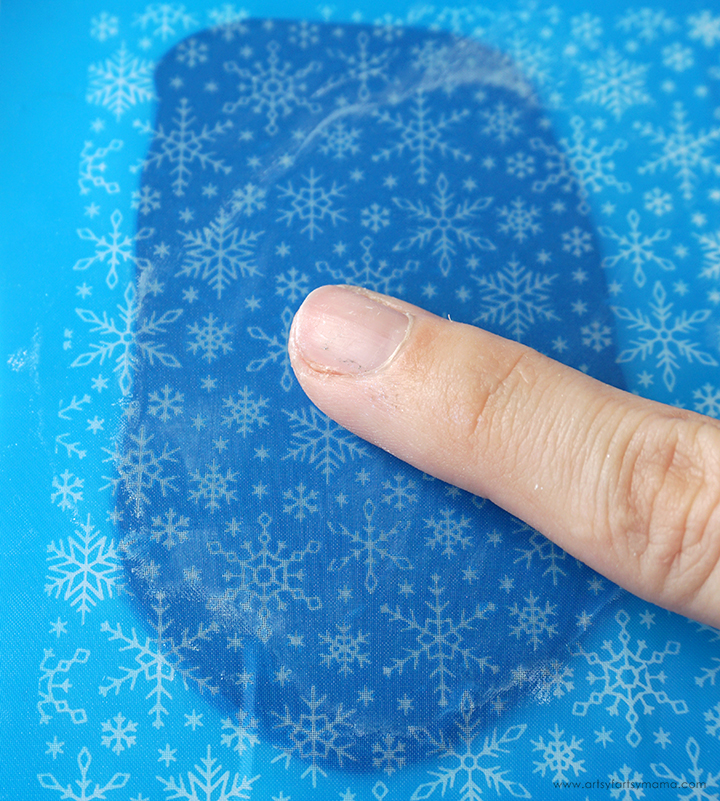
Remove the carrier sheet from the back of the stencil and place it over the clay. Rub it down gently with your fingers or use the roller to make sure the stencil is pressed down well and that there aren't any air bubbles trapped underneath.
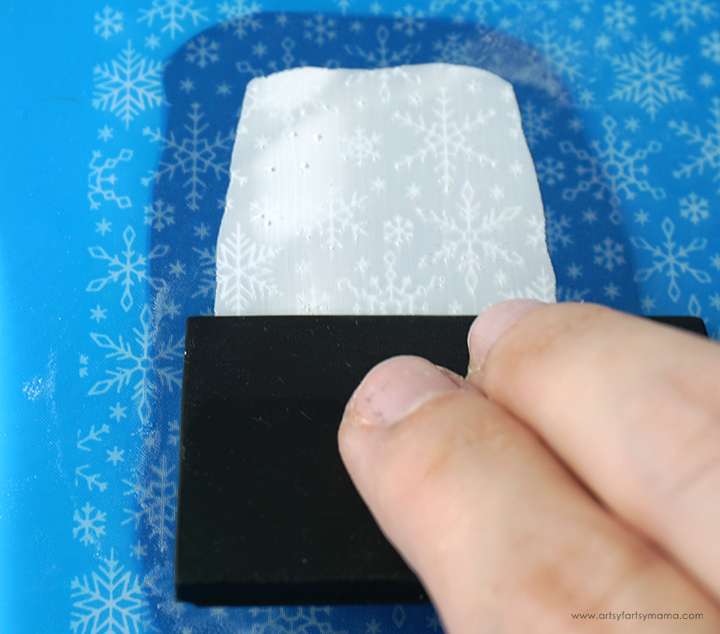
Add a small line of acrylic paint on top of the stencil. Use a squeegee to gently pull the paint down to the bottom edge. Don't press hard, just skim over the top of the stencil. Scrape the excess paint away and put it back into the paint bottle.

Slowly lift the stencil up to reveal the painted pattern underneath. If you see anywhere that you may have missed while peeling the stencil away, carefully lay the stencil back down and add a little more paint over the area.
If everything looks good as you get to the end of the stencil peel, remove the stencil completely. Let the paint dry before moving on to the next step (don't worry - it doesn't take long).
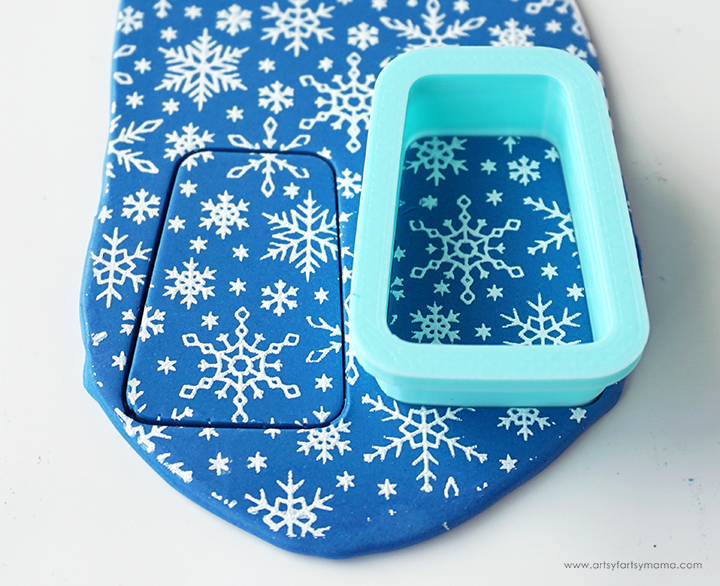
Cut two pieces (per earring pair) using creatively shaped clay cutters or freehand with a craft knife. Place the cutter over the clay and gently press it straight down. Gently pull the cutter straight up. If the clay stays down, leave it there. If it comes up with the cutter, be careful how you remove it. Poking through the top to push the clay out can leave dents or misshape the earring piece.
Here's a few tricks & tips for cutting clay that have worked for me:
- Place a piece of plastic wrap over the clay first, and then cut the clay.
- Dip the cutter in corn starch or talcum powder before cutting
- Your clay or workspace might be too warm. Put the clay in the fridge or freezer to cool it down before cutting.

Use a toothpick or a small circle cutter to make holes at the top end of the earring pieces to easily connect them later.

Carefully peel away the excess clay, leaving the earring pieces in place. It's ok if the edges of the earrings look a little rough. Just make sure to remove all of the excess clay from around the earring pieces.

Next, roll out a small piece of white polymer clay the same way (and thickness) as the blue clay. For some extra shimmer, you can rub a little bit of white metallic mica powder over the surface of the clay using a small brush or your finger.

Use a small snowflake cutter to cut a top for each earring. Use the tips I shared above for cutting the clay successfully.

Just like the other earring pieces, use a toothpick or a small circle cutter to make holes at the bottom end of the earring pieces to easily connect them together later.
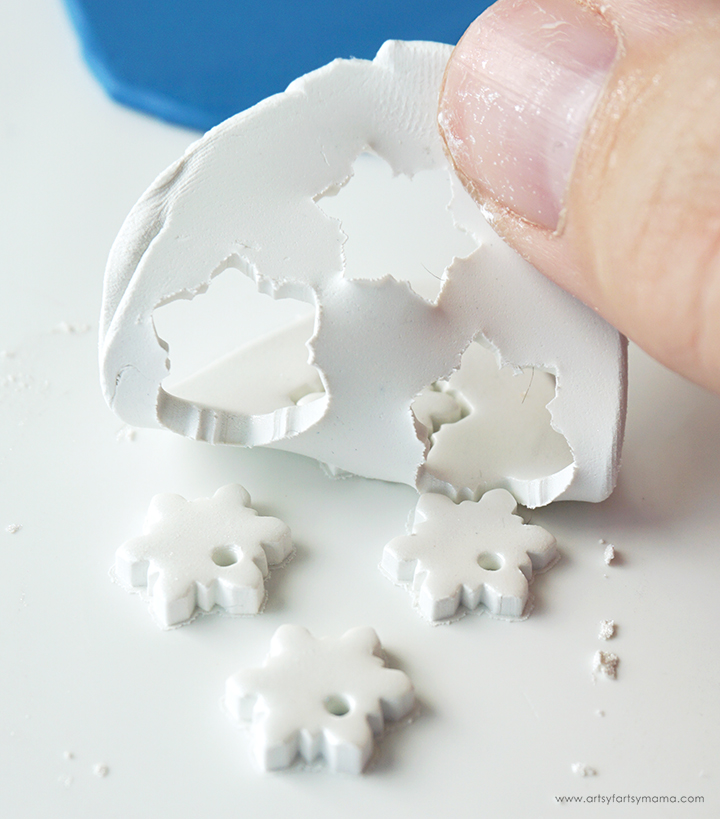
Peel the excess clay away, leaving the snowflakes in place. Like I mentioned before, it's ok if the edges look a little rough.

Preheat your oven and bake the earring pieces. Most polymer clays are usually baked at 275º for 15 minutes per quarter inch thickness, but refer to your specific clay packaging directions to make sure. Once baked, let the pieces cool completely before handling.
Use a fine sandpaper to clean up the edges of the earring pieces. To give the earrings a shiny and professional-looking finish, apply a coat of gloss glaze or UV Resin to the surface with a toothpick.
If using glaze, apply it to the clay in thin coats (30 minutes between each coat). Give the earrings 24 hours to dry completely.
If using UV resin, apply a thin coat over the earrings, and cure under a UV light according to package directions.
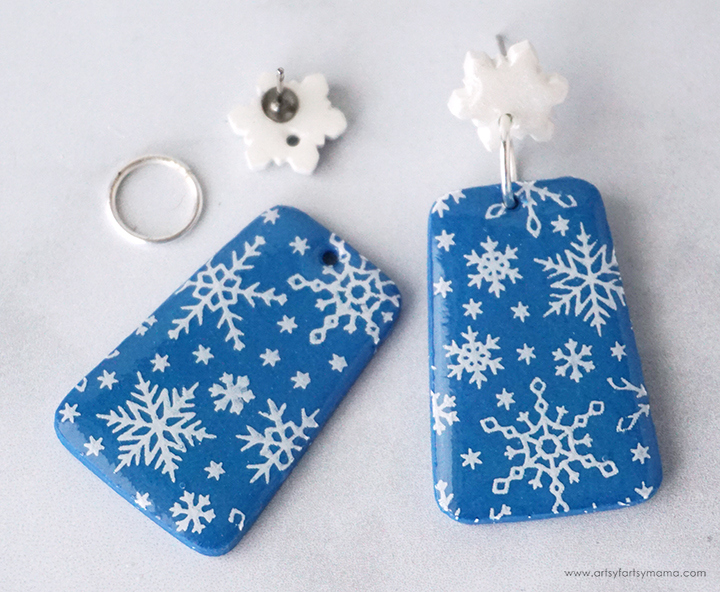
Turn the top/snowflake earring pieces over, and attach an earring post to the center using strong adhesive or UV Resin.
Use pliers to open a 10-12mm jump ring for each earring. Hook the rings through the holes in the earring sets to connect them together. Close the jump rings with the pliers.

I LOVE how this pair of earrings turned out, and I could NOT have made them without the help of my Ikonart kit. They have a bit of shimmer when the light hits them, and they are perfect for winter fashion! If you try making some of these Polymer Clay Snowflake Silkscreen Earrings, I would love to see them! Leave me a comment, or tag a photo on Facebook, Twitter, or Instagram! #AFMcrafts
Don't forget to Pin, Like, and Share!


