
Get into the holiday spirit with a custom Christmas Tree Countdown Advent Calendar!
Counting down the days until Christmas such a fun way to build the excitement throughout the month. I have a bunch of different advent calendars that I have made over the years, but I have to say that this Christmas Tree Countdown Advent Calendar is probably my new favorite. It was so easy to make using my xTool S1 laser cutting machine, and there are so many ways to make it your own. I hope you get inspired to make one of these countdowns for your family this holiday season.
New to laser cutting? Be sure to check out how to get started with the xTool S1 Laser Machine!


This Christmas Tree Advent Calendar design is just what I was looking for in a Christmas countdown. I ended up making a few adjustments to the design to fit my personal style, and then uploaded it into xTool Creative Space.
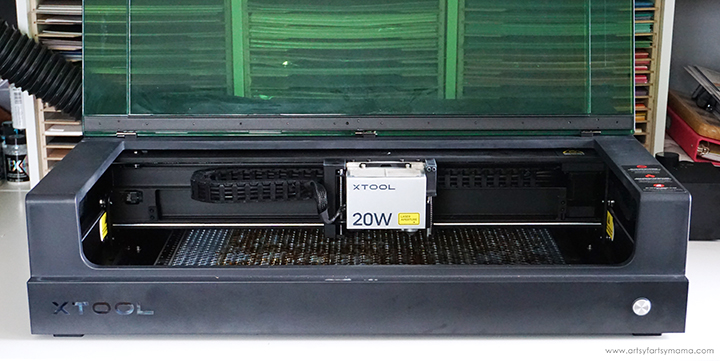
The crafting possibilities are endless when it comes to using the xTool S1 laser cutting machine, and it's actually very easy to use! Once you have one of these, the hardest thing you'll have to do is decide what to make first. If you want to learn more about how this incredible machine works, be sure to check out my complete xTool S1 review.
When you upload an SVG design, you need to make sure each part of the design is set for cutting, scoring, and engraving. For this project, each shape outline needs to be set to cut. The lines on the tree itself need to be scored. This will help you put pieces into the right place later. There isn't anything that needs to be engraved on this project, so don't even worry about that one!


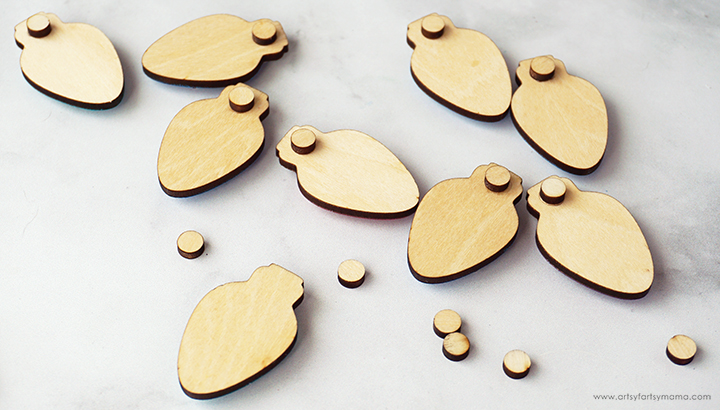
Remove the pieces from the machine, including the 25 small circles cut from the lightbulb strips. Before assembling the project, I would highly recommend cleaning the soot away from around the edges of the wood using a Magic Eraser or baby wipe to prevent making marks all over your hands.

Now it's time to start painting the Christmas tree countdown! Pick out your favorite colors of acrylic paint that fit your holiday decor color scheme - or let the kids pick. I like to use non-traditional colors, like pinks, purples, blues, teals, and splashes of silver and glitter in my holiday decor.
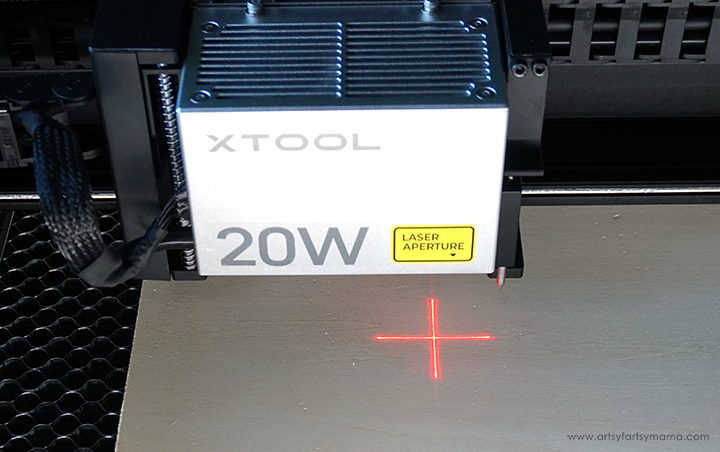
Place a piece of 12"x18" 3mm basswood into the xTool S1 machine. Manually pull the laser box with your hand so that the red "+" is located on the material - it doesn't have to be centered.
In XCS, you will see "Distance (mm)" in the right menu bar. Click on the target icon to the right of that space, and the machine will automatically measure your material.
For more details on how this machine works, be sure to check out my review of the xTool S1 Laser Machine!
Next, you need to mark where your material is located inside the machine. Mark your material "rectangularly": one in each opposite corner. Manually move the laser head so that the red "+" is squared in the top left corner of the material. Once it's in place, press the large button on the front of the machine. The machine will beep, and then will record the point.
Next, move the laser to the bottom right corner and push the button again to record the second point. Once you have both points marked, click on the "End Marking" button. Now your machine knows where the material is, how big it is, and is now loaded into XCS.
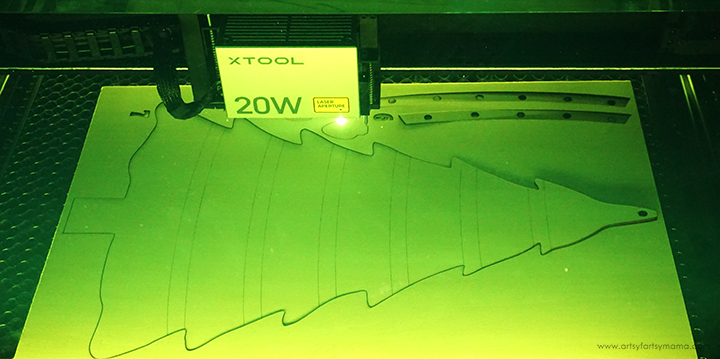
Make sure that all of the design elements are within the marked bounding box in XCS, and then proceed to cutting out the project. I ended up splitting the design elements to fit onto two separate pieces of wood.
Close the green laser hood, and watch the xTool S1 go to work! The process took about 30 minutes, which is so much quicker than I expected!
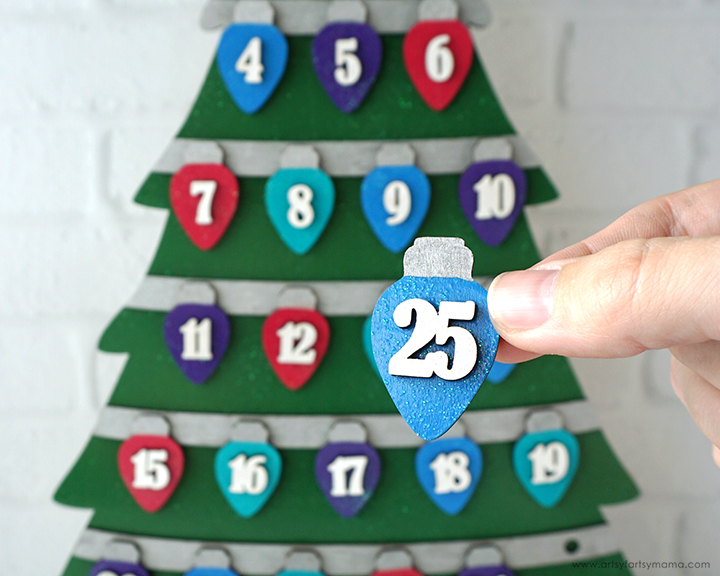
I started by painting all of the lightbulbs first, but leave the top of the bulbs unpainted to cover later. To make the numbers stand out, I painted them in white. Of course, I painted the tree a gorgeous green. For best results when painting, allow the paint to dry completely before adding another coat on top.

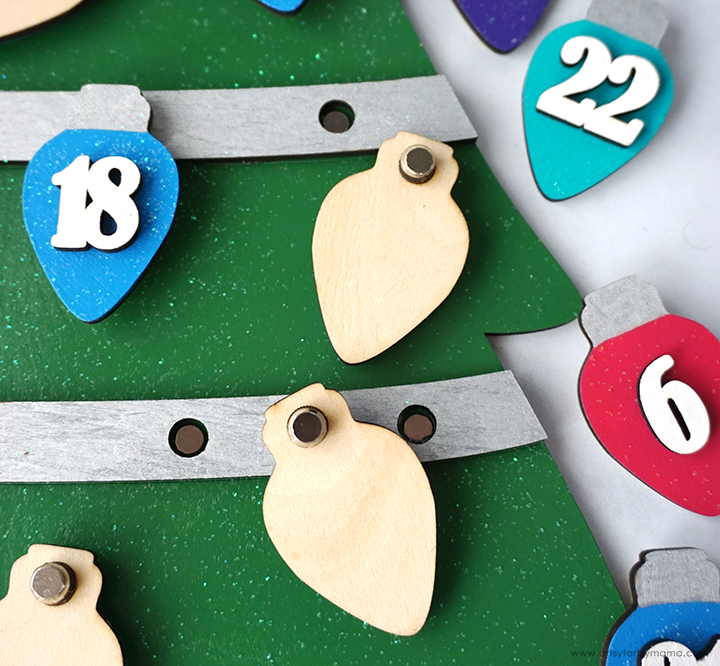
I used a shimmery, metallic silver acrylic paint pen to cover the tops of the lightbulbs as well as the strips that will end up holding the bulbs on the tree.


Next, use strong adhesive to attach the numbers to the front of the lightbulbs. I laid out the bulbs in the color order I wanted them to be places in first, and then put the numbers on. Allow the adhesive to dry completely.
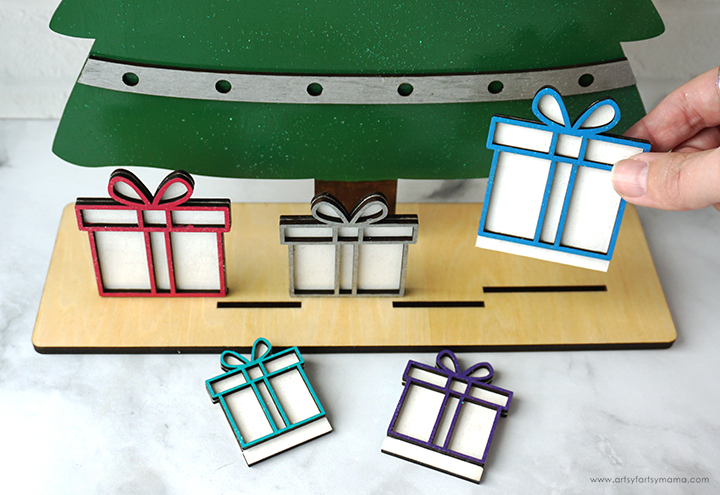
You will also need to use the adhesive to attach the gift pieces together, and to attach the strips to the front of the tree. When placing them on the tree, line the pieces up with the score lines for a perfect fit and alignment. I also cut two base pieces (for extra stability) and glued them together as well.
Once the numbers on the lightbulbs have set, turn them over and use adhesive. to attach the small wooden pegs/circles (cut from the strips attached on the tree) to the top section of the bulbs. Allow the adhesive to dry completely.
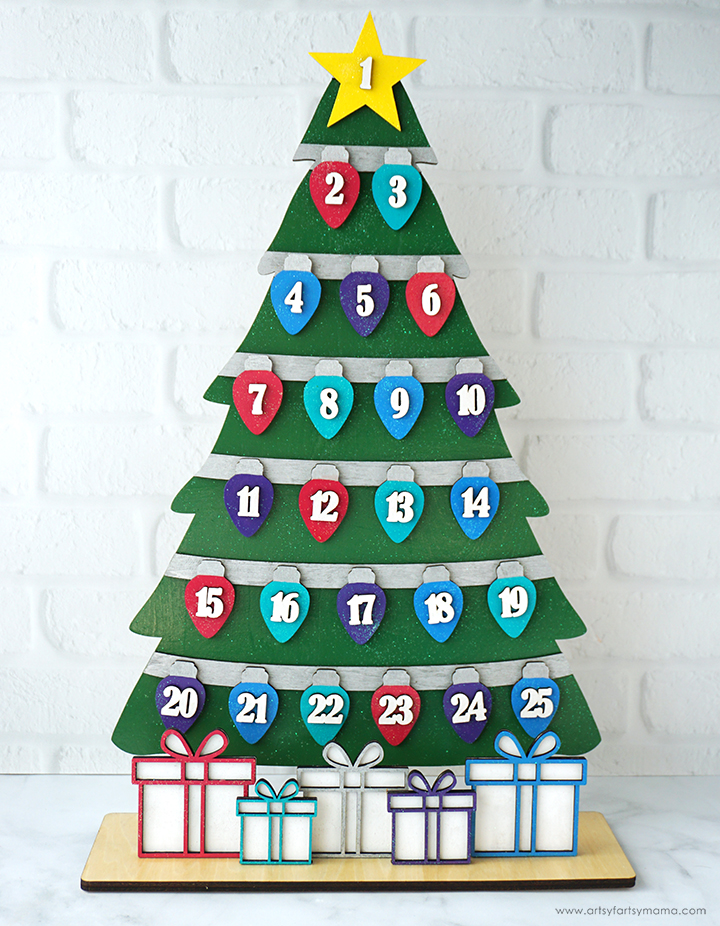
Lay out all of the pieces: tree (with strips attached), base, 24 numbered lightbulbs, star, and five gifts. Make sure everything is there and completed with paint and attachments, if necessary.
Cover all of the pieces with a coat of clear sealant to protect the paint and keep your advent calendar looking good as new for years to come. For some extra sparkle, I sprinkled iridescent glitter over the pieces while the sealant was still wet. *Imagine me doing this in a similar way to the "Salt Bae" meme...
Once the sealant has dried completely, the Christmas tree advent calendar is ready to assemble! Turn the base so that the single slit is in the back, and place the tree trunk into that opening. Next, arrange the gifts into the alternating openings in the front. The larger gifts fit on each end, with the smaller ones in between.
This is how the Christmas tree advent should look once the tree and gifts are in place. They should also be able to stand on their own. If you are having trouble with pieces tipping over, you can add small supports in the back. I didn't have any trouble after I attached a second base piece.
Now you can count down the days until Christmas by adding the star and lightbulbs to the tree in numbered order! Since the pegs on the back of the lightbulbs are the same pieces cut out of the strips, they fit on the tree perfectly.
If you are using this advent calendar with kids or a clumsy adult (like me), the pieces can easily be bumped off of the tree. To give ours a little more hold, I decided to add tiny (5x1mm) magnets to the back of the star/lightbulbs and to the inside of each hole on the light strips. Now they pop right into place when added, and stay put when we accidentally bump the tree!
I absolutely delighted with how this Christmas Tree Countdown Advent Calendar turned out, and am so impressed with the xTool S1 machine. We have been having so much fun counting down the days until Christmas, and hope you feel inspired to give this project a try. As always, I would love to see what you're making! Share your creations on Instagram, Facebook, or leave a comment/photo on the project pin on Pinterest! #AFMCrafts!
Don't forget to Pin, Like, and Share!


