
Store your favorite pens in a Paw Print Pen Holder made of resin!

My workspace gets cluttered pretty quickly, so I'm always looking for ways to organize my things. This Resin Paw Pen Holder is not just cute, but is just what I needed to keep my pens in one place. To make this pen holder so vibrant, I combined Unicorn Spit with the resin! If you are new to resin, this is a great project to start with. It's a great way to get yourself organized, and also makes a great gift idea.
New to resin? Be sure to check out Resin 101: Getting Started with Resin!
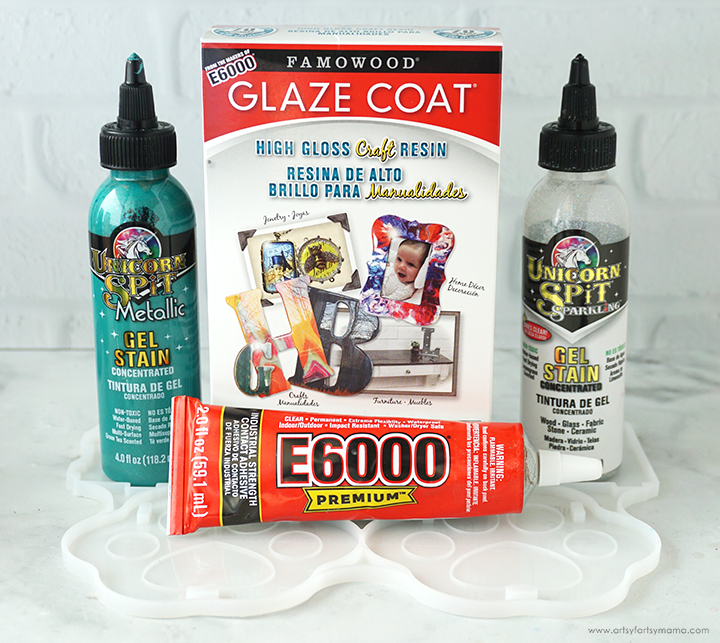
To make your own Resin Paw Pen Holder, you will need these supplies:
SAFETY FIRST: Before getting started, be sure to wear PPE, including disposable gloves. Protect your workspace, and always work in a well-ventilated area!

Prepare 5ml of resin according to package directions. Pour in equal parts resin and hardener to a small mixing cup. Slowly stir the resin together with a stir stick for two minutes or until fully combined. If the resin looks cloudy or has any streaks running through it, you need to keep stirring it until it becomes clear.
Add a small drop of Iced Egret Unicorn Spit Sparkling to the resin and stir with a stir stick until evenly incorporated. Give the resin a few minutes to "rest" and allow the bubbles to rise to the top.
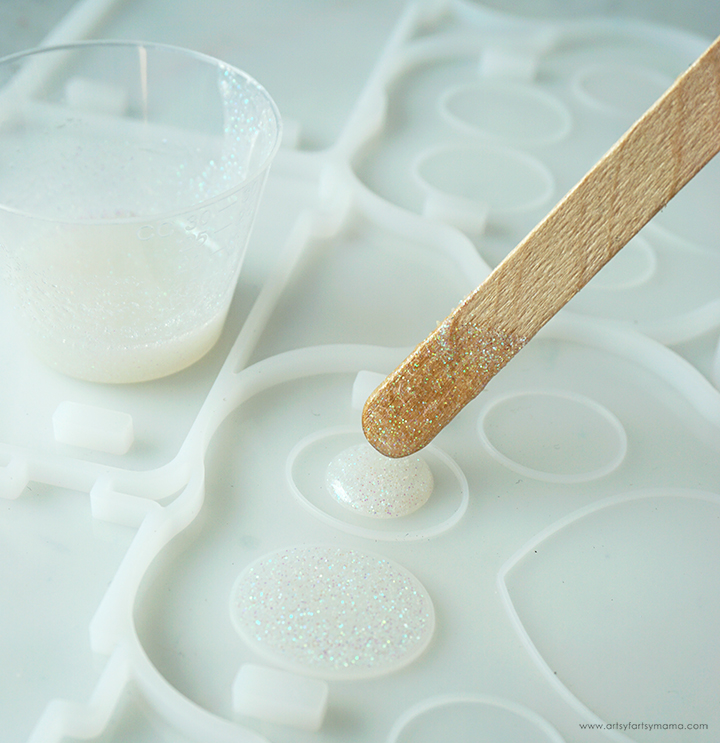
Use the stir stick to carefully fill all of the paw/toe bean areas of the paw print pen holder mold. Be careful to NOT overfill! Let the resin sit for a few minutes, then spritz with 91% alcohol to remove surface bubbles.
Leave the resin to cure in an undisturbed, well ventilated area for at least 4 hours. DO NOT REMOVE THE RESIN FROM THE MOLD.
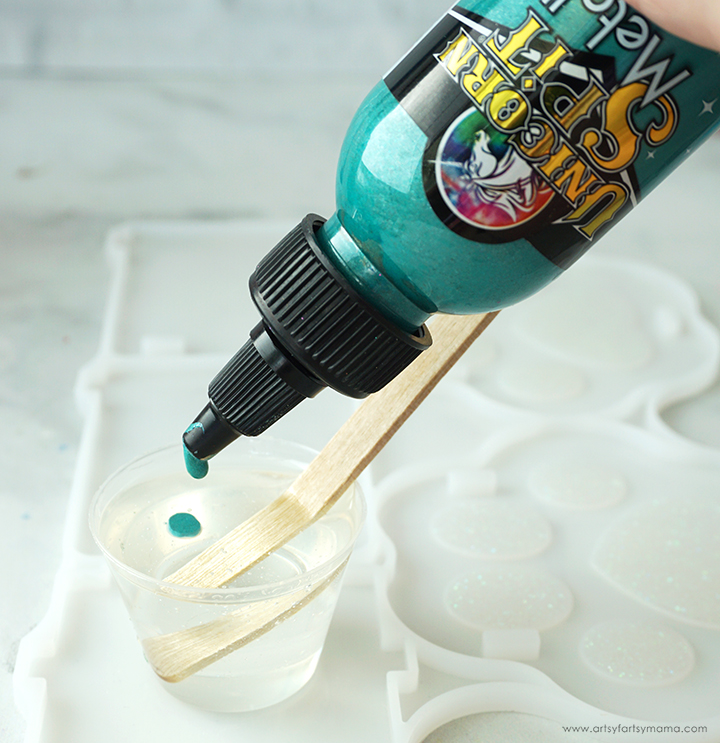
Prepare 1oz of resin according to package directions. Pour in equal parts resin and hardener to a small mixing cup. Slowly stir the resin together with a stir stick for two minutes or until fully combined. If the resin looks cloudy or has any streaks running through it, you need to keep stirring it until it becomes clear.
Add a small drop of Poseidon Unicorn Spit Metallic to the resin (a little goes a long way) and stir with a stir stick until evenly incorporated. Give the resin a few minutes to "rest" and allow the bubbles to rise to the top.

Use the stir stick to carefully fill the paw mold, covering the white resin. Also make sure to fill the three rectangle parts of the mold. Be careful to NOT overfill, otherwise the pieces won't fit together well later!
Pop any bubbles that rise to the top by spritzing with alcohol. Leave the resin to cure in an undisturbed, well ventilated area for 12-24 hours. You will know that the resin is cured and ready to remove when it is no longer tacky to the touch and pulls away from the edges of the mold.
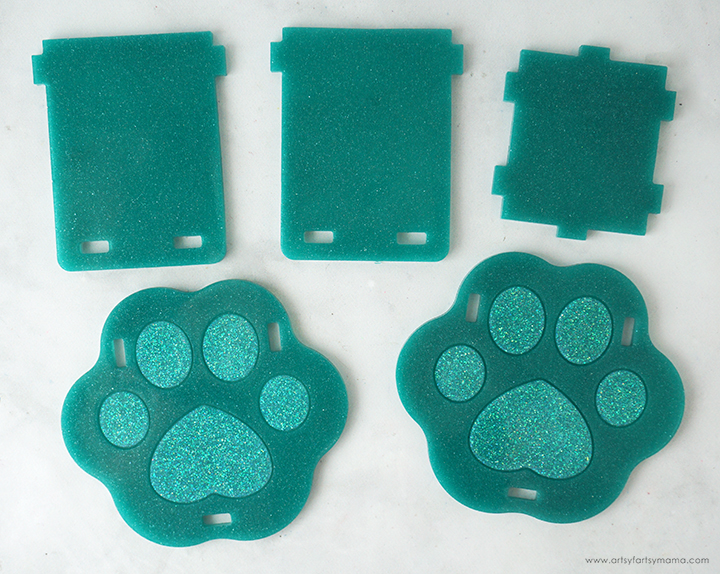
Carefully remove the pieces from the mold. Trim away any excess resin with scissors or a craft knife. If the resin still feels flexible, it may just need more time to cure. Let the pieces sit in a warm, flat area to cure for a few hours (or days).
Once the resin has completely cured (no longer flexible), you can assemble the pen holder. First, put all of the pieces together to make sure everything fits properly. If necessary, file down the notches if you have a hard time fitting them into the holes front and back paw pieces.
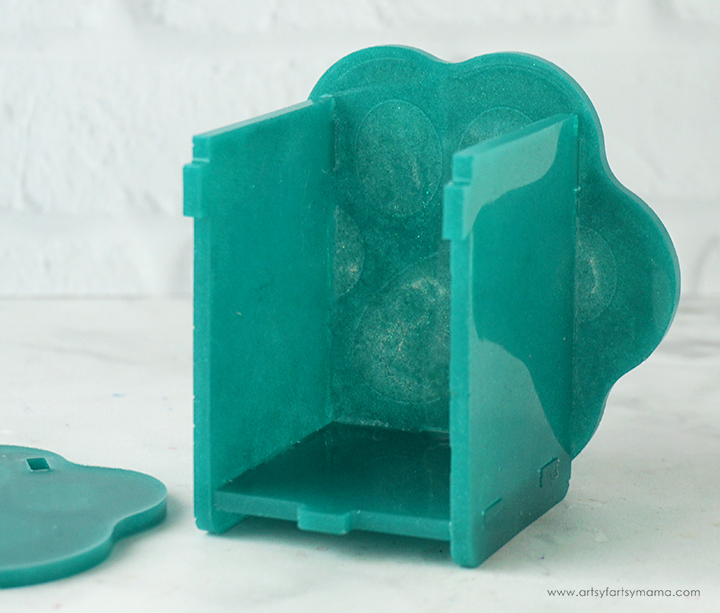
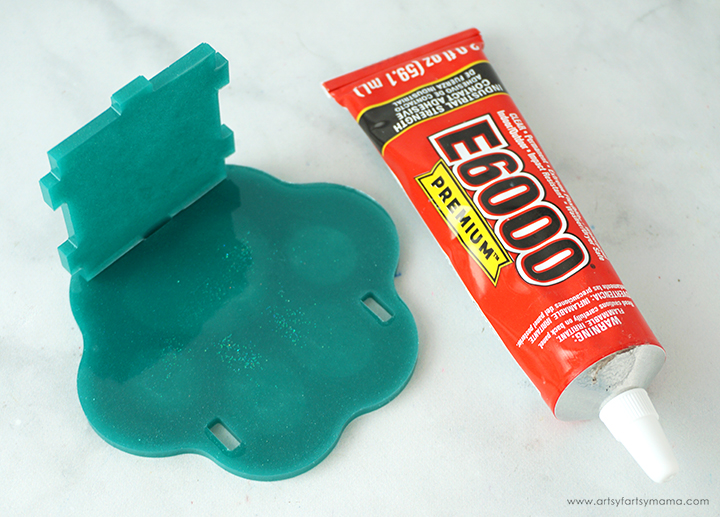
Use E6000 Premium adhesive to make sure the pen holder will stay together permanently. Add a little adhesive along the edge, next to the notches, on the smallest rectangle piece. Attach it to the bottom of one of the paws and hold the pieces together.
Next, add a small line of adhesive to the side edges of the bottom piece, and the edge of one of the side pieces that will line up with the back of the paw. Fit the side piece into place, pushing the notch into the paw piece, and fitting the notches of the bottom piece into the holes of the side. Repeat for the other rectangle side piece.

Place the pen holder face down. Add a thin line of adhesive to the edges of the rectangles that will fit against the other paw piece. Press the paw piece into place, and hold it in place for the adhesive to set.
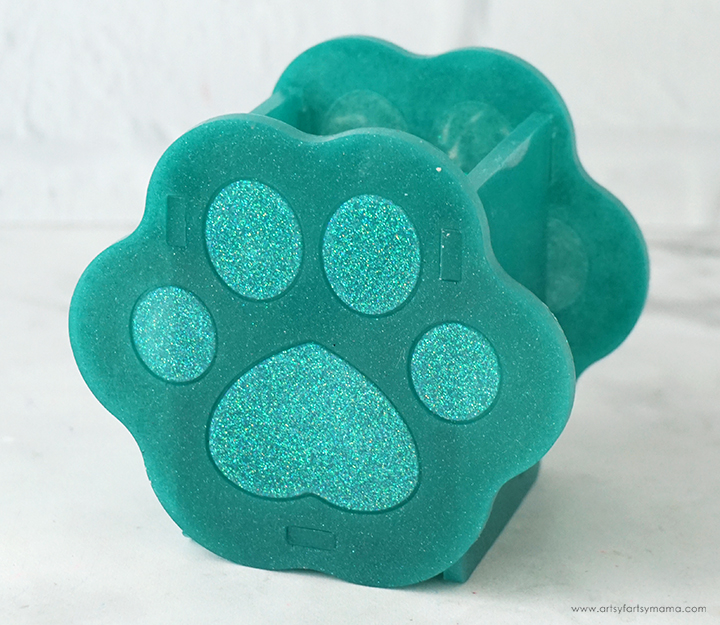
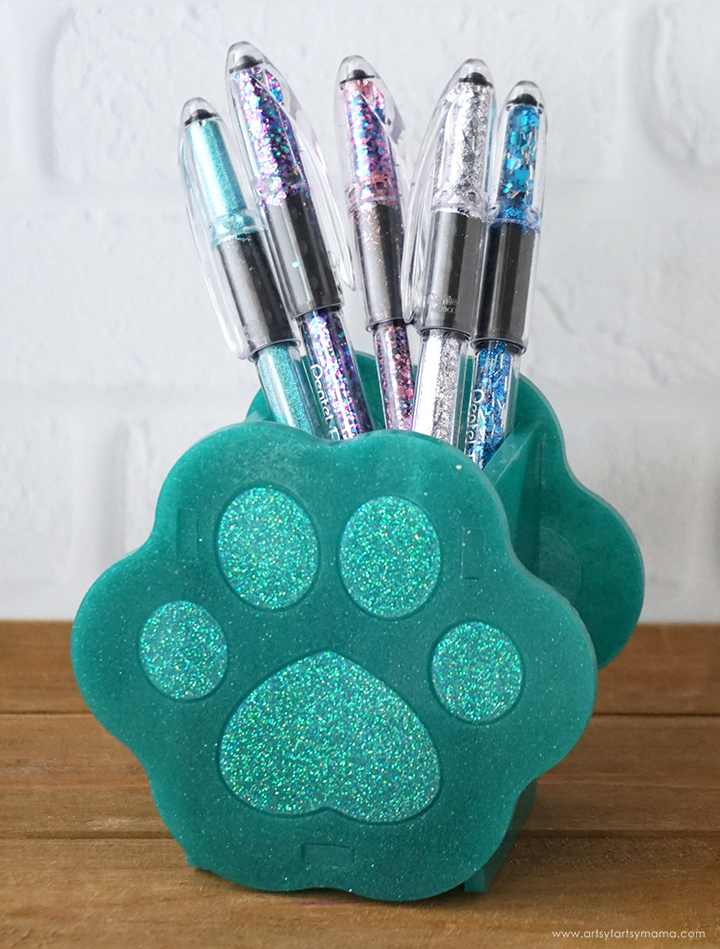
I absolutely love this Resin Paw Print Pen Holder, and my glitter pens fit inside of it perfectly. The Unicorn Spit gives this pen holder a fun pop of color, and I love how it sparkles when the light hits it! As always, I would love to hear what you think about this sparkly Resin Paw Print Pen Holder! If you make any of these projects for yourself, I'd love to see your creations! Tag me on Instagram and Facebook, or leave a comment/photo on the project pin on Pinterest! #AFMCrafts

Check out these adorable projects that Laura and Beth made using E6000 Premium adhesive! Beth from Creatively Beth made Polymer Clay Embellished Home Decor, and Laura from Me & My Inklings created an Upcycled Mason Jar Football Dish!
Don't forget to Pin, Like, and Share!


