
Paint a set of Watercolor Galaxy Bookmarks that are out of this world!

I've been wanting to try some watercolor art, but have been feeling a bit intimidated to paint a larger project. Bookmarks are not only a great way to encourage reading, but they also happen to be a great size for painting! These Watercolor Galaxy Bookmarks are a lot of fun to make, and are such a simple watercolor project for beginners. Hand painted bookmarks would also be a creative gift to share with a fellow reader!

To make your own Watercolor Galaxy Bookmarks, you will need these supplies:
- 5x7 Watercolor Paper
- 1/2" Masking Tape
- FolkArt Watercolor Gelz - Pinkberry, Whipped Cream, Urchin Black, Ocean Waves, Pacific Iris
- Watercolor Brush
- Paint Tray Palette
- Water Cup
- Paper Towel
- Scissors or Paper Trimmer
- Packaging Tape or Laminator
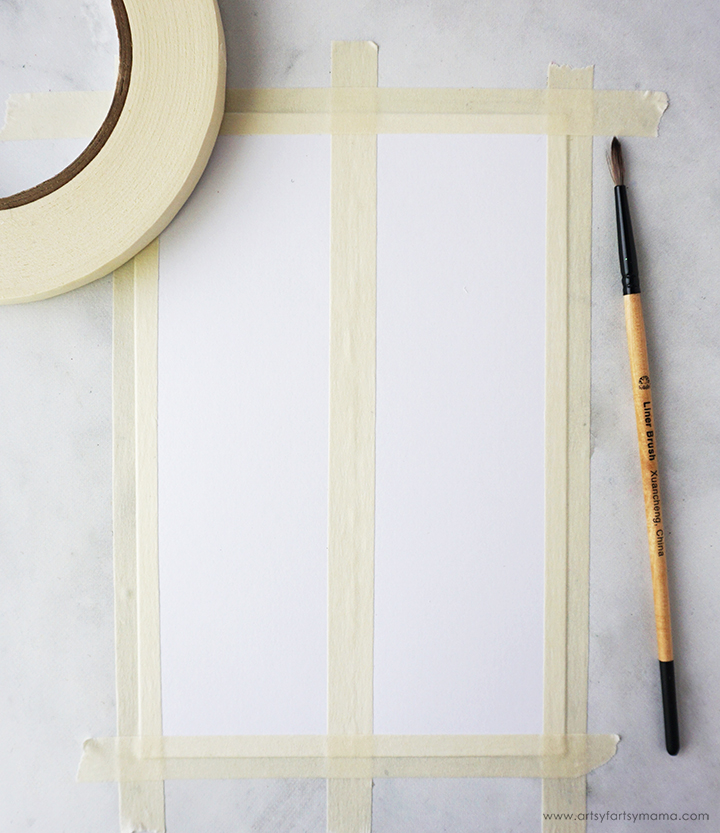
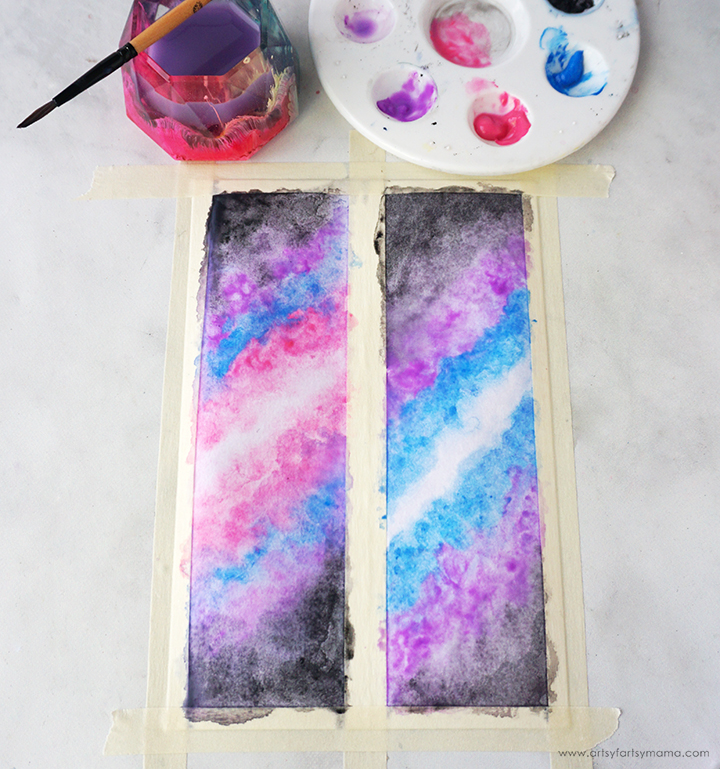
Fold the watercolor paper in half, vertically so that you have a center mark. Lay the paper down on your workspace and place a piece of masking tape down the fold line, centering the tape over it. Next, add pieces of tape around all edges, halfway on the paper. This not only keeps your paper in place, but it will leave the two bookmarks with a 1/4" border.
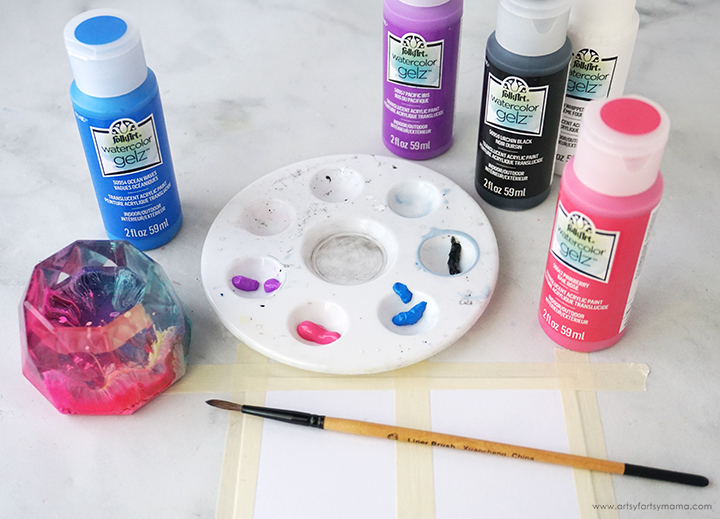
Add a small dollop of pink, purple, blue, and black Watercolor Gelz paint into the wells of a paint palette. A little goes a long way! The paint can be used right out of the bottle for a vibrant coverage, but we need to water it down to paint in layers for this project. Use your brush to add a bit of water into each of the paint colors.


The main technique used to paint this miniature galaxy is the wet-on-wet method. This means that you are painting with wet watercolor on wet paper, which makes the colors spread easier for a more blended look.
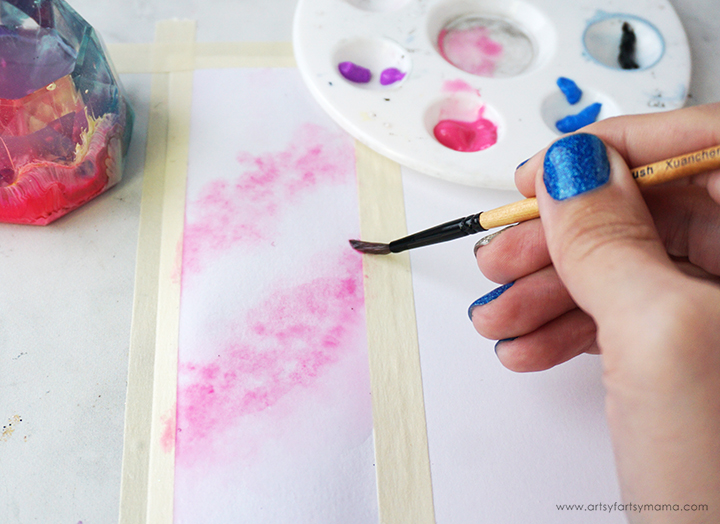
Wet one of the bookmarks well with your brush. The center of the galaxy is going to be a white line, so decide where you want that to be. I made mine a diagonal area around the center of the bookmark. Mix up a little bit of the pink watercolor and dab it on to the paper on either side of the "white" line. The color will be more of a pastel pink at this stage, but we are going to make it brighter through the process.
Remember that this is an organic galaxy, so you don't want the lines to be perfectly straight. Add a little more water if you need the paint to spread a little more or if the color is a little too bright.
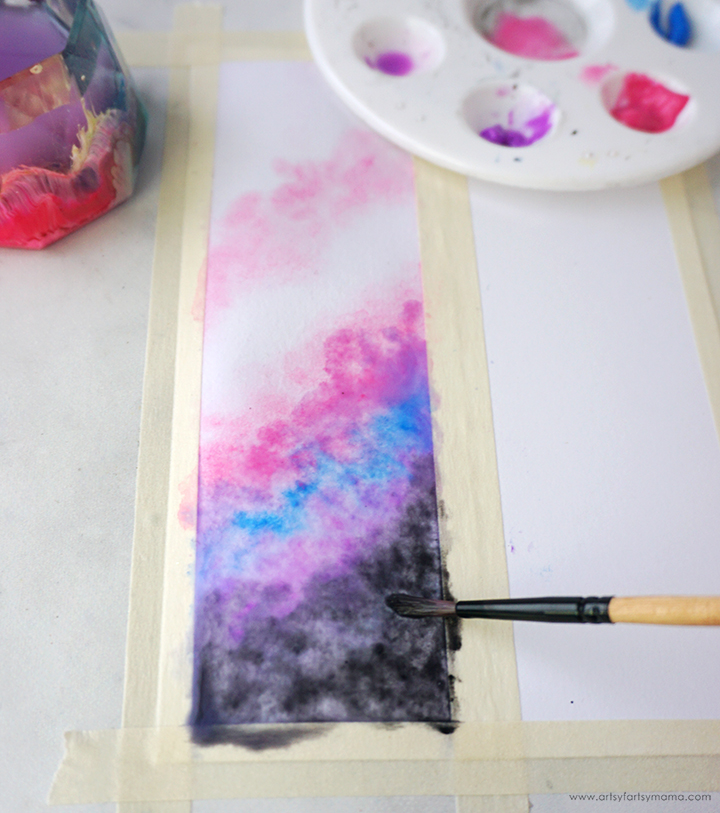
Rewet the paper, if necessary, and then add lines of blue and purple next to the pink, and then blend the end of the bookmark to black. To "blend", all I mean is to keep up with the wet-on-wet method - wet paper and wet paints to that the edges spread into each other. Do this on the bottom half first so that you get a feel for it, and then repeat the process at the top.
Make another galaxy on the second bookmark, and feel free to change up the colors or patterns! The fun part about watercoloring is that no piece is exactly the same, so enjoy experimenting.
Let the paper dry completely before moving on to the next step. This is only the first layer, so don't feel like it needs to be "perfect" at this point! Just get the basic colors down on the paper and let it be. You should also know that a lot of water and brushing can eventually tear the paper, so try to keep it simple.
The second layer is similar to the first, and is about brightening the colors and adding some depth. Wet the paper again with clean water, and then go over each area again with wet paints. Add a little extra water if necessary to blend the edges of the colors. Add more black this time to darken the top and bottom edges.
Let the paint and paper dry completely.
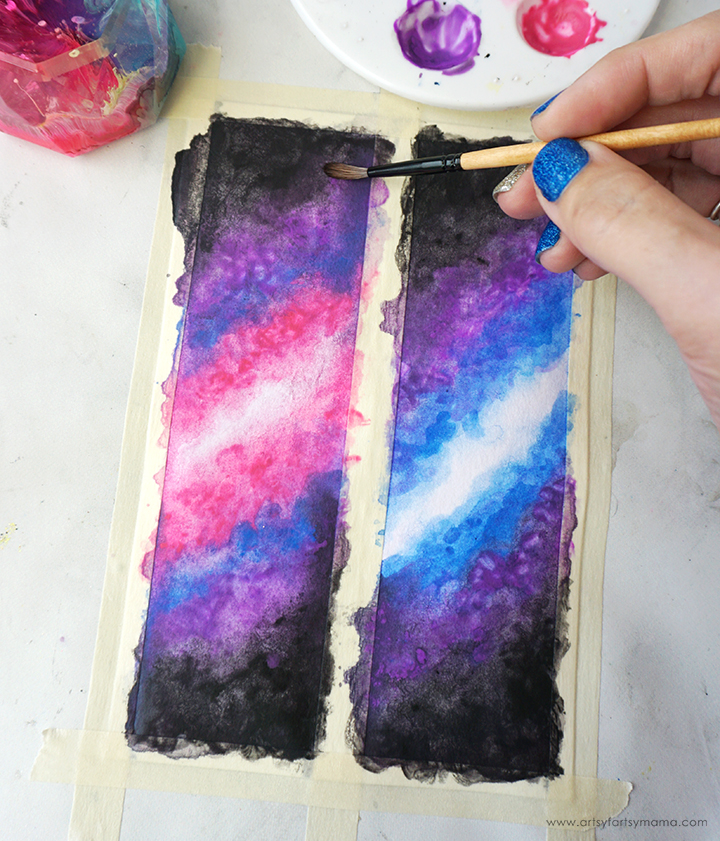
For the last layer, wet the paper again well. This time, add black paint on strongly at the outer edges. Keep the brush wet, and drag some of the black paint down a little bit over the stripes of color. This darkens everything a little bit, and blends to look more galaxy-like instead of stripy. If some of the color gets too darkened by the black, you can go back in with a wet brush and dab some of the color back in.
If some of the paints start to pool in the white area of the galaxy, take a paper towel and dab some of the paint away. You can also add some clean water to the area and clean it up a little more with paper towel. It doesn't have to be perfectly white, but you want it light enough to have a stark contrast against the colors.
Let the paint and paper dry completely.
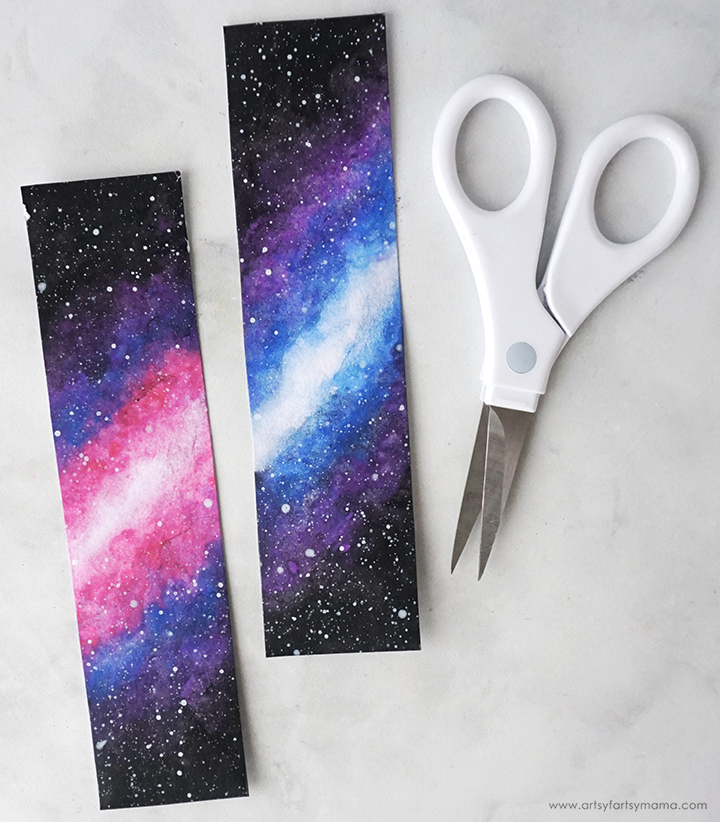
Now it's time to add some stars to the galaxy! Add a tiny drop of white watercolor paint to the palette and mix in a generous amount of water. You want it to be an ink-like consistency. Dip the tip of a brush into the paint, and then tap another brush on top of it. This will create small dotted splatters on your galaxy that give the appearance of billions of stars in various sizes.
Dip the brush again, if necessary, and keep tapping over the paper until you get the amount of stars you'd like on your galaxies.
I was laughing a little while tapping, because it reminded me of "The Parent Trap" when the twins trick Vicky into warding away mountain lions.
If you want to add in any larger stars or planets, dip the opposite end of the brush into the paint and add dots wherever you'd like. Be sure to let the paint dry completely so that you don't smear any of the splatter. It doesn't take very long.
Make sure the paper is completely dry, and then carefully peel the tape away from the paper. It's okay if the paper sticks to the tape a little bit. Just peel the tape away slowly and try to stop it from ripping away the paint.
Use scissors or a paper trimmer to cut away the borders of the bookmarks. If you had some of the paint peel up from the tape, just trim the bookmark a little smaller to get rid of the area(s). The bookmarks started out at 2 inches wide, and I ended up trimming mine to about 1.75 inches wide.
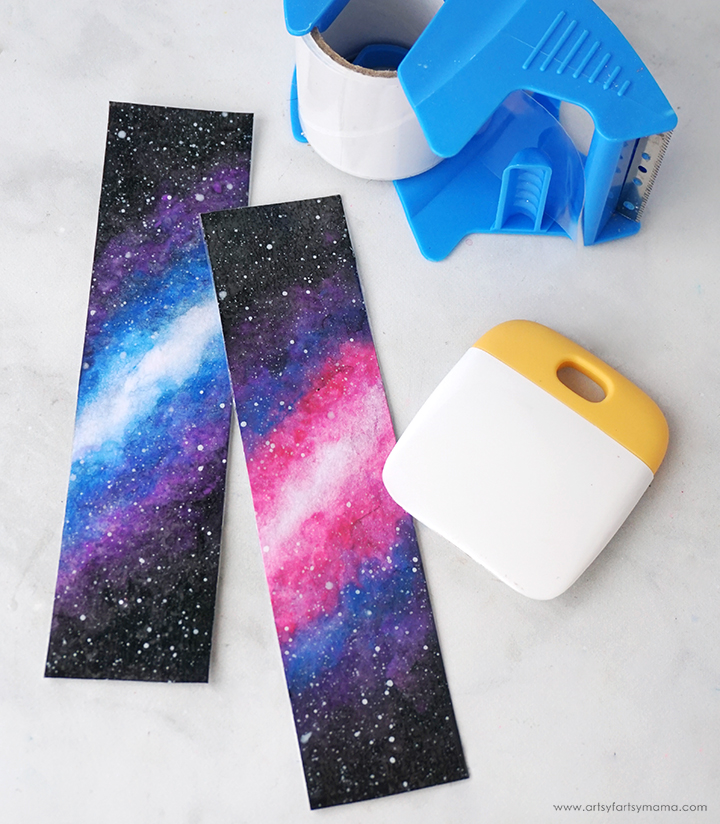
This step is totally optional, but I would recommend laminating the bookmarks. This will help keep them looking new for as long as possible. If you don't have a laminator, here's an easy trick: use packaging tape and a scraper tool.
Tear a long strip of tape, and center the tape over the top edge of the bookmark. Use the scraper to press the tape down over the bookmark and to get any air bubbles out as you go. Once the front has been covered, turn the bookmark over and place another piece of tape over the back. Trim the excess tape away from all edges of the bookmarks.
Now the Watercolor Galaxy Bookmarks are ready for use! I am so excited about they turned out, and would love to hear what you think! As always, if you make these projects for yourself, I'd love to see your creations! Tag me on Instagram and Facebook, or leave a comment/photo on the project pin on Pinterest!
Don't forget to Pin, Like, and Share!


