
Make some "turtley awesome" Sea Turtle Jewelry using polymer clay!
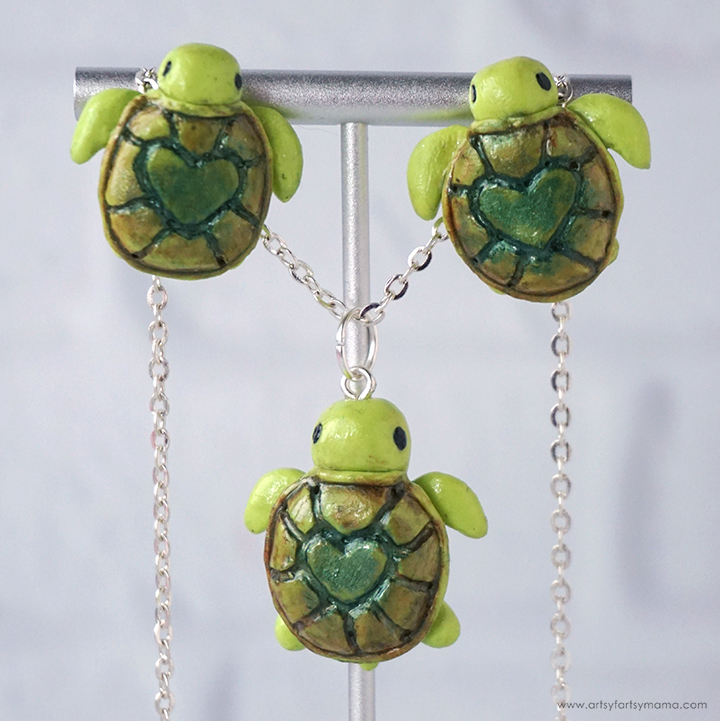
One of my favorite vacations was in Turks & Caicos, and when we went on a sea excursion to look for sea turtles. Luckily, we saw a bunch of them, and it was amazing!! Sea turtles are one of my favorite animals, and I was inspired by these adorable turtle charms to make some Polymer Clay Sea Turtle Jewelry of my own. I can't believe how fun and easy they were to make, and I'm absolutely thrilled with how this jewelry set turned out!! These turtle charms would also make a great gift or product to sell in your small business.

To make your own Polymer Clay Sea Turtle Jewelry, you will need these supplies:
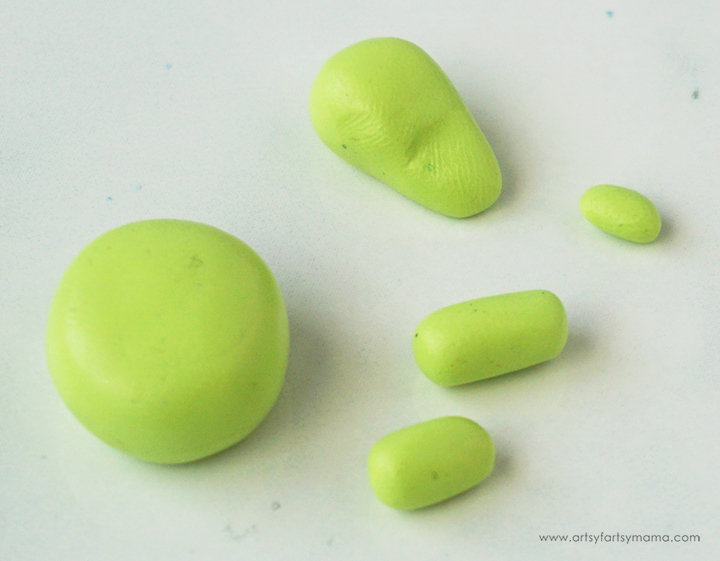
You don't need a lot of polymer clay to make one of these sea turtle charms. I used about half of a one-ounce brick of clay. Now you need to split this clay into 5 pieces. For the first piece, take about 1/3-1/2 of the clay and make an oval-shaped ball with a flat bottom. This will be the shell of the turtle.
Next, make a teardrop shape for the head of the turtle and set it aside. You will also need two small logs - one slightly larger - for the arms and legs. The last, and smallest piece will be for the tail and shell lining.

Shape the head into slightly flattened a teardrop shape, and completely flatten the pointed end. Place the head on the underside of the shell, at one the top end of the oval. Blend the flattened end of the head into the bottom of the shell piece so that they don't come apart.

Place the partially-assembled turtle's body onto a ceramic tile or oven-safe work mat to finish putting the turtle together.
Take the piece for the arms and cut it in half with a craft knife. Shape the clay into a pair of mirrored boomerang-type shapes to make the turtle arms. Flatten the ends of the arms that will be attached to the body. Gently lift the body, and put the arm into place near the "neck" of the turtle. Repeat for the other arm. Turn the turtle over to blend the clay pieces together on the underside.

Next, shape a small piece of clay into a triangle, and place it on the opposite end of the head. Blend the pieces together underneath the body. Place two small balls of clay on either side of the tail for the turtle's feet. Again, make sure to blend the clay so that it all stays together.
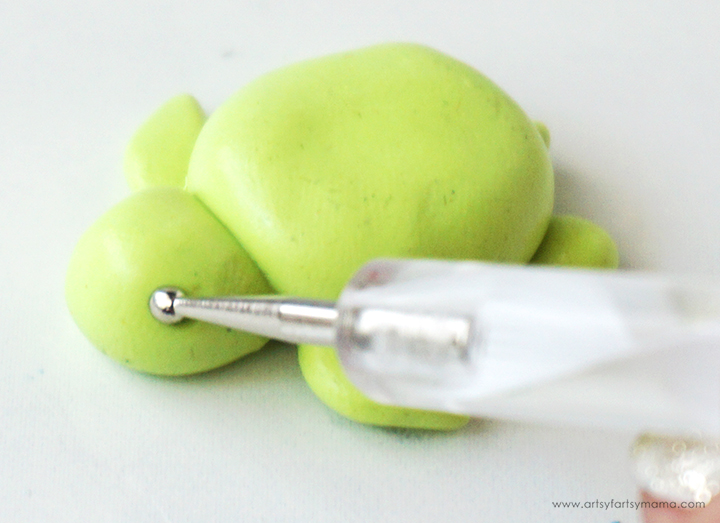
Use the end of a dotting tool to poke a small dent in the clay on either side of the head for the eyes.
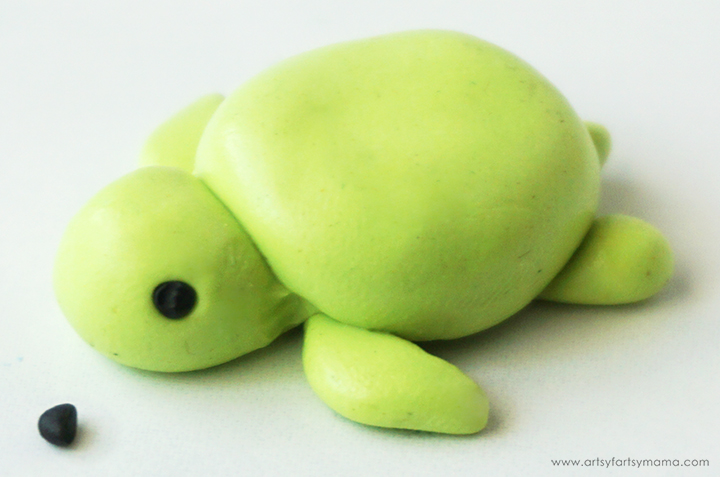
Roll two tiny balls of black clay to fit into the eye holes. Carefully and lightly put the clay into the hole using the dotting tool. That way if the clay eye is too big, you can easily pull it back out and make adjustments. Once the clay fits well, gently press it into place with the tool so that they don't fall out.

Now it's time to add detail to the turtle shell. I decided to do a heart in the center of the shell, but you could really do any shape you want! Use a thinner dotting tool and lightly draw out your shape in the center. As long as you do it lightly, you can gently rub over it with a fingertip to "erase" it and start over if you need to.
Once you are happy with the shape, lightly drag the tool over the indentation to smooth it out.
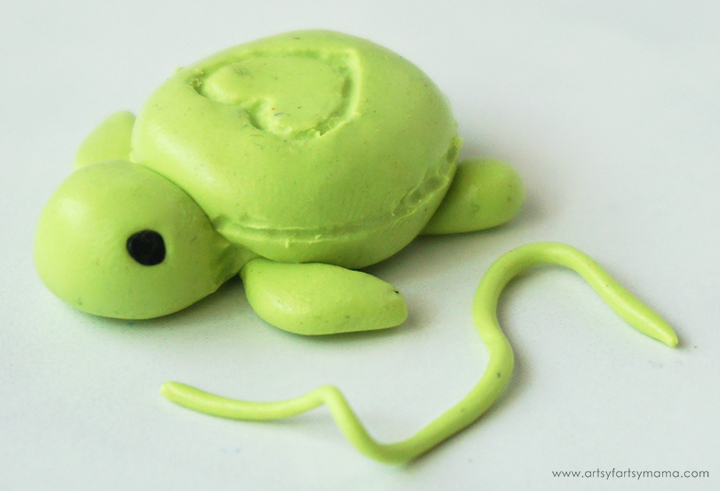
Next, draw a line around the center of the shell, horizontally. This will be a guide to add the ring to the shell. Take the last piece of clay (left over from the tail piece) and roll it into a long rope.
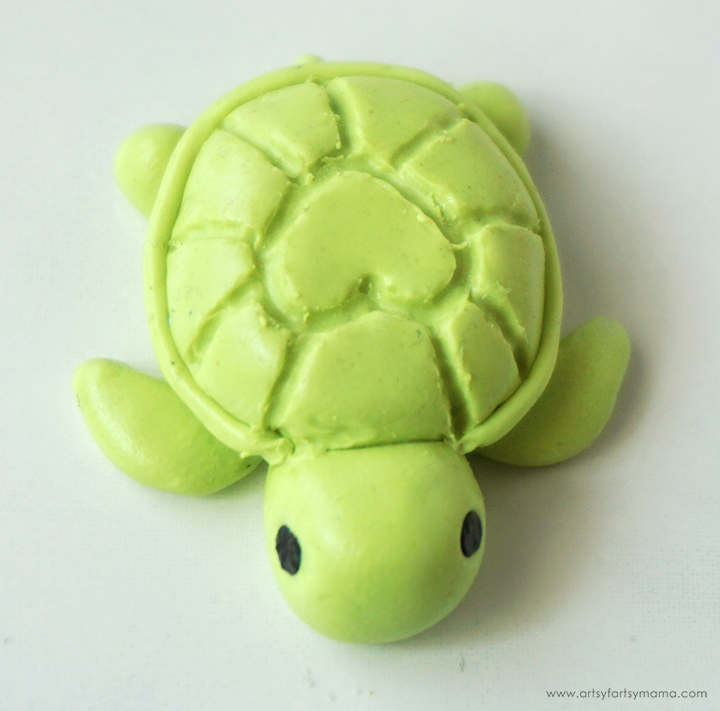
Line the rope up with the indented line around the shell, and gently press it into place. I didn't do it on this turtle (at first), but line the rope ALL the way around the shell, including over the head/shell seam. Use the craft knife to trim off any excess clay rope, and blend the edges together.
Lastly, use the same thin dotting tool used to make the heart to make the rest of the shell lines. Once lightly drawn, go over them again to smooth the lines out and blend them together.

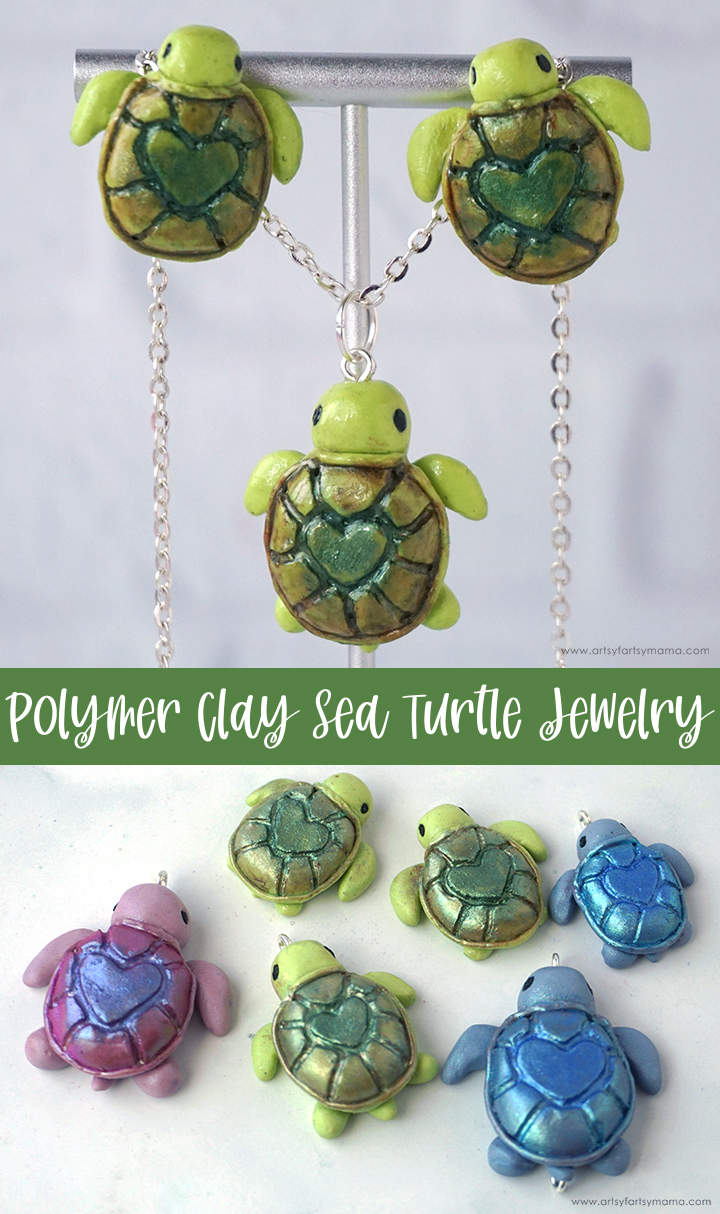
I was originally making one sea turtle to use as a necklace charm. However, after making the first sea turtle, I just couldn't stop! I made two more smaller green turtles to make matching earrings, and then mde a few more turtles out of some different colors.

To help the sea turtles become charms (for jewelry, keychains, etc), gently twist a small jewelry eye screw at the top of the turtle, actually about where the "mouth" would be. You could just push the eye screw in, but it can make the head become a bit misshapen.

Next, I added a little bit of color to the shells using mica powders and a detail brush. The key to getting detail is layering multiple colors. First, add some brown to the top of the shell using a dry brush, making sure to get into all of the shell lines. Don't worry if powder accidentally gets on other parts of the turtle. I'll show you how to clean it up later.

Layer other shades of green over the brown, focusing on the heart area. Make sure to clean out the brush between colors. For the pink and blue turtles, I decided to use coordinating colors instead of brown to see how they would turn out. I actually really love how the chameleon/color-shifting mica powders look when the shells hit the light!
Preheat your oven and bake the sea turtles on your ceramic tile or oven-safe work mat . I baked the turtles at 275º for 30 minutes, but refer to your specific clay packaging directions. Once baked, let the pieces cool completely before handling.

If you have any rogue mica powders on the turtles, dip the end of a cotton swab into some alcohol and gently rub it away for easy clean-up.
To protect the sea turtle charms and give them a glossy finish, apply a thin layer of Sculpey Gloss Glaze over the turtles - especially the shells - with a small paint brush. You can apply multiple coats of glaze, but make sure that the previous layer has completely dried before adding another coat.

To make the smaller green turtles into earrings, I simply turned them over and added earring posts using
strong adhesive just below the head. For a more permanent hold, I would recommend adding a layer of UV resin or Liquid Sculpey* over the earring post bases.*If you use the Liquid Sculpey to attach the posts, don't forget to bake the earring pieces again to make it permanent!
To make the turtle charm into a necklace open a jump ring using jewelry pliers. Hook the ring through the opening in the eye screw, and then use the pliers to close the rings. Thread a necklace chain through the jump ring to complete the necklace.
The eye screw is baked into the charms and should be fine as-is. However, if you are concerned about it coming out, carefully twist the screw out of the charm and add a little bit of super glue to the end. Twist it back into place, and it should be permanent once the glue dries.
Now you have a complete Polymer Clay Sea Turtle Jewelry Set! This is such a great set to wear with any type of outfit, and would make such a creative handmade gift for someone who loves sea turtles!

I decided to make the blue clay sea turtles into a "Mommy and Me" type of necklace, which would be such a sweet gift for Mother's Day or for a new mom! To connect the baby and mama, I added another eye screw just below the tail on the larger turtle and hooked them together with a jump ring.
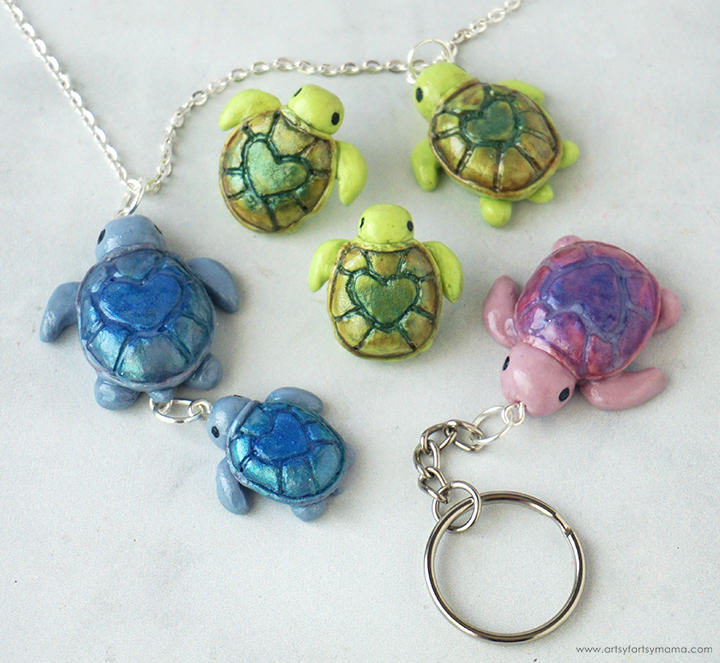
Making Polymer Clay Sea Turtle Jewelry is so much fun, and I love how they all turned out. Not only can you make the turtle charms into jewelry, but you can attach a key ring chain to make an adorable keychain to attach to purses, backpacks, and more! As always, if you make any of these projects for yourself, I'd love to see your creations! Tag me on Instagram and Facebook, or leave a comment/photo on the project pin on Pinterest! #AFMCrafts
Looking for more ocean craft inspiration?
Check out this collection of OVER 100 creative ocean-themed craft ideas!!
Don't forget to Pin, Like, and Share!


These little turtles are simply the cutest little things!
ReplyDeleteAlexandra
OnRockwoodLane.com
EyeLoveKnots.com