
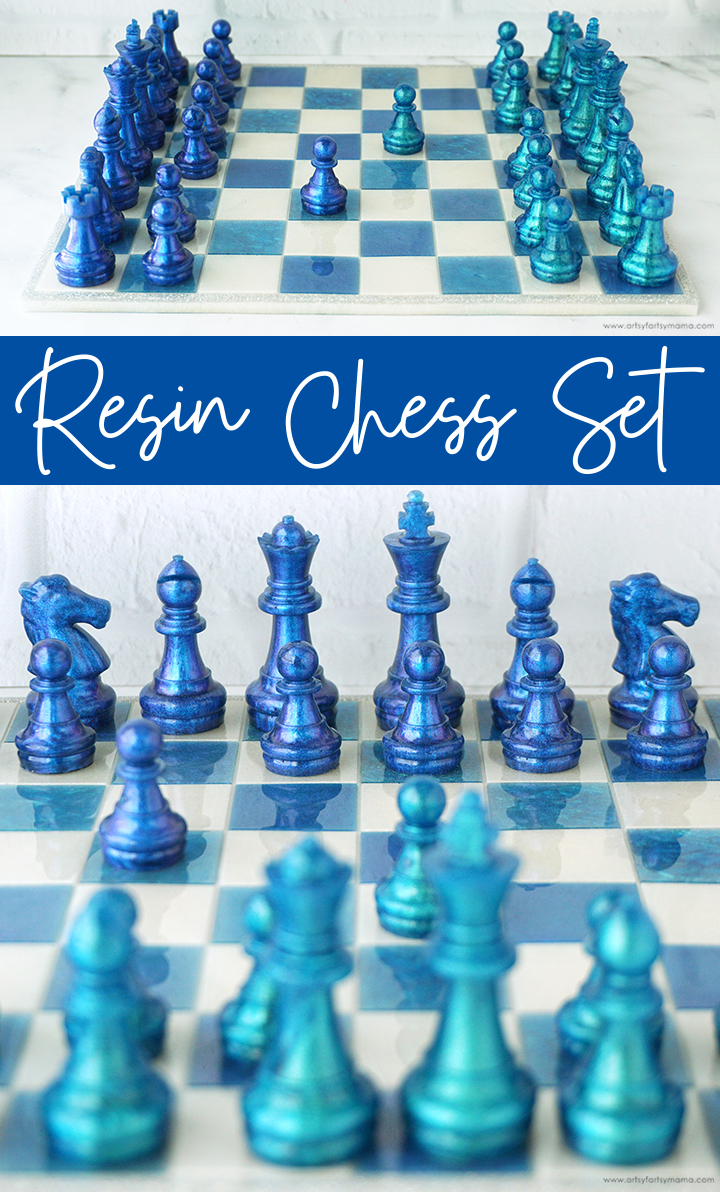
Make a custom Resin Chess Set to play with the family or share as a gift!

We love playing games together as a family, and this time we're learning something new! Chess is a classic game that kids of all ages enjoy, and we've had a great time figuring it out. Instead of buying a basic set from the store, I was inspired to make our own custom resin chess set using molds and pigments from Let's Resin. Not only is making a custom resin chess set really simple, but it would be such a creative gift to share with friends!!
New to resin? Be sure to check out Resin 101: Getting Started with Resin!

To make your own Resin Chess Set, you will need these supplies:
- Chess Board & Pieces Set Mold
- Amazing Clear Cast Resin
- Chameleon Mica Powders - blue, teal, olive
- Silver Holographic Glitter
- Mixing Cups
- Stirring Sticks
- Disposable Gloves
*Save 10% on resin supplies when you shop ETI with code AFM
SAFETY FIRST: Before getting started, wear disposable gloves, protect your workspace, and be sure to work in a well-ventilated area!
You will need a total of 150ml (5 oz) resin for each chess color. However, filling the pieces takes more time than you'd think, so mix it up in small batches at a time so that it doesn't start to cure while you're still pouring.
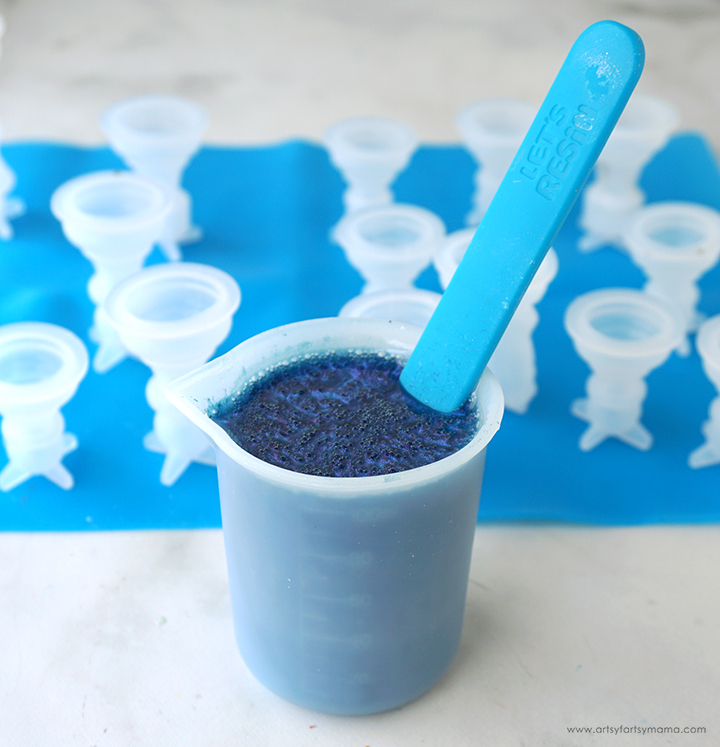
Prepare 2-3 oz of Amazing Clear Cast resin according to package directions. Pour in equal parts of resin and hardener to the mixing cup*. Slowly stir the resin together with a stir stick for two minutes. If the resin looks cloudy or has any streaks running through it, you need to keep stirring it until it becomes clear.
Pour in a generous amount of blue chameleon mica powder into the cup, and stir until the resin mixture is evenly incorporated.
*These silicone mixing cups are my favorite! They are reusable, so there is there less waste - which is a big deal for me. There are easy-to-read measuring marks on the outside of the cup, it's flexible for easy mixing, and clean-up is a snap once the resin has cured! If you use resin often, I highly recommend giving them a try.
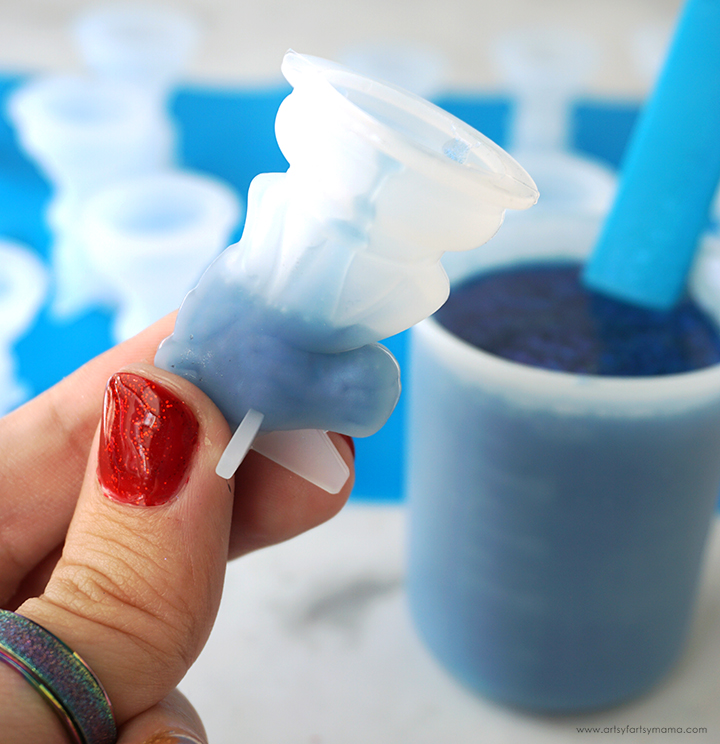
The trick with getting the resin chess pieces to come out right is to make sure there aren't any bubbles trapped in the molds. The chess pieces have a lot of detail, so you have to keep a close eye on it and work slowly.
Start by adding a little bit of resin to the mold using the stir stick. Squeeze the mold together at the bottom, and bring any trapped bubbles to the top. With the Knight (horse) piece, tip the mold so that the resin goes into the nose and mouth area, and squeeze any bubbles out. Once that's taken care of, fill the mold up the rest of the way.

Repeat the slower filling process for all of the chess pieces. If you run out of resin, mix up some more using the same instructions as above. To keep the mess to a minimum, I placed the filled molds on a silicone mat. Once any spilled resin has cured, it peels right off for easy clean-up!
Let the resin pieces sit for 5-10 minutes, and then pop any bubbles that rise to the top by spritzing with alcohol. Leave the resin to cure in an undisturbed, well ventilated area for 12-24 hours. You will know that the resin is completely cured when it is no longer tacky to the touch.

Last, but not least, it's time to add color to the chess board! Instead of the traditional black squares, I decided to alternate the blue and teal instead, and then fill the rest with white. Mix more resin, if necessary, and use a toothpick to fill the squares.
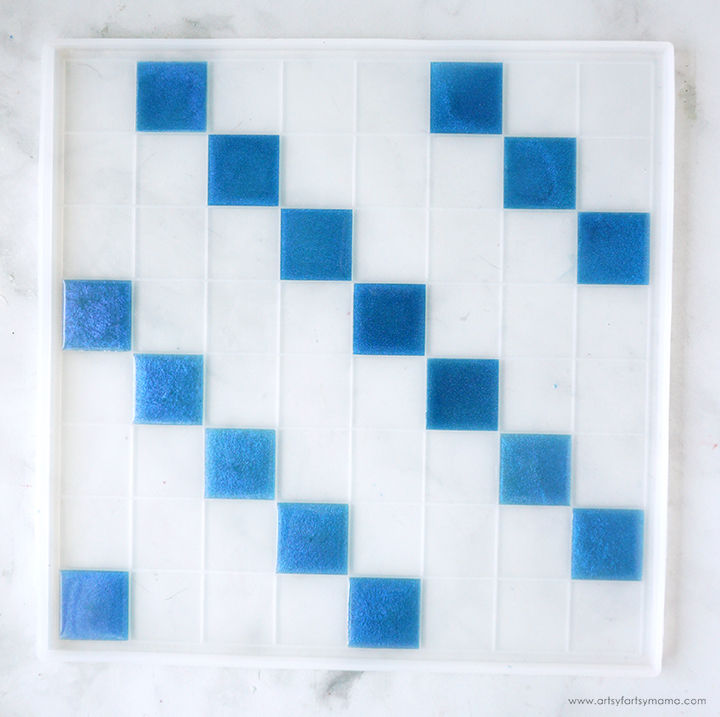
The easiest way to alternate the blue and teal mica colors is to refer to the image above. To begin, fill the square in the bottom left corner first. Move over (or up) three squares, and then fill that row of squares, diagonally. Repeat this two more times to get the four diagonal rows of squares filled with the blue mica resin.
Pop any bubbles that rise to the top by spritzing with alcohol. Leave the resin to cure in an undisturbed, well ventilated area. Do NOT remove any of the resin from the chess board mold!!

"Demolding" is my favorite part of the process! Removing the chess pieces from the molds can be a little tricky, but it's SO worth it! Gently pull the mold edges away from the chess pieces and add in a few drops of water. Carefully work the pieces out of the molds.
If the resin still feels flexible, it may just need more time to cure. Straighten the pieces back out, if necessary, and let the pieces sit in a warm, flat area to cure for a few hours (or days). Trim away any excess resin with scissors or a craft knife.
Congratulations! You are halfway through making a Resin Chess Set!!

Now it's time to make the other set of chess pieces. Again, you will need a total of 150ml (5 oz) resin, but mix up a little bit at a time.
Prepare 2-3 oz of Amazing Clear Cast resin according to package directions. Pour in equal parts of resin and hardener to the mixing cup*. Slowly stir the resin together with a stir stick for two minutes. If the resin looks cloudy or has any streaks running through it, you need to keep stirring it until it becomes clear.
Pour in a generous amount of teal chameleon mica powder into the cup, and stir well until the resin mixture is evenly incorporated.
Carefully fill the chess piece molds the same way as the blue, making sure to squeeze any large bubbles out the molds as you go so that they don't get trapped and ruin your project. Leave the chess piece molds to cure on a silicone mat.

Use a toothpick to fill the remaining diagonal rows with the teal resin. Pop any bubbles that rise to the top of the resin by spritzing with alcohol. Leave the resin to cure in an undisturbed, well ventilated area for 12-24 hours. You will know that the resin is completely cured when it is no longer tacky to the touch.

Carefully remove the teal resin pieces from the molds the same way as the blue set. Be sure to take your time and be patient so that you don't damage the resin pieces or the molds.
If the resin still feels flexible, it may just need more time to cure. Straighten the pieces back out, if necessary, and let the pieces sit in a warm, flat area to cure for a few hours (or days). Trim away any excess resin with scissors or a craft knife.

As I always say, glitter makes everything better. I decided to use some silver holographic glitter to add some extra sparkle to the border of the chess board. Mix up about 20 ml of resin according to package directions. Pour in equal parts of resin and hardener to the mixing cup*. Slowly stir the resin together with a stir stick for two minutes. If the resin looks cloudy or has any streaks running through it, you need to keep stirring it until it becomes clear.
Pour in a generous amount of holographic glitter into the cup, and stir well until the resin mixture is evenly incorporated.

Carefully fill the border of the mold with the glittered resin using a toothpick. Be careful to not overfill the mold. Spritz the resin with alcohol, and let the resin cure for at least 2-4 hours before moving on to the next step.

Now it's time to add the white resin to the chess board to finish it up! Prepare 12-13 oz of Amazing Clear Cast resin according to package directions. Pour in equal parts of resin and hardener to the mixing cup. Slowly stir the resin together with a stir stick for two minutes. If the resin looks cloudy or has any streaks running through it, you need to keep stirring it until it becomes clear.
Pour in a generous amount of olive chameleon mica powder into the cup, and stir well until the resin mixture is evenly incorporated. Pour the resin into the mold, and use your stir stick to help distribute the resin.
Pop any bubbles that rise to the top by spritzing with alcohol. Leave the resin to cure in an undisturbed, well ventilated area for 12-24 hours. You will know that the resin is completely cured when it is no longer tacky to the touch.
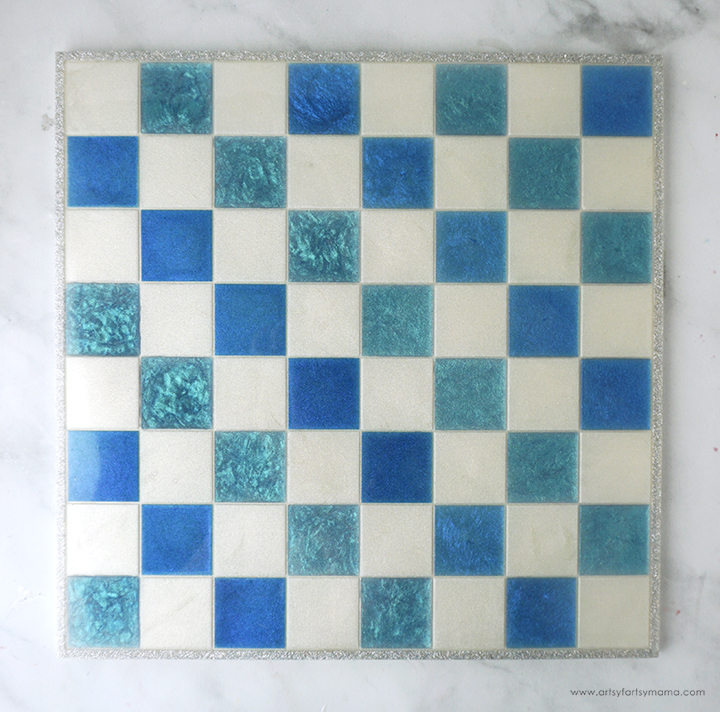
Carefully remove the chess board from the mold. Trim away any excess resin with scissors or a craft knife. If the resin still feels flexible, it may just need more time to cure. Let the chess board sit in a warm, flat area to cure for a few hours (or days).

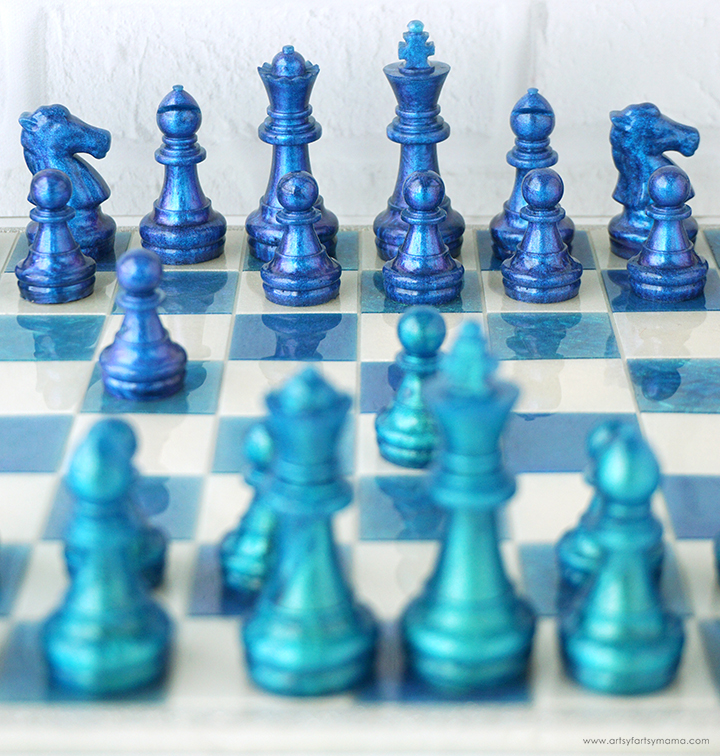
Now that all of the chess pieces and board have been created, it's time to put them to use! I love how the mica powder pigments shimmer and color shift in the light, and how professional it all looks. This would be such a wonderful custom gift idea for the chess fanatic in your life.
My daughter and I are total newbs when it comes to chess, so we have been trying to learn using our new Resin Chess Set. If you're like us, here is a helpful chess instruction video to get you started with the basics!
I had a lot of fun making this colorful chess set using resin, and we have had a blast playing round after round together as a family! As always, I would love to see your creations! Leave a comment and let me know, or tag a photo on Facebook, Twitter, or Instagram! #AFMcrafts
Don't forget to Pin, Like, and Share!


Does this kit contain all the materials needed to make the game?
ReplyDeleteWay too many ads on this page ;-)
ReplyDeleteIf you and your daughter would like to improve more at chess, you should totally check out chess.com. It has different chess lessons and you can learn how to play openings, and practice tactics by doing chess puzzles. It’s free, but your puzzles and lessons are limited to a certain amount a day. However, it still pushes you to improve!
ReplyDelete