
Clean up your craft room with a customized Craft Tool Organizer!
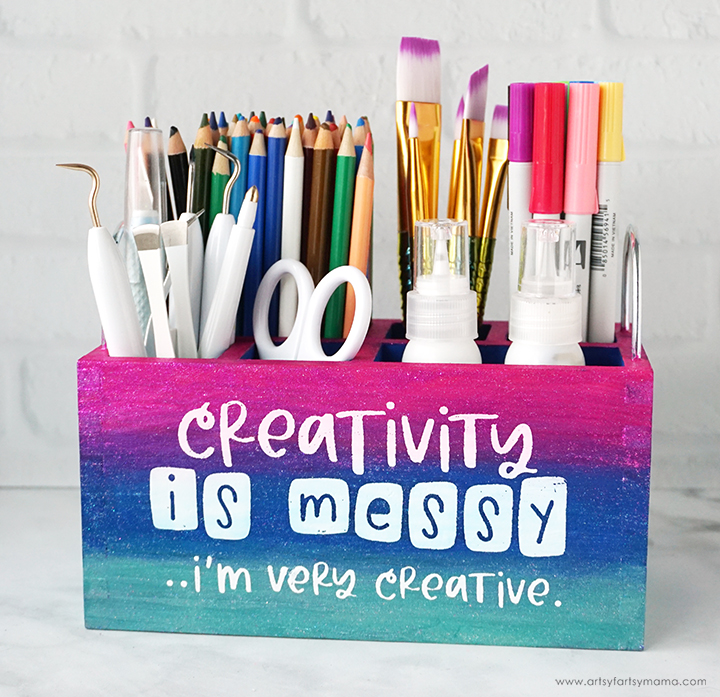
My craft room has become kind of a mess, and I'm honestly getting tired of digging through the "organized chaos" to find the tools I need to complete a project. To help get things under control, I gave this unfinished wood organizer a spectacular makeover (if I do say so myself) using my Ikonart Stencil Kit to hold all of my craft tools in one gorgeous, glittery spot. I absolutely love how it turned out, and have been so excited to show you how I did it!
New to making reusable stencils? Here's how to Get Started with Ikonart!

To make your own Craft Tool Organizer, you will need these supplies:
*Save 15% on Ikonart supplies when you shop with code AFM15
Printables from Artsy-Fartsy Mama are for personal use only. You may use these in an educational setting, but you may not sell them. If you'd like to share this printable digitally, share a link to this post only. Do not share a direct link to the printable.

To make a stencil, you need to start with a printed design. Download the Creativity is Messy Design (for personal use only) and print the design as dark as possible on either inkjet or laser Ikonart Printer Film.
The next step in the process is exposing the stencil film. Set up the exposure stand with UV LED Light by following the directions included in the kit. Ikonart Stencil Film is light sensitive, so be careful to keep it out of sunlight and bright lights before exposure. Cut a piece of the film the slightly larger than the design print.
Lay the piece of film down on the base of the stand with the textured side facing up. Place the printed design on top of the stencil film, making sure it's right-side up - meaning that you should be able to read the words printed on the design.
Lastly, place the clear exposure sheet (found in the stencil film pack) on top and press it down well to seal the design tight against the stencil film. Turn the exposure light on and expose the film for 35 seconds.

The final step in the stencil-making process is to washout, or rinse the stencil. Clip the exposed stencil film to the Ikonart clipboard with the shiny side (carrier sheet) touching the clipboard. Use the kitchen sink sprayer to rinse the stencil film with warm water until the design shows through and becomes completely clear. The washout process shouldn't take more than 3 minutes.
Gently blot the excess water from the stencil, and hang or lay the stencil flat to dry for about 45 minutes. When the stencil is dry, you shouldn't see any water spots or discoloration. Once the stencil is completely dried, place the it back on the exposure stand and expose it again for at least 2 minutes without the clear cover sheet. This extra exposure time will increase the durability of the stencil so you can get as much use out of it as possible.

Unicorn SPiT can get a little messy, so protect your work surface before getting started! Dip a paper towel in water and wipe the wood organizer down well to get it damp. Adding water to your surface before applying Unicorn SPiT helps the wood to absorb the gel stain better, giving you a more vibrant finish!
Use a paint brush to cover the top third of the organizer with a thick layer of pink Unicorn SPiT. Alternatively, you could put the Unicorn SPiT directly onto a damp paper towel and apply it to the wood like a stain. Wait about 10 minutes, and then apply another coat. The more coats of stain you add, the more vibrant the color will be.
*Wear gloves if you are worried about staining your hands!

Repeat the process with blue and then teal Unicorn SPiT. Overlap the colors at the edges and blend them to make a gradient. Don't worry about any bubbles or high spots like when using paint. The stain self-levels and will absorb into the wood evenly.
Depending on how thick the layer of Unicorn SPiT is, it could take at least 15-30 minutes to dry completely.

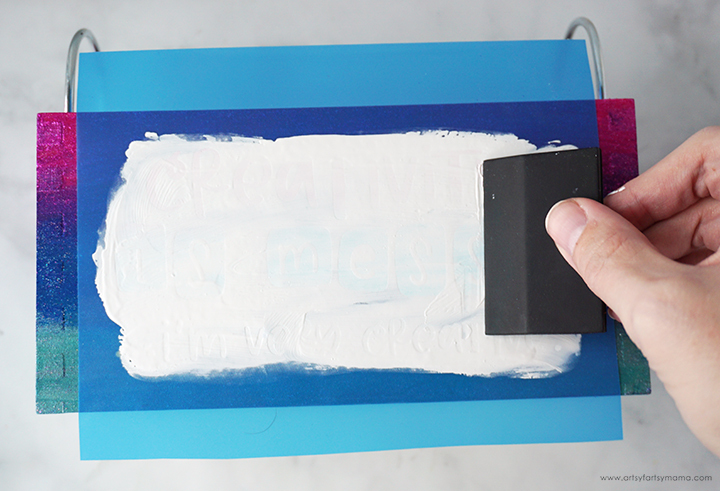
Remove the clear backing from the stencil and center the design on the front of the wood organizer. Once the stencil is in place, rub it down well.
*If you don't have chalk paint, you can thicken some white acrylic paint with Chalk Paint Powder instead.
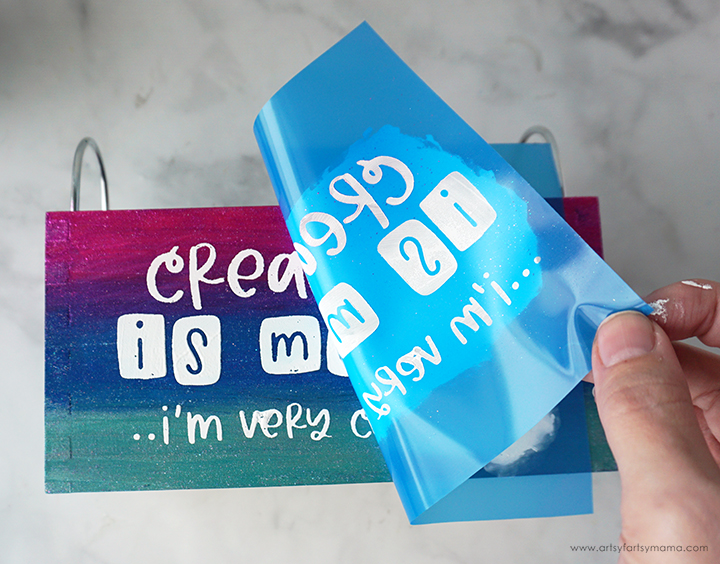
Carefully pull the stencil away to reveal the design! If you see any spots that you may have missed before completely removing the stencil, you can carefully lay it back down and add a little more paint.
If you notice a missed spot after removing the stencil, grab a small detail paint brush and add a light coat of paint over the area(s). If you have an area that has bled (like I did between the "v" and "e"), you can use a craft knife to carefully scrape the excess paint away while it's still wet.
To wash your stencil so that it can be used again and again, first get the clipboard wet so your stencil doesn't stick to it. Place the stencil on the clipboard with the textured side up, and lightly rub the stencil under cold running water to remove all the paint.
Do not rub or scrub the adhesive side of the stencil, and NEVER use anything other than water to wash the stencils. To prevent the stencil from breaking down, don't ever leave the stencils to soak.
Remove the stencil from the clipboard and lay it down with the adhesive side up. While the stencil is still wet, place the carrier sheet onto the stencil so that the word “BACK” is readable. Hang or lay the stencil flat to dry completely.
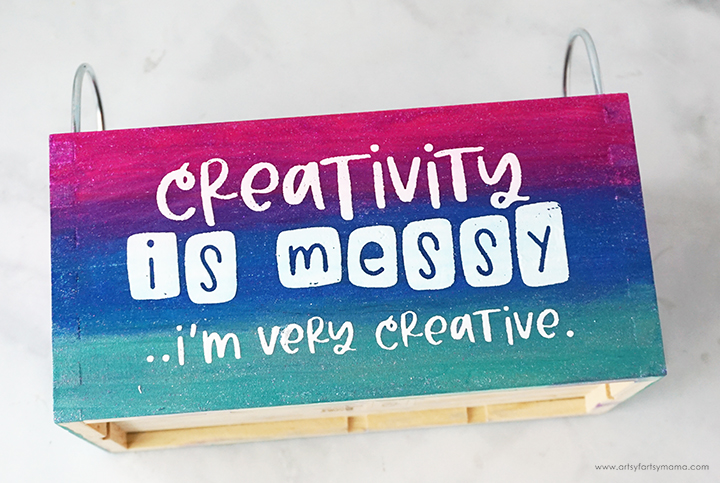
Once the paint has completely dried, fill the organizer with your favorite weeding tools, markers, paint brushes, and other craft supplies! I absolutely LOVE how this turned out, and it's helped me get my craft room that much more organized.
I'd love to hear what you think about this project, or if you want to know more about reusable stencils. If you've made your own stenciled projects, I would love to see your creations! Share them on Instagram, Facebook, or leave a comment/photo on the project pin on Pinterest! #AFMCrafts
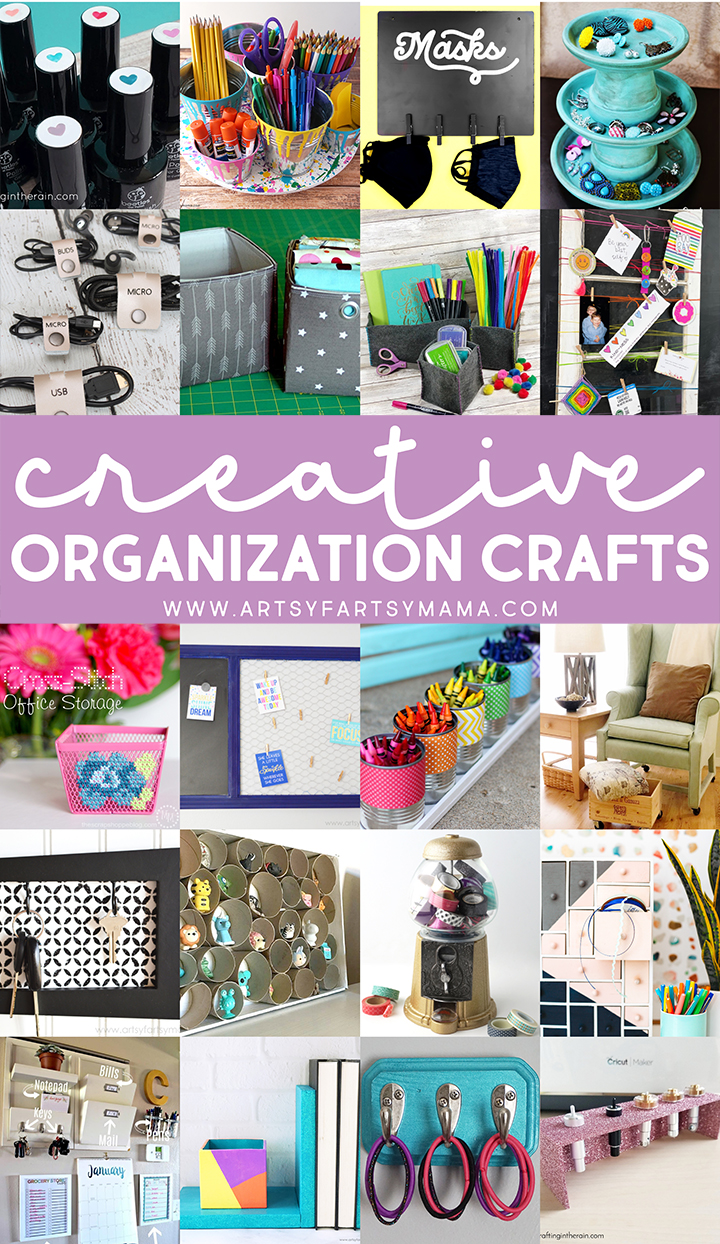
Looking for more organization craft inspiration?
Check out this collection of OVER 100 creative organization craft ideas!!
Don't forget to Pin, Like, and Share!


