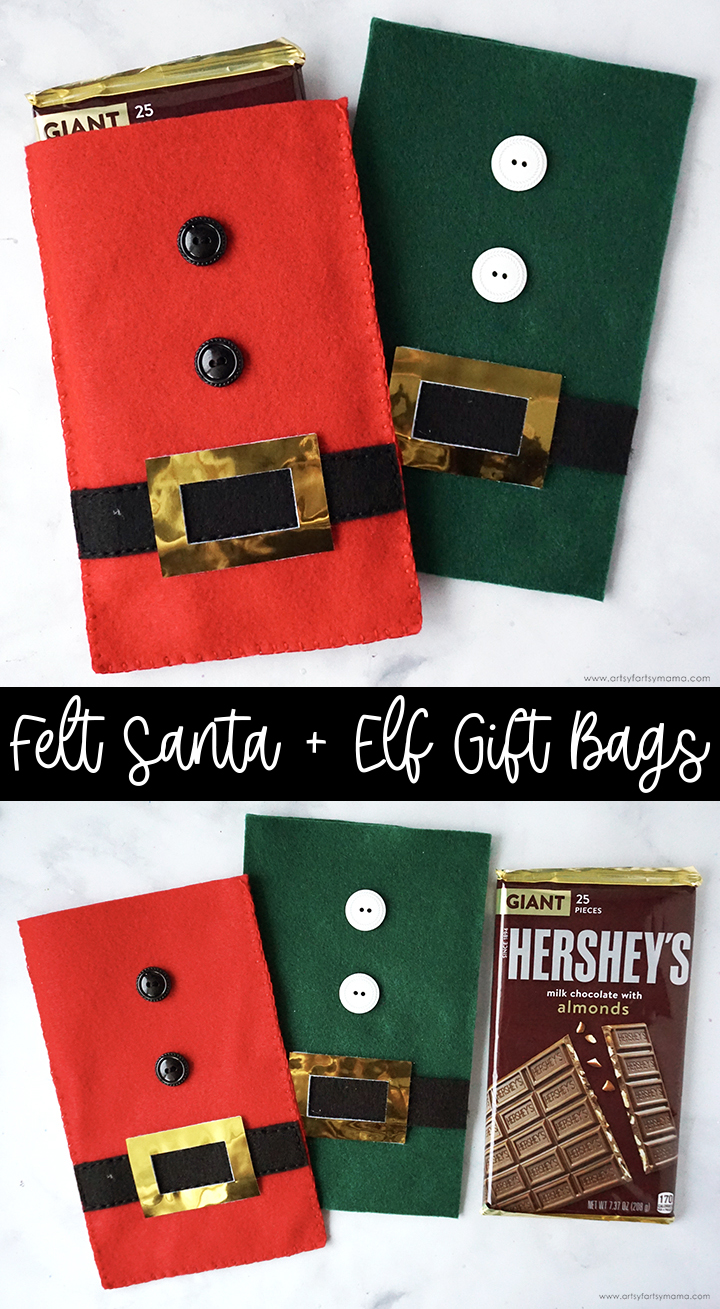
Make your holiday gifts extra special by packaging them in a handmade Felt Santa Claus (or elf) Gift Bag!

I'm always looking for creative ways to package holiday gifts, and this one couldn't be easier! Made of felt, these Santa Claus and Elf Gift Bags are a fun way to add a handmade touch to gifts for neighbors and co-workers. These bags are a simple no-sew project, but can also be assembled using embroidery floss - lucky for you, I'm going to show you how to do BOTH! No matter how you make one, I just hope you get inspired to try making one for yourself.

To make your own Felt Santa Claus + Elf Gift Bags, you will need these supplies:
- Santa Claus Gift Bag Pattern (personal use only)
- Cricut or Fabric Scissors
- Felt - red or green, black, white
- Metallic Gold HTV (optional)
- Buttons
- Fabric Adhesive
- Embroidery Floss - red, black
- Embroidery Needle
Download and print the Santa Claus Gift Bag Pattern PDF (personal use only). Cut the two large rectangles out of red felt for Santa, or green felt for an elf. If you want to use actual buttons, don't worry about cutting out the small circles from the pattern.
I used my Cricut to do the hard work of cutting out the pattern pieces for me, but hand-cutting the pattern using fabric scissors will work just as well!

If using a Cricut, download the Santa Claus Gift Bag SVG (personal use only). Along with the felt, you can also cut a piece of gold HTV to use for the belt buckle. This is totally optional, but I love the extra shimmer! Like I mentioned before, if you want to use actual buttons on your project, be sure to delete the small circles from the design before cutting.
*Here's a great tutorial on how to upload your own images into Cricut Design Space.
Embroidered Santa Gift Bags

Add a little bit of adhesive to the back of the black strip of felt and place it on the front of one of the red rectangles. Putting adhesive on the belt before stitching will help keep the felt in place while you sew it on. Try not to get any adhesive around the edges, or it can be a little tough to stitch through.
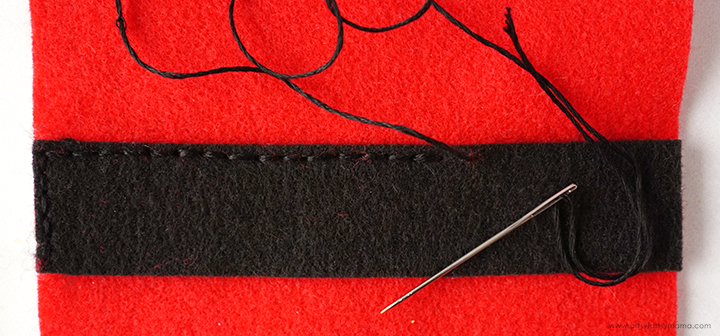
Back stitch around the border of the belt piece using a needle and black embroidery floss.

Next, sew two buttons above the belt with black embroidery floss. If you have a problems with the buttons sliding around while you are sewing them on, I find it helpful to add a small drop of adhesive to the back before sewing them on.
If you are using felt circles for buttons, backstitch them into place. If necessary, add a small drop of adhesive to the back before sewing.

Switch the embroidery floss to red. Use a blanket stitch to connect the red rectangles, starting at one of the top corners. Make sure to leave the top edge open!
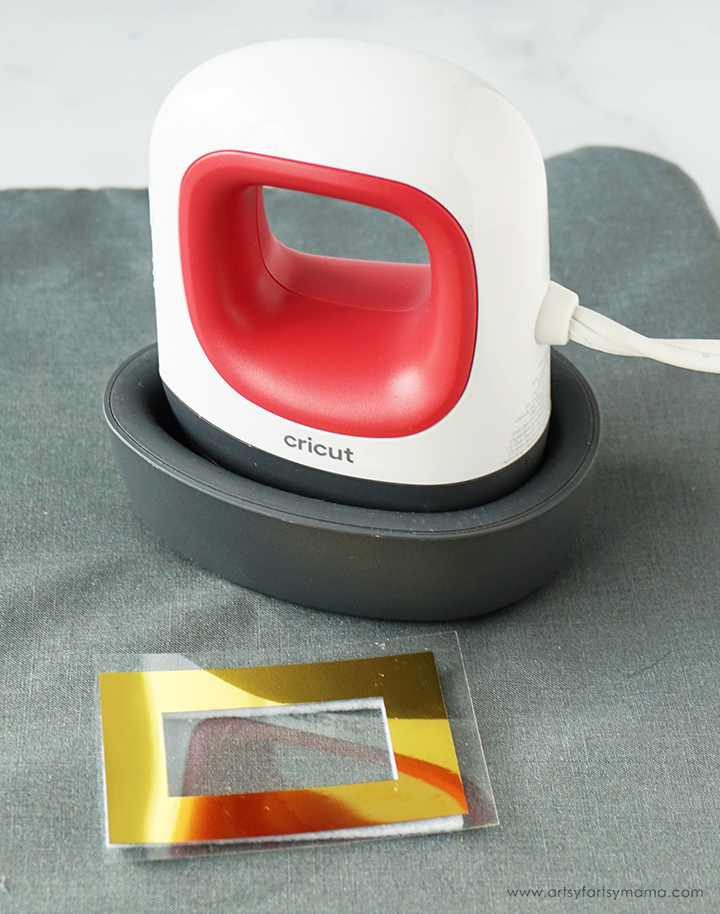
If using gold HTV for the belt buckle, weed the vinyl and center it on top of the felt buckle piece. Because this piece is so small, the EasyPress Mini does the job perfectly! Heat it the press up to the second bar.

Once the EasyPress Mini beeps, it's ready to go. Place the piece of felt with the HTV on an EasyPress Mat, and run the press over the felt with medium pressure. Once cooled, peel the carrier sheet away from the buckle.
Since stitching through the HTV can be tricky, I would recommend going the no-sew route and applying adhesive to the back of the buckle. Center the buckle piece over the belt and lightly press it into place.
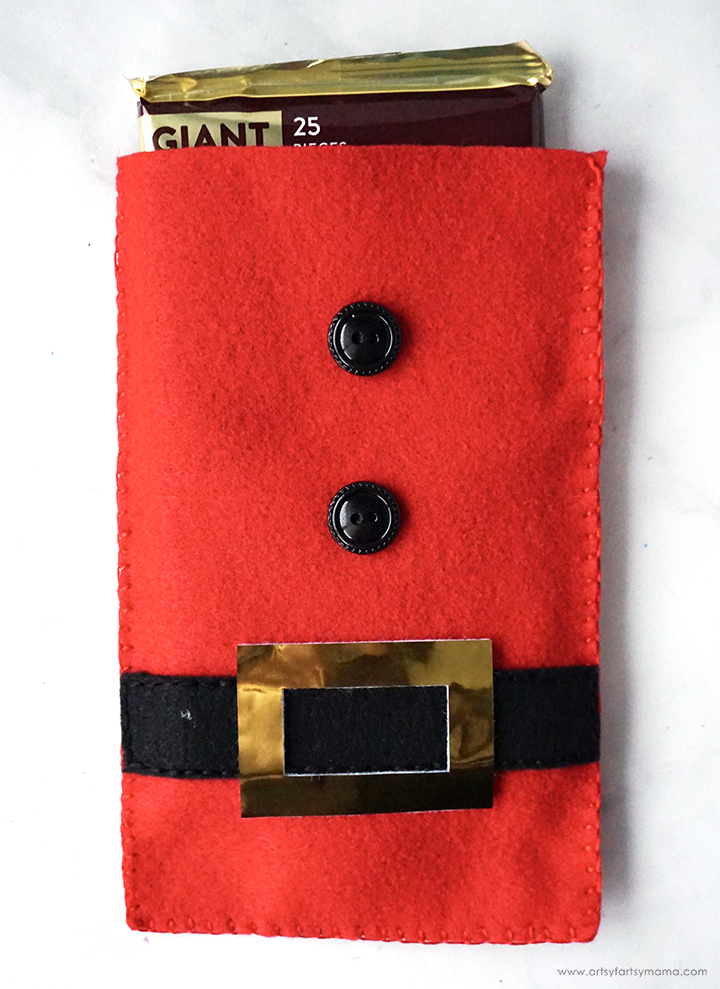
Now this adorable Santa Claus Gift Bag is ready to be filled with goodies! If you need gift inspiration, my go-to is a giant candy bar with a gift card because the candy bar is the perfect fit. This is such a quick and unique way to package holiday gifts for neighbors, co-workers, and friends.
No-Sew Elf Gift Bags

Next, add a line of adhesive around the sides and bottom edges of one of the felt rectangles. Place the other rectangle on top, making sure the edges are aligned. Lightly press the edges together.

Add adhesive to the back of the belt buckle, and center it over the belt piece. Press it into place. If you are using HTV on the buckle, you can press the vinyl onto the felt before or after it is glued in place.
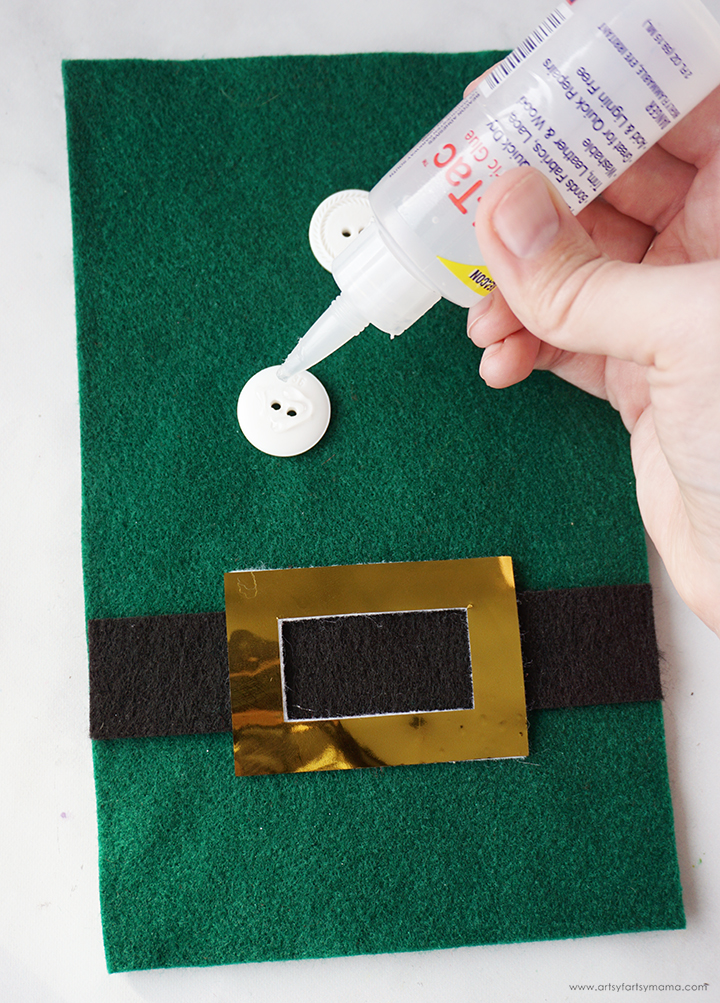
Turn two buttons over and add a small drop of adhesive to each one. Center the buttons above the belt, and lightly press them into place.

That's it!! No-sew is definitely the quickest option - you just have to make sure that you give the project enough drying time before filling it up with goodies. I think it's so fun that just by changing the felt and button colors, you can turn the Santa bag into an elf bag!

Don't you think that these Felt Santa Claus + Elf Gift Bags are so cute? I don't know about you, but I would LOVE to receive a gift packaged in one of these! I hope you are as excited about this project as I am. As always, I love to see your projects! Please share your creations on Instagram, Facebook, or leave a comment/photo on the project pin on Pinterest #AFMPrintables!
Don't forget to Pin, Like, and Share!