
Create your own custom Stenciled Christmas Sugar Cookies to share during the holiday season!

Baking Christmas cookies is one of my favorite holiday activities, and this year I am daring myself to try something new! I've been watching cookie decorating videos for years, and but have always felt too intimidated to give it a try. I recently learned that you can use a custom stencil made using an Ikonart kit to make cookie designs, and that gave me the push to make my own stenciled Christmas sugar cookies! I definitely learned a lot through the process, but it was SO much more fun and simple than I thought it would be. I hope that my cookie stenciling adventure inspires you to give it a try this holiday season!!
New to making reusable stencils? Here's how to Get Started with Ikonart!
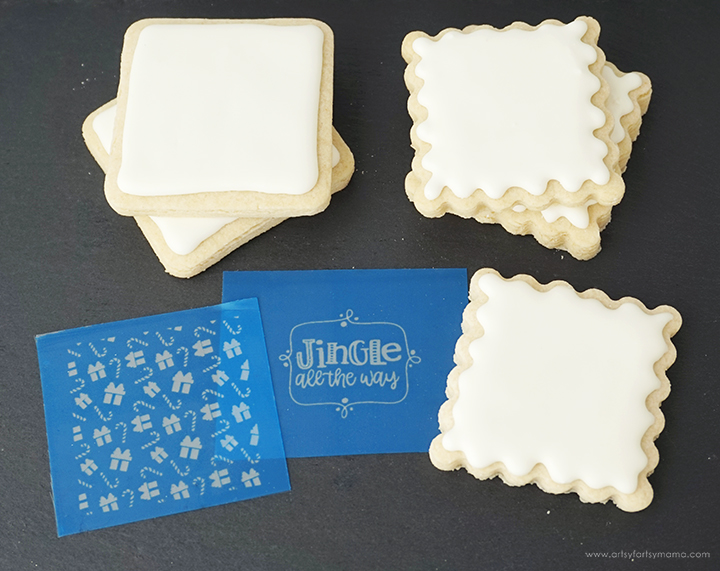
To make your own Stenciled Christmas Sugar Cookies, you will need these supplies:
- Sugar Cookies
- Royal Icing
- Christmas Cookie Stencil Designs (for personal use only)
- Ikonart Custom Stencil Kit*
- Ikonart Stencil Glaze
- Squeegee
*Save 15% on Ikonart supplies when you shop with code AFM15
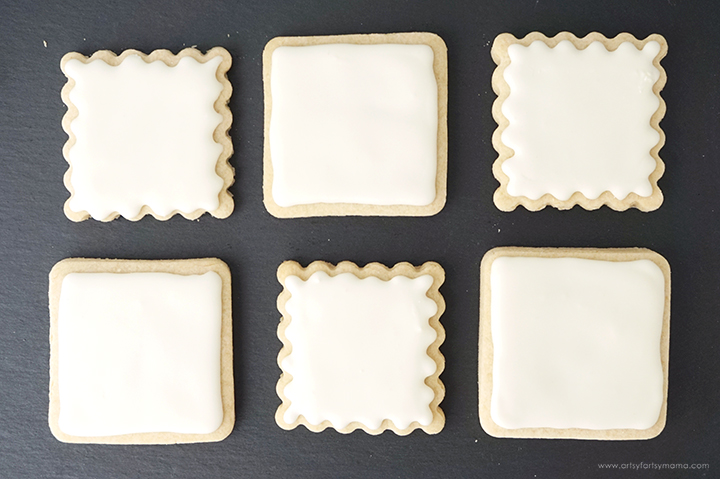
Before you can stencil on Christmas cookies, you first need some cookies to work with! I used a simple no-spread sugar cookie recipe and cut them out with a square cookie cutter. Once they were cooled, I topped them all off with a delicious and simple royal icing recipe. Make sure to let the royal icing sit for at least 6-8 hours to completely harden before stenciling.
If you want to skip the baking, you can always order some blank iced sugar cookies from a bakery or local baker! Nothing wrong with going semi-homemade on this project!!

To make a stencil, you need to start with a printed design. You can create your own, or download the Christmas Cookie Stencil Designs (for personal use only) that I used on my cookies. Print the design as dark as possible on either inkjet or laser Ikonart Printer Film.
The next step in the process is exposing the stencil film. Set up the exposure stand with UV LED Light by following the directions included in the kit. Ikonart Stencil Film is light sensitive, so be careful to keep it out of sunlight and bright lights before exposure. Cut a piece of the film the same size as the design print.
Lay the piece of film down on the base of the stand with the textured side facing up. Place the printed design on top of the stencil film, making sure it's right-side up - meaning that you should be able to read the words printed on the design.
Lastly, place the clear exposure sheet (found in the stencil film pack) on top and press it down well to seal the design tight against the stencil film. Turn the exposure light on and expose the film for 30-35 seconds.

The final step in the stencil-making process is to washout, or rinse the stencil. Clip the exposed stencil film to the Ikonart clipboard with the shiny side (carrier sheet) touching the clipboard. Use the kitchen sink sprayer to rinse the stencil film with warm water until the design shows through and becomes completely clear. The washout process shouldn't take more than 3 minutes.

When you are working with smaller stencils, be sure to watch the exposure time closely and don't over-rinse. The first stencil was exposed for 35 seconds, and I let the stencil soak a little bit in water before rinsing the design out. The second one turned out MUCH better, being exposed for 30 seconds instead, and wasn't soaked at all before rinsing.
Gently blot the excess water from the stencil, and hang or lay the stencil flat to dry for about 45 minutes. When the stencil is dry, you shouldn't see any water spots or discoloration. Once the stencil is completely dried, place the it back on the exposure stand and expose it again for at least 2 minutes without the clear cover sheet. This extra exposure time will increase the durability of the stencil so you can get as much use out of it as possible.

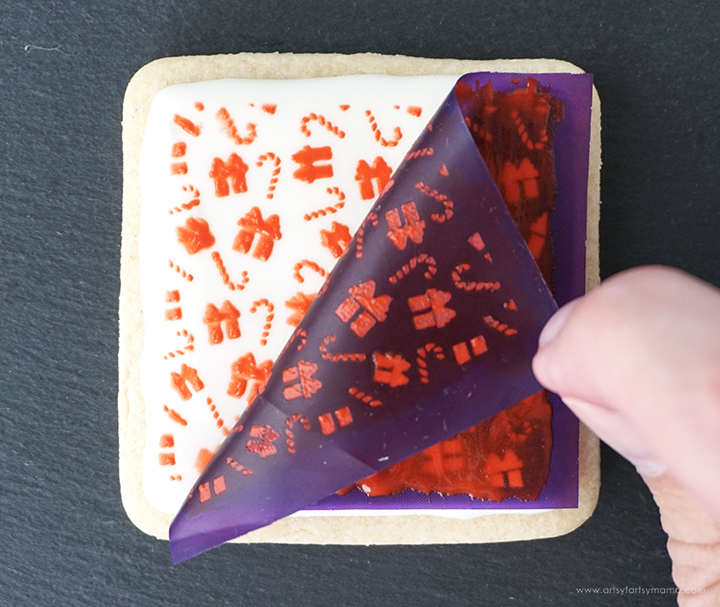
Usually you can go directly to crafting once your stencil is completely dry. Since these stencils are going to be used on cookies, you will need to make the stencils food safe using Stencil Glaze. The glaze kit comes with the bottle of powder* and a brush.
*The powder is a vegetable-based, non GMO, vegan, FDA-approved food additive which provides additional durability to Ikonart stencils. Once applied and dried, the coating is insoluble in water, which makes cleanup and drying the stencils faster and easier.

To create the glaze, you need to dissolve the powder in rubbing alcohol. Follow the included instructions for adding the alcohol to the bottle, and gently shake until the powder has fully dissolved.
- Remove the clear carrier sheet from the back and lay the stencil face-down on a paper towel.
- Dip the brush in the glaze, and apply it liberally to the stencil.
- Rinse the brush in a cup of alcohol to clean it well.
- Remove the stencil from the paper towel, and lay it flat to dry completely (do NOT hang it up). Drying can take about 15 minutes naturally, but may go faster using a heat gun or hair dryer on the lowest setting.
- Repeat steps 1-4 on the opposite side of the stencil.
- After the stencil is dry, hold the stencil up to the light to check for any clogging in the mesh. If clogged, the stencil openings will have a whitish, mottled appearance. Use a cotton swab to gently blot the clogged areas, if necessary.
- When the stencil is completely dry, rinse the stencil in fresh water to set the glaze.
- Once dry, the stencil is ready for use on the cookies!
*Visit Ikonart for a fantastic step-by-step photo tutorial on making food-safe stencils.


One HUGE tip, especially if you are new to using stencils on food. Have a set of "practice" cookies that you can use to get the hang of stenciling. It takes just the right amount of pressure and icing thickness to get it just right. Here you can see one of my mess-ups (there were quite a few at first). I can honestly say that I learned a lot through this process, one cookie at a time!
So, my best advice is that if this is new to you, be patient with yourself and don't give up!
...and let's be honest - even the ugly cookies are going to get eaten, so don't stress too much about it and have fun learning something new!!

I had a TON of fun learning to use custom stencils to make these gorgeous Christmas sugar cookies, and my family was so impressed! Now that I've had some practice, I'm looking forward to making more stenciled sugar cookies on Christmas Eve for our "Dear Santa" Christmas Cookie Tray that was also made using Ikonart!
I'd love to hear what you think about this project, or if you are interested in trying out reusable stencils. As always, I would love to see your creations! Share yours on Instagram, Facebook, or leave a comment/photo on the project pin on Pinterest! #AFMCrafts
Don't forget to Pin, Like, and Share!


