
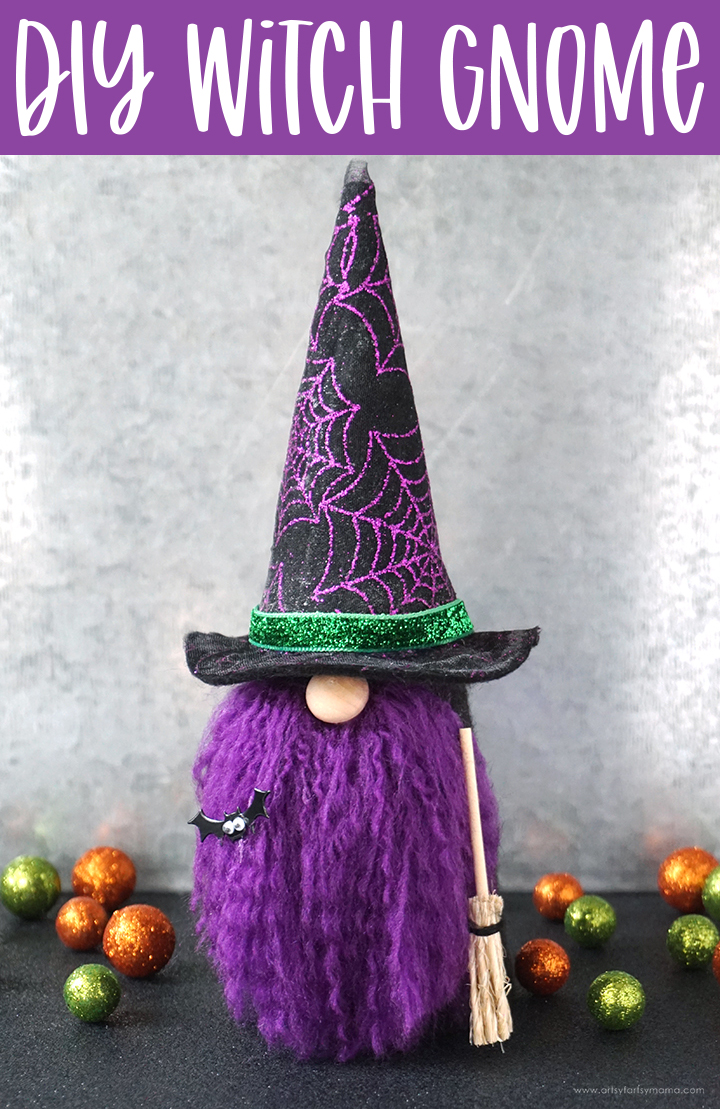
Create an adorably wicked Witch-themed Gnome to adorn your home for Halloween!
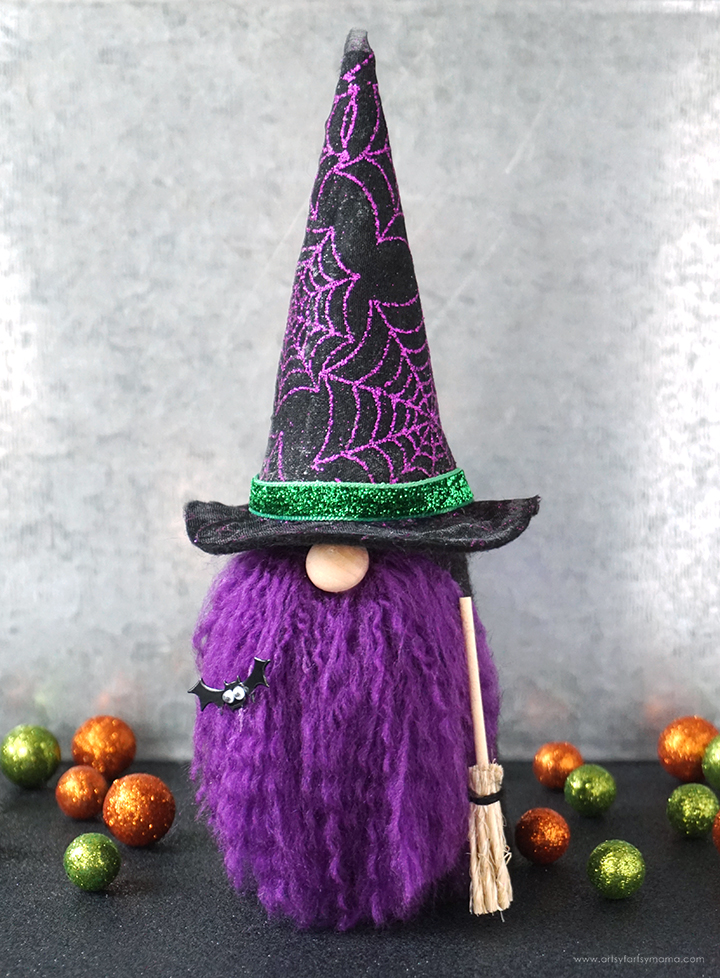
Spooky season is upon us, and I could NOT be more thrilled about it. Halloween is one of my favorite holidays, and I especially love crafting for it! I'm adoring the gnome craze right now, and wanted to make a spooky version to add to my Halloween decor. If you're looking for something to make for a "ghouls" crafternoon, this DIY Witch Gnome is so fun and easy to make!! I just love how it turned out, and hope you are inspired to give it a try for yourself!

To make your own DIY Witch Gnome, you will need these supplies:
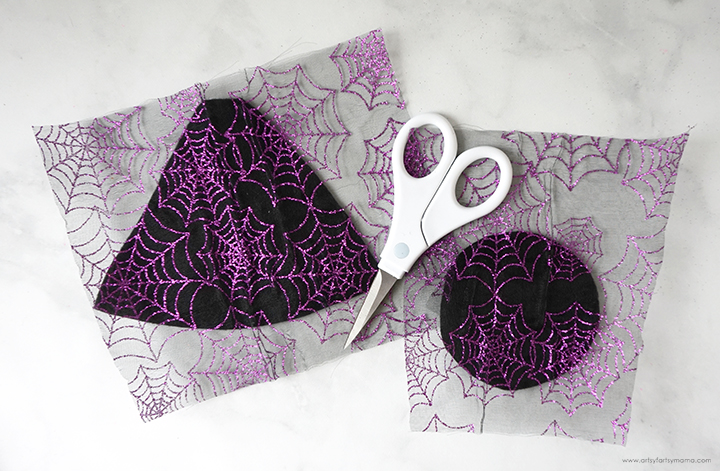

Apply a thin layer of Fabri-Fuse over the entire front sides of the felt hat pieces, and spread it around evenly using a paint brush or your fingertip. Wash your hands/brush well while the adhesive is still wet!
Place the spiderweb tulle over the felt, and lightly press it down so that it's smooth. Fold the tulle over the edges use pins or clips to hold the tulle tightly in place. Repeat the process for the hat brim piece. The adhesive goes on white, but will dry clear.

Once the Fabri-Fuse is completely dry, remove the pins or clips and use scissors to trim away the excess tulle. If you have any areas that aren't sticking, you can apply a little more adhesive and use clips again to press the fabrics together.

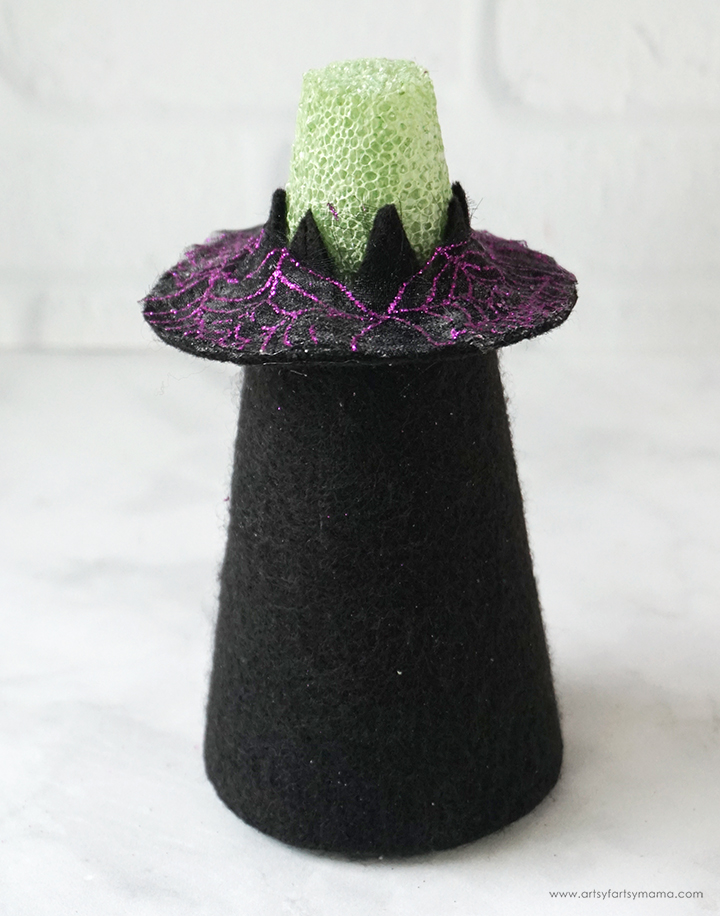
While the hat pieces are drying, you can start to put the gnome together. Wrap the "dress" pattern piece around the cone, making sure the bottom edge of the felt lines up with the bottom of the cone. Apply a thin line of Fabri-Fuse to one end of the felt, and place the other end on top. To hold the felt in place while the adhesive dries, stick pins straight through the felt into the cone down the entire seam.

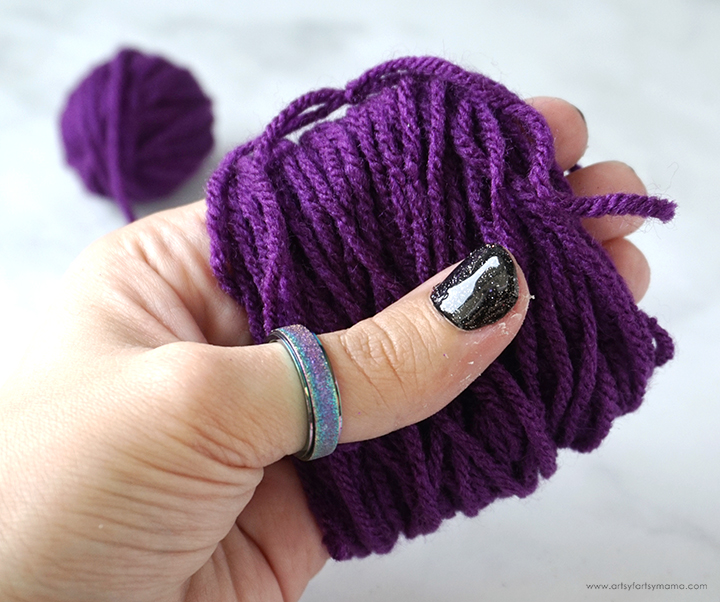

Lay the yarn flat, with the knot in the center. Use a small brush (pet brush, macrame comb, or even a doll brush) to comb through the yarn and give it a fluffy texture. The yarn WILL shed as you brush it, so don't panic when you remove clumps of yarn from the brush. The ends will also become ragged and uneven.


While the beard is drying, you can add a pop of color to the hat. Apply a line of Fabri-Fuse right above the hat/brim seam and then place a length of metallic ribbon over the adhesive. To keep the ribbon in place, use a couple of pins.

Separate the center of the beard at the top, and make a space about halfway in to place the nose. Keep a finger on the area to keep it open, and apply some E6000 to the back of the wood button. Press the nose into place, and hold it there tightly until the glue sets.
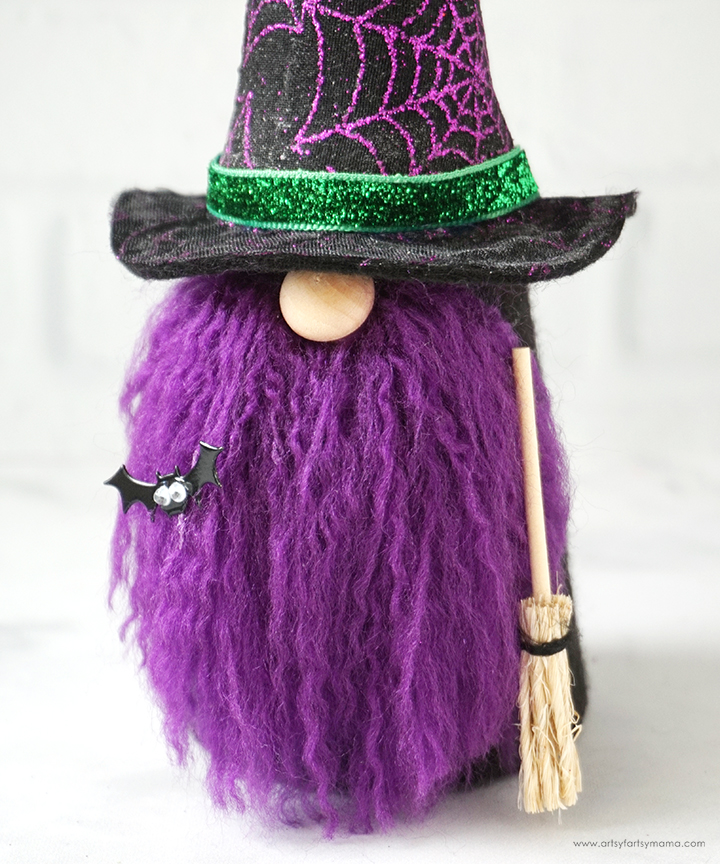
To really push the witchy vibe, I found some fun miniature Halloween accessories like a little bat to put in the beard and a dollhouse-sized broom. If you decide to add accessories, use E6000 to attach them to your gnome.
Once the adhesive has dried completely, your little DIY Witch Gnome is ready for spooky season!! Now that I made this little guy, I kind of want to make a whole bunch of Halloween friends for him to hang out with. What do you think?!
As always, I would love to see your creations! Share yours on Instagram, Facebook, or leave a comment/photo on the project pin on Pinterest! #AFMCrafts
Don't forget to Pin, Like, and Share!


I never thought to work right onto a foam cone for a gnome, but that is so perfect! Love this Halloween gnome!
ReplyDeleteAlexandra
EyeLoveKnots.com
OnRockwoodLane.com
Great project! I make brooms (and mops) for my dollhouse people with a teriyaki stick, straw, raffia, or bits off the bottom of a real broom, and for a mop, string. I love tying it on with a touch of hotglue and red embroidery thread!
ReplyDeleteThis little guy is adorable! I haven't gotten into the gnome thing yet, but he definitely makes me want to. I'll be featuring your post on Sunday's Happiness is Homemade. Thanks for sharing on HIH & Crafty Creators. I always enjoy your creations! Have a great weekend!
ReplyDelete