
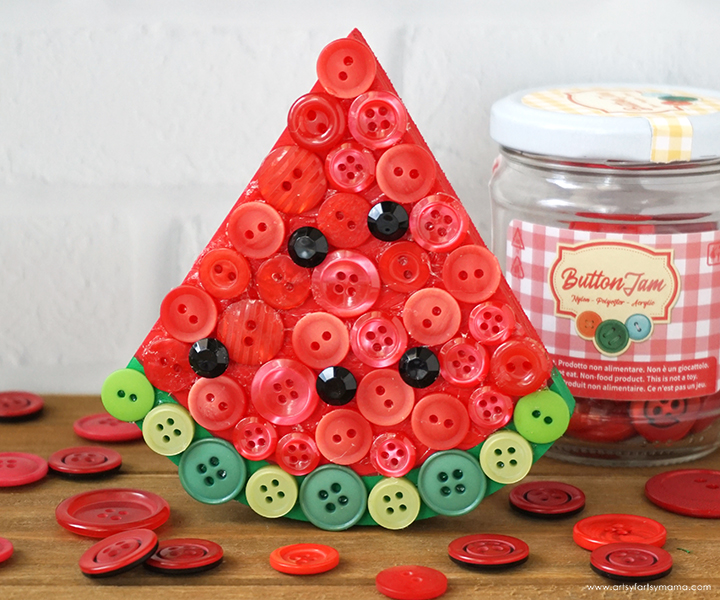
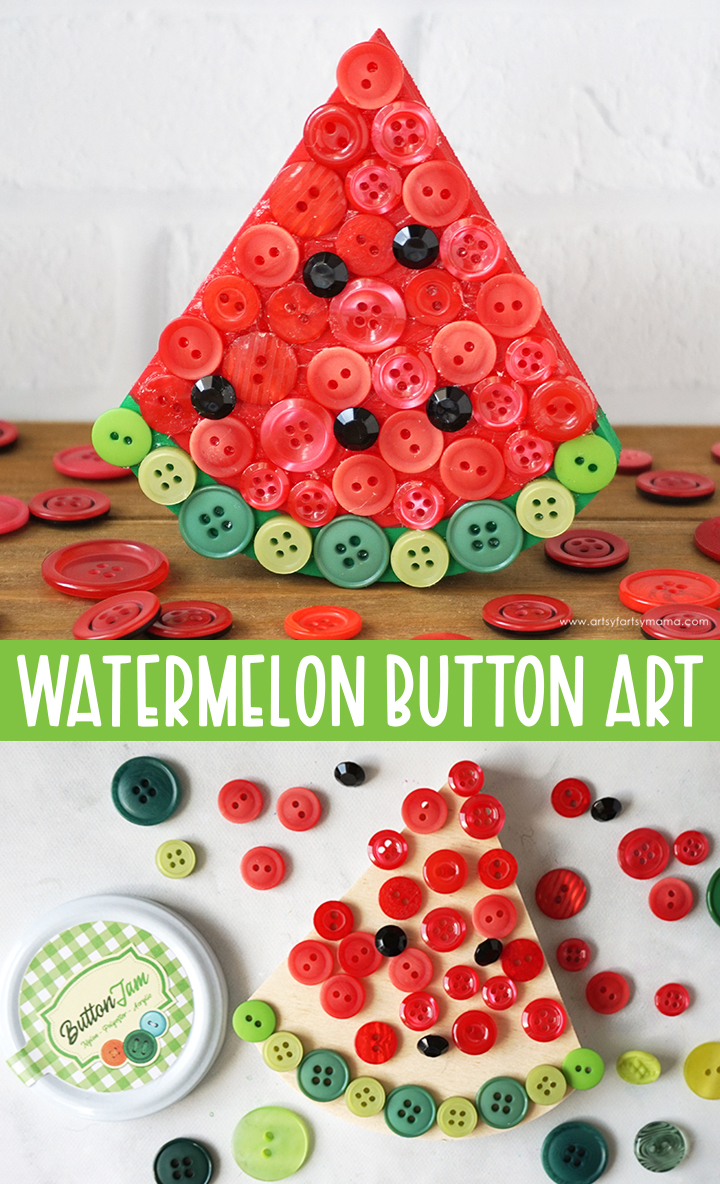
Add a "slice" of color to your summer decor with handmade Watermelon Button Art!
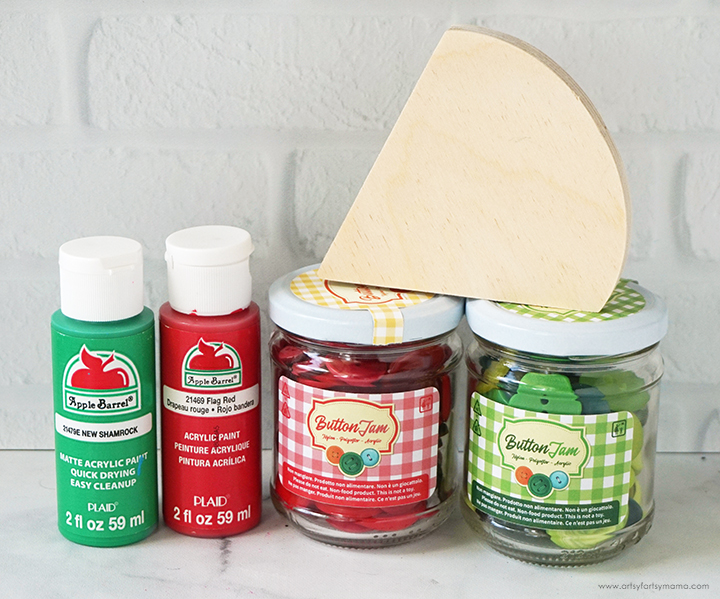
To make your own Watermelon Button Art, you will need these supplies:
- Wood Watermelon Slice
- Acrylic Paint - red, green
- Buttons - red, green, black
- Clear Adhesive
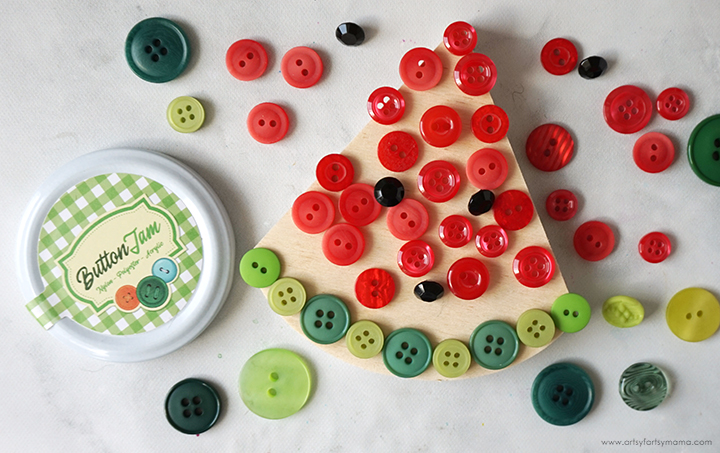
Before adding paint or adhesive, pour out some green, red, and a few black buttons. Arrange them on the wood watermelon slice to decide which buttons you want to use and how they will all fit. Once you have everything how you like it, get rid of the buttons that won't be used in the project. I also recommend taking a photo of the buttons in place. This is helpful to refer to when putting the buttons on later.
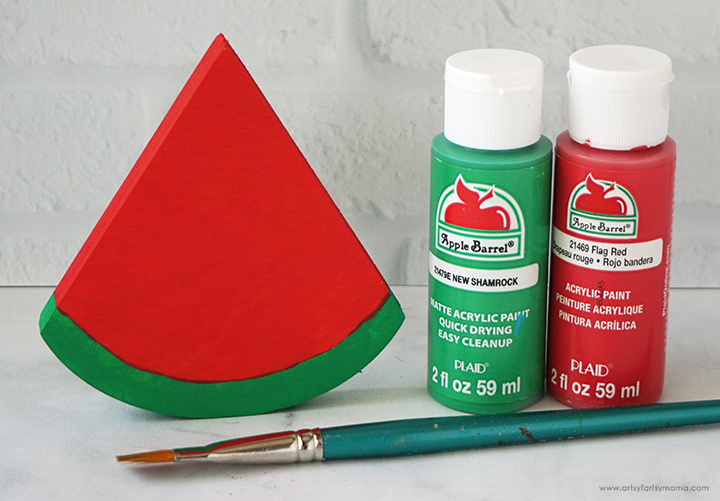
Use a small paintbrush add a line of green paint at the bottom of the watermelon. Use one of your smaller green buttons to determine the size of the line. Paint the rest of the watermelon with red acrylic paint. Because the color will only be seen peeking between the buttons, you will only need one coat of paint. Let the paint dry completely before moving on to the next step.
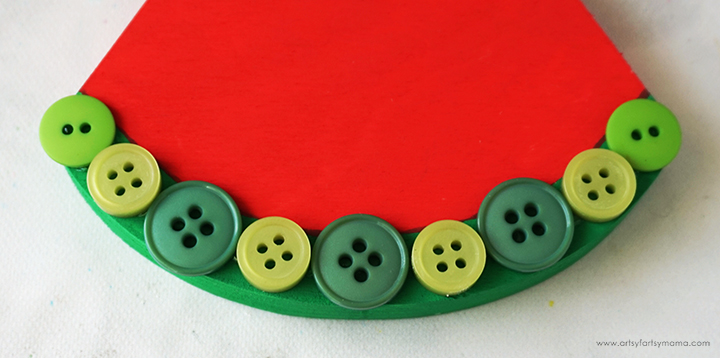
Apply a thin line of adhesive along the green portion of the watermelon. The adhesive will show through the button holes, so make sure that your adhesive is clear. Place the buttons, one at a time, over the adhesive and press them down gently. The adhesive takes a little bit of time to set, so there's time to make adjustments if needed.
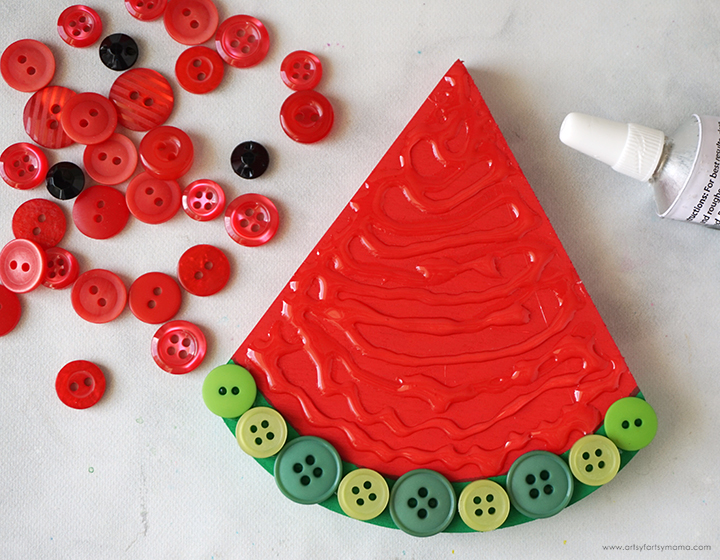
Next, it's time to place the red buttons onto the watermelon! You can apply adhesive to the wood all at once, or add it on a line at a time. Do what makes you feel comfortable. Place the red buttons on one at a time and gently press them into place. Once the red buttons are in place, fit the black buttons into any empty spaces. Alternatively, you could put black buttons on top of red ones.
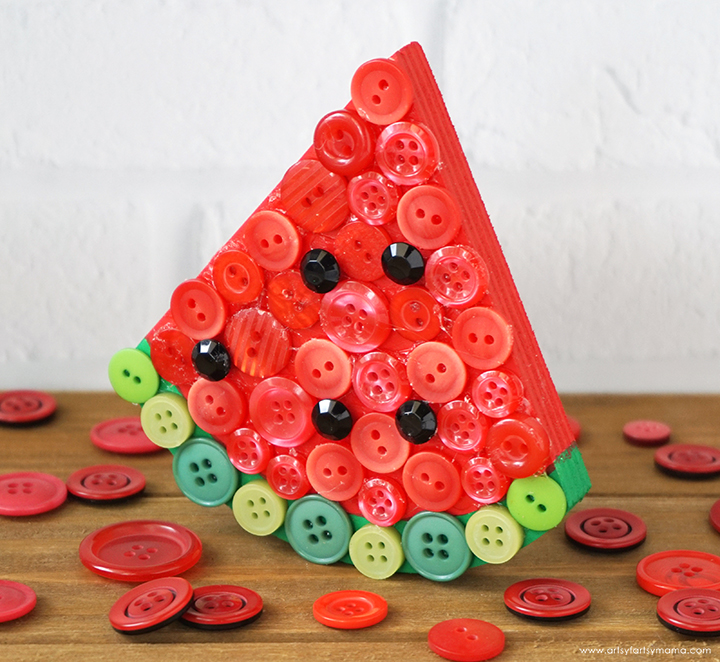
Let the adhesive dry completely (refer to package directions), and then the button-adorned watermelon is ready to put on display! This is such a simple and quick craft for a summer afternoon, and can be completed by practically anyone. I love how bright and colorful this watermelon is, and how it looks on my shelf with other summer decor.
As always, I would love to see your creations! Leave me a comment, or tag a photo on Facebook, Twitter, or Instagram! #AFMcrafts
Don't forget to Pin, Like, and Share!


That is adorable.
ReplyDeleteThank you for having your watermelon button projet shared, this is so dang cute!!
ReplyDeleteI hope you have a great week!
Super cute! Thanks for sharing at Vintage Charm!
ReplyDeleteThanks for sharing with us at the To Grandma's house we go link party! I'm featuring you when the next party starts!
ReplyDeleteThis couldn't be cuter if it tried!! So summery!
ReplyDelete