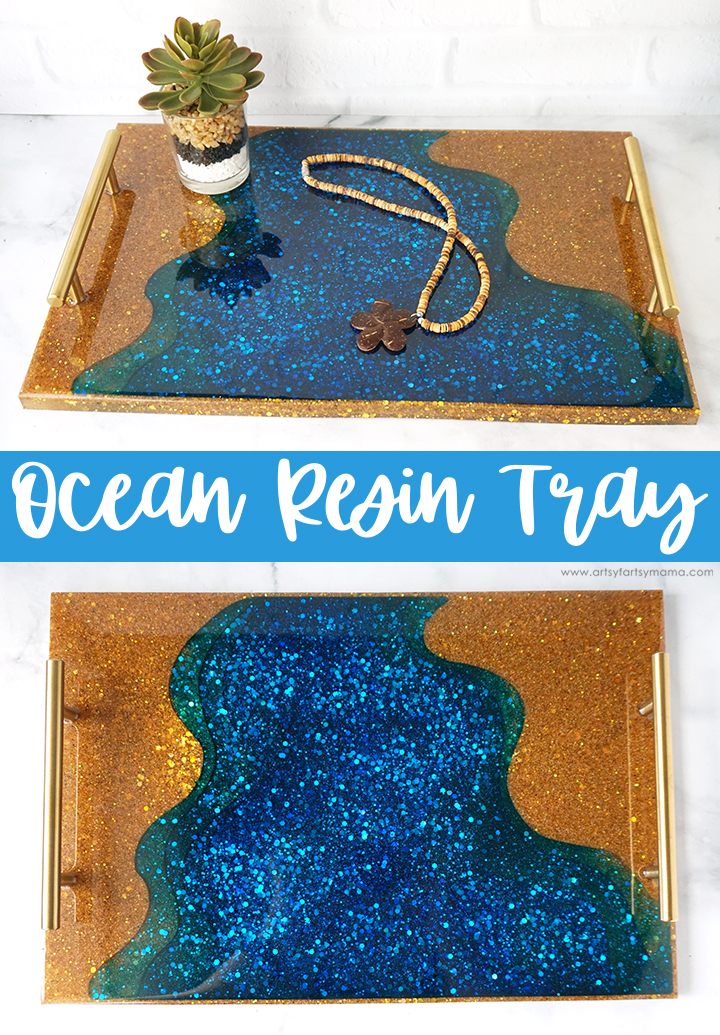
Bring a bit of the beach into your home with this DIY Ocean Resin Tray made of resin and real sand!

New to resin? Be sure to check out Resin 101: Getting Started with Resin!
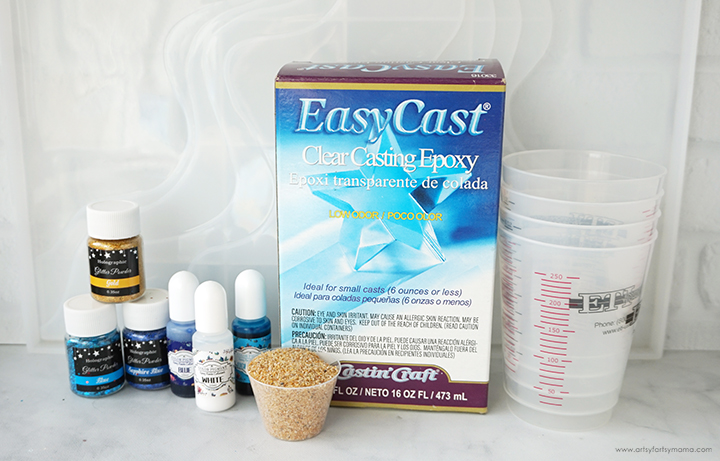


To make this Ocean Resin Tray, you will need these supplies:
- Ocean Terrace Tray Mold
- EasyCast Clear Casting Epoxy*
- Measuring Cups or Resin Measuring Kit
- Stirring Sticks
- Disposable Gloves
- Resin Pigments - light blue, dark blue
- Glitter - gold, light blue, dark blue
- Decorative Sand
*Save 10% on resin supplies when you shop ETI with code AFM
SAFETY FIRST: Before getting started, wear disposable gloves, protect your workspace, and be sure to work in a well-ventilated area!
Prepare the EasyCast Clear Casting Epoxy according to package directions. Trays are actually really simple to make, but will require more resin than smaller projects. For this part of the tray tutorial, you will need 24 ounces of resin. I only had 8 oz cups, so I mixed up three batches.
Add equal parts resin and hardener to the mixing cup. Stir the resin mixture together with a stir stick for two minutes, making sure to scrape the bottom and sides of the mixing cup. After 2 minutes, pour the resin into a clean mixing cup and stir the resin again for another minute or two with a clean stir stick.
If the resin mixture is still cloudy or streaky, you will need to keep stirring until it becomes clear. To keep the bubbles down to a minimum, don’t stir too fast, and then give the resin a minute or two to “rest” after mixing to let any bubbles rise to the top.
If the resin mixture is still cloudy or streaky, you will need to keep stirring until it becomes clear. To keep the bubbles down to a minimum, don’t stir too fast, and then give the resin a minute or two to “rest” after mixing to let any bubbles rise to the top.
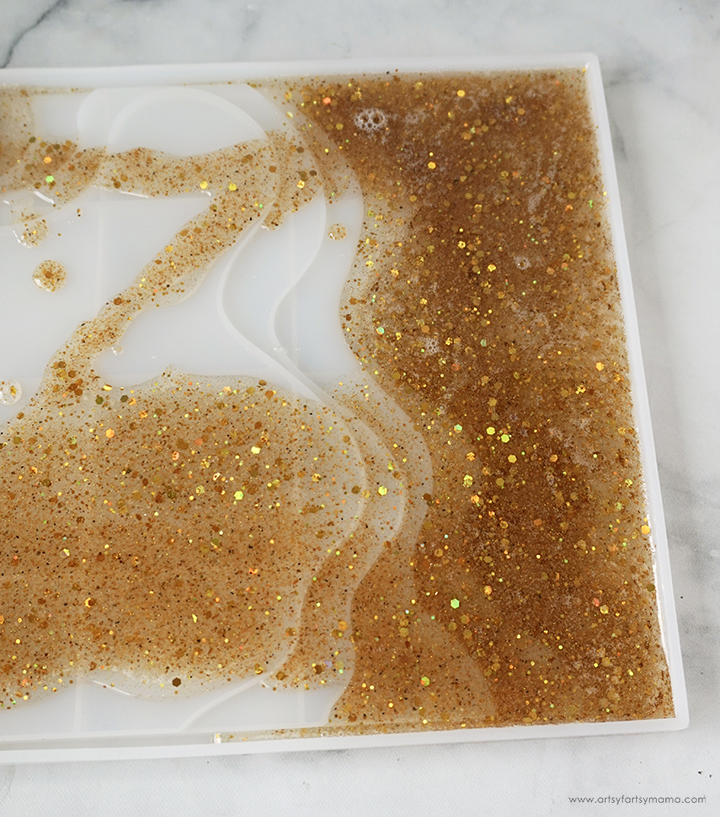
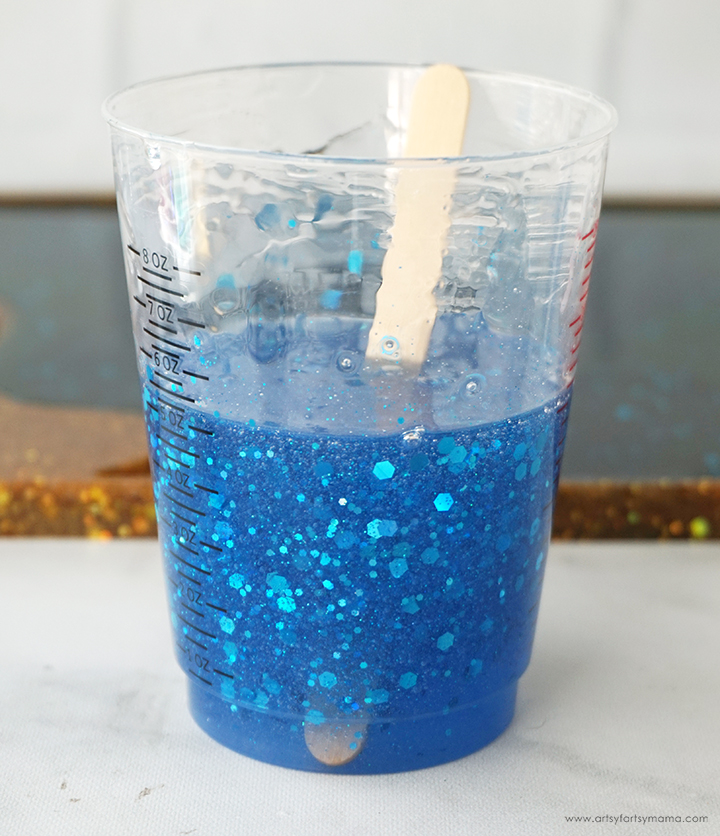
Use a small mixing cup to add in 2 ounces of sand and about 5 ml bit of gold glitter to the 8 ounces of resin. Stir the mixture well until the sand and glitter have been combined. If making multiple batches, be sure to add the same amount into each batch.
The Ocean Terrace Tray Mold measures about 15"x10", and has raised layers in the center. Don't worry about any of the blue "ocean" quite yet. Pour the resin mixture(s) into the mold, making sure to get sand into the border of the mold. Use the stir stick to even the sand out in the mold.
Let the resin sit for a few minutes, then use a straw, heat gun, or spritz with 91% alcohol to remove any air bubbles that rise to the top.
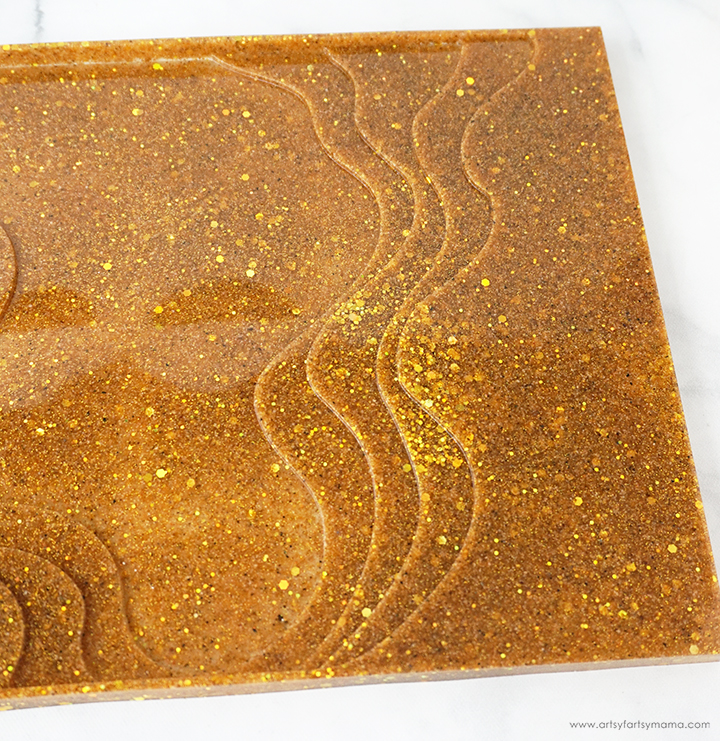
Leave the resin to cure in an even, undisturbed, well ventilated area for at least 12 hours. The resin is cured when it's completely hardened and no longer tacky to the touch. Carefully remove the tray from the mold and admire your work! Remove any over-poured resin with scissors. Sand down edges, if necessary, and re-seal them with clear spray sealer.
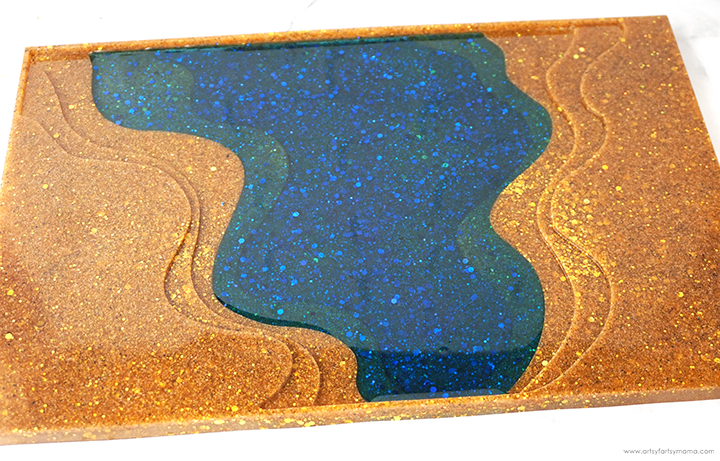
Now that the tray is out of the mold, you can see the four "terrace" layers, which add so much depth to the tray. I've never worked with anything like this, and was so excited throughout the process to see how it would all turn out.
Next, mix up 4 ounces of resin to fill just the first two lowest terrace layers of the mold. Stir the resin mixture together with a stir stick for two minutes, making sure to scrape the bottom and sides of the mixing cup. After 2 minutes, pour the resin into a clean mixing cup and stir the resin again for another minute or two with a clean stir stick until there are no streaks.
Add in some dark blue resin pigment. If it feels like it's too dark, add a little bit of light blue pigment to brighten it up. For some extra sparkle, add in a generous amount of dark blue glitter and stir the resin well until the pigment and glitter have been completely combined.
Carefully pour the resin into the bottom layer of the tray, and slowly fill it up to the second layer. Use a stir stick to gently push the resin to the edges. Let the resin sit for a few minutes, then use a straw, heat gun, or spritz with 91% alcohol to remove any air bubbles that rise to the top.
Leave the resin to cure for at least 3 hours. The resin doesn't have to be completely cured before adding another layer, but it has to be solid enough that the layers won't mix together.
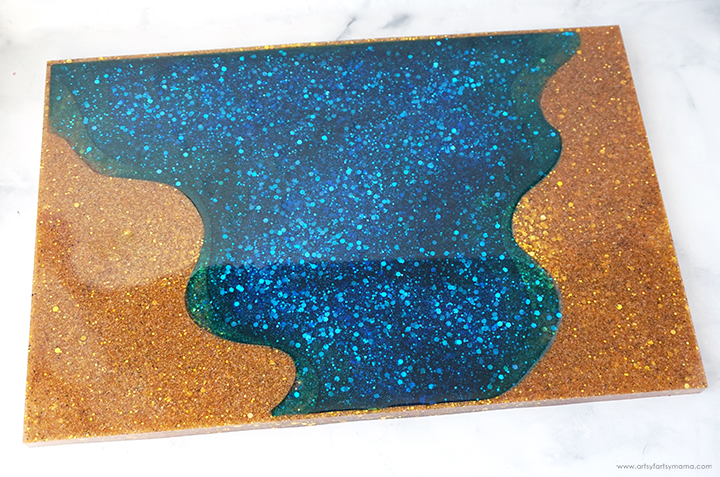
The area for the last two layers is considerably larger than the bottom two, so you will need to mix up about 9 ounces of resin for this step. Stir the resin mixture together with a stir stick for two minutes, making sure to scrape the bottom and sides of the mixing cup. After 2 minutes, pour the resin into a clean mixing cup and stir the resin again for another minute or two with a clean stir stick until there are no streaks.
Add in some light blue resin pigment, and a few drops of dark blue pigment. Add in a generous amount of blue glitter and stir the resin well until the pigment and glitter have been completely combined.
Pour the resin into the center of the tray until the resin *just* reaches the top of the last terrace, which will be even with the top of the tray. If you overfill the center, it will spill over onto the side areas of the tray.
Let the resin sit for a few minutes, then use a straw, heat gun, or spritz with 91% alcohol to remove any air bubbles that rise to the top. Let the resin cure for at least 8 hours.
Next, you need to choose some tray handles to add to the tray. I used some simple gold handles, but any style would work! You can drill through the tray and attach the handles that way, but I am adding it the "easy" way by using resin.
Decide where you want the handle to be placed, and then use a tape measurer to make sure it's even and centered. Mark where the base of the handle will need to go with a permanent marker. If you need to erase any markings, use a little bit of alcohol on a tissue to wipe it away. Repeat the process for the other side of the tray.
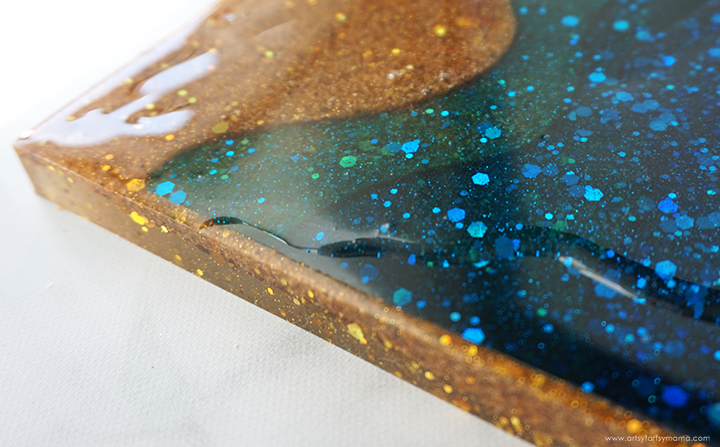
Mix up 3 ounces of resin to add a thin top coat to the tray. Pour about half of the resin in the center of the tray, and use a stir stick to gently bring the resin near the edges. If you tilt your head or angle yourself to see the light reflecting in the resin, you will be able to see any "bald spots" or areas that aren't covered in the resin top coat yet. Use the stir stick to fill in the areas.
To prevent the resin from spilling over the sides, you need to carefully bring the resin to *just* the edge. If you see any drips going down the side, wipe it away immediately.
When the shorter sides of the tray have been covered to the edges, carefully place the handles down over the markings.
Add enough resin to the tray so that the entire top is covered, but do NOT overfill. Let the resin sit for a few minutes, then use a straw, heat gun, or spritz with 91% alcohol to remove any air bubbles that rise to the top. Leave the resin to cure for at least 12 hours, but it could be more depending on humidity.


Once the resin is completely cured, the tray is ready to be used! There are so many ways to use a resin tray in your home. They are great for organizing your favorite vanity items, jewelry, and so much more. The resin is food-safe, so you can also use the tray for serving charcuterie, treats, and drinks.

I am absolutely enamored with this tray, and am so excited to be sharing it with all of you! This is such a fun resin project. If you like working with resin, I definitely recommend that you grab this Ocean Terrace Tray Mold and give this project a try!
I would love to hear what you think about this Ocean Resin Tray! As always, if you make any of these projects for yourself, I'd love to see your creations! Tag me on Instagram and Facebook, or leave a comment/photo on the project pin on Pinterest!
Don't forget to Pin, Like, and Share!