
Create custom reusable screen stencils in 3 easy steps with the Ikonart Custom Stencil Making Kit!

I'm always wanting to try new crafting techniques, and screen printing has been on the list for a long time. I have customized many projects using stencils using vinyl, but screen printing is such a different process. There is so much you can do with screen printing than you can with vinyl. Ikonart makes creating your own reusable stencils easier than ever, and I'm excited to show you how to get started!!
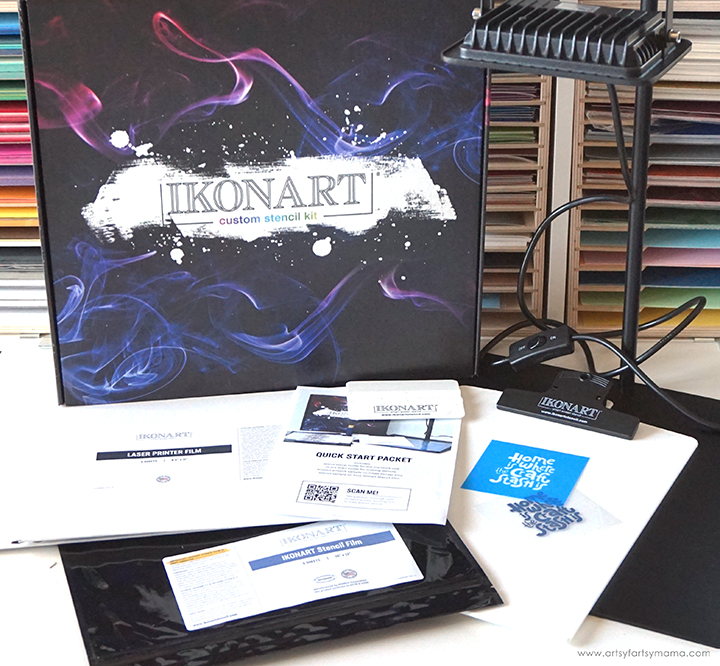
- Quick Start Guide
- Printed Inkjet Sample
- Finished Stencil Sample
- Inkjet Printer Film
- Laser Printer Film
- Ikonart Stencil Film + 2 Clear Exposure Sheets
- Exposure Stand + UV LED Light
- Ikonart Clipboard
- Ikonart Plastic Squeegee
- Coupon codes for free fonts and designs
*Save 15% on Ikonart supplies when you shop with code AFM15

The first step in making reusable stencils is printing. Designs and images need to be in black only, and printed at the highest quality possible. You can design your own images, or purchase them. Most of my cut files in the shop would also work - just print them out instead of cutting with a Cricut! Size the design to fit your project, and print it out on either Inkjet Printer Film or Laser Printer Film. Be sure to mirror the image and follow the directions closely for best results.
The kit comes with a sample print if you want to see how designs should look when printed, and to give you a chance to try making a stencil with it.

The second step in the process is exposure! Set up the exposure stand with UV LED Light by following the directions included in the kit. Ikonart Stencil Film is light sensitive, so be careful to keep it out of sunlight and bright lights before exposure. Cut a piece of the film the same size as the design print.
Lay the piece of film down on the base of the stand with the texture side facing up. Place the printed design on top of the stencil film, making sure it's right-side up - meaning that if there are words in your design, you should be able to read them.
Place a clear
exposure sheet (found in the stencil film pack) on top and rub down to seal the design tight against the stencil
film. Turn the exposure light on and expose the film for 35
seconds if you are using inkjet printer film, or 30
seconds if you are using laser printer film.
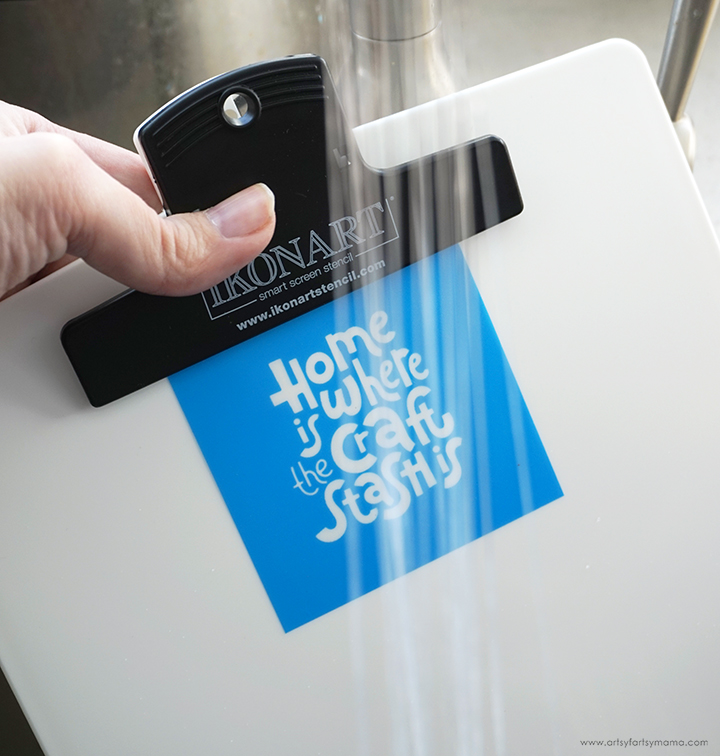
The third and final step in the stencil-making process is washout, or rinsing. After exposing the film, you won't be able to see the stencil design yet. A helpful, but optional, tip is to soak the stencil
for up to one minute in warm water to help make the the process a little quicker.
Clip the
exposed stencil film to the Ikonart clipboard with the shiny
side (carrier sheet) touching the clipboard. Use the kitchen sink sprayer to rinse the stencil film with warm water for the big reveal! Wash/spray evenly until the design shows through and becomes completely clear. The washout process shouldn't take more than 3 minutes.
A finished stencil
sample is included in the Quick Start Packet as an example of
how a washed out stencil should look. You can also use this stencil for your first project!
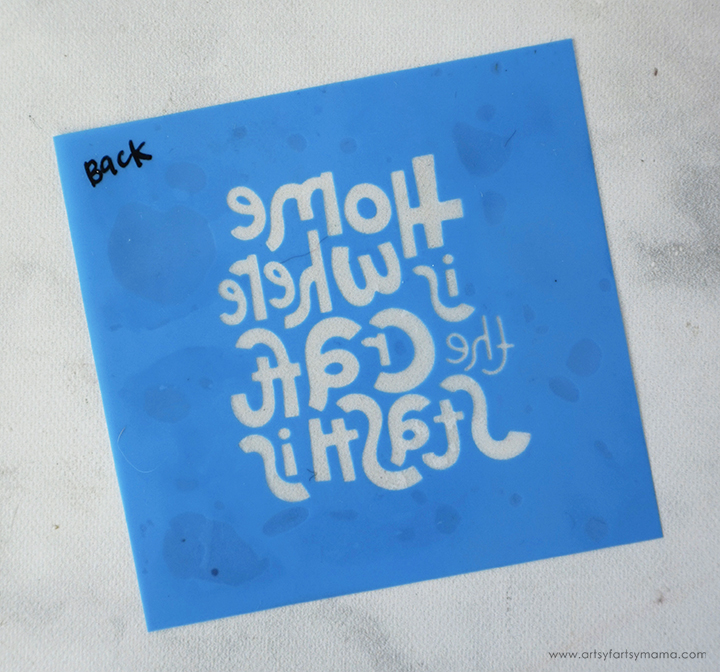
Gently blot excess water off the textured side of the stencil, and hang or lay flat to dry for about 45 minutes. You
shouldn't see any water spots or discoloration. To increase the durability of the stencils, place the stencil back on
the exposure stand (textured-side up) and
expose it again under the light for at least 2 minutes without the clear cover sheet.
Use a permanent marker and write "back" on the carrier sheet (shiny side) on the back of the stencil.
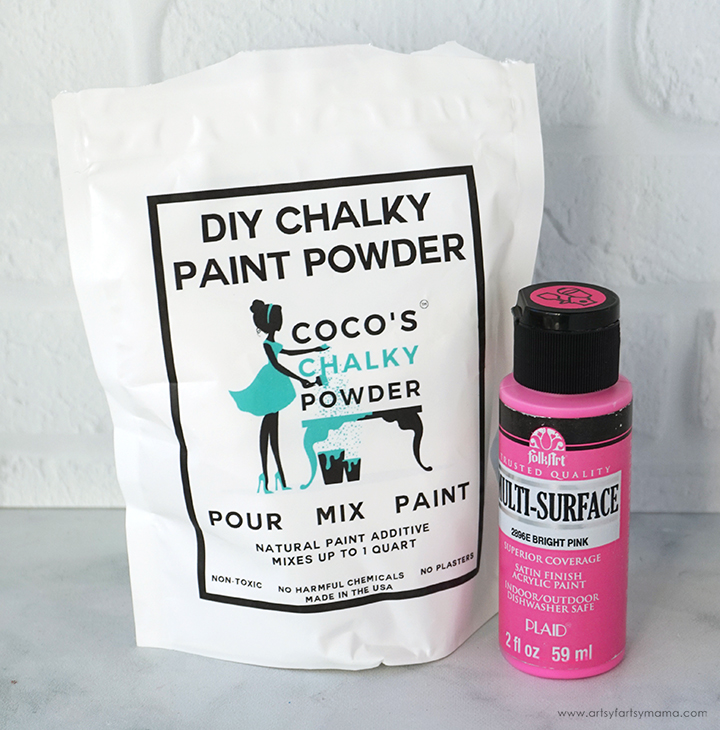
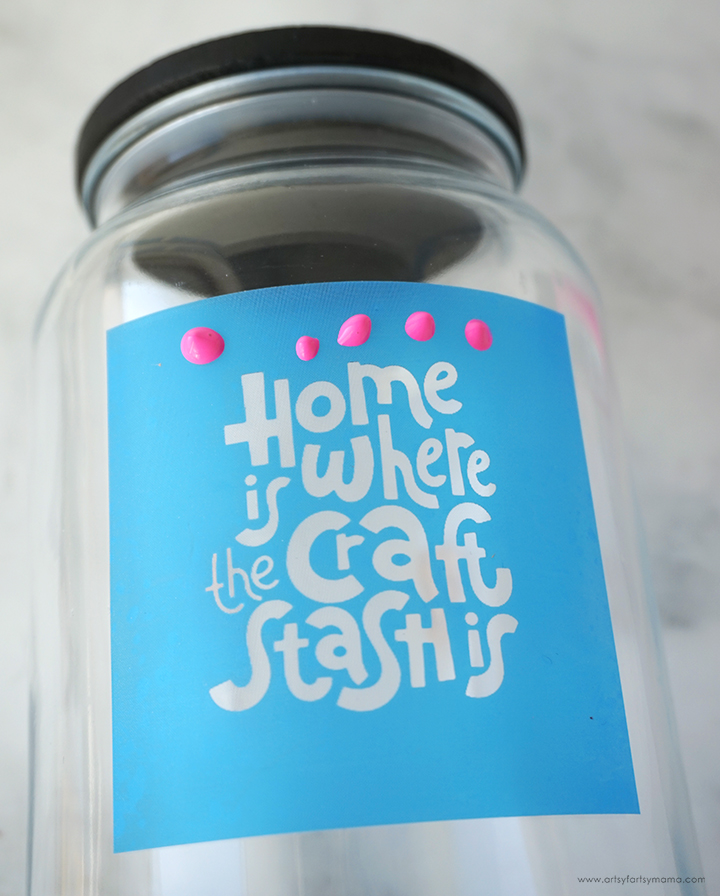
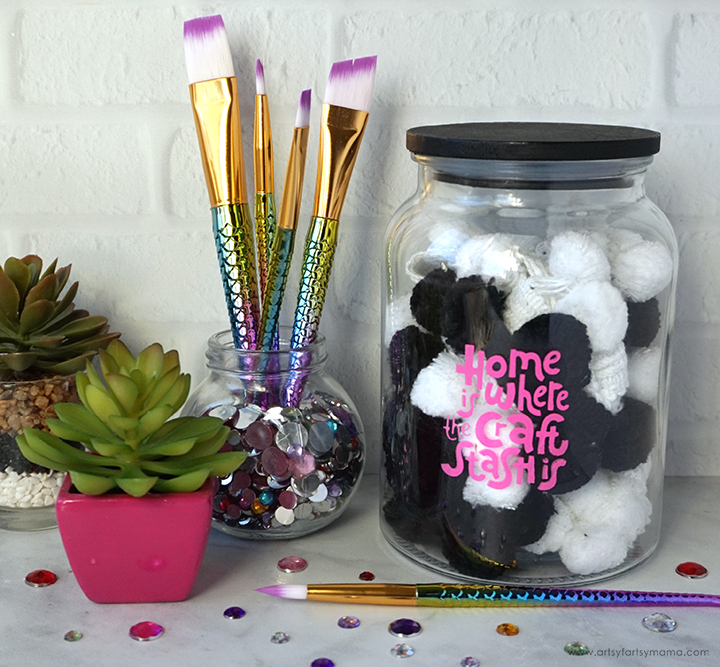
Once the stencil is made, you can use it on practically any surface you want. I decided to decorate a storage jar that I found at the Target Dollar Spot for my first Ikonart stencil project. You can also use any water-based paints, inks, or pastes with your stencils. If your paint is a little thin, you can mix in a little bit of chalk paint powder to thicken it up.
If you're not sure what to use on your project, Ikonart has a list of paint and ink selections to help you out!
Peel the carrier sheet away from the stencil and set it aside (don't throw it away). Carefully rub the stencil down and apply pressure to help it stick to the surface and to get rid of any air bubbles.
Add a little bit of your a water-based paint, ink, or paste to the top or side of the stencil, being careful not to go near the edges. If you feel like you need a little more room, you can place some painters tape around the edges.
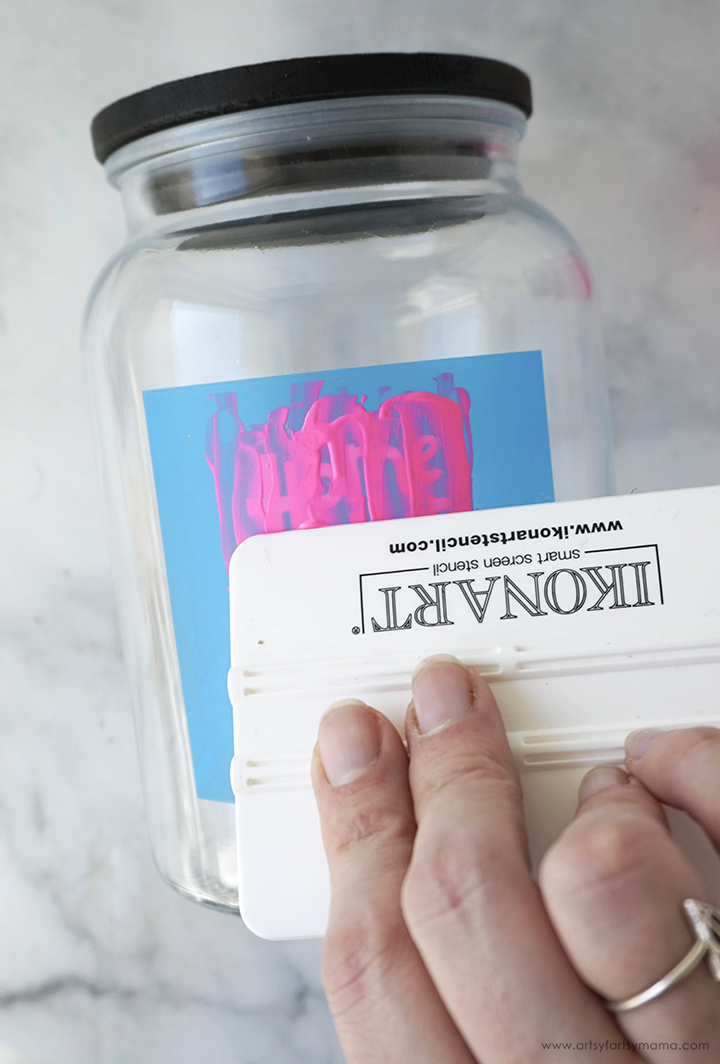
Cover all the open mesh areas of your stencil using the included Ikonart squeegee or a brush. Again, be careful not to scrape the paint off of the stencil edges.

**This is why I highly recommend choosing something washable for your first project! I re-stenciled and washed about 4 times before I got it right.**
To clean the stencil, get the clipboard wet so
your stencil does not stick to it. Place the stencil
on the clipboard with the textured side up, and lightly
rub the stencil under running water to remove all the paint. Do not
rub or scrub the adhesive side of the stencil, and NEVER use anything other than water to wash the stencils. To prevent the stencil from breaking down, don't ever leave the stencils to soak.
Remove the stencil from the clipboard and lat it down with the adhesive side up. While the stencil is still wet, place the carrier sheet onto the stencil so that the word “BACK” is readable. Hang or lay the stencil flat to dry completely.
Stencils MUST be dry before using, or you could ruin your stencil and/or project surface. Repeat the stenciling process (and washing) again until you are satisfied with the project.
I am so excited to keep working on this screen printing journey with Ikonart! It's going to be a lot of fun see what kinds of projects I can create with custom stencils. I'd love to hear what you think - are you interested in learning more about screen printing or making reusable stencils? If you've already made some, I would love to see your inspiring creations! Share yours on Instagram, Facebook, or leave a comment/photo on the project pin on Pinterest! #AFMCrafts
Don't forget to Pin, Like, and Share!


I love this . Thanks for posting at Funtastic Friday.Pinning.
ReplyDeleteThank you for sharing with us! I'll be featuring you this week when the next To Grandma's house we go party starts :)
ReplyDeleteThis looks like a great technique to try out. Thanks for sharing the project and product. #HomeMattersParty
ReplyDelete