
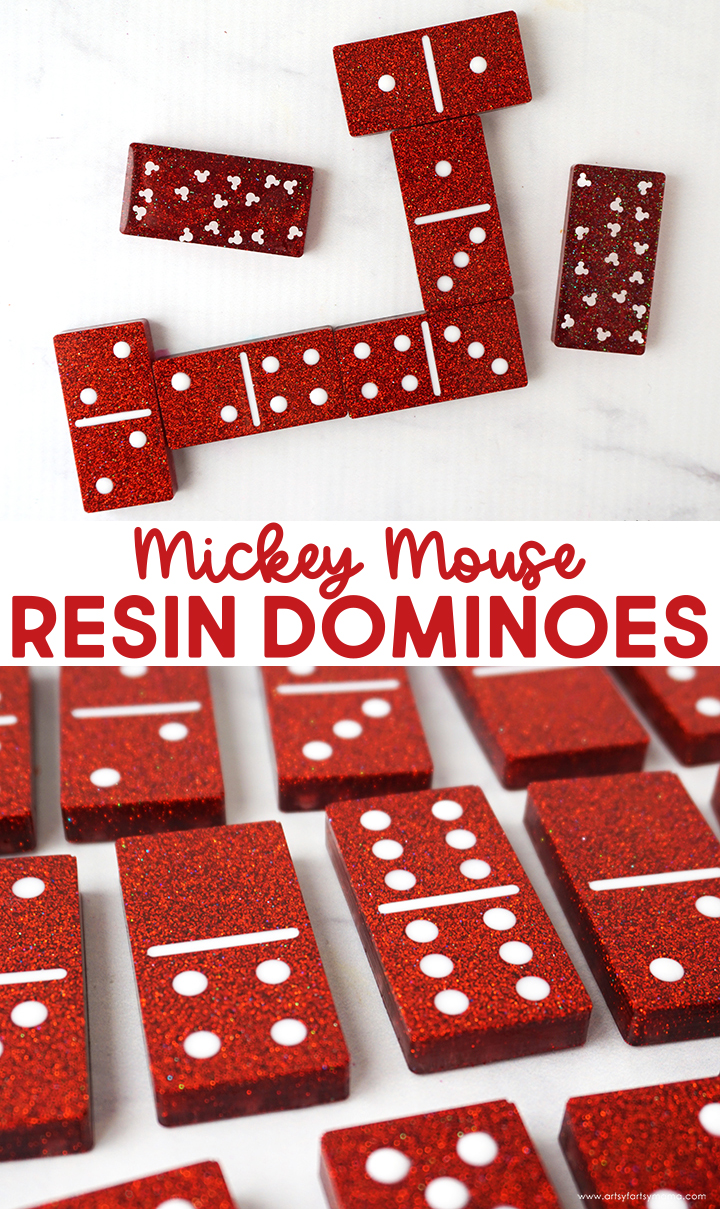
Make a custom set of Mickey Mouse Dominoes out of resin to play with the family!

Do you have family game nights? They are such a fun way to spend time together and to get your mind off of the day-to-day. These Mickey Mouse Resin Dominoes are a fun way for Disney-loving families to change up game night. Depending on the colors of resin you use, these handmade domino sets can be customized for hours of fun with your family or to even give as a gift!

To make a double-six set of Mickey Mouse Dominoes, you will need these supplies:

Prepare about 4 ounces of EasyCast Clear Casting Epoxy according to package directions. Be sure to protect your workspace, work in a well-ventilated area, and wear disposable gloves. Pour in equal parts of resin and hardener to the mixing cup. Slowly stir the resin mixture together with a stir stick for two minutes.

Slowly fill the domino molds to the top with resin. Pop any bubbles that rise to the top using a lighter, heat gun, or by blowing through a straw. You could also lightly spritz the mold with 91% alcohol to remove surface bubbles.

Most of the time, glitter pulls into the center on the back of a project. This usually isn't a problem for me because you rarely see it. However, you will always be looking at the back of dominoes! Wait an hour or two after pouring the dominoes when the resin is more of a gel consistency. Gently pull a toothpick through the top of the resin to even out the glitter distribution.
Leave the resin to cure in an undisturbed, well ventilated area for 24 hours. You will know that the resin is completely cured when it is no longer tacky to the touch. DO NOT REMOVE THE RESIN FROM THE MOLD!

Next, get some Mickey Mouse-shaped confetti in a contrasting color (I chose white). To make dominoes in a different theme, simply change out the confetti/chunky glitter to different shapes!

You can sprinkle the Mickey confetti over the resin, or make them look a little more uniform by placing the confetti pieces in one at a time. I opted for the second option and placed 15 Mickeys into the resin on each domino.
Leave the resin to cure in an undisturbed, well ventilated area for 24 hours. You will know that the resin is completely cured when it is no longer tacky to the touch.


Once the domino pieces are done, leave the resin to cure for 12 hours. It will probably take less time than that because the area is so small, but you don't want to risk ruining your new domino set!
Once the dominoes are cured, you are free to play with them! With this set, you can have 2-4 players or team up into 2-4 groups. I know there are ways to keep score, but we don't really keep track at our house. You can look up some rules for the specifics, or feel free to make up your own.
How to Play Dominoes:
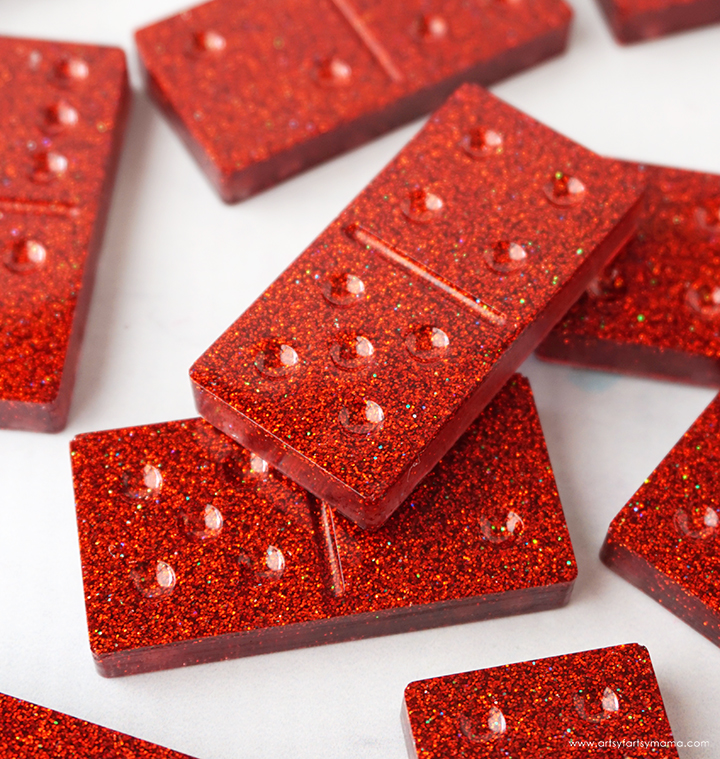
Carefully remove each of the domino pieces from the mold. Trim away any excess resin. As you can see, the molds create little holes in each of the domino pieces. However, they are a little tough to play with just like this.
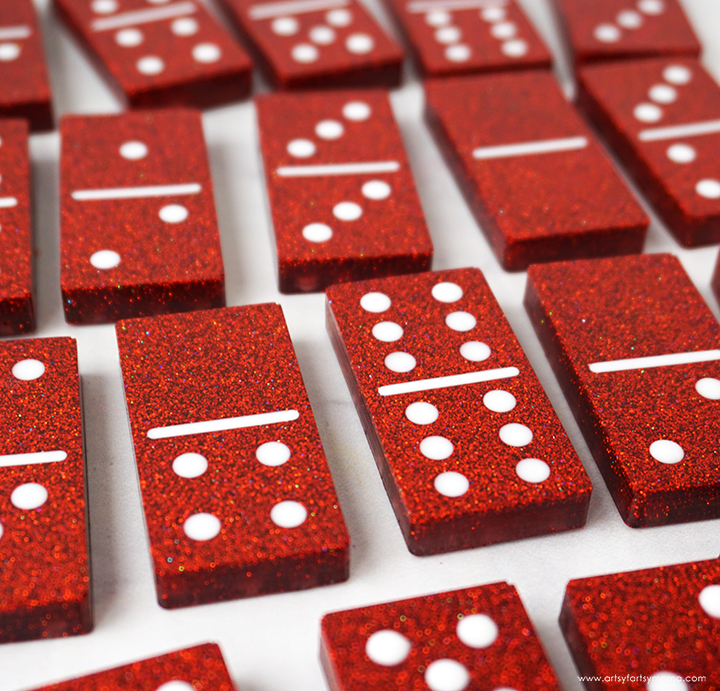
To make the domino dots and lines easier to see, you can fill them in a few different ways: acrylic paint or paint marker, or you can use resin and any variety of pigments, mica powders, glitter, or alcohol inks.
I mixed up about 1 ounce of resin and added a drop of opaque white pigment. Mix the resin well and follow the same directions as before!
Use a toothpick to carefully fill each of the dots and line on each domino piece. Be careful to not overfill or drip!
How to Play Dominoes:
- Place the dominoes face-down and shuffle them around. The first person to pick up a "double", or a domino with the same pattern on both sides, gets to go first! Put the dominoes back down and reshuffle.
- With 2 players, each player draws seven dominoes. With 3-4 players, each player draws five dominoes. The remaining dominoes (the boneyard) are left face-down on the table.
- The first player can put any domino down from their hand to start the game.
- Going clockwise, each player must place a domino down to match one end ONLY of the domino already on the table. If you start running out of room, you can place a domino down at a right angle. "Doubles" may be placed perpendicularly, and can be matched on all four sides (as shown above).
- If a player cannot make a match, they must select a domino from the "boneyard" and forfeits their turn.
- The game ends when a player uses all of their dominoes, and the "boneyard" is empty. If moves can no longer be made, the player with the least amount of dominoes left in their hand is the winner and goes first in the next round!


Wry cool idea!
ReplyDeleteMichelle
https://mybijoulifeonline.com
Very cool idea!
ReplyDeleteMichelle
https://mybijoulifeonline.com
Curious about the white resin for the dots. Would it not harden before you are done with all the dots?
ReplyDeleteThank you, I love this project, can't wait to try it.