
Use your Cricut machine to personalize a dollar store night light!
From budget-friendly decor projects to clever storage hacks, the dollar store is an amazing place to shop for items to customize with your Cricut machine. I found this night light at my local dollar store that is perfect for putting vinyl on! It's a simple project for anyone, especially those who are new to using a Cricut. I'm also sharing the Yoda Bedtime cut file at the end of the tutorial if you want to make one of these night lights for yourself!
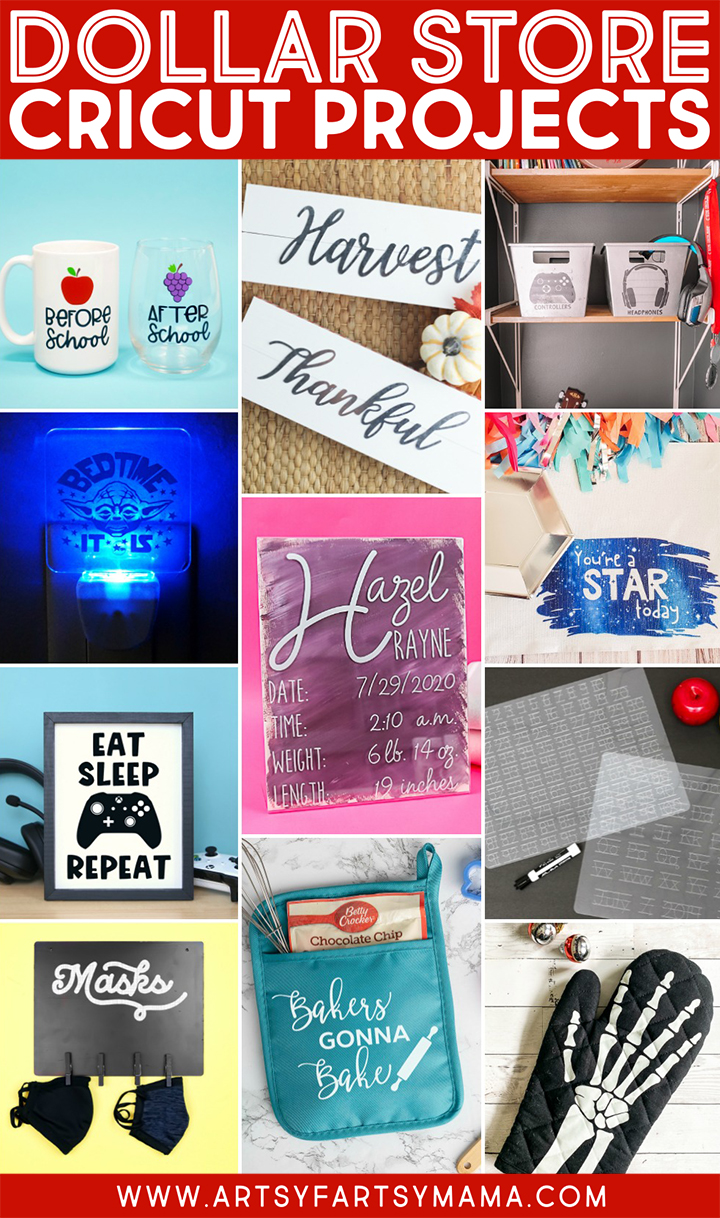
Click the links below to check out these other creative dollar store project ideas to make with your Cricut:
1. Before/After School Mug/Wine Set - Happiness is Homemade
2. Dollar Store Fall Signs - Hello Creative Family
3. Gaming Organization Bins - See Lindsay
4. Yoda Night Light - Artsy-Fartsy Mama (you are here)
5. Painted Acrylic Sign - The Country Chic Cottage
6. Reverse Canvas - Happy Go Lucky
7. Infusible Ink Placemat - Crafting in the Rain
8. Penmanship Tracing Mats - That's What Che Said
9. Mask Holder - Mad in Crafts
10. Pot Holder Baking Mix Set - Brooklyn Berry Designs
11. Skeleton Oven Mitt - Everyday Party Magazine
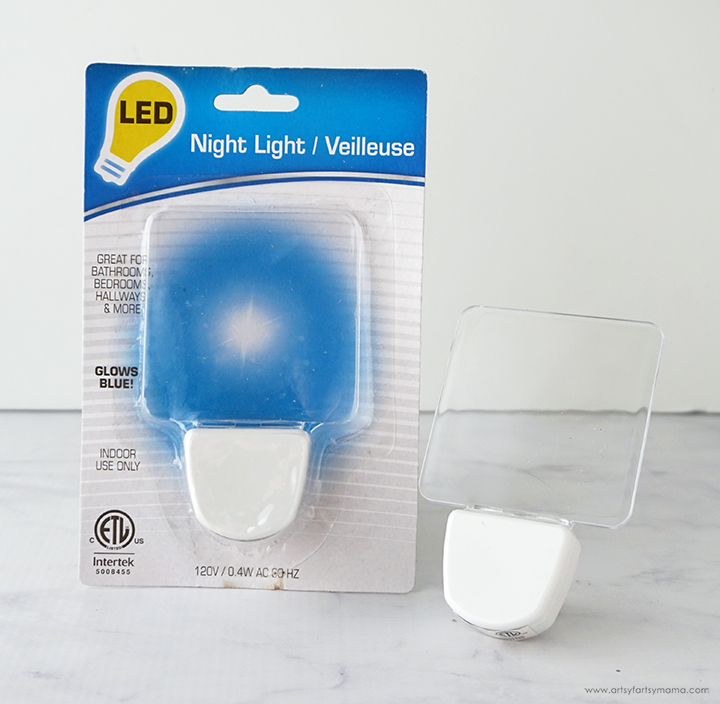
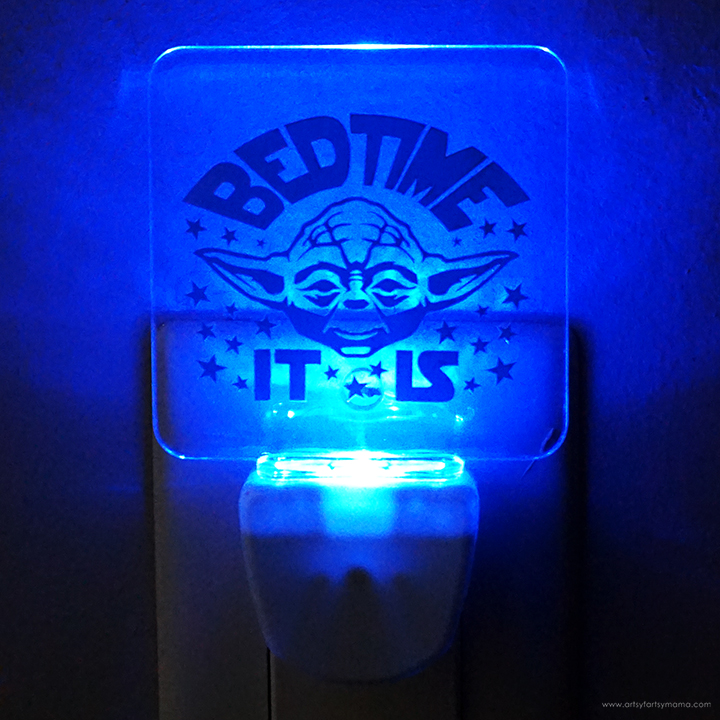
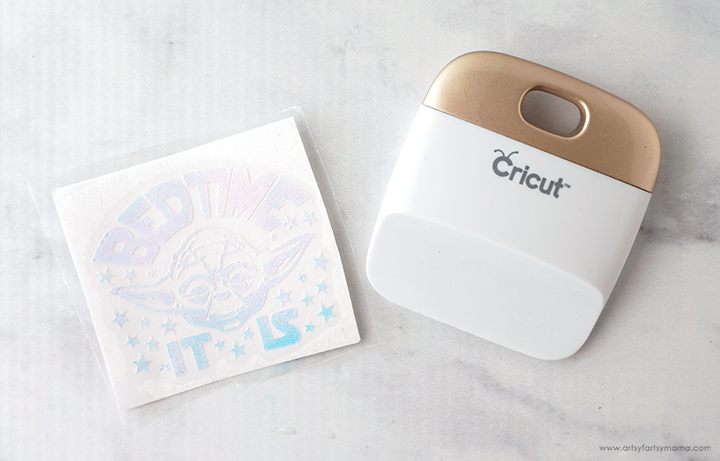
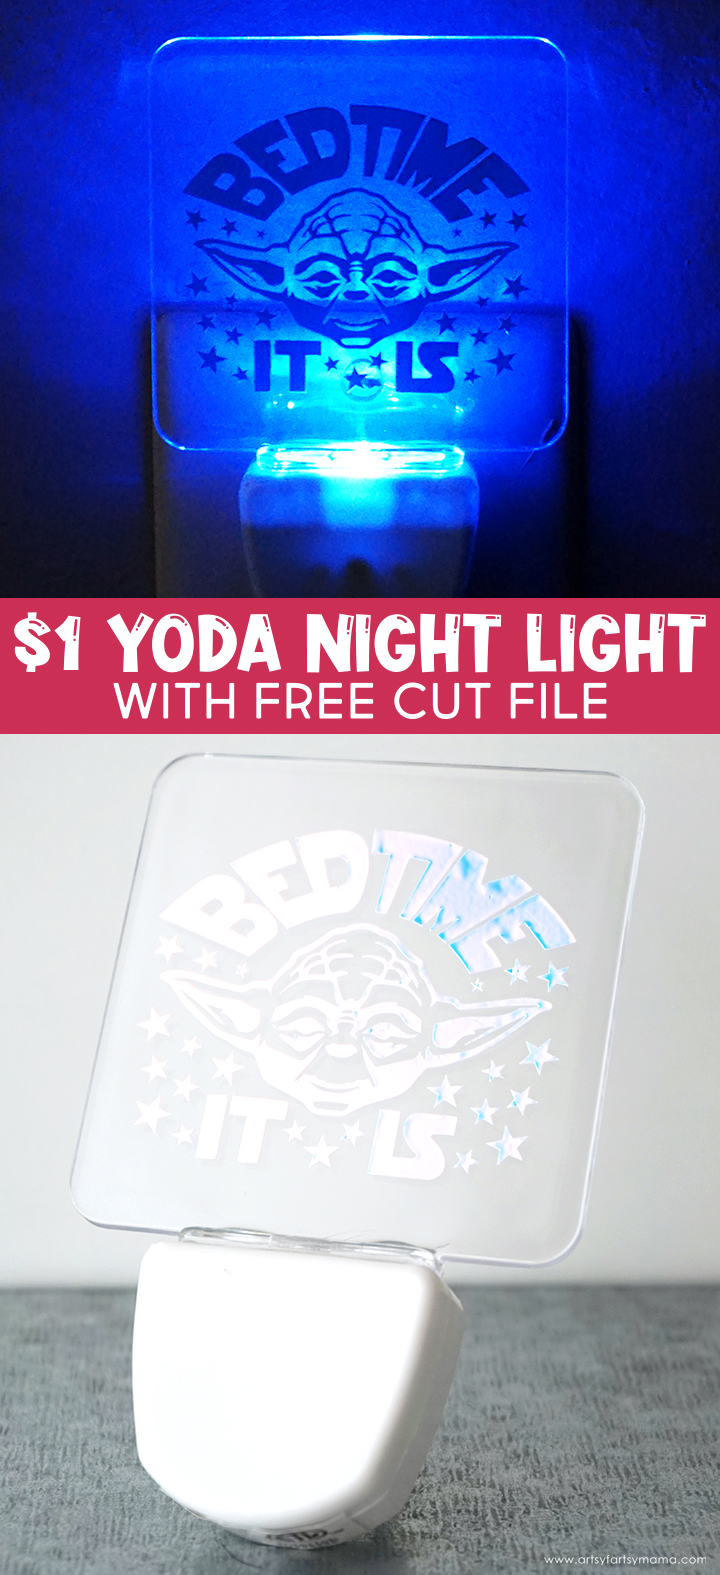
While perusing the dollar store for things to personalize with my Cricut, I found this LED night light. The light glows blue when plugged in, and the clear plastic above the light is the perfect canvas for your favorite adhesive vinyl! My daughter's current night light just burnt out, so I think this project was meant to be!
*If you don't have a dollar store near you, this LED night light is very similar.
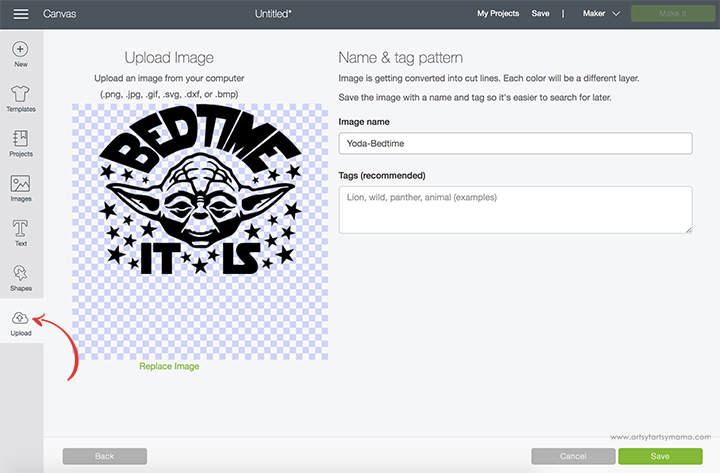
Since this project is such a small one, you can use any Cricut machine: Maker, Explore, or the Joy. Now for the most exciting part - deciding on your night light design! You can choose an image from the Design Space library, or upload one of your own. You can download my FREE Yoda Bedtime cut file at the end of this tutorial.
To upload a design, start a new canvas and click on the "Upload" button on the left menu bar. Choose the image file (SVG, PNG, JPG, DXF, GIF, and BMP) from your computer to upload. Make any edits if needed, and then save it to your account. Easy, right?
*For more detailed instructions, here's a helpful tutorial for uploading your own images into Design Space.
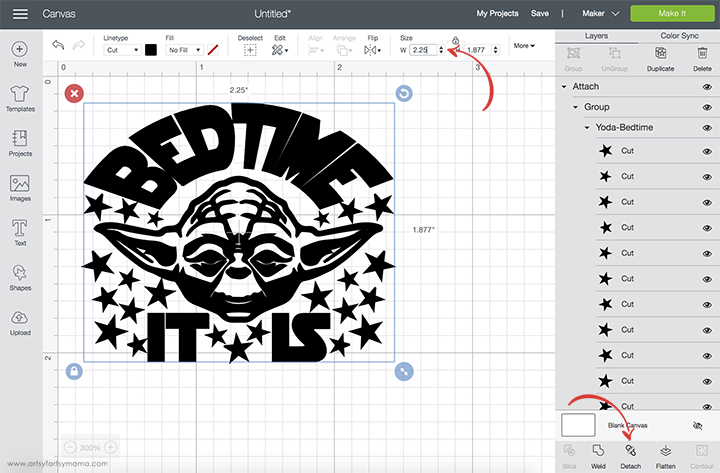
Bring your image into the canvas. Make sure the entire design is selected, and then click "Attach" in the bottom right part of the menu to keep the design together when it is being cut. Measure the clear part of the night light to see how large you want your design to be. In the top menu bar, change the width/height measurement of the design. Once you are satisfied with the changes, click the green "Make It" button in the top right corner.
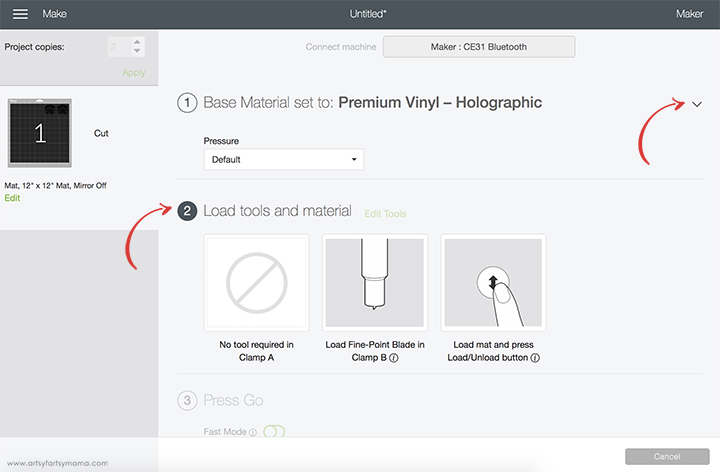
Before cutting your design, be sure to select the correct material that you will be using from the base material drop-down list. Then, follow the directions for loading the tools and material.
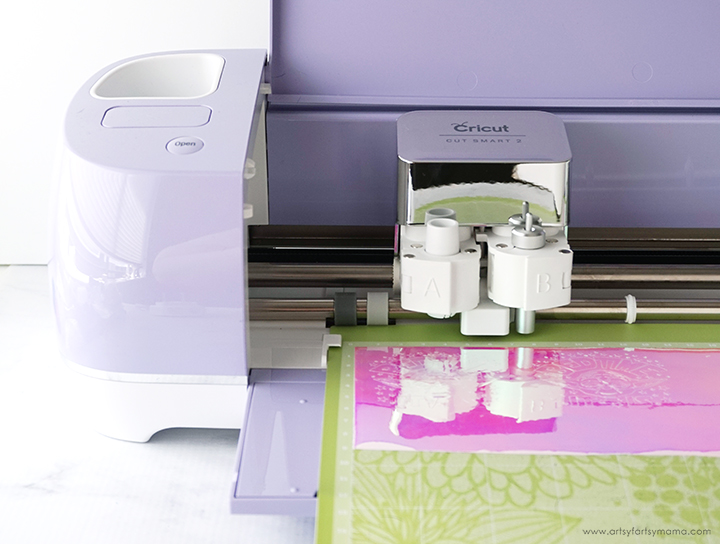
Lay the adhesive vinyl (I used holographic) face-up on the green StandardGrip Mat, and load it into the machine by pressing the flashing arrow button. When the button with the Cricut icon begins flashing, you can then press it to start cutting your project out.
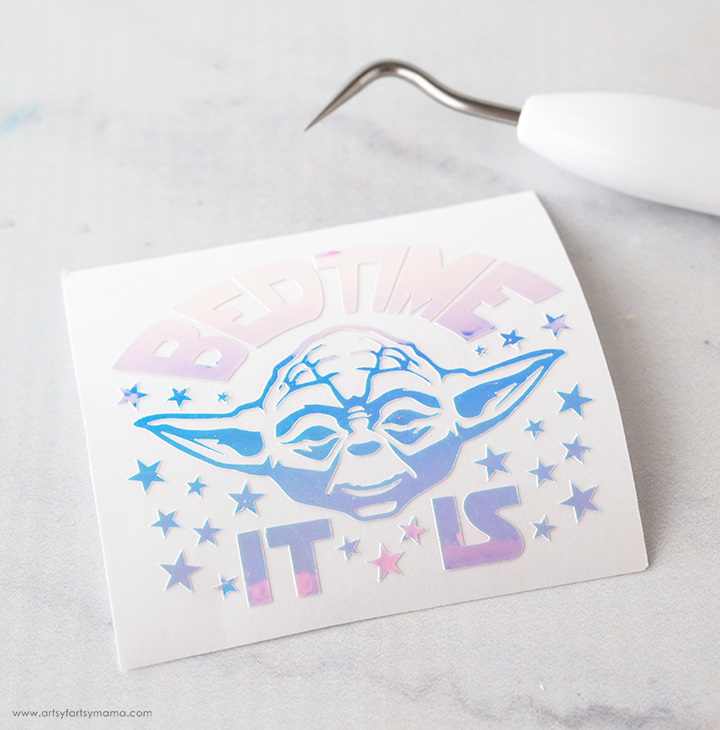
After the vinyl has been cut, you'll need to "weed" the vinyl. Use weeding tools to carefully peel away excess vinyl (or the parts of the design that you won't be using). Because this image is so small, be sure to take your time to reduce the chance of mistakes.
Cut a piece of transfer tape and lay it over the vinyl. Use the scraper tool to press it down well on both the front and back.
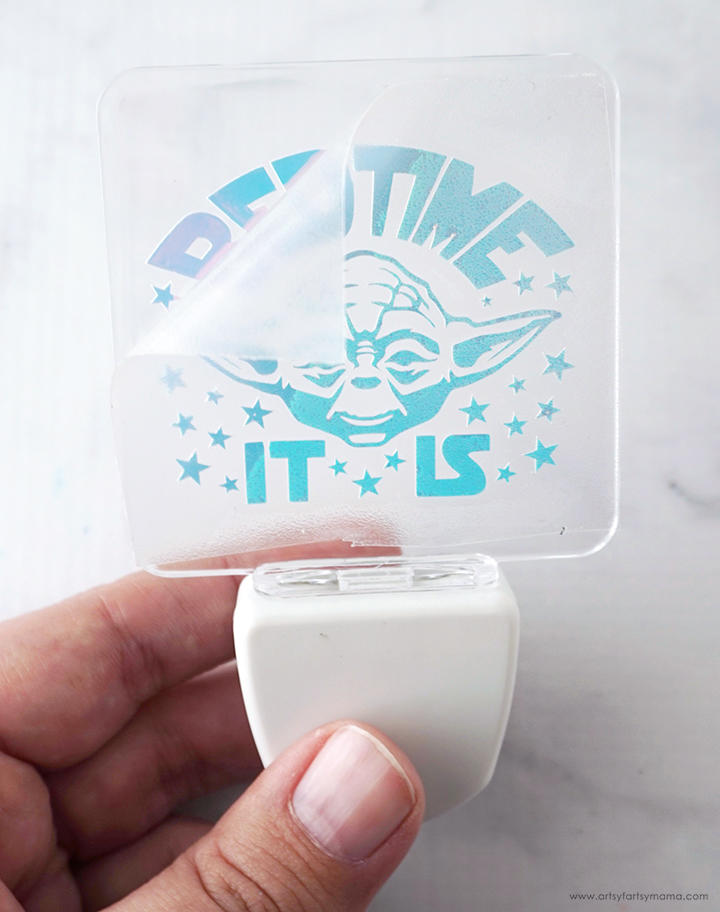
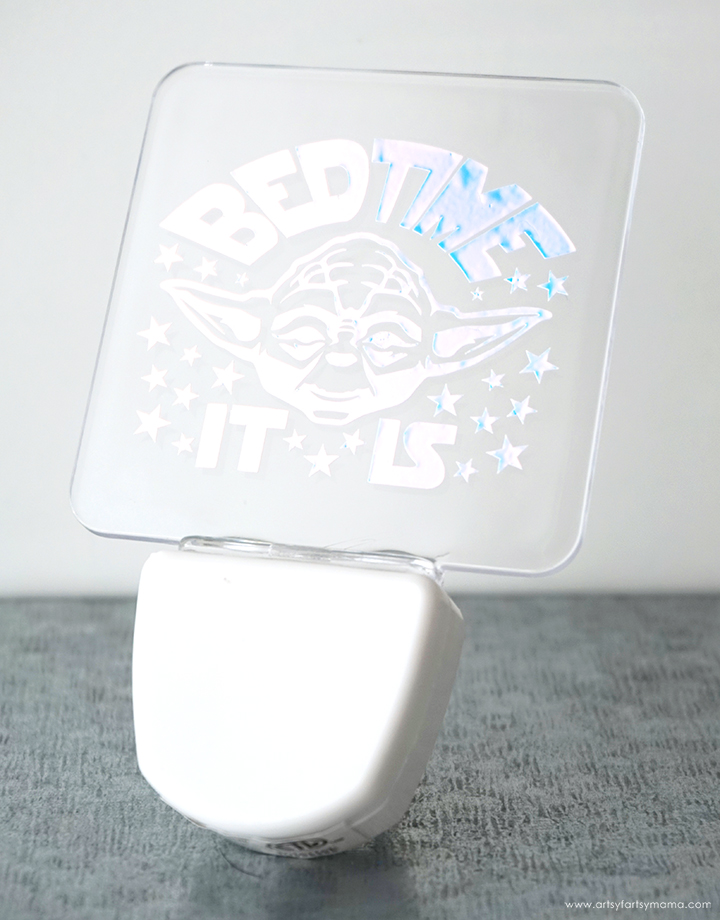
Remove the backing from the vinyl, then center the design on the clear part of the night light. Use the scraper tool again to press the vinyl down and to remove any air bubbles. Slowly peel the transfer tape away from the vinyl. If the vinyl is still sticking to the transfer tape, lay it back down and press it again with the scraper tool.
There are so many design options out there - think names or initials, character silhouettes, motivational words or sayings, dream/sleep sayings, and SO much more!
(PERSONAL USE ONLY)
Plug the night light in, and you've got a personalized night light! I think having a specially made night light helps make things a little more bearable for kids who get anxiety about being in the dark. My daughter loves having this in her room. A specially made night light would also be a great gift idea!
As always, I would love to see your creations! Please tag me on Instagram and Facebook, or leave a comment/photo on the project pin on Pinterest!
Don't forget to Pin, Like, and Share!


Love it, I do! Thanks!
ReplyDeleteHi! I'm brand new to the Cricut. Trying this, and I'm stuck on "print then cut" setting that comes up automatically when I put the file into the canvas. Am I really supposed to print first?
ReplyDeleteThanks!
I've downloaded the file 4 times and the svg file isn't there.
ReplyDelete