
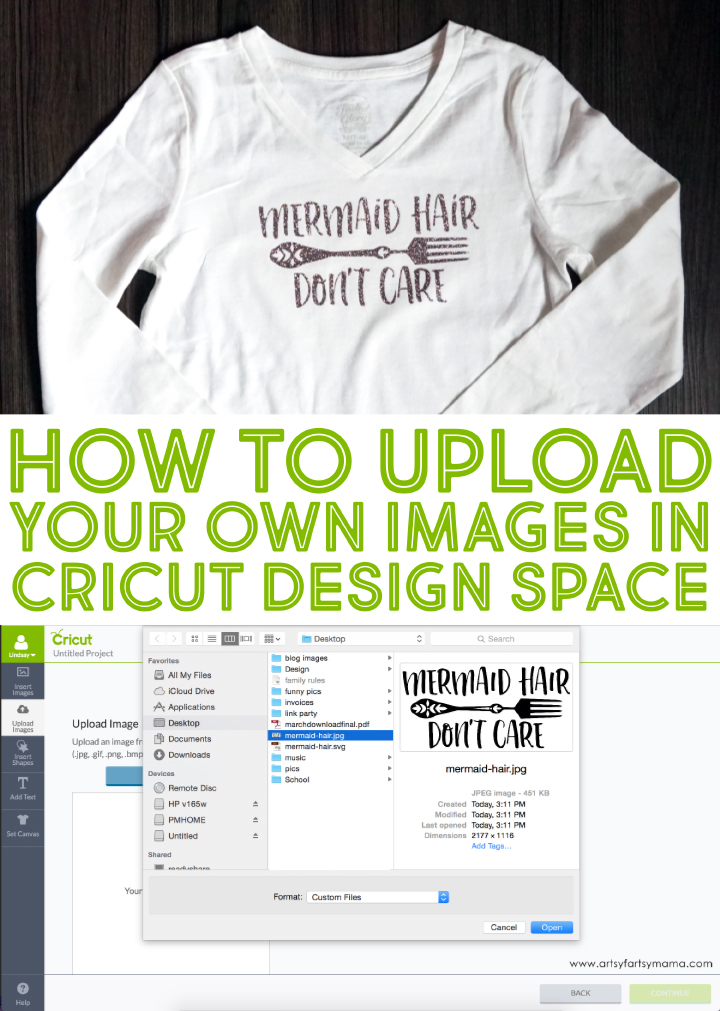
My daughter loves helping me come up with her own style of shirts to wear. Being a graphic designer, I can draw up anything she has her mind set on and create the shirt of her dreams with the Cricut. When it comes to mermaids, unicorns, or anything sparkly, it's sure to be a hit with this girl! She's got the "messy hair, don't care" attitude already, so we went the more mystical route with "Mermaid Hair, Don't Care" on a t-shirt and glittery vinyl.
You can create just about anything with a Cricut Explore machine. There are tons of images and fonts available to help you make everything you need in a snap. I've tried multiple cutting machines through the years, and one thing I've found that the Cricut Explore can do better than the others is that I can cut my own designs easily. Today I'm going to show you how you can do it, too!
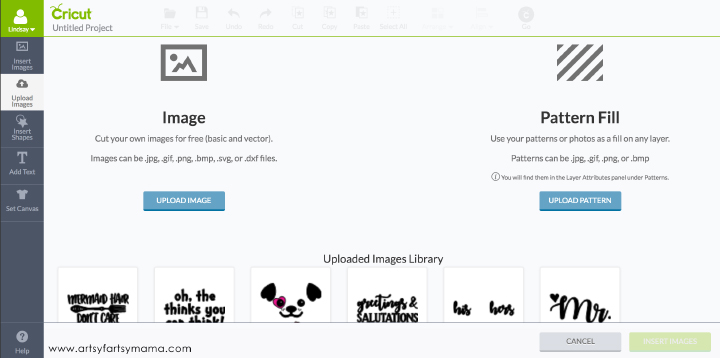
You can upload any custom images in Cricut Design Space for free. Create your own designs in Photoshop, or use other programs like PicMonkey. As long as you save your images as JPG, GIF, PNG, BMP, SVG, or DXF files, they can be uploaded.
To start, open the Design Space program with a new canvas. On the left menu/tool bar, select the "Upload Images" tab. Under "Image" click on the blue "Upload Image" button.
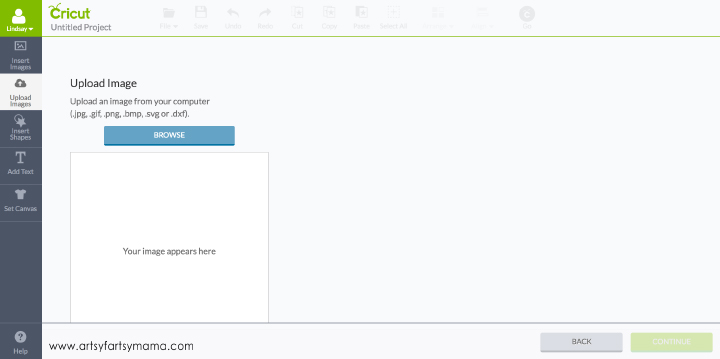
Next, click "Browse".
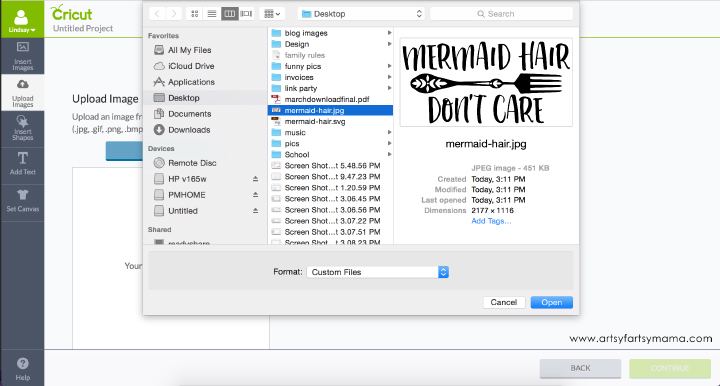
A screen will pop up so you can find your image file to upload. Once you've located your image, select it and click "Open".
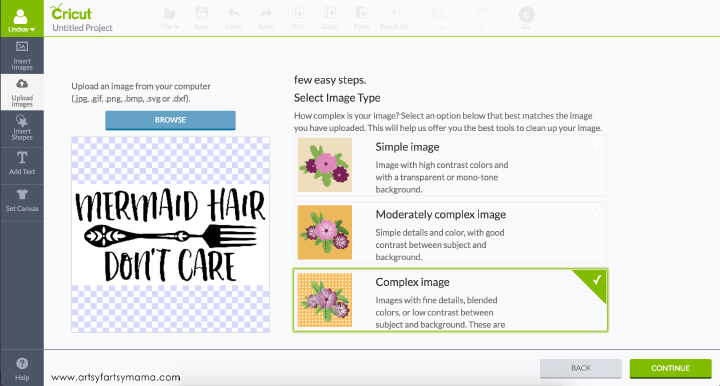
My file is a JPG, so that means the design and the background are one flat image. We need to remove the background (white) and leave the design (black). Depending on how simple or complex your image is, you can choose from three options to give you the best tools to clean up your design for cutting, drawing or printing. Select your image choice, and click "Continue".
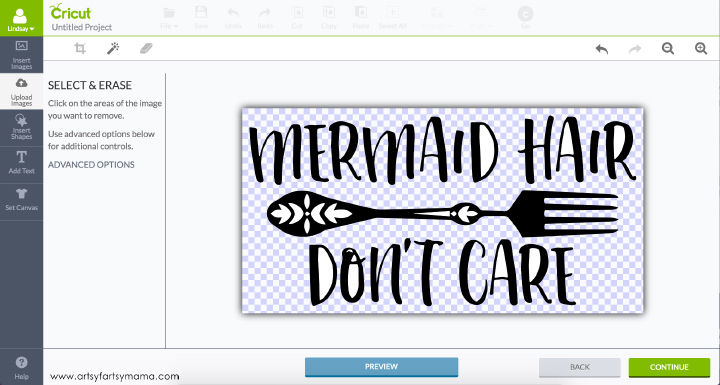
The next screen will allow you to clean up your image. You can crop and erase parts of your image in just a few clicks. Deleted parts of your image will show the checkered background, which won't show in your finished design.
All you want left is the black parts of the design, so don't forget to delete the white insides of letters and zoom in to remove the smaller white details of the design! Once you've got your image cleaned up, click "Continue".
All you want left is the black parts of the design, so don't forget to delete the white insides of letters and zoom in to remove the smaller white details of the design! Once you've got your image cleaned up, click "Continue".
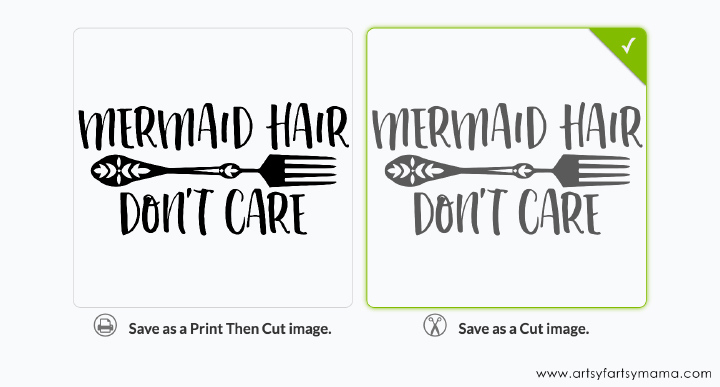
The next screen will show two boxes to choose from. The option on the left is for designs that you'd like to Print Then Cut, like for stickers, printable vinyl, and more. Since my design is to be used with vinyl, I need to save the design as a "Cut Image" with the scissors icon.
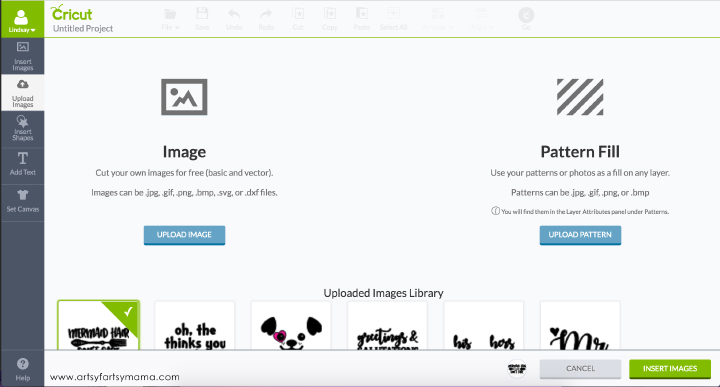
Now that you've saved your image, you're done uploading. Easy, right? Everything you upload can now be easily found in the "Upload Images" tab to use time and time again!
To use your image, select the design in the "Uploaded Images Library". You'll know it's selected by the green checkmark in the top right corner of the image box, as well as a smaller thumbnail at the bottom of the screen next to the "Cancel" button.
Click "Insert Image".
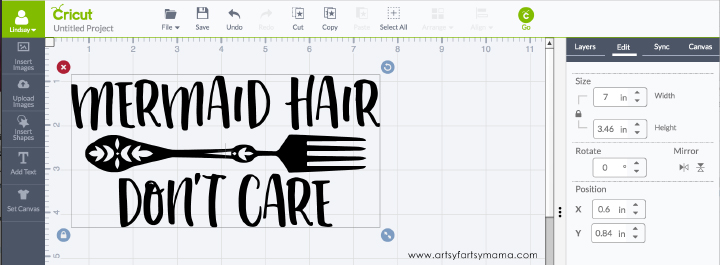
Now the your custom, uploaded design is ready to be used for your projects. In the Edit panel, you can adjust size, mirror your image for iron-on projects, and more!

Creating your own custom projects with images you design yourself on the Cricut Explore machine couldn't be easier. My daughter is thrilled with her new "Mermaid Hair, Don't Care" shirt with Glitter Iron-on and is already making plans for her next shirt design!
What custom projects will you create with Cricut?


Everything is free with your snipping tool. Including cricut images. Every cartridge, every image every font. Even if you want to use a cricut font, type out your word. Use the snipping tool, save, upload in d's. Every computer has a snippi g tool just use search bar in lower left hand corner on your computer. Your welcome
ReplyDeleteI’m still unsure how to access n use the snipping tool. Could u explain more plz!
DeleteI can upload images and edit them for print to cut or as a cut file, and then insert the image in design space. However when I click on make it, an error message with item not available for sale comes up and I can not make my project. Do you know what's up with that?
ReplyDelete