
You don't need to be a gamer or a geek to have hours of fun with these DIY Tetris Magnets!

This post contains affiliate links for your convenience. As always, I only share things that I use myself and truly recommend!
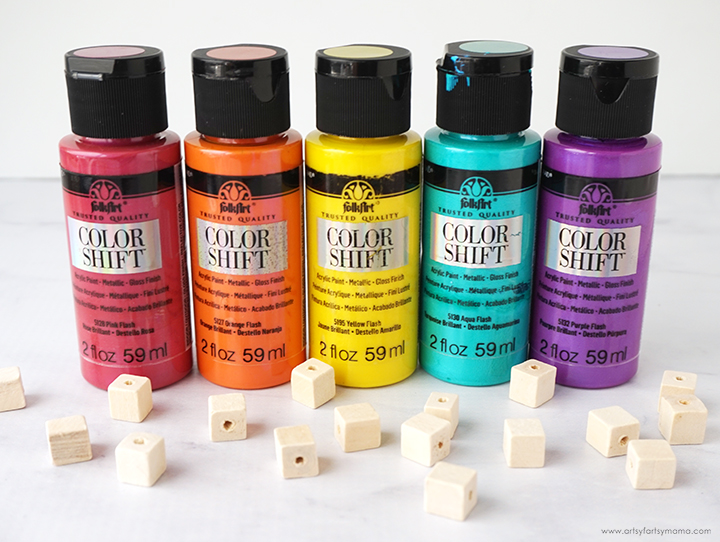
To make your own set of DIY Tetris Magnets, you will need these supplies:
- Unfinished Cube Beads (1/4" - 1/2")
- Clear Adhesive
- FolkArt Color Shift paints, in a variety (5) of colors
- Paint Brush
- Toothpicks (optional)
- Magnets

Look through all of the wooden cubes and separate any that are broken or unusable. Lightly sand the cubes if needed. Each Tetris shape consists of four cubes each, so separate your cubes into groups of four to see how many of each shape you can make. Instead of the traditional 7 Tetris shapes, I used 5 instead to make the math easier.
For example, I had 100 cubes to work with. When I separated them into groups of four, I had 25 shapes to make. Since there are 5 basic Tetris shapes, I could make 5 of each one. Does that make sense?
Add a small amount of adhesive to one of the cubes (if you are using a bead, add it to the side with the hole) and stick another cube to it, making sure the sides are aligned (as best as you can). Hold the cubes in place until the glue has set. Repeat the process until you've used all of the beads in each of the 5 shapes. Let the glue dry completely.

Choose a color for each of the shapes. I used Color Shift paints in Aqua, Pink, Purple, Yellow, and Orange. It's hard to paint these little guys while holding them in your hand, so I recommend sticking a toothpick through one of the bead holes to make it a lot easier.
Use a small brush to paint the shapes. You can paint the entire shape, or you can paint the front and sides and leave the back blank. After painting, stick the toothpicks into a scrap piece of styrofoam to let the paint dry. Paint multiple coats if necessary, but just make sure to let each coat dry before adding another.

Look at all that color!! I love how vibrant the Color Shift paints are and how they have that bit of shimmer and extra pigment to make them interesting. Some of the Tetris shapes in the game are reversed (teal and yellow), so instead of making more, I just turned a couple of them over!

Use some strong adhesive to attach a magnet to the back of the shape. Try to get the magnet as close to the center as possible. Hold the magnet in place until the glue has set, and then attach magnets to the rest of the pieces. Just make sure not to set them down too close to each other!! The glue needs to completely set before using the magnets, so be sure to refer to your adhesive packaging.
*Disc magnets are a little more expensive, but they are stronger than other ceramic magnets.
*Disc magnets are a little more expensive, but they are stronger than other ceramic magnets.
Now you can play your own version of Tetris in a locker, on your fridge, or wherever you like to put magnets! My daughter loves rearranging them while we are making dinner, and my husband has asked for a set to put in the classroom! What do you think? Are you a Tetris fan?
Don't forget to Pin, Like, and Share!


This is so clever!!! Absolutely love it!
ReplyDelete