
Make your own custom silicone mold in minutes to create all kinds of projects!

New to resin? Be sure to check out Resin 101: Getting Started with Resin!

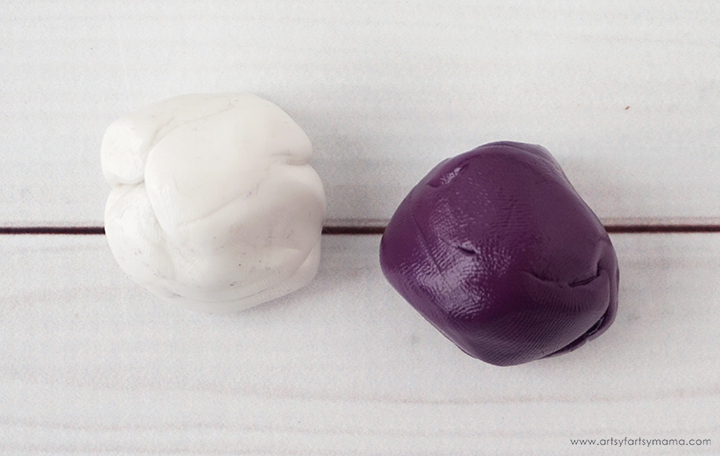
EasyMold Silicone Putty comes in two parts: Part A (white) and Part B (purple). Use equal amounts of each part for your mold project. Another great part about using a mold form is that you can pour some rice into it to measure how much putty you will need. Take at least half that size in each color. If you roll them into small balls, that can help to determine if they are similar in size.


Roll the putty into a ball and then flatten it down into whatever shape you want. If you are using a mold form, place the form down on a smooth surface and place the ball in the center. Press it down as evenly as possible to fill the form. Smooth the top of the putty out with your fingertips.

Press your mold item face-down into the putty. Try to do this as evenly as possible and press it down until the top of the item is even with the top of the putty. Do not remove anything from the putty!
Leave the mold putty to cure for 25 minutes.


To make your own silicone molds, here is what I recommend using:
- EasyMold Silicone Putty
- Disposable Gloves
- Item to make a mold from
- Optional: mold shaper (cookie cutter, small container, etc)
*Save 10% on resin supplies when you shop ETI with code AFM
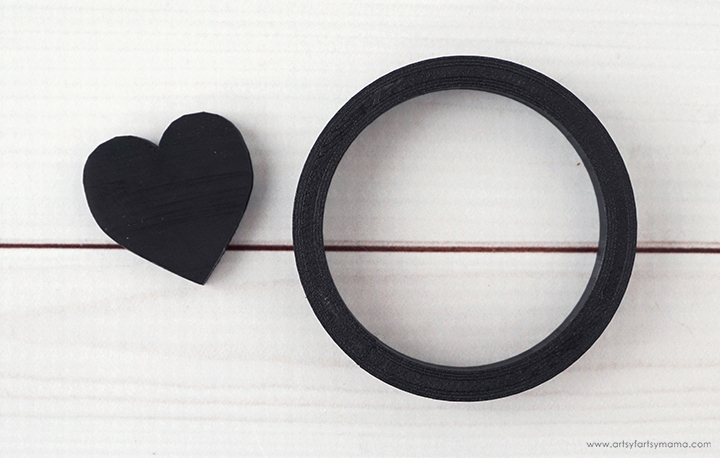
Just for fun, I decided to create a heart shape and a circle to form a mold in with our 3D printer. Like I mentioned in the supplies, a mold form is totally optional. I just like the look of molds with a flat and even shape. I learned a lot using this method, so I am going to teach you some tips and tricks!
When choosing the item you want to make a mold of, keep in mind that the texture of the item is exactly how your project will come out in resin. For example, if the item is glossy then your project will come out with a gloss finish. Same for matte. The heart I used for my mold is a matte finish, so stay tuned so I can show you how to turn it into gloss later!
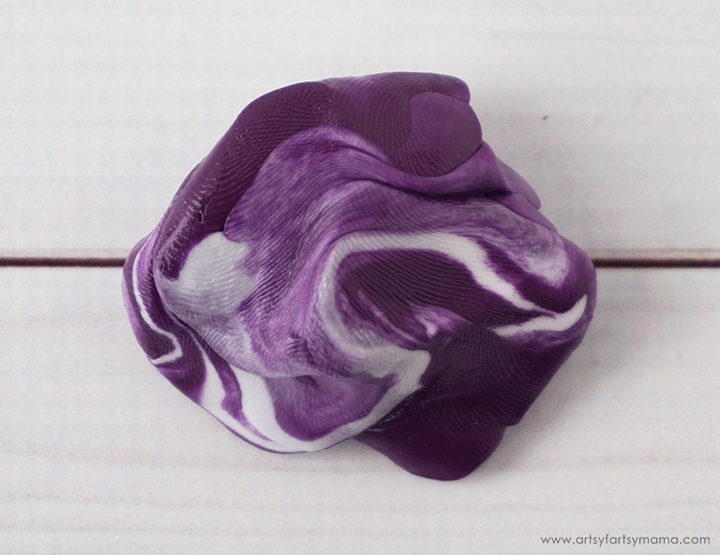
Press the two parts together and knead quickly. It should take you only one minute to get the putty combined. The two parts will look marbled.
Keep kneading until the putty is one solid color. In total, you have about three minutes of working time from the start of mixing the putty to setting your mold item into it.
Press your mold item face-down into the putty. Try to do this as evenly as possible and press it down until the top of the item is even with the top of the putty. Do not remove anything from the putty!
Leave the mold putty to cure for 25 minutes.
After 25 minutes, you can remove the putty from the mold form. Even though the putty has cured, do this slowly and carefully.
Next you can remove the item from the putty to reveal your new custom mold!
If you are planning to use your mold for resin, epoxy, plaster, or concrete, you will need to let the mold cure for an additional 24 hours at room temperature. If you are in a hurry, you can do a heat cure for your mold. For this, you need to place your mold on some foil or a cookie sheet and bake at 350º for 30 minutes. Let the mold cool completely before using.
Like I mentioned before, my mold has a matte finish for anything I make with it using resin. Not a problem though! To get a glossy finish, you just need to apply a light coat of clear resin or spray on a clear gloss resin spray on top of your piece. It really is as easy as that!!
Have fun getting creative with your new mold! You can make your own custom keychains, jewelry, and so much more!
Don't forget to Pin, Like, and Share!
What kind of molds would you like to make?


Ur welcome
ReplyDeleteHi! I made a mold but my uv resin doesn’t cure all the way. Any recommendations?
ReplyDeleteJust a thought but if you really want a shiny item you can do the first mold as described. Cast a resin piece and add the gloss, then make another mold using the glossed item. It's a little more work and materials but will save time in the long run if you are always looking for that shine.
ReplyDelete