
Make your own DIY Reindeer Prance Pillow to add a little Christmas spirit to your home this holiday season!
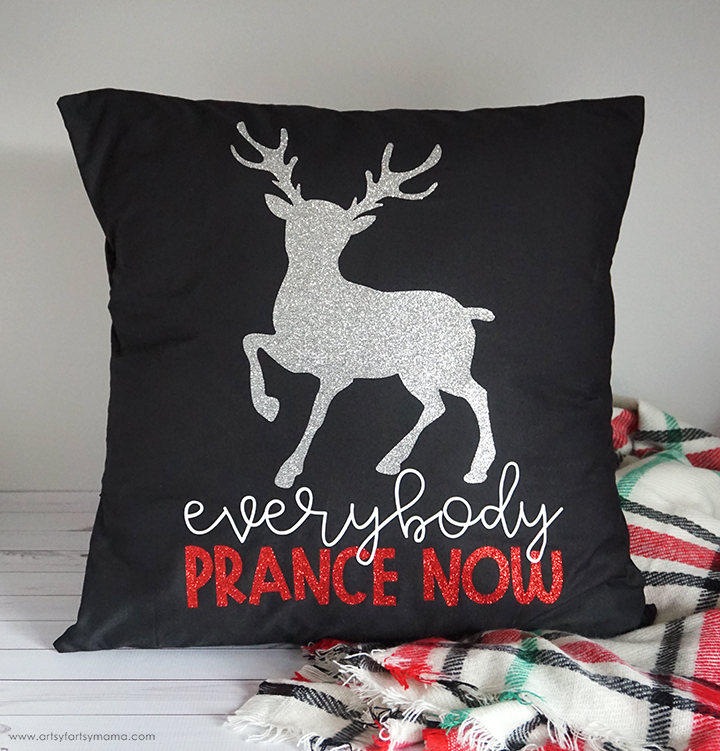
Throw pillows are a simple way to add decor to your home, and are especially fun when you can customize them yourself! With just a little bit of fabric, iron-on vinyl, and a pillow insert, you can make a holiday pillow in a snap. This DIY Reindeer Prance pillow cover is so simple to make, and I've got the FREE cut file here so you can make one for yourself!

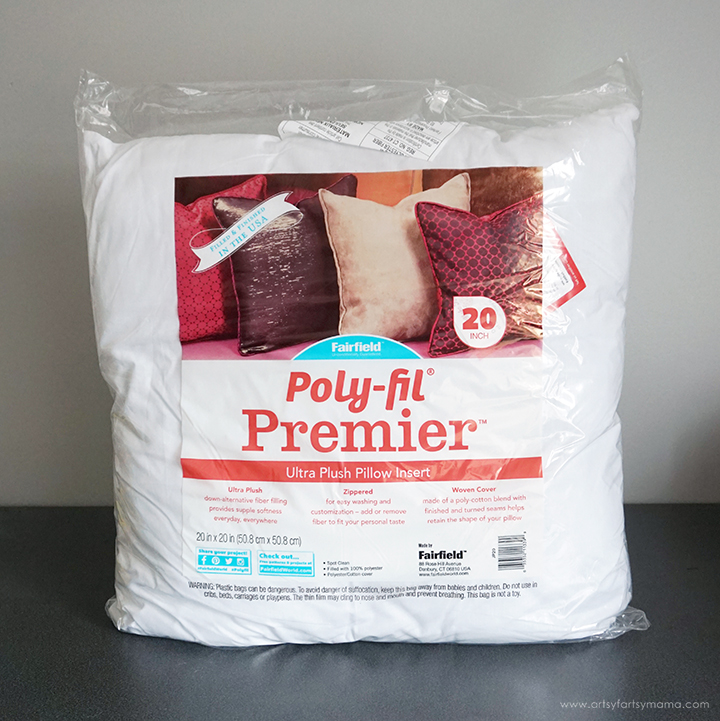
First, you will need to get a pillow insert. Fairfield accent pillow inserts come in all different sizes, which gives you options in your home decor! This 20" square ultra plush pillow insert has a washable liner that you can decorate, and the zipper allows you to add or remove filling for your comfort.
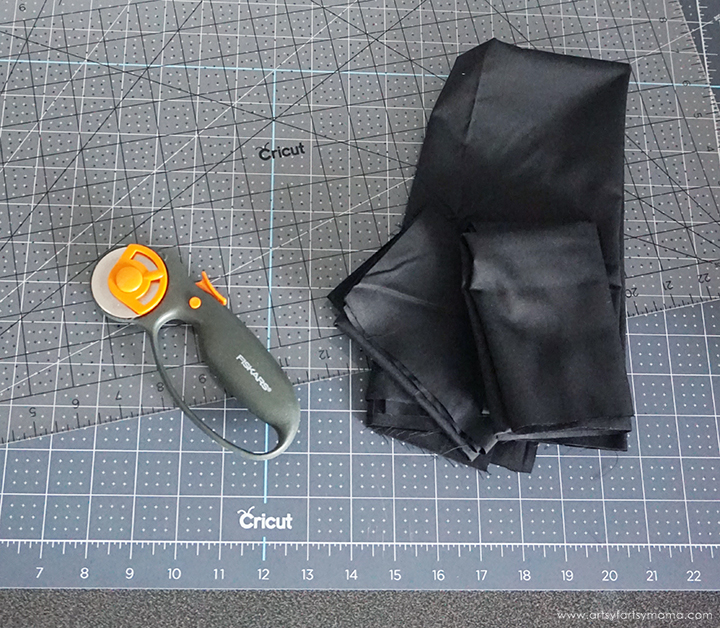
Instead of using the pillow liner, I wanted to make a black pillow cover instead. Like I mentioned earlier, this is my first time making a pillow cover, and I'm happy to say that it is easier than I thought it would be! I definitely recommend giving it a try!
To make your own Reindeer Prance pillow cover, you will need:
- Cotton/Poly Fabric
- Sewing machine, sewing accessories
- Cricut Maker or Cricut Explore Air 2 machine
- HTV/Iron-On Vinyl OR Glitter HTV/Iron-On Vinyl
- EasyPress 2
- EasyPress Mat
- Iron-On Protective Sheet
- Weeding Tools
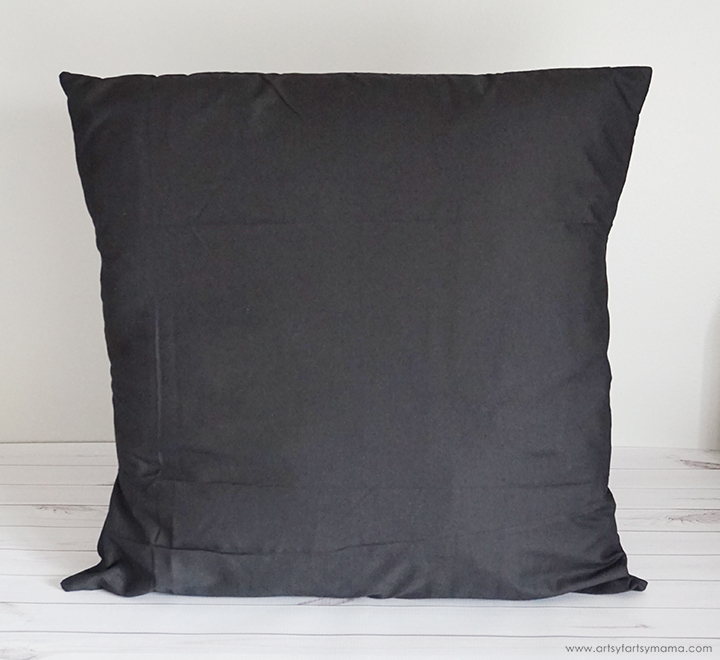
I followed this super helpful envelope pillow cover tutorial, and whipped my pillow cover together in less than 30 minutes from the first fabric cut to final ironing! The pillow insert fits perfectly, and I'm excited now to make a pillow cover to switch out for every season and holiday!!
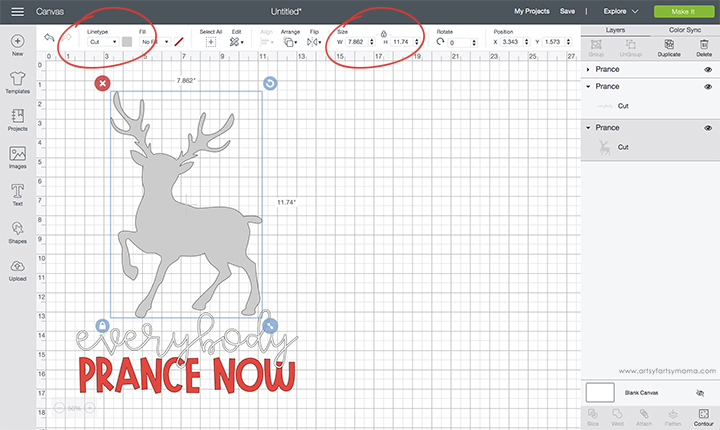
Upload* the "Reindeer Prance" cut file into Design Space and size the image to fit your pillow cover (right circled area). If you want your design to be cut in different vinyl colors, select each part of the design and change the colors in the menu bar (left circled area). Once your design is ready, click on the green "Make It" button in the top right corner.
*Here's a great tutorial on how to upload your own images into Cricut Design Space.
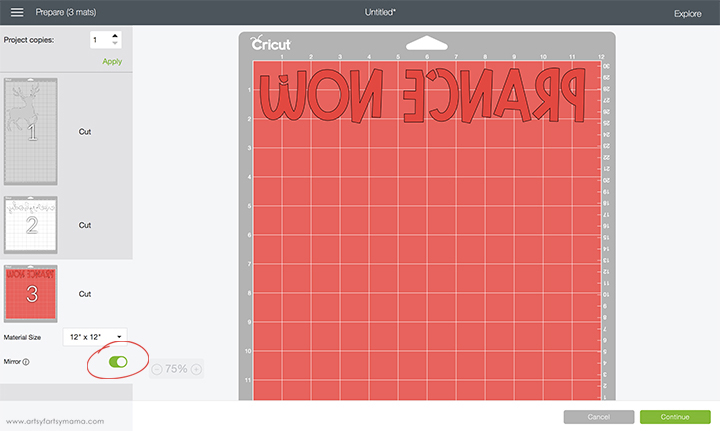
Make sure to mirror the image before cutting the iron-on vinyl! Otherwise, your design will be backwards when you put it on the pillow cover. To do this, select the mat thumbnail and click the "Mirror" toggle to reverse the image.
*Here's a great tutorial on how to upload your own images into Cricut Design Space.
Place the vinyl face-down on the mat and load it into the machine. Change the material settings to the type of vinyl you are cutting, and then click the "Go" button to cut the vinyl. Repeat for all of the different pieces of the design.
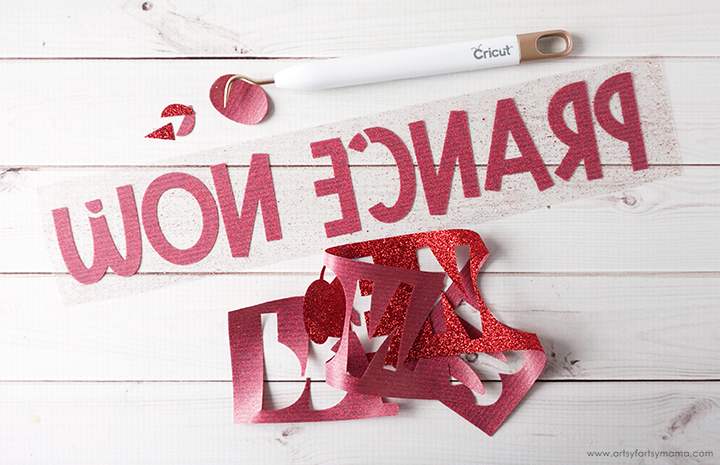
"Weed" the excess vinyl by removing all of the parts that don't belong in the design. I usually peel away the outer edges, starting at the corner and then working my way around the design. Then I use weeding tools to remove the smaller pieces of the design.
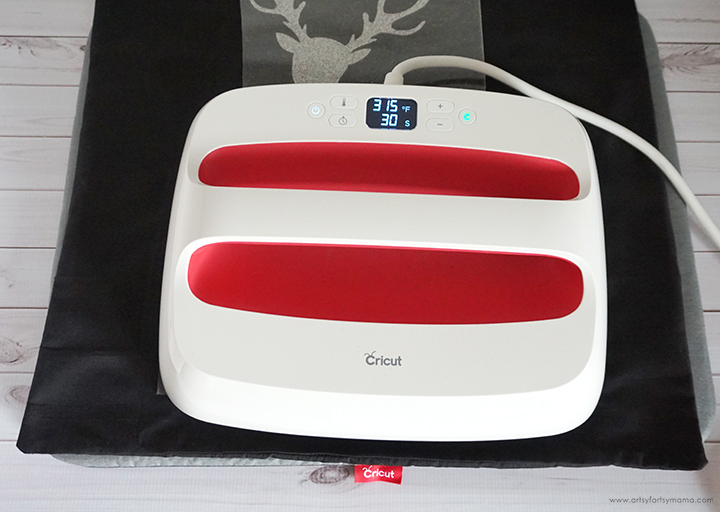
Plug in the EasyPress 2 and power it on. Each kind of HTV has a different heat and time setting, so be sure to check the recommended EasyPress settings before getting started. Adjust the heat and time setting to your shirt and vinyl specifications. Once the light turns green and the machine beeps, it's ready to use.
When the EasyPress is up to temperature, place your shirt on the EasyPress Mat and preheat the area for 5-10 seconds. Lay the HTV down on the shirt, with the clear carrier sheet facing up. Set the EasyPress over the vinyl and press the green "C" button. Hold firmly in place while the timer counts down. Turn the fabric over and press the EasyPress firmly again for 15 seconds.

Turn the pillow cover over and press with the EasyPress firmly again for 15 seconds. Peel off the carrier sheets. If some of the vinyl isn't sticking, cover it again with the Iron-On Protective Sheet and press it down, following the same directions as above.
Place the pillow insert into the pillow cover through the opening in the back. Make sure to fit the corners into the cover to make it nice and square. Now you have a sparkly new piece of holiday decor that you can enjoy all season long!
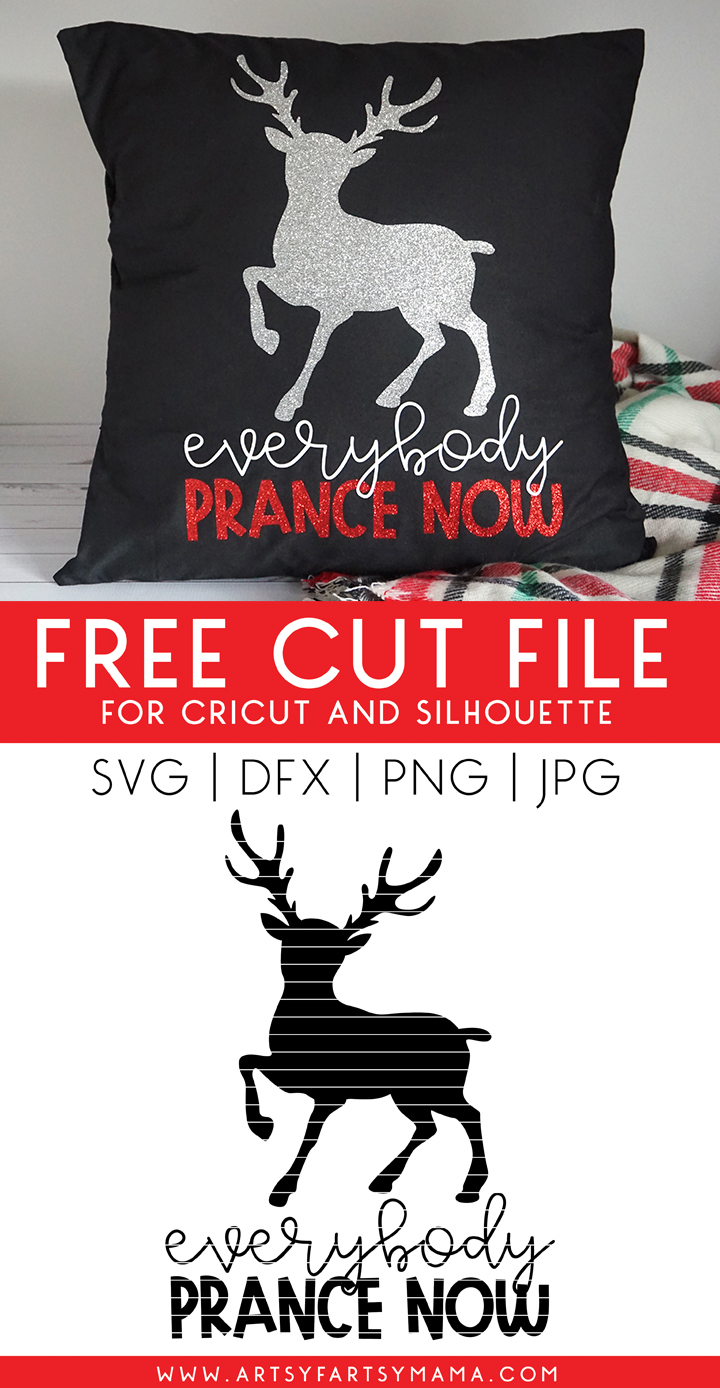
Download Free Reindeer Prance Cut File
(personal use only)
The cut file comes with multiple file types, so you can actually cut the design with any cutting machine. All I ask is that the file for personal use only. I hope you enjoy using this cut file, and I would absolutely LOVE to see your creations!!
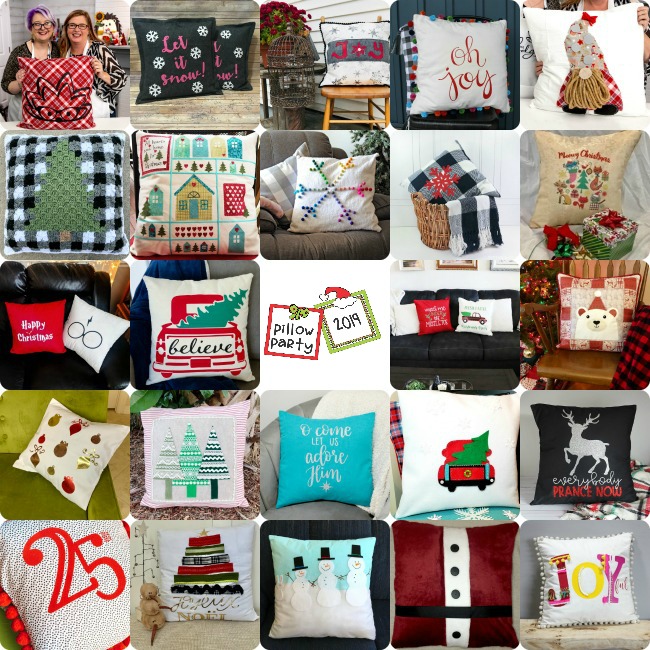
Be sure to stop by the FFW Pillow Party hosted by Laura Kelly Designs and Hedgehog Hollow to see all of the pillow links in one place to get inspired to create your own holiday decor! I'd love to hear which pillow design is your favorite!
- Gnome Pillow by Laura at Laura Kelly Designs
- Hedgehog Pillow by Alexandra at The Hedgehog Hollow
- Pom Pom Snowflake Pillow byt Emily at The Benson Street
- 3 Snowmen and a Bunny Pillow by Cindy DeRosier
- Reindeer Prance Pillow by Lindsay at Artsy Fartsy Mama
- 3 Trees Pillow by Beth from Creatively Beth
- Tree in a Truck Pillow by Katie from The Crafty Blogstalker
- Snowflake on Buffalo Plaid by Cheryl and Maybe That's What Che Said
- Snowman Pillow by Janet at Try It Like It
- Oh Joy Pillow with Pom Poms by Ginger at GingerSnaps Crafts
- Merry Christmas by Ann Makes
- 25th of December Pillow by Lindsay at See Lindsay
- Joyful Pillow with Pom Poms by Natalie at DoodleCraft Blog
- Plaid Christmas Tree Pillow by Erica at Five Little Monsters
- Harry Potter Christmas Pillows by Julie at The Quiet Grove
- Felt Tree in Truck Pillow by Debra at Quartermain Designs
- Joyeux Noel Pillow by Monica at Sookee Designs
- Oh Come Let Us Adore Him Pillow by Amy at Amy Latta Designs
- Joy on Snowflakes Pillow by Diana at Miss USG Moments
- Polar Bear Pillow by Kimberly at Crafting Cheerfully
- Let It Snow Pillow by Katie at A Sweet Berry Designs
- All Hearts Come Home For Christmas Pillow by Suzie Bentz Designs
- Ornaments Pillow by Morena's Corner
- Meet Me Under the Mistletoe AND Fresh Farm Christmas Trees by Laura at Laura's Crafty Life


I love it and now I’m singing that song in my head 😂😂😂
ReplyDeleteLove the design - so creative.
ReplyDeleteVery clever - and I love the bling-y vinyl!
ReplyDelete