
**I am SO sorry, but I didn't realize Cricut removed Simplicity patterns from their library until now! This pattern directly from Simplicity is similar to what I used. I plan to make some new printable patterns similar to this project that you will be able to be cut with the Cricut Maker.
Making 18" doll clothes couldn't be easier when you use the Cricut Maker!

As soon as my daughter got her 18" doll, there was an immediate need for her to have ALL the things. My mom supplied a full wardrobe for her doll, but not everyone is so lucky. Doll clothes can be expensive to buy and intimidating to make yourself (unless you're a pro at sewing).
Unless it's super basic, I'm not really the best at cutting out the tiny patterns perfectly. Did you know that there are Simplicity doll clothes patterns that can be cut with the Cricut Maker? Yep. Let's just say that life has just become a lot easier if you have someone in your life with a 18" doll that needs some new clothes!
Unless it's super basic, I'm not really the best at cutting out the tiny patterns perfectly. Did you know that there are Simplicity doll clothes patterns that can be cut with the Cricut Maker? Yep. Let's just say that life has just become a lot easier if you have someone in your life with a 18" doll that needs some new clothes!
*Before you get started on this project, learn everything there is to know about the Cricut Rotary Blade!

To make your own DIY 18" Doll Clothes, you'll need these supplies:
- Cricut Maker machine
- Cricut Rotary Blade
- Simplicity Doll Clothes Design Space Projects (see below)
- 12x24 Cricut FabricGrip Mat (Pink)
- Cricut Designer Fabrics
- Cricut Holographic Iron-On Vinyl
- Cricut Washable Fabric Pen
- Cricut Applicator and Remover Set
- Cricut Sewing Kit
- Cricut EasyPress 2 (6" x 7")
- Cricut EasyPress Mat (8" x 10")

When it comes to doll clothes, shirts are a wardrobe staple! You can mix and match shirts with pants, shorts, skirts to make all kinds of outfits. There are a few different Simplicity shirt patterns available in Design Space, and the Doll Baseball Top pattern immediately caught my eye. Once you click on the project, you can read through and print the list of materials and cutting instructions.

Scroll down to the bottom of the project instructions to find a link to the the Simplicity pattern directions. Here you can read through the directions before getting started, and print them out to follow along as you sew.
After you have printed the directions, click the green "Make It" button to get started and to purchase the pattern. This is a one-time payment. (If you are a subscriber to Cricut Access*, you can save 10% on this pattern purchase!) Once you purchase, the pattern is yours to use in Design Space whenever you want.
*Cricut Access allows you to get instant access to 60,000+ images, fonts, and projects for endless possibilities! That subscription also gives you 50% off digital fonts, images, and cartridges in Design Space and 10% off all physical purchases on the Cricut website!


After all the clothes have been sewn, rinse them in warm water to remove the washable fabric pen marks and writing. Hang them to dry or toss them in the dryer to dry completely.
Lay the fabric you want to use face-down on the FabricGrip Mat. Use a brayer tool to press the fabric down well and smooth it out on the mat.
Place the Rotary Blade tool and the Washable Fabric Pen into clamps A and B, then load the mat into the machine. The pen marks your pattern pieces, hem lines, and other important parts of the pattern. The rotary blade cuts seamlessly through the fabric, cutting the pattern pieces out perfectly every time. The way the Cricut Maker cuts and draws in one step saves you so much time!
Place the Rotary Blade tool and the Washable Fabric Pen into clamps A and B, then load the mat into the machine. The pen marks your pattern pieces, hem lines, and other important parts of the pattern. The rotary blade cuts seamlessly through the fabric, cutting the pattern pieces out perfectly every time. The way the Cricut Maker cuts and draws in one step saves you so much time!
Peel away the excess fabric, starting at one of the corners. Use the broad-tipped tweezers to carefully remove the pattern pieces from the mat.
Keep the Simplicity PDF instructions next to you as you sew. The illustrated, step-by-step instructions combined with labeled pattern pieces by the Washable Fabric Pen made it helpful for a beginner like me to sew the doll shirts successfully.
The Cricut EasyPress 2 (6" x 7") is the perfect size to press the doll clothes as you go and to add touches of vinyl to the tiny, new wardrobe.
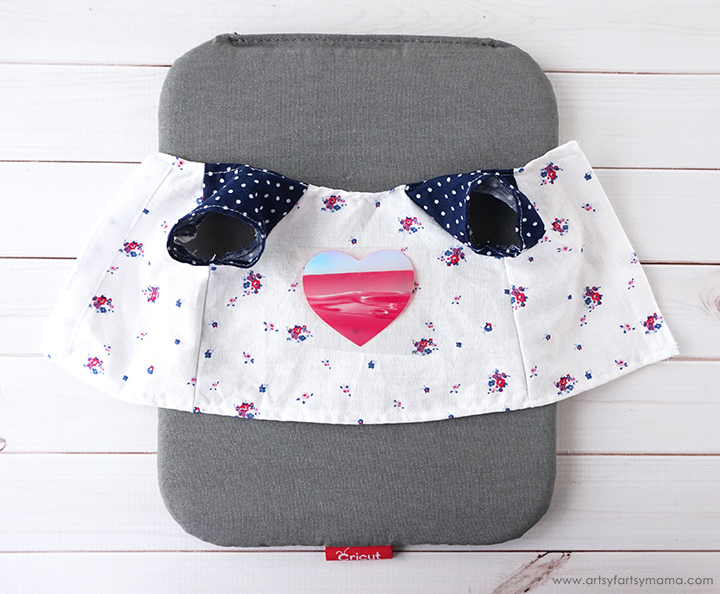
Lay the shirt (opened up) on the Cricut EasyPress Mat (8" x 10"). Place the vinyl heart on the front of the shirt, making sure it's centered. Cover the shirt with an Iron-On Protective Sheet (optional).
Adjust the heat and time setting* on the EasyPress 2 to 330º for 30 seconds. Once the light turns green and the machine beeps, it's ready to use. Set the EasyPress over the vinyl and press the green "C" button. Hold firmly in place while the timer counts down. Peel the carrier sheet away while the vinyl is still warm.
*Each kind of iron-on vinyl has a different heat/time setting for different materials, so be sure to check the recommended EasyPress settings for best results.
I made some doll pants the same way I did the shirts. Open the Doll Pants pattern in Design Space. Print and read through the instructions before getting started. This pattern has more steps than the shirt, but they are so fun to make! The pants are more of a capri length, and even have REAL pockets! I was quite proud of myself for getting through that unscathed. Another great thing about the pattern is that after I made one pair, I made up another - but I decided to trim the length to turn them into shorts! Easy, peasy.
If you want to make leggings for your doll, check out this Easy 18" Doll Leggings Tutorial!
This Doll Wrap Skirt honestly was the simplest of all the doll clothes to make. Depending on the fabrics you use, you can create a bunch of different looks with just this pattern.
After all the clothes have been sewn, rinse them in warm water to remove the washable fabric pen marks and writing. Hang them to dry or toss them in the dryer to dry completely.

Here are our sweet little models, Liza and Zoey D, showing off their new outfits. You can mix and match the tops with any of the bottoms, which makes it such a fun and coordinating wardrobe for any 18" doll. After this experience, I am happy to say that I actually feel a lot more confident in making doll clothes with the help of my Cricut Maker!
Pin this project for later:
What kind of doll clothes would you make with the Cricut?


Those outfits are sooooo cute! I love that the Cricut does the boring work of cutting. My granddaughters would love these!
ReplyDeleteHello, I have a Cricut maker with a subscription to Cricut Access and I absolutely cannot find any Simplicity patterns or doll clothes patterns whatsoever! Please help, thank you!!
ReplyDeleteI'm wondering the same thing!
DeleteOh my goodness, I am SO sorry!! I didn't realize Cricut removed them! This pattern directly from Simplicity is similar to what I used for pants & shirts https://www.simplicity.com/simplicity-storefront-catalog/patterns/crafts/doll-clothing/simplicity-pattern-8576-unisex-doll-clothes/.
DeleteI'm going to try and make some similar patterns on my own that you can use with the Cricut. Again, I am SO sorry!!
when i click the link the patterns show up. If I search for it it wont
ReplyDeleteIs there a Raggedy Ann Doll pattern for Cricut Maker?
ReplyDelete