
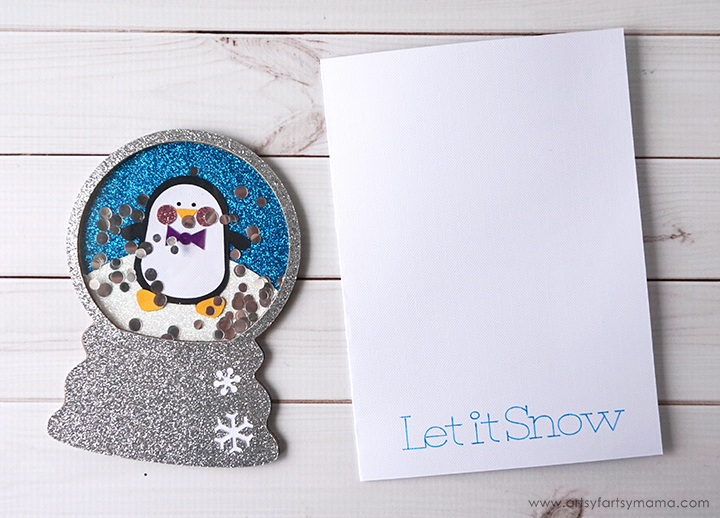
Spread some holiday cheer with a DIY Snow Globe Shaker Card made with the Cricut!
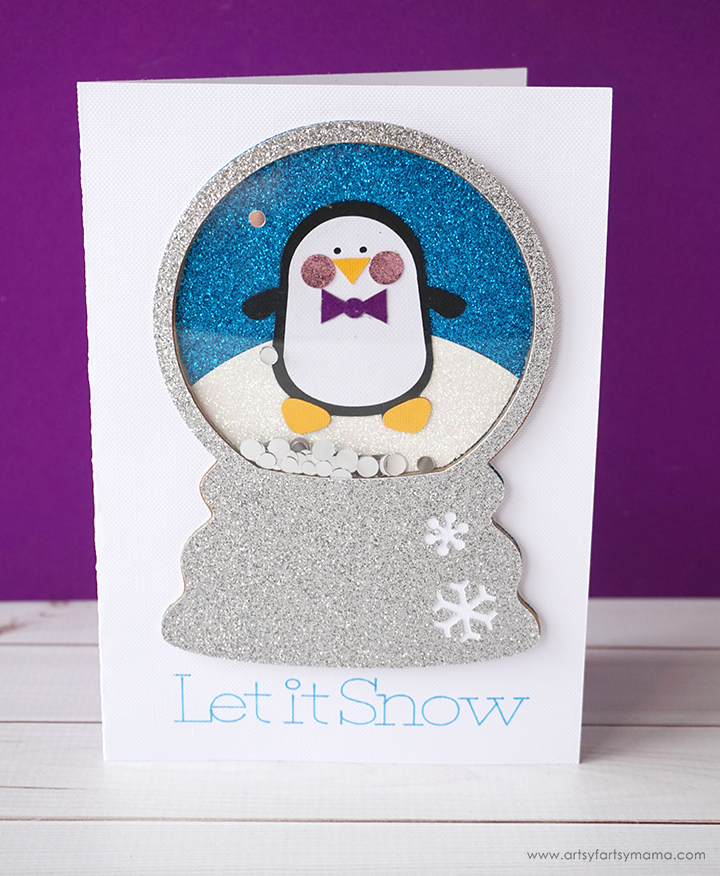
The holidays are around the corner, and we love sending cards to everyone we know. A shaker card turns an ordinary card into an interactive experience. The recipient can shake the card and see the confetti snow inside the card! They are so fun to make and will take your paper crafting skills up a notch! With some help from my Cricut Maker machine, this card was simple to put together and we can't wait to make a bunch to share with loved ones this holiday season.
To make your own DIY Snow Globe Shaker Card, you'll need these supplies:
- Cricut Maker machine
- Snow Globe Card Design Space File (for personal use only)
- Scoring Wheel or Scoring Stylus
- Knife Blade
- Glitter Gel Pen - Blue
- Chipboard 2mm
- StrongGrip Mat
- Cardstock - white, black, orange,
- Glitter Cardstock - blue, white, silver, pink, purple
- Cricut Party Foil - silver
- Clear Acetate Sheet
- Paper Adhesive
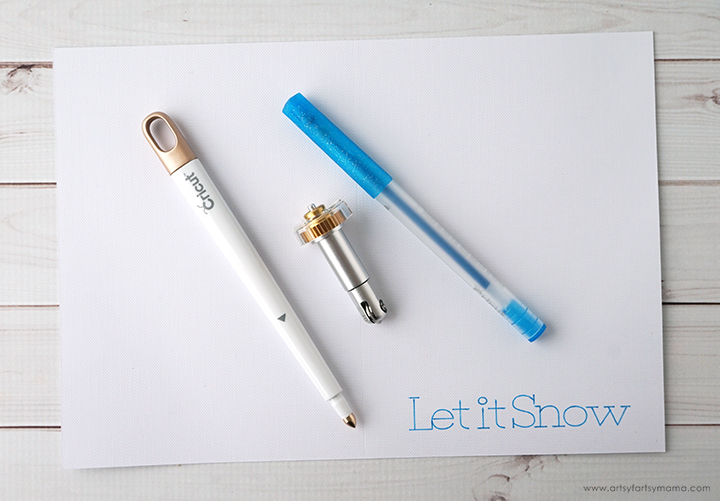
Open the Snow Globe Card cut file in Design Space. Click "Customize" to adjust the image size or colors. Click "Make It" to go straight to cutting the design. Start by cutting the card base out of white cardstock. Besides cutting the card, you'll also need to add a score line for an easier and cleaner fold. To score the card, you can use the Scoring Wheel or Scoring Stylus. You'll also need a Glitter Gel Pen to write the card message (with a hint of sparkle).
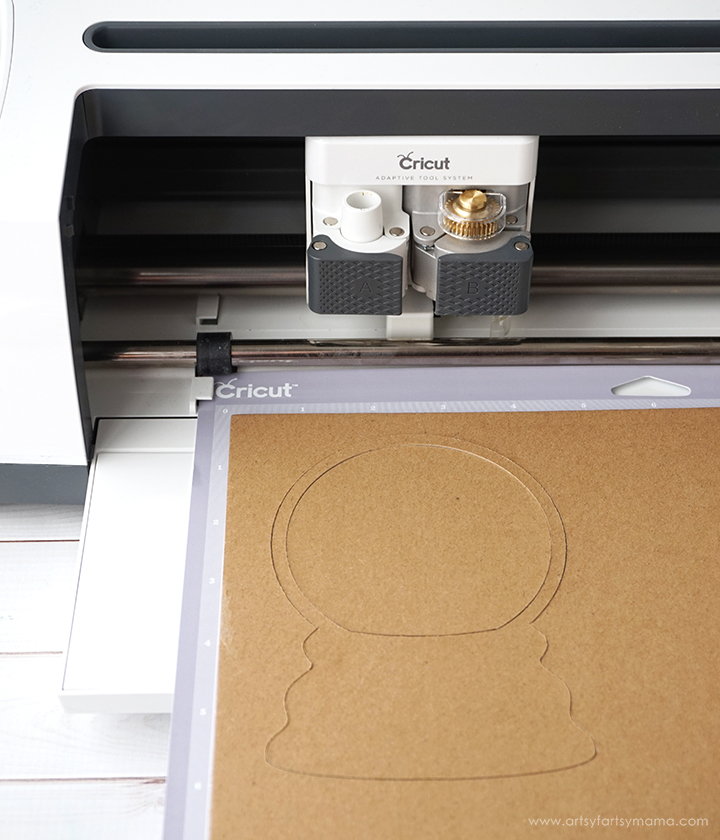
To make a shaker card, you need to add layers. We made one thick layer by using chipboard instead of multiple sheets of paper or foam. Chipboard is a thicker material that requires the Knife Blade, which is the newest tool to use with the Cricut Maker machine. This blade is similar to a craft knife, and allows your machine to cut through thicker materials like chipboard with precision.
To ensure you get a successful cut, you need to take a few precautions before getting started. First, you need the StrongGrip Mat (purple). This is the stickiest mat there is to keep materials like this in place. Place the chipboard in the top left corner of the mat, and use a brayer to press it on well. The Knife Blade will cut in multiple passes (like you would with a craft knife), so I recommend using some masking tape around the edges of the chipboard to make sure nothing shifts during the cutting process.
To ensure you get a successful cut, you need to take a few precautions before getting started. First, you need the StrongGrip Mat (purple). This is the stickiest mat there is to keep materials like this in place. Place the chipboard in the top left corner of the mat, and use a brayer to press it on well. The Knife Blade will cut in multiple passes (like you would with a craft knife), so I recommend using some masking tape around the edges of the chipboard to make sure nothing shifts during the cutting process.
You'll need a little bit of time for this part of the cut because of the multiple passes. Make sure you have a strong bluetooth connection, or connect directly to your machine by cord if needed. Also make sure that your computer doesn't "sleep" during the cutting process. If you lose connection, you'll have to start over.
The machine defaults to 20 passes, but you can pause the cut (do NOT unload the mat) and check the chipboard to see if it has cut through before then. I noticed mine was finished cutting through at about 10 or 11 passes.
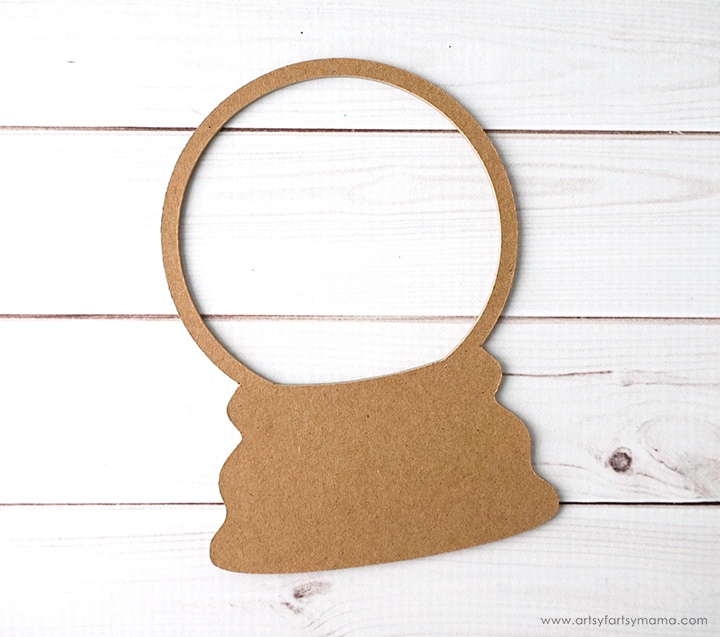
Once the snow globe have been cut through, unload the mat and carefully remove the chipboard. If for some reason you have unloaded the mat and the design isn't cut through, you can use a craft knife and finish it by hand.
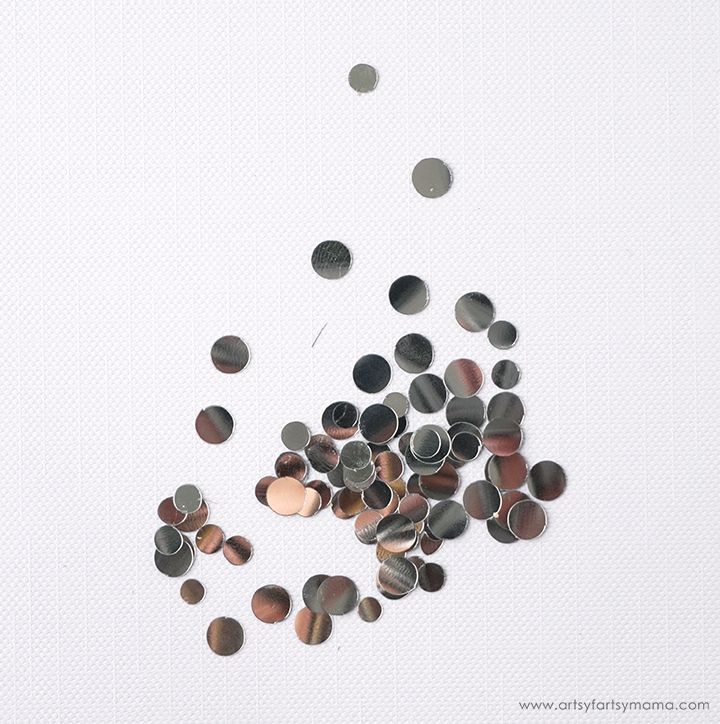
Did you know that you can cut out your own confetti? Cricut Party Foil is the perfect material, and with the Cricut you can cut it into any shape you can imagine! We just went with circles of different sizes to keep things simple in the shaker card.
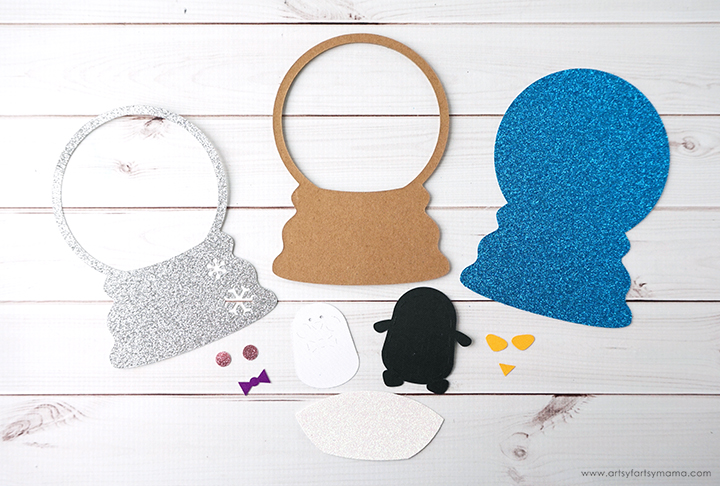
Cut the rest of the shaker card pieces out of different cardstocks to get multiple textures, colors, and patterns in your card. Use your imagination and have fun with it!
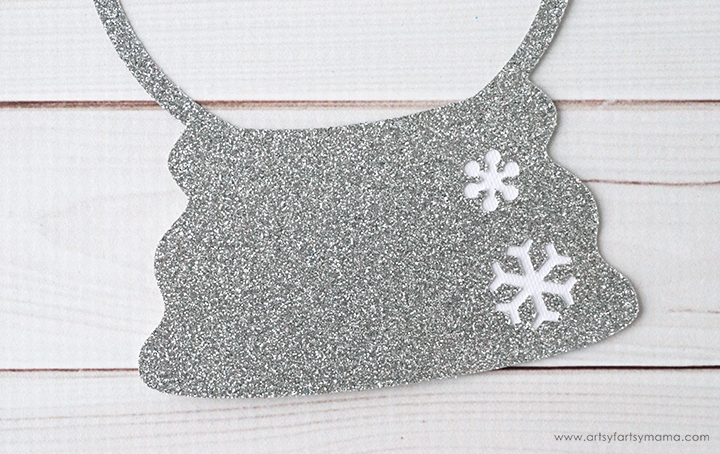
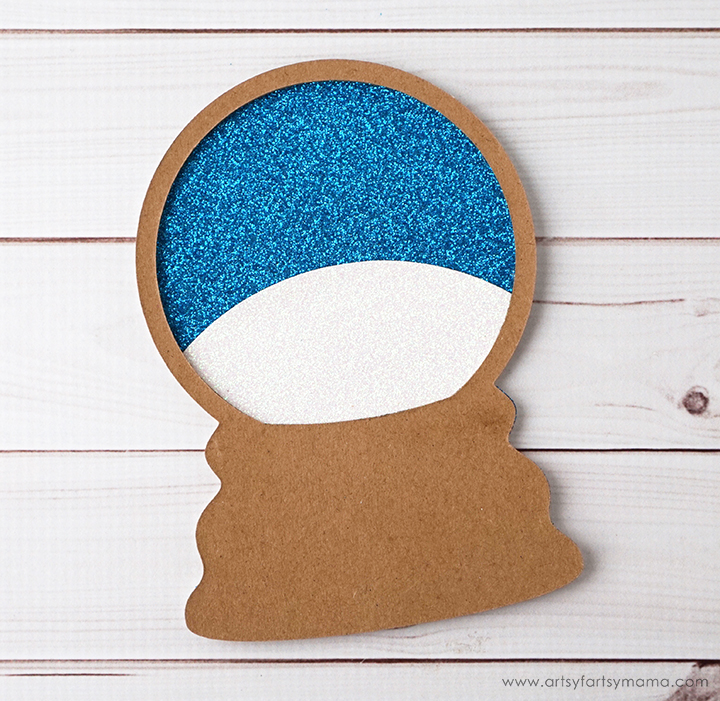
The top layer of the snow globe is the silver glitter cardstock, and it has a couple of snowflakes cut out of it. To make the snowflakes stand out, I used a small scrap piece of regular cardstock and attached it behind the snowflakes.
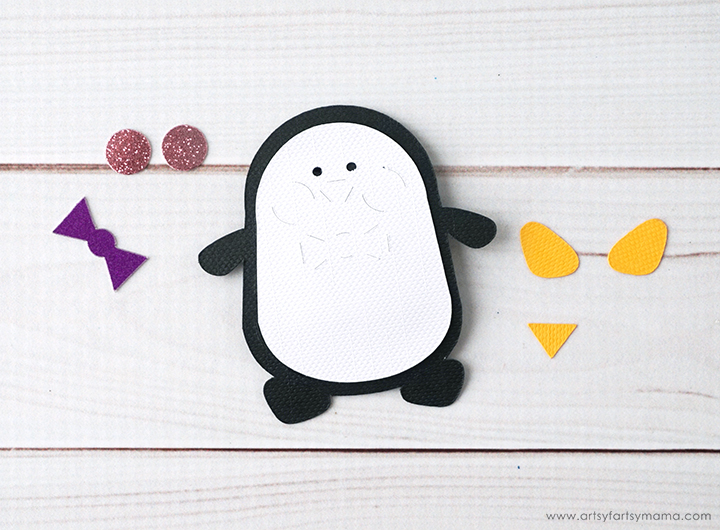
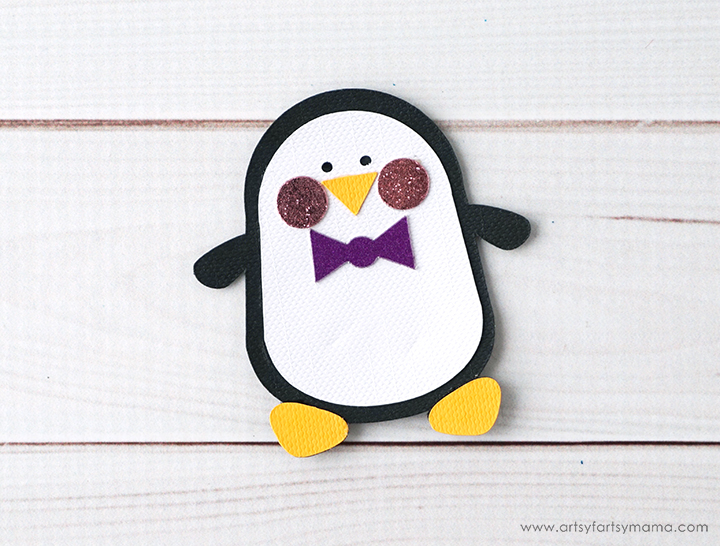
Assembling the little penguin is very easy! The Cricut will cut small guidelines so that you know where to place all of the small pieces. Attach the body of the penguin first with a small amount of adhesive.
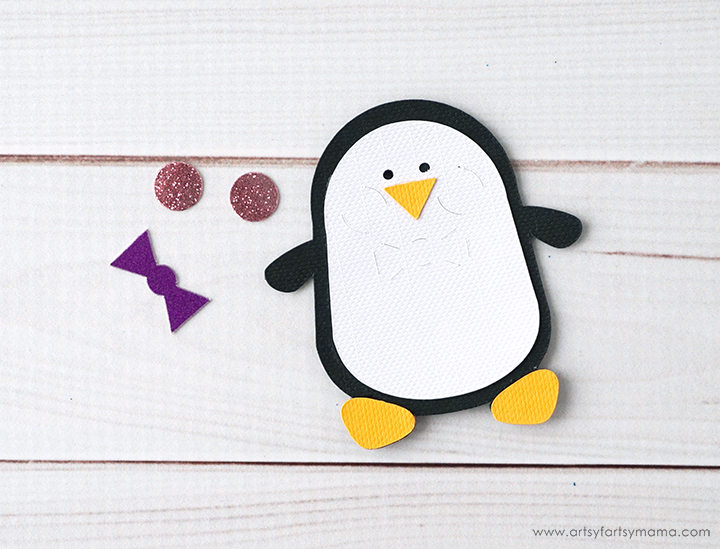
Next, attach the beak and the feet. Hold in place until the glue has set.
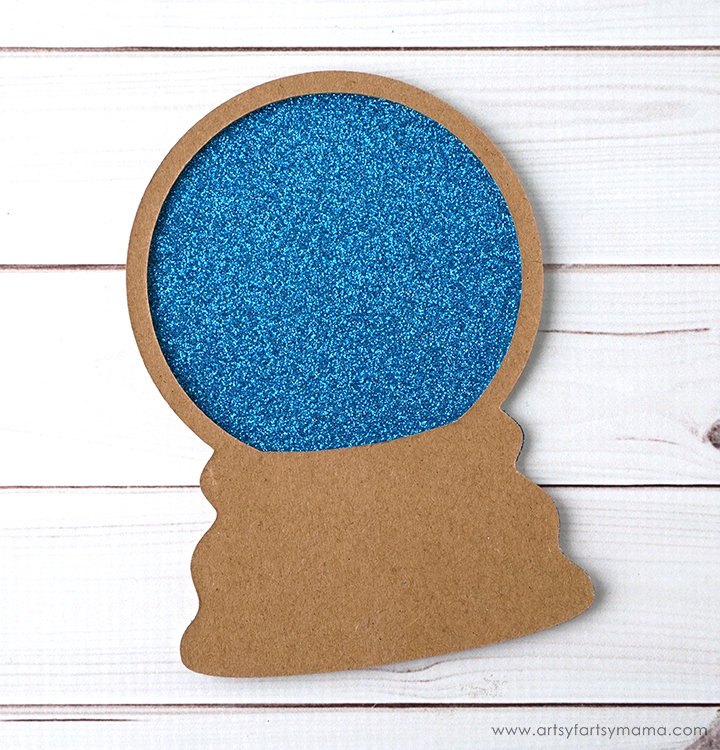
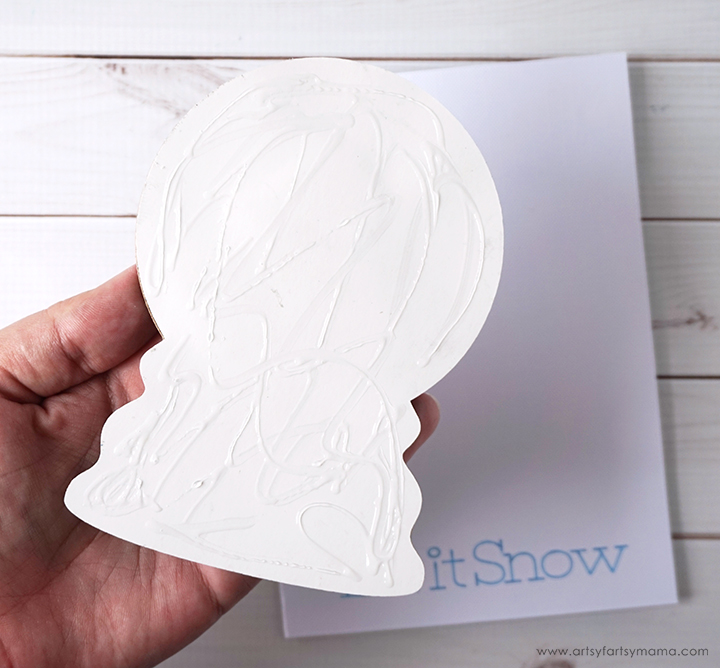
While the penguin dries, assemble the snow globe. Add some glue to the back of the chipboard and place it on top of the solid, blue glitter cardstock. Allow the glue to dry, using a heavy book if necessary.
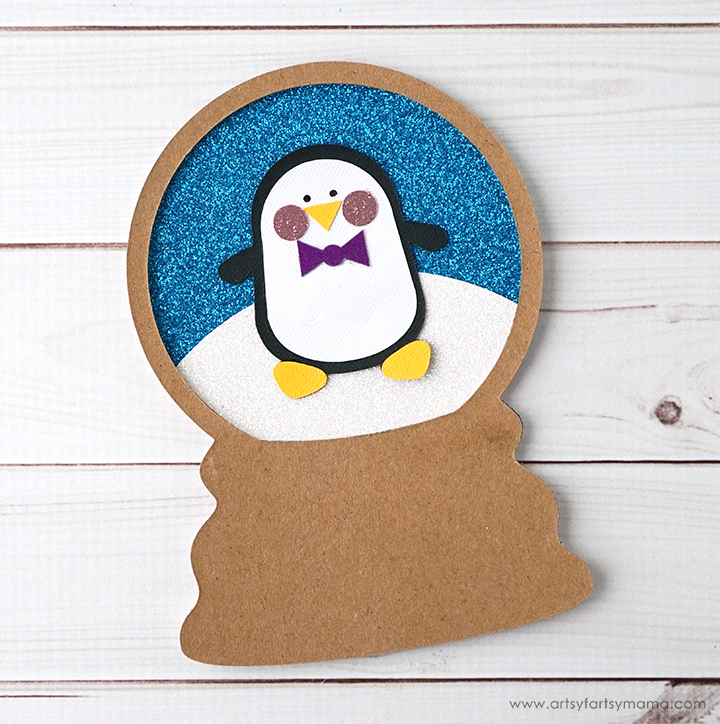
Once the penguin is dried, add a thin layer of adhesive along all of the edges. Press the penguin down well over the white and blue cardstock. I used a heavy vase to keep everything down flat while the glue dried. It's important to not have any gaps or edges folding up.
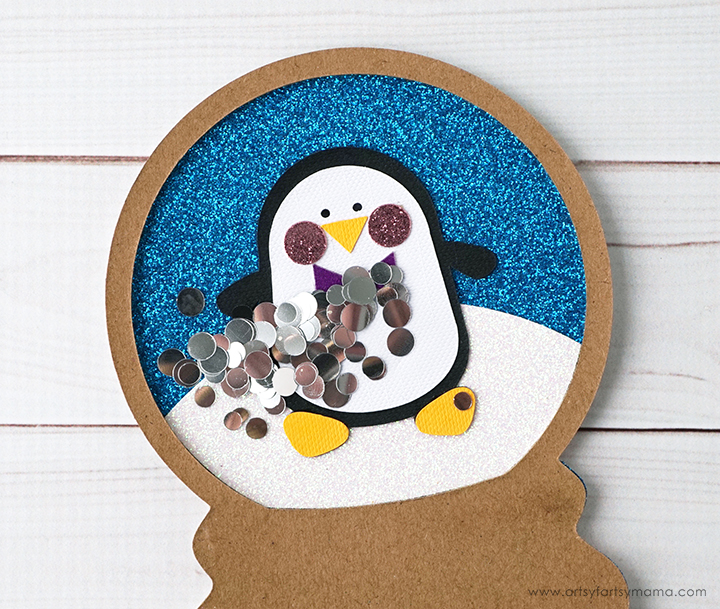
Cut a piece of clear acetate by hand or with the Cricut to fit over the hole in the chipboard snow globe. Use craft adhesive around the edges to keep in in place, making sure there aren't any gaps. Place under a heavy book (again) if needed.
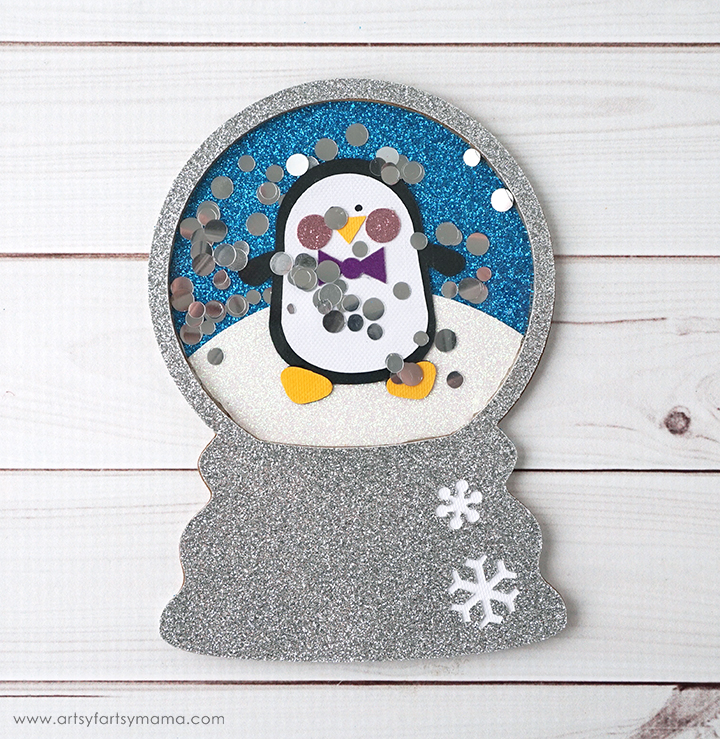
Last, attach the snow globe piece cut from silver glitter cardstock to the front the chipboard. Hold in place, then let it dry completely (you know the drill).
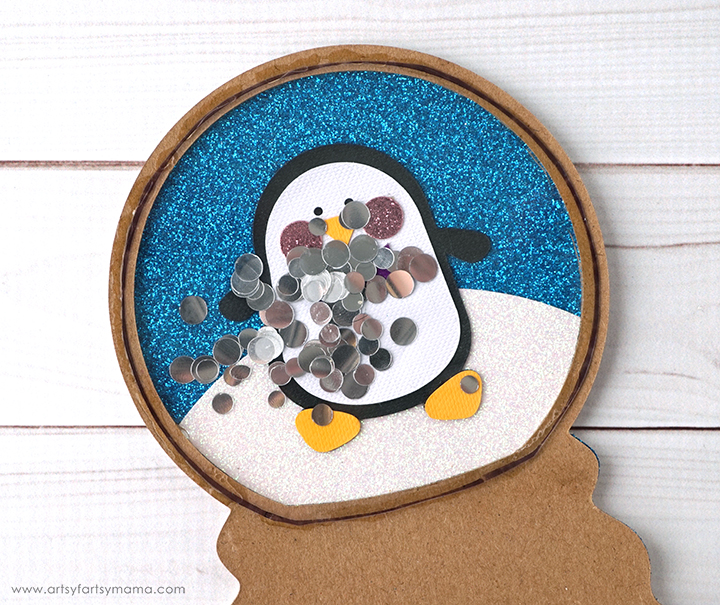
Once the glue has dried, shake the snow globe to test it out. If you have any confetti pieces fall out, find the gap and glue it closed. Fold the card base along the score line.
Add a thin layer of glue to the entire back of the snow globe. Place it on the front of the card, and... you know what to do now!
After the glue has dried, shake the card again because it's fun. Write your message inside the card, and gift it to your loved ones this holiday season. I hope you have a great time making your own DIY shaker cards with the Cricut Maker!!


This is absolutely adorable. Thanks for sharing! Will be fun to make!
ReplyDeleteI am having a hard time accessing the template. Every time I click the link it takes me to the Cricut Design space Home page. I do not see the template anywhere. Is it possible for you to email it to me?
ReplyDeleteI'm so sorry about this! I have updated the link in the post.
DeleteHello, I'm having the same problem as "Unknown" above. Would it be possible to get a copy of the template some other way? Thank you!
ReplyDeleteSO sorry about that!! Cricut project links are so glitchy. I updated the link in the post, so hopefully it will work for you now. https://design.cricut.com/landing/project-detail/5be2bcdff0d27c062a9d6e3f
Delete