
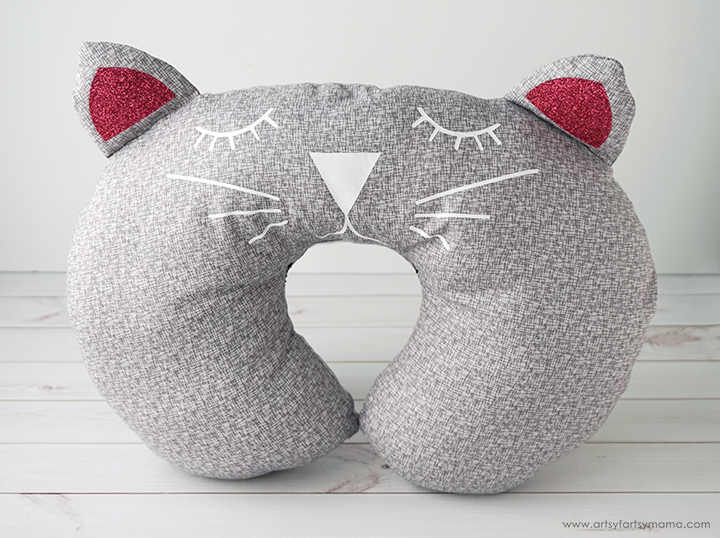
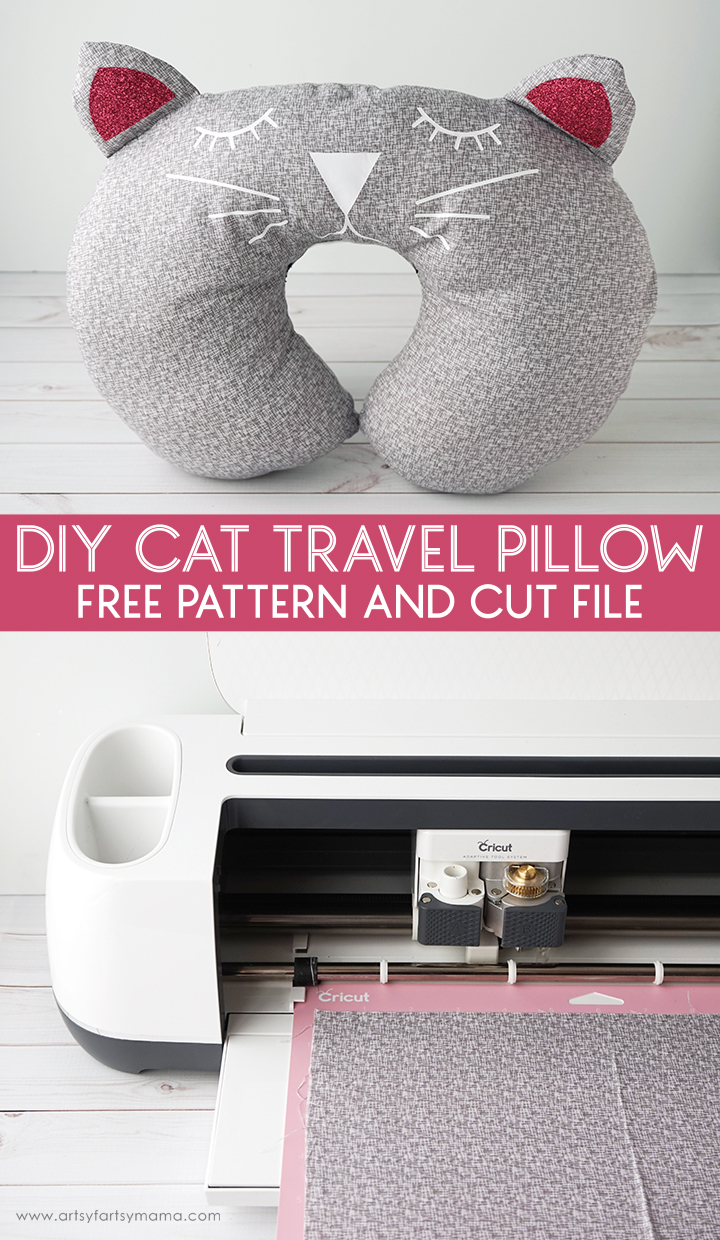
Travel in comfort with a DIY Cat Travel Pillow (with free pattern and cut file)!
*You don't have to use a Cricut machine for this project, but I would definitely recommend it!
This post contains affiliate links for your convenience. As always, I only share things that I use myself and truly recommend!
To make your own DIY Cat Travel Pillow, you'll need these supplies:
- Cricut Maker machine
- Cat Travel Pillow Pattern or SVG Cut File (for personal use only)
- Cricut Maker Rotary Blade
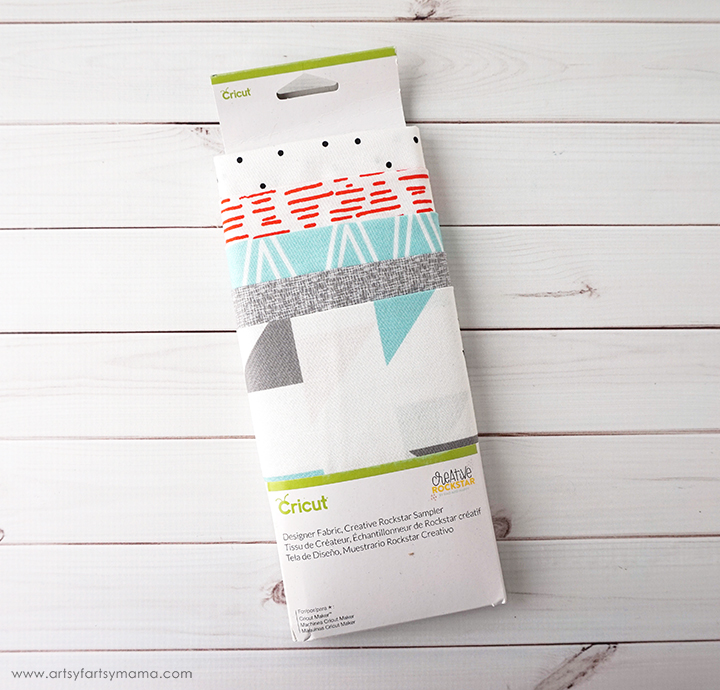
- Cricut Designer Fabric (I used the gray fabric from the Creative Rockstar Sampler shown above)
- Iron-On Vinyl
- Glitter Iron-On Vinyl
- 12"x24" Cricut FabricGrip Mat
- 12"x12" Cricut StandardGrip Mat
- 9"x9" EasyPress 2
- EasyPress Mat
- Cricut Sewing Kit
- Cricut Weeding Tools
- Poly-fil Stuffing
- Sewing Machine, etc
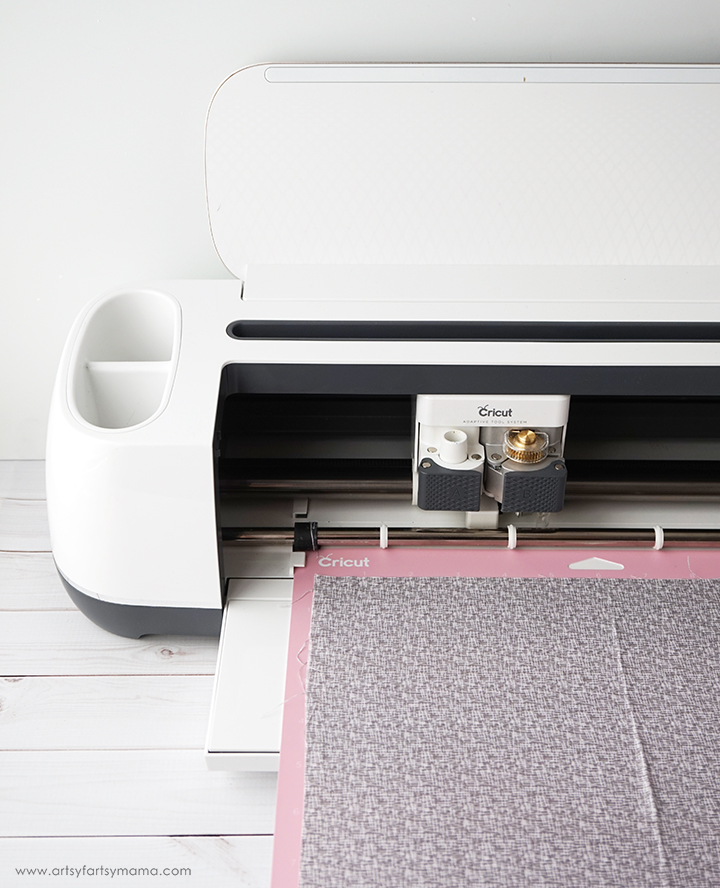
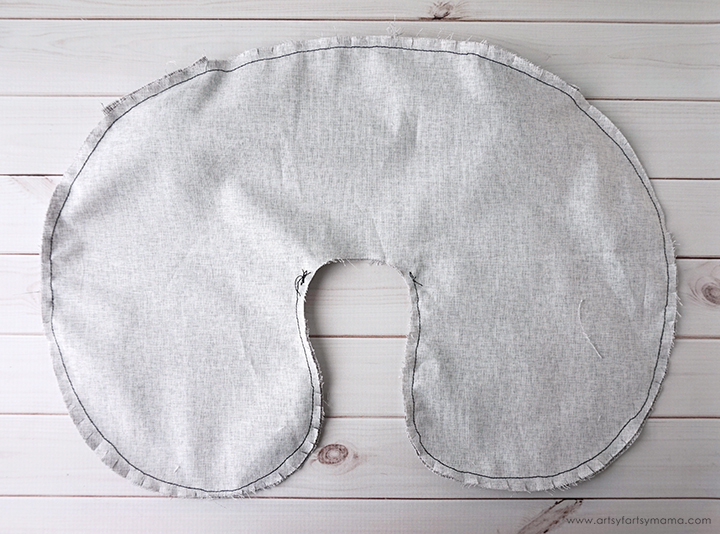
Each piece of fabric from the sampler measures 12"x26", so you don't even need to trim it to cut with the Cricut. Lay the fabric on the pink Cricut FabricGrip Mat and use a brayer tool to press the fabric down well and get rid of any air bubbles or wrinkles.
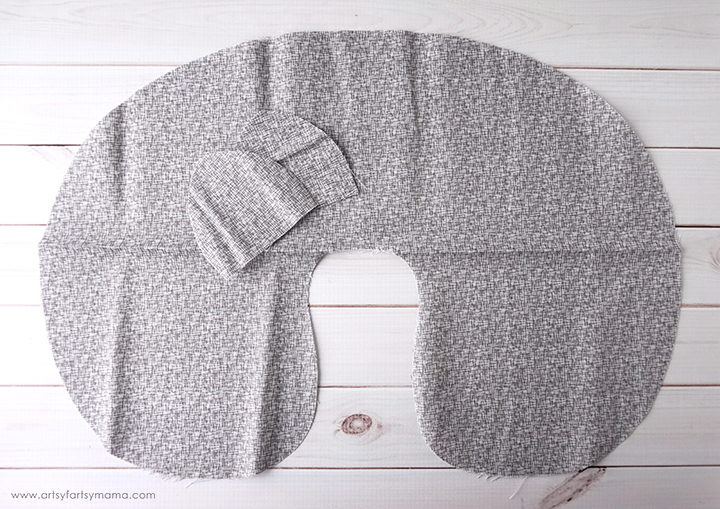
**If you want to cut the pattern out by hand, no problem! Print the PDF Cat Travel Pillow Pattern and piece the two pages together. Then, cut the fabric pieces out. There should be four ear pieces and two pillow pieces.
Upload the Cat Travel Pillow SVG Cut File in Design Space*. Duplicate the the pillow and ear shapes, and change the color of the inner ear to pink to represent the pink glitter vinyl. Select "Cotton" in the material settings and load the Rotary Blade in the Cricut. The machine's Adaptive Tool System ensures professional-level cutting of hundreds of materials, so you don't have to worry about adjusting settings other than the material you are cutting.

Cut the ear design out of any iron-on vinyl you like, or one that coordinates with your fabric. I used pink glitter iron-on vinyl.
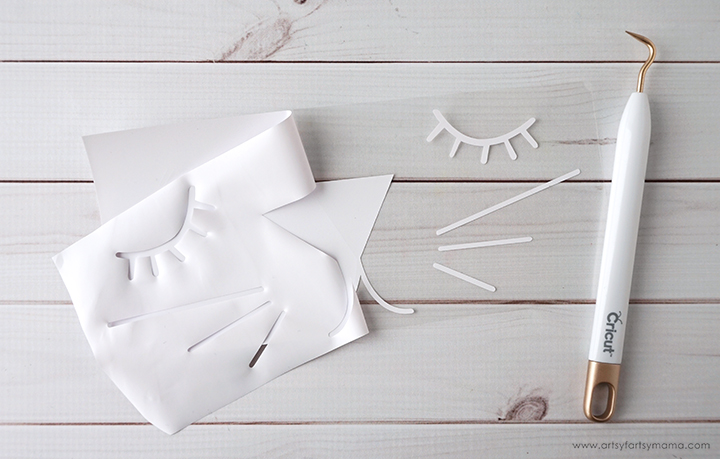
Open the Cat Travel Pillow Face in Design Space*. I've adjusted the size to fit the pillow, so click "Make It" to go straight to cutting the iron-on vinyl with your Cricut machine. Click "customize" if you want to resize it.
When cutting your iron-on vinyl, make sure to mirror your image and place the vinyl face-down on the mat. If you don't, your design will be backwards when you put it on your fabric. To do this, click on each mat thumbnail before cutting and click the "Mirror" toggle to reverse the image on the mat.
"Weed" the excess vinyl by removing all of the parts that don't belong in the design. I usually start with the outer edges first by peeling away at the corner and working my way around the design. Then I use a weeding tool to remove smaller pieces of the design, if necessary.
*If you're using the Cricut Explore or Cricut Maker machines, you can subscribe to Cricut Access to get instant access to over 50,000 images, fonts, and projects for endless possibilities! That subscription also gives you 50% off digital fonts, images, and cartridges in Design Space and 10% off all physical purchases on the Cricut website!
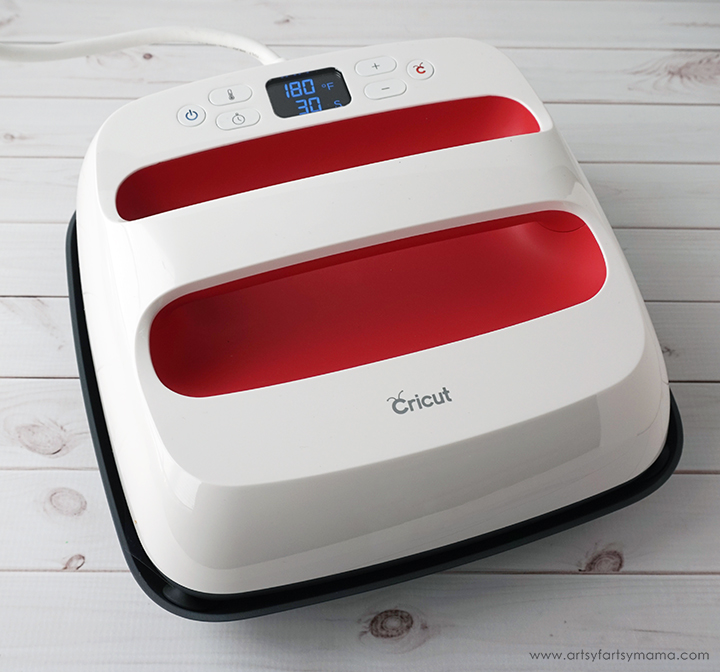
Besides the new raspberry color, there are now three sizes of EasyPress 2 to choose from: 6"x7", 9x9 (shown here), and 12"x10". These variety of sizes allows you to create projects of every size! The heat-up time is faster than the original, which means you can get to work faster. The original EasyPress heats up to 350º, where the EP2 will keep precise temperature control up to 400º.
Along with the new EasyPress 2, there's also the Cricut StrongBond Guarantee:
Making sure your iron-on material sticks and continues to stick after many, many washes is paramount. At Cricut, the quality of our iron-on materials and our EasyPress are best-in-class.This is why we now have in place the StrongBond™ Guarantee on many of our iron-on materials. Cricut’s StrongBond™ Guarantee means that when this iron-on material is used as directed, you’ll be completely satisfied with the results. If not, we’ll replace it for free. Look for the StrongBond™ Guarantee on select iron-on materials.
Not only is the EasyPress 2 an amazing tool for iron-on vinyl, but it works fantastically to press fabrics for your sewing projects as well!
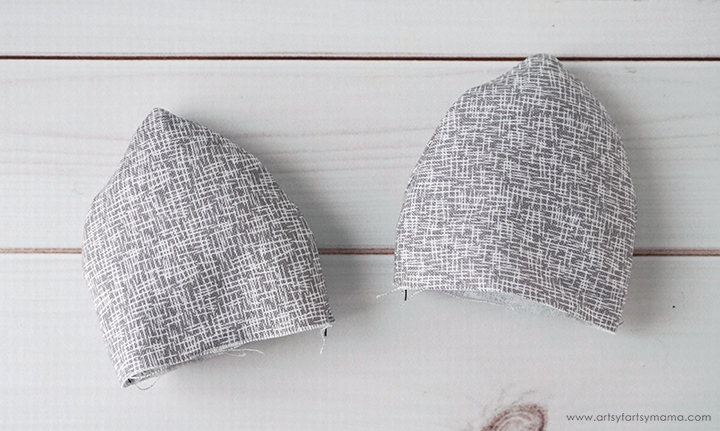
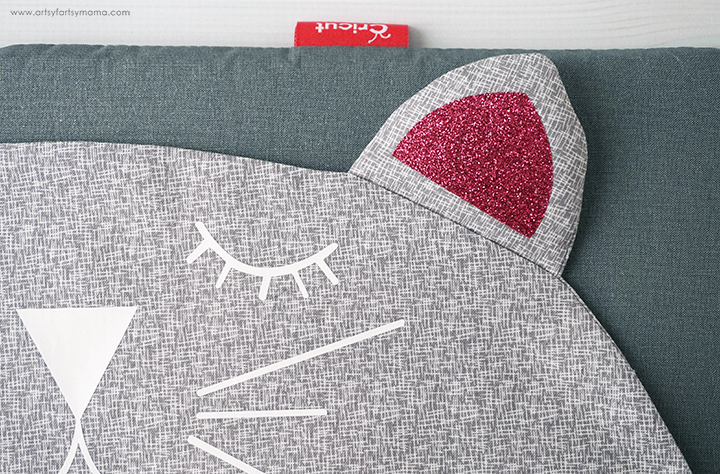
Line up your ear pieces with right sides together. Sew along both sides, but not the bottom, with a 1/4" seam allowance. Clip around the edges without cutting through the seams. Flip the ears right-side out and press. Fill each ear with a little bit of poly-fil stuffing.
Line up the pillow pieces, right sides together. Decide where you want to place the ears, then sandwich the ear pieces between the pillow pieces with the ends facing the outer edges of the pillow. Sew around the entire pillow with a 1/4" seam allowance, but leave a 4"-5" opening. Clip around the entire pillow without cutting through the stitches. I left mine open at the neck area.
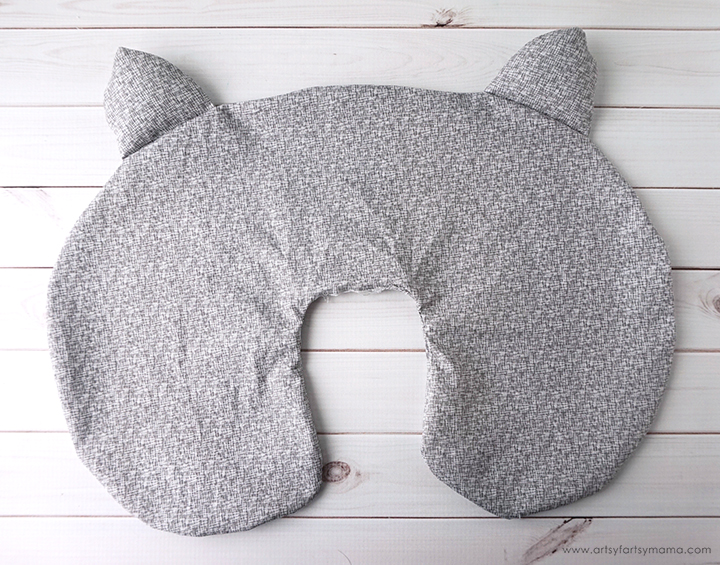
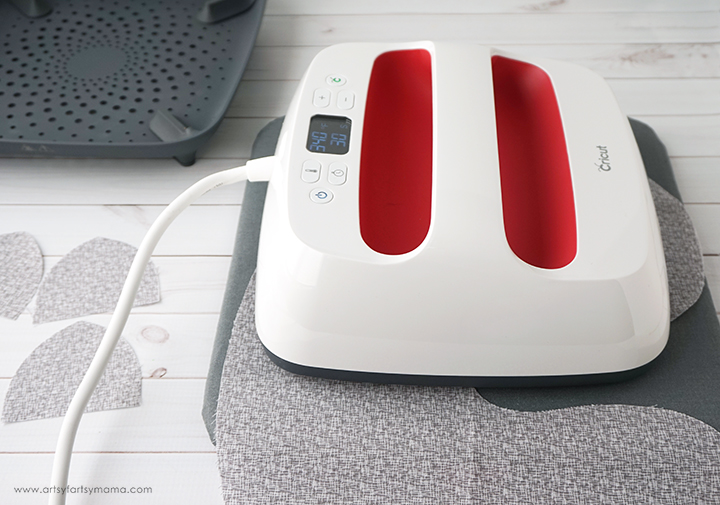
Flip the pillow right-side out through the opening and press the seams with an iron or the EasyPress 2.
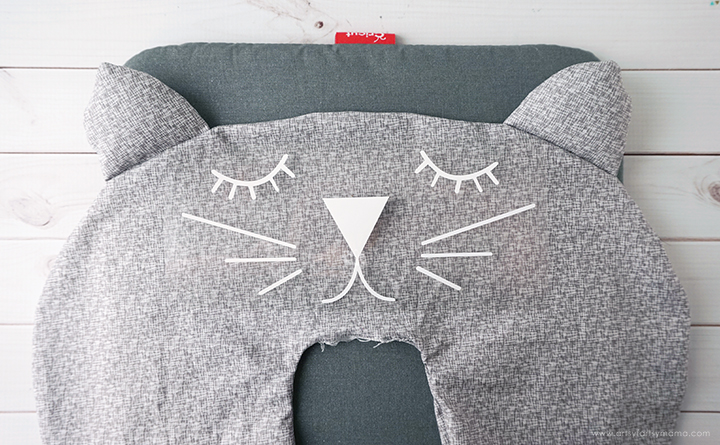
Lay the pillow on the 12"x12" Cricut EasyPress Mat. Place the vinyl face on the front of the pillow and press it down so that the vinyl liner sticks to the fabric.
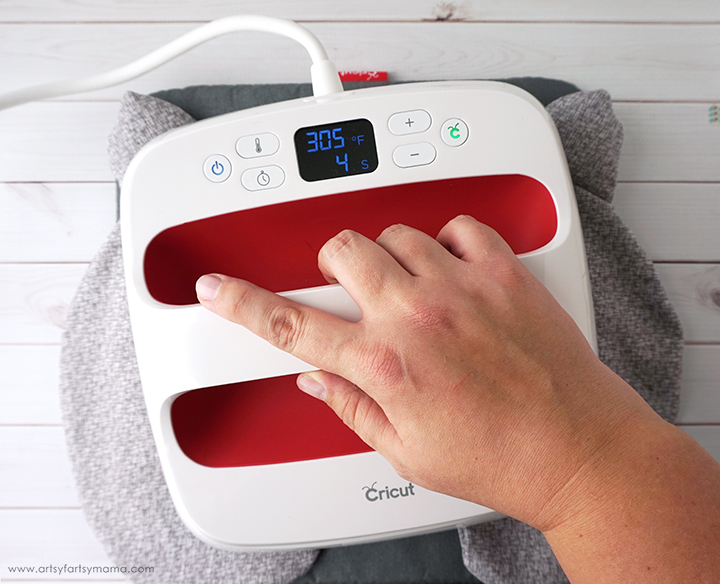
Heat up the EasyPress 2. Each kind of iron-on vinyl combined with different materials has a different heat and time setting, so be sure to check the recommended EasyPress settings. For example, to apply iron-on lite to cotton fabric while using the EasyPress Mat, the recommended temperature is 305º for 30 seconds.
Once the EasyPress is up to temperature, preheat the area for 5-10 seconds. Lay the vinyl down on the mask with the clear carrier sheet on top. Set the EasyPress over the vinyl and press the green "C" button. Hold firmly in place while the timer counts down. Turn the pillow over and press firmly again for 15 seconds. Peel the carrier sheet while the vinyl is warm.
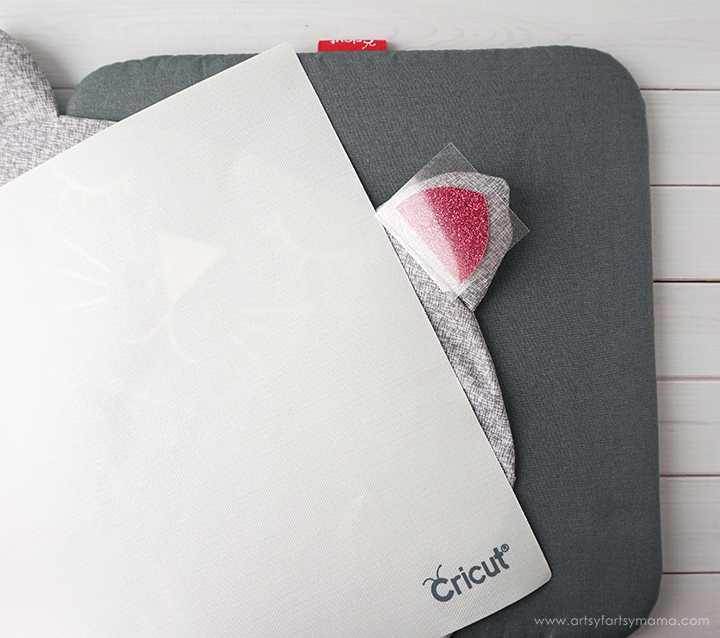
Adjust the settings on the EasyPress for glitter iron-on vinyl (recommended is 340º for 20 seconds) and place the vinyl on the ears of the pillow. Put the Iron-On Protective Sheet over the face to protect the vinyl from the heat. Press the ears to attach the glitter iron-on vinyl to the fabric. Peel the carrier sheet away from the vinyl while it is still warm.
Fluff the ears back up using your fingers, then fill the pillow with poly-fil stuffing until it's as firm as you'd like it to be. Sew the opening of the pillow closed, and squish the pillow around a bit to evenly distribute the stuffing.
Now your Cat Travel Pillow is ready to take wherever you go for the ultimate cat nap! With all of the different vinyl & fabric options out there, you could make a variety of pillows!
Pin this image to save this project for later:
This is a sponsored conversation written by me on behalf of Cricut. The opinions and text are all mine.


I'm excited to make one of these for my each of my kids for when we can start traveling again. I can't figure out where to get the pattern for the iron-on face though...when I click the link that says "Cat Travel Pillow Face" it brings up the Cricut Design Space home page. Where can I get the face? Thanks so much and this is a super fun design!
ReplyDelete