
Take the ultimate cat nap with this adorable DIY Cat Sleep Mask made with Cricut and the new EasyPress 2!

My daughter loves cats. Even though we can't own a real one, she collects all kinds of things with a feline theme. I decided to put my Cricut Maker to use to create a custom sleep mask that she can wear at night to make all of her kitten dreams come true! This project is easy to make, and it gives a whole new meaning to "cat nap"!

To make your own DIY Cat Sleep Mask, you'll need:
• Cricut Maker machine (with Rotary or Fabric Blade)
• Cat Sleep Mask Cut File
• Cotton Batting, optional
• 1/2" Wide Elastic
• Cricut FabricGrip Mat (Pink)

Each piece of fabric from the sampler measures 12"x26", so you don't even need to trim it to cut with the Cricut. Lay the fabric on the pink Cricut FabricGrip Mat and use a brayer tool to press the fabric down well and get rid of any air bubbles or wrinkles.
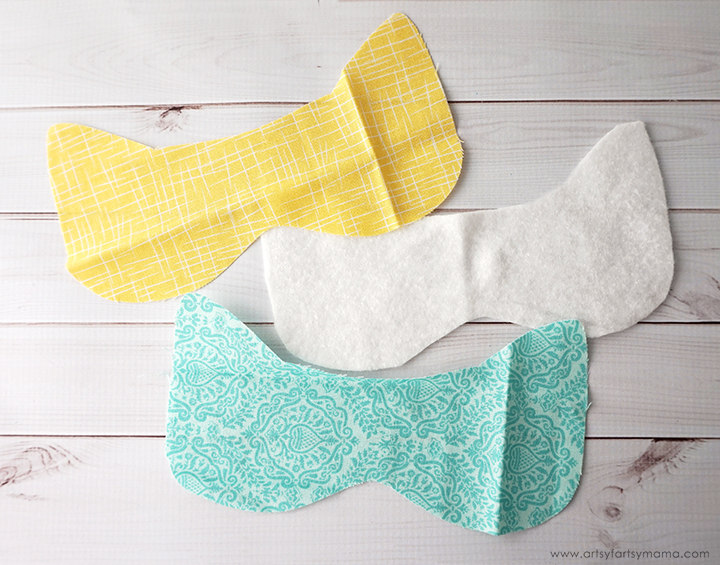
Open up the Cat Sleep Mask cut file in Design Space. Click "customize" to make adjustments to colors, or click "Make It" to take you straight to cutting the project. Before you cut the fabric, make sure to select "Cotton" in the material settings. Select "Quilt Batting" in the material settings if you choose to add that to your mask. The machine's Adaptive Tool System ensures professional-level cutting of hundreds of materials, so you don't have to worry about adjusting settings other than the material you are cutting.
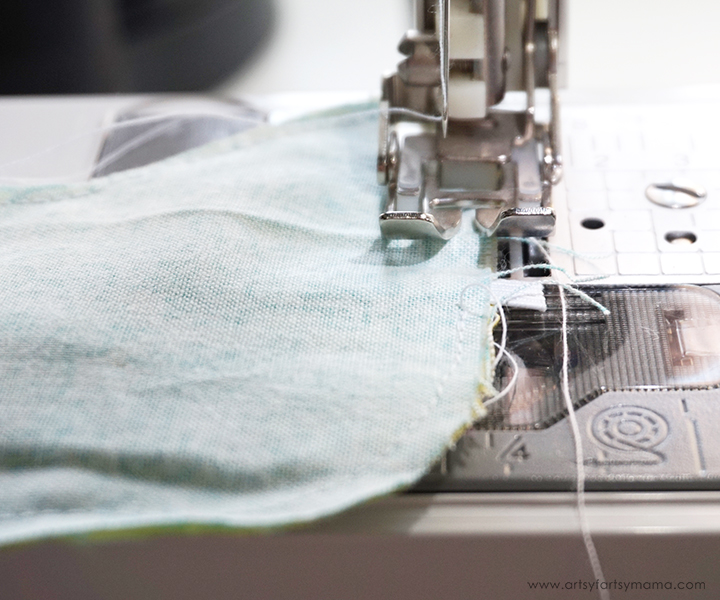
Measure around the back of your child's head (temple to temple) to get a measurement for the elastic. Layer the sleep mask elements together in this order: batting, back fabric (facing up), elastic, front fabric (facing down). Pin the sleep mask fabrics together around the edges, and secure one end of the elastic in place on one side of the mask.
Start sewing on the side of the mask where the elastic isn't secured. Sew about 1/2" below the elastic, then all the way around until about 1/2" above where the elastic will go. Carefully clip along all of the edges without cutting through the stitches.
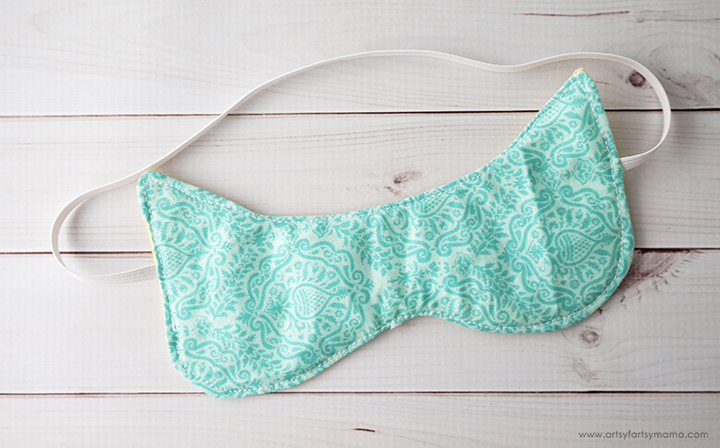
Turn the sleep mask right-side out and press well with an iron, or even the Cricut EasyPress 2! Fold the open seam in and press. Make sure the elastic isn't twisted, and secure it into place with a pin. Topstitch around the sleep mask to give it a finished look and to sew the elastic in place.

Cut the face design out of any iron-on vinyl you like, or one that coordinates with your fabric. I used black Iron-On Lite vinyl for the eyes, and gold Glitter Iron-On vinyl for the ears and nose.
"Weed" the excess vinyl with a weeding tool to remove all of the parts that don't belong in the design. I usually start with the outer edges first by peeling away at the corner and working my way around the design.
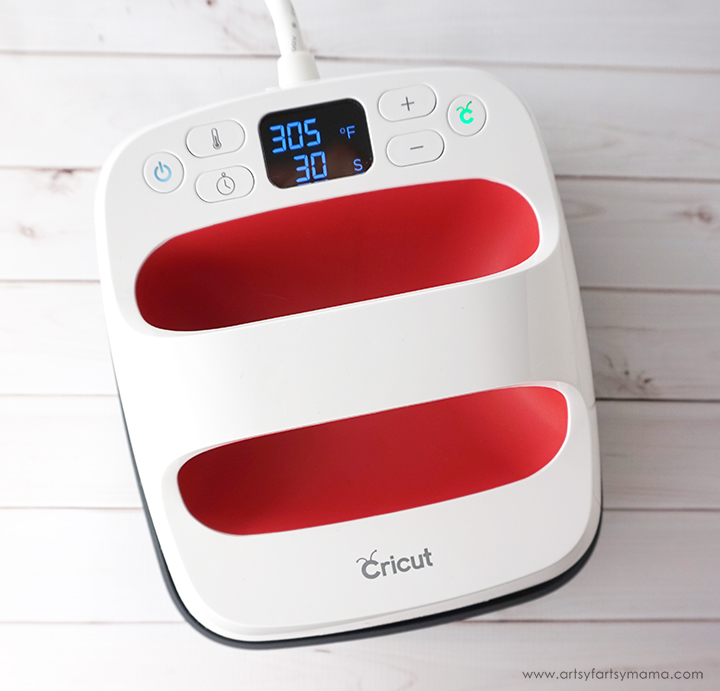
The EasyPress has definitely been a game changer with iron-on projects, but Cricut just released the new EasyPress 2. So, the big question is: what's the difference between the original EasyPress and the EasyPress 2?
Besides the new raspberry color, there are now three sizes of EasyPress 2 to choose from: 6"x7" (shown here), 9x9 (same as original), and 12"x10". These variety of sizes allows you to create projects of every size! The heat-up time is faster than the original, which means you can get to work faster. The original EasyPress heats up to 350º, where the EP2 will keep precise temperature control up to 400º.
Along with the new EasyPress 2, there's also the Cricut StrongBond Guarantee:
Making sure your iron-on material sticks and continues to stick after many, many washes is paramount. At Cricut, the quality of our iron-on materials and our EasyPress are best-in-class.This is why we now have in place the StrongBond™ Guarantee on many of our iron-on materials. Cricut’s StrongBond™ Guarantee means that when this iron-on material is used as directed, you’ll be completely satisfied with the results. If not, we’ll replace it for free. Look for the StrongBond™ Guarantee on select iron-on materials.


Once the EP2 is up to temperature, preheat the area for 5-10 seconds. Lay the vinyl down on the mask with the clear carrier sheet on top. Set the EasyPress over the vinyl and press the green "C" button. Hold firmly in place while the timer counts down. Turn the mask over and press firmly again for 15 seconds. Peel the carrier sheet while the vinyl is warm.

Adjust the settings on the EasyPress for glitter vinyl (recommended is 340º for 20 seconds) and place the vinyl on the mask. Put the carrier sheet back over the eyes to protect the vinyl. Press the mask again the same way as before to attach the glitter iron-on vinyl to the fabric. Peel the carrier sheet away from the vinyl while it is still warm.
Now your Cat Sleep Mask is ready to wear so you can take the ultimate cat nap! With all of the different vinyl & fabric options out there, you could make a whole herd of cat masks in different varieties!!

My daughter is SO excited about this new sleep mask! These masks are fun and simple to make, so they would be a purrr-fect handmade gift this holiday, or could be a clever favor to give to guests at a slumber party!
Pin this project to save it for later:

This is a sponsored conversation written by me on behalf of Cricut. The opinions and text are all mine.


