

I have always enjoyed coloring and creating with colored pencils. It wasn't until recently that I discovered a new technique of using baby oil to take my coloring to a whole new level! In fact, I am kind of obsessing over it and have been SO excited to share this awesome hack with all of you. So without further ado, here is how you can easily blend colored pencils with baby oil!

You'll also need some baby oil. I grabbed some Johnson's® Baby Oil at Walmart in the baby products aisle right next to the baby wash and body lotion.
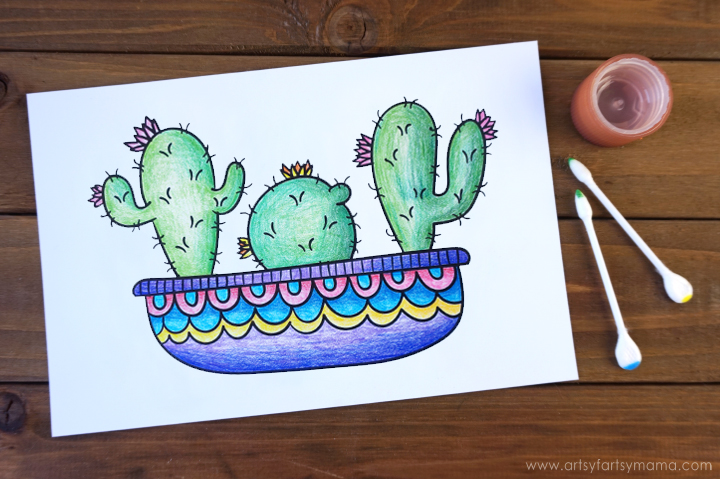
Last, but not least, you'll need some precision tip cotton swabs. They are perfect for blending your colored pencil projects because the pointed end is shaped just like your pencils. You can also find these at Walmart in the beauty aisle or near the regular cotton swabs.

Download and print the cactus printable at the end of the post. You will need to print on a laser printer for the baby oil hack to work. Using a print from an inkjet printer or water soluble ink will bleed and ruin your project. You will also need a high quality cardstock for best results. Paper texture will also make a difference. A smooth paper will result in smooth color, while a rougher surface will show lots of texture.
Now that your image is printed, you can use any technique you want to color your picture: color lightly or press harder for a more saturated color, stipple (dotting), crosshatch, or just scribble to your heart's content. Like any skill, the more you practice with colored pencils, the better you'll get.
Coloring lighter to darker and layering colors will also give the illusion of shadows and depth. I used 3-4 shades of green on each cactus, but in different orders and areas to get a slightly different look on each one.
Once the picture is colored, it's time to get blending! Grab some cotton swabs and pour a small amount of baby oil into the cap or a small container. You may also want to keep a paper towel on hand.

Dip the tip of the cotton swab into the baby oil. Start with the tiniest amount, because a little goes a long way. Blot on the paper towel if you pick up too much. The trick is to use just a little bit of oil, otherwise it can leak through the paper and cause it to rip.
Hold the cotton swab like a pencil, and rub it on the colored area with the same amount of pressure that you use to color. The colored pencil strokes will immediately begin to smooth out and blend together like magic!
My best tip is to work slowly and start small with the oil. You can always add more. You can re-dip the colored cotton swab into the oil if you need to "reload". You'll notice you need more oil when the colored pencil isn't blending as easily.

To show you the difference the oil makes, I only blended half of this cactus. The left side is smooth and vibrant, with an almost watercolor-like look. The right side is the unblended colored pencil with 3-4 different colors.
Use a different cotton swab for each color so you don't accidentally blend them together. By using a small amount of oil, I didn't have any problem with oil leaking through the paper. If you happen to over-do it on the oil, don't panic. You can sandwich your image with paper towel and a heavy book on top overnight and it should absorb some of the extra oil from your paper.
The image dries almost immediately, and you can frame it that day! Pour the extra baby oil back into the container to use again next time.

I think I may have a new obsession with this colored pencil and baby oil technique! I just love the way it looks, and it's so unbelievably simple!!
You can print out this image, along with one other cactus image to color and frame in your own home. I have also included both images on one sheet in smaller sizes for you to practice on if you'd like to.
Some things you should know before downloading:
*Artsy-Fartsy Mama printables are for PERSONAL USE ONLY.
*You may NOT modify, re-sell, redistribute, or claim the design as your own.
*Please do not remove the credits/watermarks.
*If you'd like to share this project, credit must be given to Artsy-Fartsy Mama & linked back to this post.
Go grab some Johnson's® Baby Oil and try it out. You're going to love it! While you're at it, check out these other Johnson's® Baby Hacks for more creative ideas!
Go grab some Johnson's® Baby Oil and try it out. You're going to love it! While you're at it, check out these other Johnson's® Baby Hacks for more creative ideas!


Holy cow! I had no idea! This is amazing!!!
ReplyDeleteI am looking forward to trying the baby oil technique, looks great.
ReplyDeleteSuch a smart idea, I love it!
ReplyDeleteHow fun! I'll have to share this with my niece :)
ReplyDeleteWow! Thanks for sharing because I had NO idea!
ReplyDeleteFantastic tip! I love it.
ReplyDeleteThis is such a cool trick! I had no idea.
ReplyDeleteIf laserjet printer is not available or you’d rather draw your own image to color using baby oil technique, which marker(s) do you suggest using to draw your own image?
ReplyDeleteHi Rosemarie! After testing out different prints and markers, I've found that inkjet prints work fine as long as you don't use too much oil. Sharpie markers also work great for drawing!
DeleteHow do you avoid to stain the paper? Thanks
ReplyDeleteיפה מאוד תודה
ReplyDeleteLooks fantastic. Shall be tying this meg
ReplyDeletetho
Like this idea. Colours look very vibrant. Will be trying to do this.
thank you for the tutorial.
Hola!! Tiene que usarse necesariamente una fotocopia para realizar esta técnica hermosa o puedo hacerlo sobre un dibujo hecho con lápiz?
ReplyDeleteThank you. I will respect your copyright.
ReplyDeleteDo these look like a water pencils look like this with the babyoil?
ReplyDelete