Posts may contain affiliate links (see Disclosure). Thank you so much for supporting Artsy-Fartsy Mama!
Monday, October 29, 2012

Candy Corn Wreath

Monday, October 29, 2012

Candy Corn Wreath

Read more »

Candy Corn Wreath at artsyfartsymama.com #Halloween #wreath

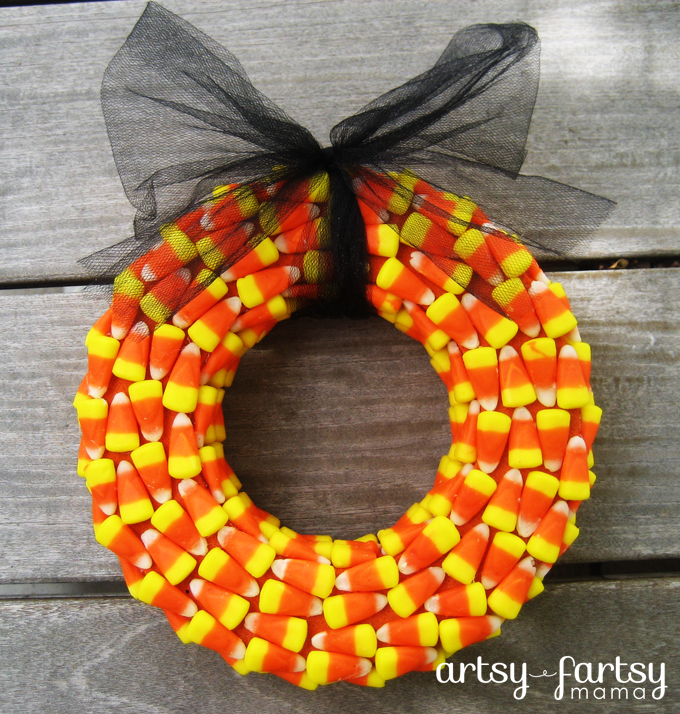
I love everything about this wreath. It only cost me $3 and really adds to my Halloween decor! Not to mention it only took me about 45 minutes, and we have some extra candy corn to eat.
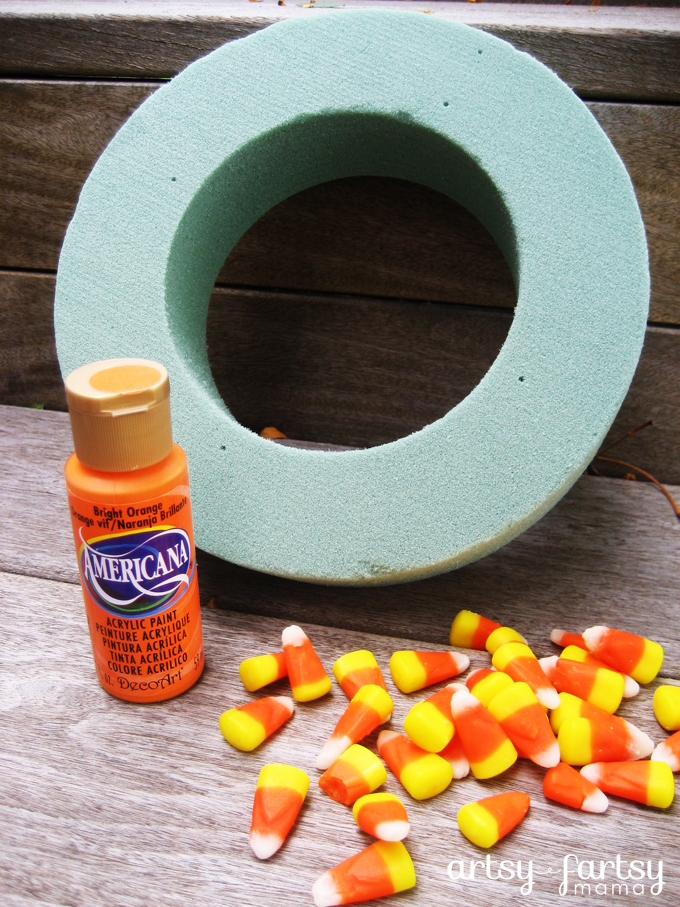

Candy Corn Wreath at artsyfartsymama.com #Halloween #wreath

Supplies:
Candy Corn: a 1 lb - 21 oz bag should work fine {$1.98 at Walmart for 21 oz bag}
Wreath Form: I used a 12 inch form {$1.00 at Dollar Tree}
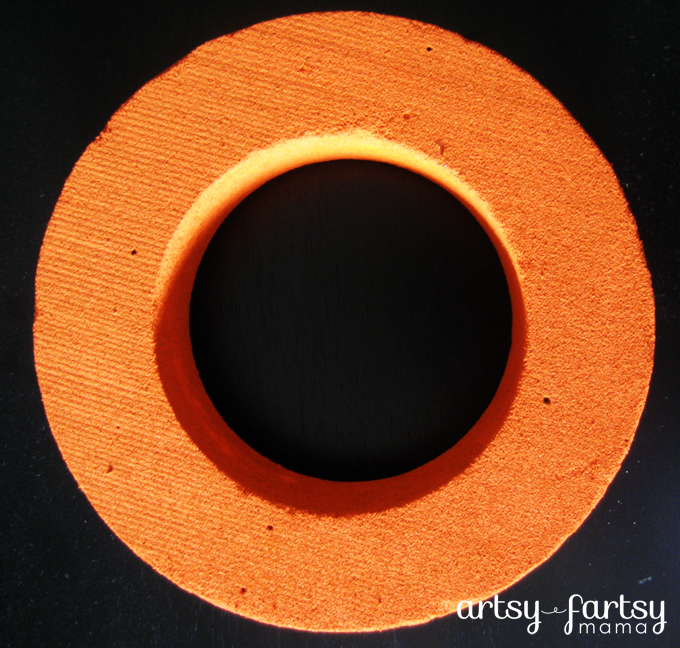
Acrylic Paint: I used Americana Bright Orange. Black would work fine, too {Already had some paint on hand}

Total Project Cost: $2.98


Candy Corn Wreath at artsyfartsymama.com #Halloween #wreath

Paint the wreath form. One coat should be fine. This will help to camouflage any spaces you have between candy corns. DO NOT SPRAY PAINT. Spray paint will melt the styrofoam.

Candy Corn Wreath at artsyfartsymama.com #Halloween #wreath

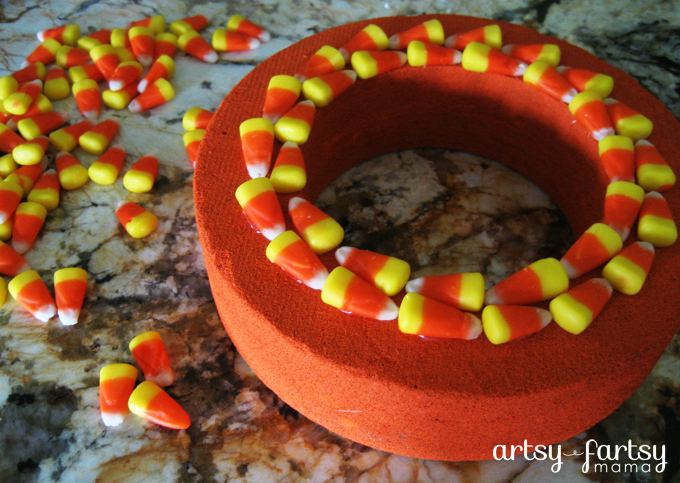
Glue candy corns on, one at a time. Start in the middle and try to use the better looking ones. Put broken or otherwise odd candy corns in a bowl to eat later. I started by gluing the first row of candy corns all facing the same direction. Start the next row going in the opposite direction. They won't always line up perfectly, so just try to align them the best you can. Once you're done, you won't notice the imperfections anyway.

Candy Corn Wreath at artsyfartsymama.com #Halloween #wreath

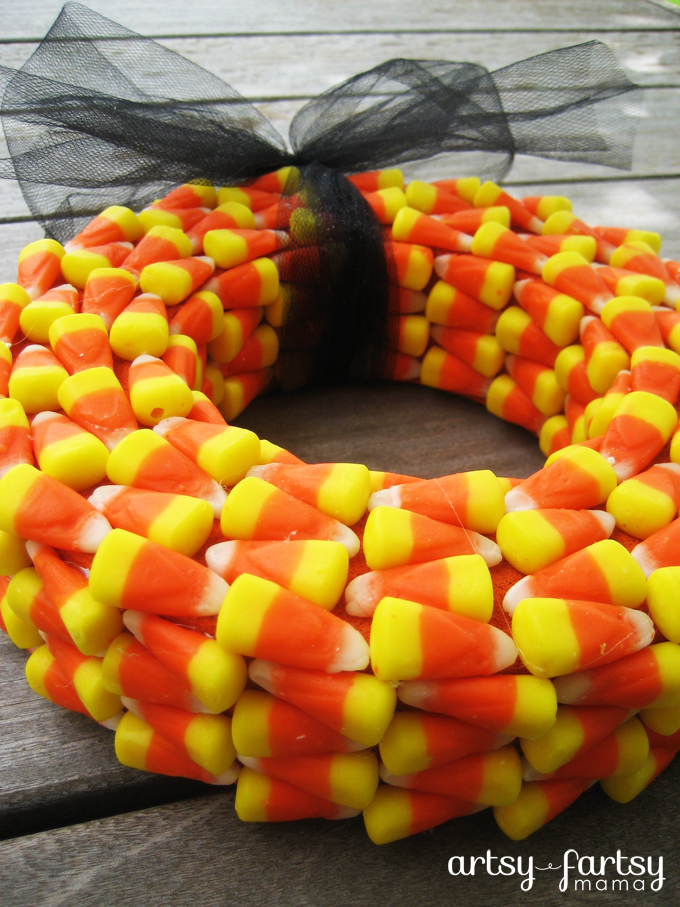
Repeat the gluing pattern until the entire front, outside, and inside of the wreath is covered in candy corn. It helped to use broken candy corns on the inside and outside to fill in larger gaps that were too small for a full candy corn. No one will see those anyway, right?

Wrap some tulle around the wreath and tie a bow at the top. You can use this to hang your wreath or to just use as decoration.

Candy Corn Wreath Fail at artsyfartsymama.com #Halloween #wreath

A word of warning:
Apparently paint, glue, and candy corn can make a wreath pretty fragile...
I had my wreath out for display on my mantel and it jumped off in the middle of the night. Oops.

To prevent your wreath from suffering the same fate, keep it in a stable place or hang it on the wall with a secure hanger! I cried a little inside when I woke up to see this, but it is easy enough to remake that I'm not too traumatized.

Also, this wreath is not recommended for outside use or to be placed near hot temperatures. The candy corns will melt, and no one wants to deal with that mess.

I hope you all have a fantastic Halloween!
Saturday, October 27, 2012

Monster Cookies

Saturday, October 27, 2012

Monster Cookies

Read more »

These guys turned out MUCH cuter than I had planned. Love when that happens!

When it's not Halloween time, we usually call these "Chinese Cookies". They are one of the easiest and quickest treats to make, and they last just about as long. I will usually find that my husband will hide his own stash of these in another fridge so no one else can have any... and with only 3 ingredients, it's easy enough to make my own stash to hide!! It's also a great recipe to let the kids help with.


Monster Cookies

11 ounce bag Butterscotch Chips
11 ounce bag Chocolate Chips
12 ounce bag Chow Mein Noodles

  1. Melt butterscotch and chocolate chips. I prefer to melt them in a double broiler, but my husband is a pro at successfully melting chocolate in the microwave. Melt at 30 second-1 minute increments.
  2. Once melted, stir and mix well.
  3. Pour in chow mein noodles and carefully stir until all the noodles are evenly covered.
  4. Drop by spoonfuls onto a wax paper-lined cookie sheet. You will need quite a few pans {we used about 4}.
  5. *Optional*: to create "monsters", top cookies with sugar eyes. If cookies have cooled, you could add a drop of melted chocolate on the back of the eye to attach to the cookies.
  6. Place in refrigerator or freezer to set chocolate and to store. You could keep the cookies out to store, but they tend to warm up really fast and then you'll have a delicious mess on your hands.

Friday, October 26, 2012

Little Red Riding Hood

Friday, October 26, 2012

Little Red Riding Hood

Read more »
My daughter's Halloween costume is finally finished!! I am She is so excited to show it off!


Obviously, she is going to be Little Red Riding Hood this year. She also likes to tell everyone we see {including the employees at every store we go to} that "mama is going to be grandma, and daddy is going to be THE BIG, BAD WOLF"! {She says the "big bad wolf" part very convincingly.} We're going to have to get a little more creative for those costumes!


The dress was made with the Chloe dress pattern from Whimsy Couture.
I used red gingham fabric, red polka dot fabric, and basic white for the ruffle, straps and bottoms of the skirts.

I love that pattern, it's so doable {that means a lot coming from me!}, and I love how versatile it is.
You can see my summer dress version here.


We made the hooded cape using McCall's cape pattern {number M2854} and used a basic red cotton fabric.

The basket was found at the thrift store. All we needed was a white shirt, tights and Grandma bought her some "parkly" red shoes to complete the outfit! Tied in some red ribbon in her hair, and now she's good to go!


This picture is one of my favorites. She looks more mischievous than the wolf!!

Linking to these parties! 
Wednesday, October 24, 2012

Halloween Mini Stacker

Wednesday, October 24, 2012

Halloween Mini Stacker

Read more »
Remember my cute Fall Mini Stacker? Well, I also made a super cute Halloween Mini Stacker!


I absolutely love this set, and it's one of my favorite pieces of my Halloween decor!
I didn't take step-by-step photos of the process because it's pretty easy.

I can explain it though for those of you who would like to make one:
  1. Purchase a Mini Halloween Stacker kit from Fab Decor.
  2. Paint your blocks. You can paint them whatever color you want - I used black, Sour Apple green, and Dioxazine Purple. Let dry completely.
  3. Paint on a thick coat of silver FolkArt Extreme Glitter paint. Love that stuff! Let dry completely. Not kidding this time.
  4. Sand all the edges and corners for a distressed look.
  5. Apply vinyl pieces.
  6. Optional - attach tulle and/or ribbon around the set like FablifyIt did. So cute!

I also put together this fun Trick or Treat block set!


Similar steps as the Halloween Mini Stacker... Just bigger!
  1. Purchase the Trick or Treat kit from Fab Decor.
  2. Paint blocks your favorite Halloween color. Purple, orange or even white would be cute! The possibilities for customizing are endless, and that's one thing I love about these kits!
  3. Let paint dry, then add a thick coat of silver FolkArt Extreme Glitter paint.
  4. Sand edges and corners.
  5. Apply vinyl.
  6. Optional - Add tulle and/or ribbon as seen here at FablifyIt.

If for some reason you can't or don't want to make these on your own,
you can also purchase the finished sets at Fab Decor!

**I received the unfinished Halloween Mini Stacker and Trick or Treat Craft Kit from FabDecor.com for this review/project series. All opinions are my own.**
Friday, October 19, 2012

Apple Pie Bars

Friday, October 19, 2012

Apple Pie Bars

Read more »

Made with a shortbread crust, spiced apple filling, and crumble topping, Apple Pie Bars have all the flavor of apple pie with much less work!


Apple Pie Bars

My husband LOVES apple pie, but it's just so much work and I often have a hard time getting the recipe right. These Apple Pie Bars, however, are an easy alternative to the classic dessert and tastes just as good, if not better! Made with a shortbread crust, spiced apple filling, and crumble topping, these Apple Pie Bars are a family favorite and are a great dessert to share with a crowd.
Wednesday, October 10, 2012

Free Printable Monster Match Game

Wednesday, October 10, 2012

Free Printable Monster Match Game

Read more »
One of my daughter's favorite games lately has been memory/match games. We have a bunch downloaded on our phones for when we're out and need to entertain her, and have a few memory games we play at home. So, instead of buying more, I decided to make one myself!

Wednesday, October 3, 2012

DIY Button Earrings

Wednesday, October 3, 2012

DIY Button Earrings

Read more »
I love jewelry. I love it even more when inspiration strikes and I can also save money on jewelry.

While shopping, I saw an assorted package of turquoise polka dot, striped, and solid buttons in a variety of sizes. They obviously needed to come home with me, but I had no idea what I would do with them.
This is not a new problem. 

Then it hit me: these would make adorable earrings!!


You never know if that thought will turn out the way you plan, but this project was pretty fool-proof. I kept in mind that if they turned out fugly {like a whole lot of projects do!}, then I could just take them apart and figure out something else to do with them.