Terrorize the town with a DIY Girly Marshmallow Man Costume! I ain't afraid of no ghost!
My daughter is totally loving everything Ghostbusters right now. She loves the originals, so we took her to see the new Ghostbusters this summer and she absolutely LOVED it!! Some may knock the new movie, but it was amazing to see this science-loving, up-for-anything girl come out of the theater feeling empowered and ready to take on the world!
When I asked her what she was going to be for Halloween this year, I was sure she'd decide to be a Ghostbuster. She considered it, but then became adamant on being a "villain". As we were looking through the costume store for ideas, she stopped dead in her tracks and exclaimed that she "finally decided on being the Stay Puft Marshmallow Man, but as a girl!" You got it!!
To make this Marshmallow Man costume more on the girly side, of course we had to incorporate a tutu! Tutus are incredibly easy to make:
1. Start by making a waistband. Measured around the waist and cut 1 inch wide elastic to an inch or two smaller than the waist measurement (the elastic stretches out a little during the process). Overlap the edges of the elastic and sew them together with a zig-zag stitch. You can also hand sew if you don't have a machine.
2. Grab some tulle! I used 3-4 rolls of tulle (6 inches wide, 30 yards). Measure your tulle into strips twice the length of your desired skirt. For example, our tutu is 8 inches long, so I cut tulle into 16 inch strips. The easiest way I've found to do this is cut a piece of cardboard 16 inches long. Wrap a roll of tulle around the cardboard. Place a rubber band around each end to hold the tulle in place. Cut each end with fabric scissors and now you've got two stacks of 16" long strips on both sides of the cardboard!
3. Add tulle to the skirt by folding two strips of tulle in half. This creates a loop on one end and two loose tails on the other. Place the folded tulle strips over the waistband so that only a few inches of the loop stick out over the top. Then fold the tail ends around the waistband and pull them through the loop. Pull the knot tight.
4. Keep adding doubled-up strips of tulle until the entire waistband is covered. Voila!
To break up the white of the outfit, I sewed a belt to go above the tutu. Cut two pieces of blue fabric 3 inches wide x waist measurement + 10". Sew them right sides together, flip them right side out, and iron the seams. Topstitch around the entire belt.
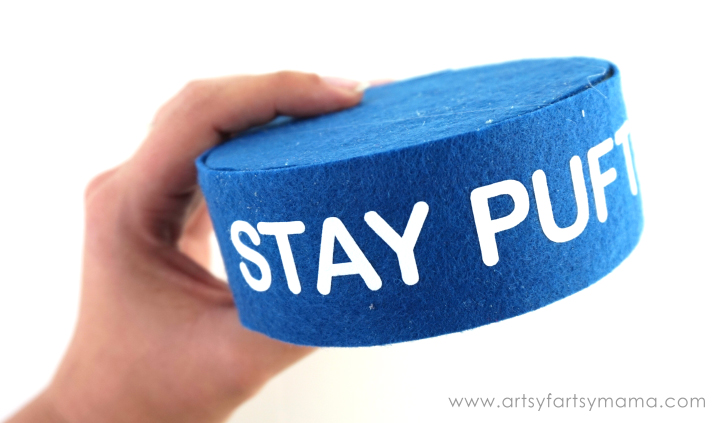
To make the hat, you'll need a foam disc that measures about 4" x 2". Trace the disc onto some blue felt and cut out two circles. Next, cut a 2" strip of felt long enough to wrap around the side of the disc to become the hat band. I also cut out a few 1" circles and a 1" x 6" strip of red felt to place on the top of the hat.
For the "poof" of the hat, I first cut a 12" or so circle of white cotton fabric. Take a needle and thread and hand sew around the edge of the circle. Pull the thread tight to gather the circle and tie a knot to keep it together. To help it keep it's shape, I stuffed some tulle inside. You could also use a batting, cotton fill, or even a plastic bag!
Hot glue the felt circles onto the top and bottom of the disc. Let dry completely.
After the vinyl has been applied to the band, use some hot glue to attach it to the disc. Now the hat is ready to be assembled!
Add a bunch of hot glue to the top of the disc. Center the poof open-side down and hold it in place until the glue dries. Fold one end of the red felt strip in half and cut a triangle from the end. Next, add a drop of glue to the top center of the poof and place the straight edge of the red strip on top. Glue a stack a few 1" circles together, then glue it onto the top of the hat (on top of the red strip).
You can now add the hat to a hair clip or glue it onto a headband!
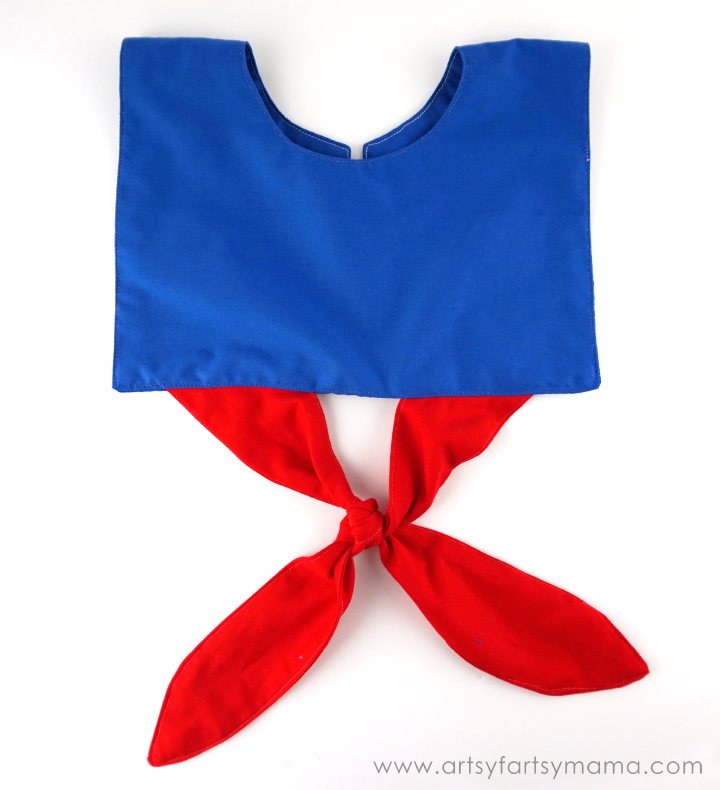
Last, but not least, is putting the collar together. Measure your child's chest to figure out how wide you want the collar to be, and also measure down from the shoulder to see how long it should go. Mine measured 7 inches wide, and 6 inches long. Double the measurement of inches long and now you've got your rectangle measurement! Cut two pieces of blue fabric to this size.
Next, I drew about a 4-5 inch circle in the center of the rectangle. Fold the fabric in half, and cut a straight line to the circle, then cut out the entire circle. The cut line will be the back, and the circle is the part that will go around the neck.
The Marshmallow Man also has a cute little red knot under the collar. So I just cut two 3 inch wide strips of red fabric and sewed them together. Instead of squared edges, I just freehanded a pointed edge. Sew them together and topstitch. Tie the strips together in a square knot.
Place the knotted strips in between the "front" side of the collar with the untied edges sticking out. Pin all the edges in place and sew around the entire collar leaving a 4-5" opening so you can flip it right side out. Keep the extra length of the red strips just in case you need to adjust anything.
Once you flip the collar, check that the knot is laying in the right place. If so, cut the extra red strips, flip right side out, and topstitch. If you need to adjust the knot, you'll need to unpick the seams and fix it before topstitching.
The finishing touch is the white line going around the collar. You could tack on some ribbon, but I decided to use some
white heat transfer vinyl instead. Measure where you want the line to be and draw it up in
Cricut Design Space. Cut the vinyl and apply with an iron. Let it cool, and peel off the carrier sheet.
To keep the collar closed in the back, add on some velcro, buttons, or even just use a safety pin!
Throw on some white leggings, a white shirt (long or short-sleeved), and the costume is ready to go! In colder weather, you could also wear some white sweats. Isn't this costume adorable?! My little Ghostbuster wannabe is in LOVE and can't wait for all of our upcoming Halloween parties!!
She might look sweet, but don't let her fool you! Who you gonna call?!
Who's your favorite villain (any) or Ghostbusters character?
What are you/your kids going to be for Halloween this year?