


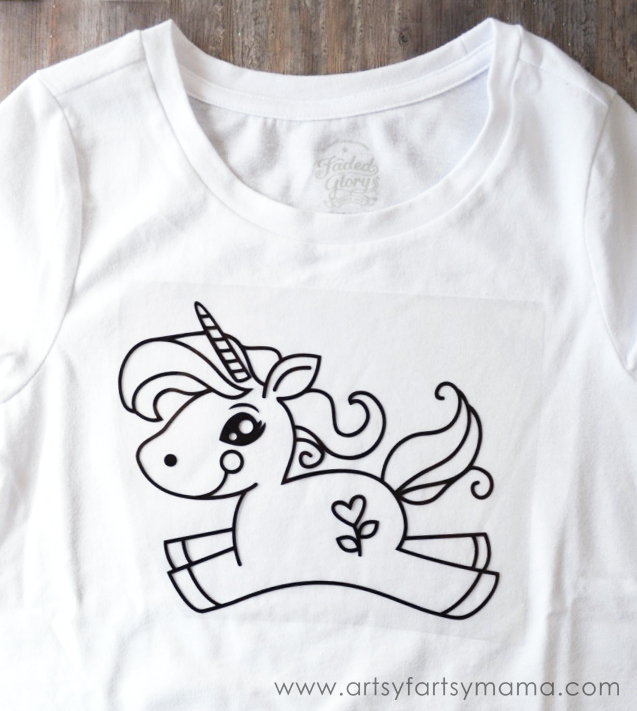
Coloring has been all the craze lately, and I can certainly see why! It's so relaxing to color pictures in coloring books, so we decided to try to do that with a t-shirt. Using iron-on vinyl and the adorable unicorn image from the soon to be released “Trendy T-shirts” cartridge, we created the cutest DIY Unicorn Coloring Shirt. This is a project anyone of any crafting skill level can make, and would be such a fun way to keep kids busy during school breaks, at parties, and anytime they want some unique fashion!!

To make your own unicorn coloring shirt, you'll need to grab some iron-on vinyl, a white t-shirt, and fabric markers. Permanent markers like the Tulip ones shown above are easy to use for this kind of project, and stay bright through washes. If you want to be able to re-color the shirt after every wash, you'll need some washable fabric markers instead.

When cutting iron-on vinyl with your Cricut Explore, be sure to keep these tips in mind:
- Mirror your image before cutting. The vinyl will be placed with the clear carrier sheet/ "pretty side" down, so if you don't mirror your image it will be backwards after it is cut.
- Iron-On Lite Vinyl can be cut using the Iron-On setting on the dial.
- To cut Iron-On Glitter Vinyl and Flocked Iron-On Vinyl, switch the dial to Custom and select Iron-On, Glitter from the drop-down menu.
Once your design has been cut, weed out the excess vinyl and place it on the shirt.
- Set your iron to the cotton/linen setting with the steam OFF.
- Lightly preheat the area with the iron for 10-15 seconds. This really does help!
- Place your image, liner side UP onto the area. If you don't place the liner side up, the vinyl will stick to your press cloth.
- Carefully lay a press cloth or dishtowel over the design.
- Apply medium pressure with the iron for 25-30 seconds.
- Flip the shirt over and apply medium pressure with the iron to the back for an additional 25-30 seconds.
- If you have any parts that didn't stick for some reason or if edges are flipping up, re-iron the pieces or loose edges with the iron tip for 10 seconds.
- Let cool and remove liner. If you try to remove the liner before it cools, you risk burning your fingers or peeling the vinyl up.

Before you get coloring, be sure to add a piece of cardboard in between the shirt layers so the ink doesn't leak through. Once you get the shirt prepped, color your shirt like a coloring book! My daughter had SO much fun coloring her unicorn using the fabric markers. We didn't have any problems with the marker ink bleeding through, but I would still be careful not to color too hard or holding the marker down in one place for too long.
Once the shirt is colored just how you'd like, let the shirt dry 24 hours. After that, you can wear the shirt and throw it in the wash.
Once the shirt is colored just how you'd like, let the shirt dry 24 hours. After that, you can wear the shirt and throw it in the wash.

My daughter absolutely LOVES her newest piece of unicorn fashion. It was fun to watch her work so hard on creating her own custom t-shirt. She is really looking forward to sharing more of her creations for her summer wardrobe here soon, so keep an eye out for that!
What kind of coloring shirt will you create?
What kind of coloring shirt will you create?


So cute, and this would make a great craft for a birthday party, too!
ReplyDeleteI think this is really cool and pretty and would make a awesome gift,great job and a fantastic idea.
ReplyDeleteI LOVE THIS!! How fun. My two year old would have eaten this up!! I love Gina's idea for a craft at a birthday party!! Good work lady :)
ReplyDeleteThis shirt is darling! I love it!
ReplyDeleteWhat a great idea. Gotta love that Cricut!
ReplyDeleteOh, my, that tshirt is so adorable! And so is the model! ;)
ReplyDeleteOMG this is crazy adorable!
ReplyDelete